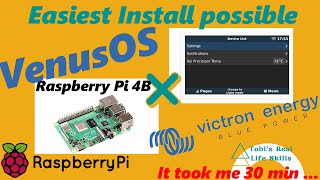
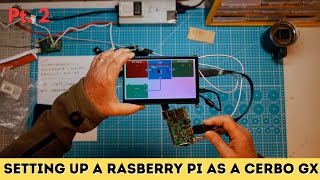
DIY Victron Cebo GX

Вставка
- Опубліковано 6 жов 2024
- Howto install Victron Venus OS on Raspberry PI w/Touchscreen to create a DIY Cebo GX
Affiliate Links:
5" Touch Screen: amzn.to/3GPDXql
Another 5" Touch Screen that works: amzn.to/3nXEZeb
VE.Direct to USB Cable: amzn.to/3ZMY6py
Some links to Raspberry PI boards
This is a RP4, I used a RP3 B+ but the RP4 should work if you download the RP4 image
store.rakwirel...
Instructions:
Download: updates.victro...
Or newer version if available
Download this instead if you have RasPi 4: updates.victron...
Use BalenaEtcher to write the downloaded image to SD Card
Install SD Card in Raspberry PI power up, and find with Victron-Connect app
Set IP, or WIFI through Victron-Connect app
Access REMOTE CONSOLE from victron app
Go to Settings, General and highlight Access level Then click, and hold the right arrow hotkey for 5 seconds.
Set root password, and enable SSH on LAN
Use Putty to SSH to IP assigned to Venus device
Enable GUI on touch screen
mv /etc/venus/headless /etc/venus/headless.off
reboot
================
CONTACT: bradcagleyt@gmail.com
Business/Collaboration only. Please do not contact me for for personal project help, or advice.
================
DISCLAIMER: These videos are documenting my own projects, and experiences. These projects, and activities can be dangerous. Do not try any of this at home, doing so will be at your own risk.


Great video! Thank you!
Another method to turn headless off is to connect a USB-A keyboard.
Then run on the console of the PI:
+ l (That's an "L", to clear the screen)
mount -o remount,rw /dev/root / (to change the filesystem from Read Only to Writable)
mv /etc/venus/headless /etc/venus/headless.off (Same steps as in the original instructions)
reboot
Does the same thing without the need to SSH.
Thanks!
Thank you 🤗🤗🤗🤗🤘👍👌👏👏👏
Worked perfect on my pi 4B with wi-fi/bluetooth!
Nice!
Your instructions seems clear amd it makes this easy,I will try this with my 2 mppt's and the inverter(all victron)
Love this, thank you! Please make some more, I am excited to give this a try.
Thank you! Will do!
Thanks for your diy video and parts links. You just saved me hundreds.
You're welcome!
@@BradCagle I got the screen and it works great. Just a quick question, what's with the lightning bolt on the screen, any ideas, you have it too.
@@NigelM18 Glad to hear. The lightning bolt is the raspberry pi warning you the power supply you're using is not providing enough power. Might be the cable, or the power supply you're using. Mine is plugged into my PC usb port, so it's not providing enough power. I will eventually have it on a dedicated 5v 5amp power supply.
Have you managed to get the screen sleep function to work? On mine it will put the screen to sleep after the set time but won’t wake again from touching the screen.
@@robwhite3932 I have not tried. I've been using the button on the top. I'll try the sleep function soon.
Very nice, i'm actually finishing my full victron RV installation. my phone is actually the device that help to manage an vizualize.. I was considering the CerboGX but does a quick research about RPI etc.. and stumbed on your video. Like you said using the GPIO port directly to the VE Direct would be great.
Thank you! Great help 👌👍.
You're welcome!
great video for my needs
Glad it was helpful.
Thanks, great episode. Cheers.
Glad you enjoyed it
One thing you need to know when working out the price this does not have the full functionality. It has it in terms of the operating system but not the interfaces if you want both can interfaces multiple direct reports you are access to the IO connections and things like that it may be worth buying one as that can get very expensive because you can do it yourself but it does not have the same level of protection and isolation that the premade one has which can be needed to stop weird errors happening
@@UKsystems Good points. Thanks
I saw that you used a Mac to dowload and load things on the file and then you used a windows. Do you need a windows PC or can this be all done on a Mac? Thanks
Yes, you can do it all on your Mac.
Hi... thanks for the video and summary of steps. Very useful reference. Have you come accross having to rotate the LCD screen in Venus OS. If so, how could I do it as well?
Super
I got my cerbo for 260€ and it still less expensive then a rasp with all those USB converter you'll need.
I added a Chinese touch screen 7 for 28€.
In the US you can get a Raspi + the screen for about $100, and the v.e. direct cables are just $28. So I don't see how the official cerbo is cheaper. I guess if you need to connect a lot of devices you may come close to the official cerbo price. Thanks.
Thank you for that. Most excellent. Do you know of a 3D printed case that could give it a better finished look? Assuming the same display on a Pi 3B.
Hi. Thank you for sharing this. I use Raspberry many years ago for timelapse photography... this seems pretty simple. So I am a newbie... I am building a camper and I need several control screen 1/ similar to this one for victron control 2/ music system 3/ navigation (android). My idea was to buy the cerbo GX but not cerbo display... now I see I do not even need to buy the cerbo GX... great! Which raspberry pi 2 3 4 would you recommend? Would you dedicated one pi to victron only or combine it with music system? What I am not sure to understand is how do u connect the pi to all the victron devices... I will have AC into the Multiplus II inverter, 24 VDC from truck engine, 48 VDC from solar, load, 3 water level sensors, several temp sensors...
It’s pretty easy to build your own Victron to USB cables for less than half Victrons price
But if any other equipment does crazy things, they will not cover it under warranty because it could be seen that that cable you made somehow changed the settings by sending incorrect communications
Thanks for this - very easy to follow - I managed to do it no problem on an RPI3 - Question - do you know of a way to connect the PI Bluetooth to the Victron SmartShunt Or it must be through usb ?
You have to use a victron USB to VE Direct cable
Доброго вечора Вам! Уважно продивився! Але зрозумів не повністю?
Belena Etcher does not work, tried two different computers with win 7 and 10. I had to use Raspberry pi software.
Interesting, I use Etcher a lot even at work. Thanks
Good video .. possible to install in an old android phone or like ?
Nope
What about canbus to batteries?
Yeah, good question. I need to find a usb to can adapter to try this.
@@BradCagle the pie could benefit from an i/o board for this.....
@@xtofury agree
@xtofury Look at the RasPi-based marine server project at Hat Labs Oy in Finland. I use the Waveshare 2 channel isolated board for my Pi to interface with NMEA2000 marine devices (they are CAN devices). Victron also has a VE Bus to USB 'cable' for about $78. Check the videos for the DIY BMS for comms examples, as well as the folks using Victron comms on Epoch LiFePO4 batteries. There are a number of CAN boards available for Pis as they've been used for hacking automotive CAN for decades.
Great video. I have an Victron smartshunt and an MPPT 100/30. Can i connect two of them to the PI ? And is it possible to set it up as an GX unit, and then use an Android tablet as touch screen ?
Yes, and yes :)
If we want a Pi to run Venus OS , Do we install Ubuntu or Raspberry Pi OS first ?
Or is the Venus OS a standalone that contains a modified Debian anyway ?
Just the Venus OS image. It's a full Linux OS image.
Its posible to do this on the blue solar mppt?
Yes
I noticed after you set your wifi config that when you went back it was stuck on "Fetching Data" then you click the back arrow. Min is stuck on "Fetching Data" and when I go back and come back like you did I do not have network showing, therefore I cannot click Remote Console. Any ideas?
Can you run this on Multiplus that already has gx built in? As you can connect touch screen to it
Hi, New subscriberr here. Can Venus os monitor two different solar battery banks with one raspberry? My current setup has two of the following: 500A battery smart shunt, MPPT 75 15 solar charger charger, 100A battery protect and two 24v 50A batteries in the same building.
You have one smart shunt for the whole bank, or are you going to have more than one smart shunt? I think you can hook up more than one smart shunt to Venus, but you must select the one to monitor, so only one at a time.
Hi. The inverter is connected with VE bus. How is the solar charger connected to the Pi?
Victron ve direct to USB cable
I cant for the life of me get past fetching data with bluetooth connection. Any tips?
Make sure your bluetooth is working and you have paired the Venus OS. I just built v3.22 last night and its working and I have it on VRM as well.
I have followed all of your steps several times, I have yet to see the victron screen you show whike it's still headless, tried putty and keep getting access denied
mv /etc/venus/headless /etc/venus/headless.off then reboot
@BradCagle i tried that, I have a different screen then the one you show so not sure if that's the problem or not, I was finally able to log in after 100 attempts but I never got the victron screen and even after I got the programming done the screen will not come on
@@todamnbad The different screen might actually be the problem. Some work, some don't. Also some that don't work can be made to work, but I have no experience doing that.
@@BradCagle well crap, thanks for the help
@@BradCagle do I need to undo what I did following your instructions? If so, how would I do this
Does it work without an internet connection after it's all set?
yes
Is there a way to connect a regular monitor through the hdmi to view the venos os?
I think you can.
@BradCagle if you know how could you make a video? I'm still new to all of this and I'm not sure how I would even make that work. When I insert the SD card with the raspberry pi operating system I get a monitor to work but it doesn't do the same thing with thebvenos os SD card, guessing I need to program it somehow but no clue how to do that
@@todamnbad First, remember that the image file from VE is just that an image created to do what Brad is showing. Therefore, get a new SD card (32G and format to FAT32), Then get an ether image creator (windows, raspberry Pi, etc). MY advice is to use the Raspberry Pi since you can EDIT the image during the creation process to enable bluetooth, wireless SSID, DHCP, root password, etc.) Then shutdown your PI and replace the SD card with the image from the video (currently it's V3.22) and then follow the instructions given. It took me longer to mess with crappy SD cards than it did to build the Cerbo! Get good 10 class cards and format for FAT32 on RPi 3 or less as when you go to 64Gb its ExFat I believe,,,,,keep it simple. Gary, SE MI
@Gary-wh7ce I am all new to this and your post if probably very helpful but it's a bit gibberish to me, I will need to do some more learning before I will understand your reply, I have solar assistant installed on an orange pi and the hdmi output works good with that so I was hoping that the venos os would be the same