DIY Arduino LED clock | Arduino Projects | 7 Segment Display | LED digital Clock from Cardboard

Вставка
- Опубліковано 8 лют 2025
- DIY Arduino LED Clock | 7 Segment Clock from Cardboard | Arduino Led Clock | Arduino Digital clock
Arduino Projects
LED Clock
NeoPixel clock
ws2812b clock
digital clock
Individually addressable LEDs ws2812/ws2812b
Cardboard Crafts
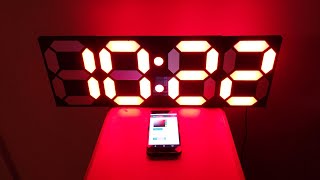
In this tutorial I have built a 7 Segment Digital clock using the recycled cardboard.
I have used below components for clock:
WS2812 individually addressable RGB LED strip.
Ds3231 RTC module.
Arduino nano.
Check the connection details here github.com/man...
Program is very basic and you can find it in internet if you are new to Arduino programming.
If you like this video, please like, share and subscribe!
Thank you!
#ledclock #arduino #cardboardclock
#ArtCraftAndKnowledge


Ohh man you did a great job and you worth it... i don't know why you didn't got the likes but i liked it and your amazing ✔️✔️✔️
Thank you!
Great video. I have searched for this , and everyone uses CNC printer or mdf cutters to build one. I never thought tht someone could do it with cardboard with such perfection. There was no light bleeding in segments.. awesome work.
I checked the Arduino code. I'm not good with Arduino code. Is there any way to change the colours of the clock. Can u do a screen recorde version to change the colour of clock in Arduino code?
Or simply specify that in GitHub itself. U can add it in description by mentioning which code to change for which colour.
Anyway, Great video. The best one for clock. U can make alternative version of the same clock with slight modification and start UA-cam career ,just with the clock video😅. Easy 100K+ views per video..
Keep up the good work👍🏼👍🏼
Thank you.
Below are the lines you need to update for the colors (just update the name of a color).
CRGB color = CRGB::Pink;
CRGB color1 = CRGB::Red;
Like, Subscribe and share the videos. I hope you enjoy the other videos as well on my channel !!!
Art, Craft and Knowledge thanks😍
I was trying to do this,but my pixel leds are not giving all white when upload to test white color,some are red,orange and some aren't working.When connect to computer powersupply it gives multiple colors by blinking,what to do now?
Test your connection with any test code to make sure they are all in series.
Hi ! Great job !!! I'd like to make it but with 3 leds instead of 1 on each part of the segments. What would be the code for that change ?
Play with the last lines For Loop... Make sure to assign number of LEDs.
Below is the explanation of how for loop works.
LEDs[i + startindex]: This accesses an element in the LEDs array at the index i + startindex. It determines which LED in the strip to control based on the current value of i and the startindex parameter passed to the function.
numbers[number]: This accesses an element in the numbers array, which contains binary representations of digits 0-9 for a 7-segment display. The specific digit to display is determined by the number parameter passed to the function.
& 1
@@ArtCraftandKnowledge Thanks a lot !!!
Amazing job. Can I use ds1302 instead of rtc3231 please.
Thanks. I was unsuccessful using ds1302.
There is inaccuracy in the time. So it is better to use ds3231 module.
Beautiful lovely module ..
❤
Thank you!
I made the similar version with Bluetooth , alarm, RGB rainbow mode and normal random color digits , and ldr , day of week, battery indicator etc.
Good to know... Congratulations!
sounds awesome, will u share code and build diagram on github?
@@joshitoshi9835 I can share it on gdrive since i don't have GitHub account.
I have made a small diagrammatic representation of the build in a png format using paint, but I'm sure it's clear to understand for electronic hobbyists
@@ArtCraftandKnowledge can you make a video of my version? I can contact you to explain how I did it and share some pictures of my clock if that's ok for you.
This is great!
But I think, maybe the Arduino code has a little problem.
I've tried compiling it with the Arduino IDE app in my phone, but it keeps saying:
"
compilation error
/FastLED/platform/avr/clockless_trinket.h: 326:24:error: expected ';' before '_attribute_' ".
I can't figure out exactly where the error is. Could you help me please.
Thank you!
Make sure you have the FastLed Library and proper Arduino board.
Please search for the error. You'll get many conversations! I found below.
community.platformio.org/t/fastled-clockless-trinket-h24-error/11929
Hope you get it worked! Good Luck 👍
Very nice project . Why You didn't give the details of LEDs connection ?? Please add this information.
I have added a jpg file showing led sequence. It's just a series connection. Check the description for code and Schematics.
@@ArtCraftandKnowledge The sequence image confused me. Can last LED is the starting to connect with nano ??
Yes
@@ArtCraftandKnowledge Thanks for your support and quick reply 🙏🙏
Watch my other videos and subscribe my channel if you like them!
Hii should we use a battery source for led's to light
I use a 5v adopter or a power bank. You can use a battery and a step-up board to have 5v and a charging Module.
5v for all leds
Plzz describe me in details
Yes 5v is enough
what if there is a power interruption and once the power is back does this clock pickup the time automatically to real time or do we manually need to set the time.
It holds the time as the RTC module has a battery.
Great video !
I have question
Led strips have only 3 pins (vcc_gnd_input)
30 led in suequance how does the arduino know wich one to turn on/off if it's all conected from same input !?
Thank you
They are individually addressable LEDe. Each LEDs will have a tiny chip inside.
WS2812b RGB LEDs.
@@ArtCraftandKnowledge thank you for information good luck with other projects
Im now doing this, hope it dont have any error, ive tried a similar project like this but there are so many issues :(
Good Luck! Post here if you face any issues. I'm not a pro, But I will try to help you if I can!
@@ArtCraftandKnowledge You earn my sub! of all the vids ive commented with youre the only one that replied im losing hope in this project. Thankyou in advance will update this comment if ive encountered any issue :D
Sure!
@@ArtCraftandKnowledge After i inputed the code from the link the led wont light up, but the arduino is on.
@@FrancisAliviocheck the connections thoroughly. Run a test code to test all the LEDs before you update this code
Very good work ♥
can i get the dimension for the segment ? minute 1:44
and thanks
Thank you and pls watch the video from starting, you will get the dimensions...
about the code here is script like this -> DateTime now = rtc.now();
are datetime also auto update when the clock shutdown ?
Your RTC module should hold the date and time.
That is the main purpose of using RTC. It wont lose previous setting time.
How will I know if its uploaded or not??
Please help me one last time
I really liked your project thats why i choose this
Check my other reply. And I'd you have connected the LEDs they should light up properly!
@@ArtCraftandKnowledge I havent done the connection yet
Please bare me
Im new to this
I am going to clock business😉
😀
May I ask for a list of things I need to buy to make this? I have to make school assignments
Please check the description of the video. I have listed them. And you can check the diagram as well in the link
@@ArtCraftandKnowledge thanks
hi! our robotics lessons now is about arduino and we have an upcoming project. may I ask how did you sync or like input time on the arduino?? thanks!
I have used DS3231 RTC module to hold the time.
Make the connections first. Edit the code (line number 41) to update the current date and time. Uncomment the line 41 and load the code to Arduino.
Then comment the line 41 and again update the code to Arduino.
@@ArtCraftandKnowledge, oh wow that's quite a lot! really appreciate your help. Thank you and have a nice day!
Thank you and Check my channel for other Arduino projects. I will be adding more easy to make projects with Arduino and Raspberry Pi.
Great Video
hey could you pls tell me how to edit the code. So i have 3 LEDs instead of 1 for every line
Thank you
I will check and let you know. And I'm creating one more clock. May be I will post it in 2 days.
I also need idea with all details to increase the No of l.e.d.
Thnx
May I request one question.
Can I use WS2811 bulb instead of WS2812B?
If yet need to modifie code?
I haven't tried but you can use. Just play with test codes and you'll understand how to change the code. Logic will be same only the library related details may be different!
Thanks.
Very nice. Can you send Arduino code details?
It's simple code from Arduino library. This is just a video on building display with cardboard. Drop your email I'd in the comment. Will write a code and send you.
Same clock but 12hours I need your arduino code please bro
@@sachindrahalder5910 Check the connection details here github.com/manjuhm/LED-Clock
LED can be on at direct 5 voltage?
Kindly watch the video and check the link in the description for the connections!
you haven't the LED Connection Part ?
Check the connection details here github.com/manjuhm/LED-Clock
@@ArtCraftandKnowledge you haven't the LED Connection Part ?
Check the connection details here github.com/manjuhm/LED-Clock
Can i use rainbow effect?
Yes you can. Try to play with the adafruit libraries
Is there a easier way to connect the LED stripes ?
It's the easiest way. They're connected in series!
which gauge size wire did you used ?
I have not used hookup wires. It's less than 16 guage
👌
Sir which are the libraries you are used in this project. Please send
They are mentioned in the code. Check the description for link
@@ArtCraftandKnowledge but not working
Can you send exact rtc library in my g mail
Buy all the things
In my phone,it is running.but leds not working.
In my lap,it seen an error with rtc.
Good job..👍
Thank you!
I have finished dng ths digital watch
But i couldn't change the time to present time
Please help me out
Did you mean, the time is changing to the time in code when you turn off and on?
No no
Fr example now time is 9.20
Bt in dt it shows 23.15
Hw to set it to 9.20
You have to update the current time in the code before you upload
Can you please say which line to upload the time in the program
Please read the code. I have commented that section.
what are the names of the colorful cables?
진짜 멋진 작품입니다
코드를어떻게 했는지 라이브러리에 그냥추가 했나요? 알고싶습니다
아두이노 나노로 테스트 해보는데 도무지 안되서 이렇게 도움을 청합니다 도와주세요 아두이노나노에 업로딩이 안되요
You need the below Libraries
#include
#include
#include "RTClib.h"
RTClib.h can be downloaded here..
github.com/adafruit/RTClib
And copy them to your libraries folder within the Arduino Installation location.
And add FastLed & wire libraries from your Arduino IDE.
Read the recent comments in this video, I have answered to many errors!
Best of luck!
@@ArtCraftandKnowledge
감사합니다 덕분에 업로드가 성공했습니다
하지만 또 다른 의문이 있습니다 시간 설정이나 시간변경은 어떻게 이루어지나요 도와주세요
Check the code. Line 36 to 42 tell you about how to set the time. You need to upload the code twice. First add the time in the code and upload then 2nd time, comment the line where you set the time and upload.
VERY GOOD
Thank you!
Super
Thank you!
You know how can i check led one by one?
When you install Fast LED, you will get the example codes in IDE. Check the LED strip by uploading some example code. It will confirm your strip is ok. No need to cut them down for testing
Nice info, thanks for sharing it :)
Thank you!
Very nice wor🙏♥️
Thank you 😊
Hw to change the time?
You need to update and upload the code to change time!
@@ArtCraftandKnowledge can u explain where to change
Hw to set it on automatic multi colour mode???
Not tried this. Read the code wherever you see the color name try Changing and play with the code.
@@ArtCraftandKnowledge this is manually right
Try making next video on automatic LED colour change
Nice project!
Thank you!
а порядок размещения светодиодов какая?
There is a picture posted check the link in the description!
Hello
Can you dim the LED's with code or is that not possible? :)
Yes. You can. Check the below link for FYI
forum.arduino.cc/t/brightening-individual-leds-using-fastled-library/600076
@@ArtCraftandKnowledge Perfect! Thanks 🙌🏼
Is it 12 hours or 24 hours clock?
It's 24 hours clock.
सर जी नमस्कार मैं जबलपुर mp से क्या आप मेरे लिऐ सेवन सिग्मेंट rgb led स्ट्रिप पर 6 डिजिट क्लाक जो टाइम, वर्ष, टेंपरेचर, अलार्म के साथ जो भी लेटेस्ट हो शो करे को बना सकते हैं तो बना दीजिए और इसकी क्या कीमत होगी
I don't sell things! I will try to create one with 6digits as a tutorial...
Hello good video friend, I would like to know if you can help me? to set the time please thank you.
Thank you! Let me know what's the issue you are facing?
I don't know where I have to update the time.
Check the code. Line 36 to 42 tell you on how to set the time. There is a comment also in the code
Whats the library for this???
Please check the code. You will get the info on the Libraries!
@@ArtCraftandKnowledge Its not there
Im getting error message for RTC_DS3231
You need the below Libraries
#include
#include
#include "RTClib.h"
RTClib.h can be downloaded here..
github.com/adafruit/RTClib
please help me i test my 4 digit only one digit
work
Check the connection diagram and make sure the connections are proper.
Test the ws2812b LEDs with the example codes in Arduino IDE (FasrLed Library). Many people have done with this instructions. It should work.
How to change time
Make the connections first. Edit the code (line number 41) to update the current date and time. Uncomment the line 41 and load the code to Arduino.
Then comment the line 41 and again update the code to Arduino.
nice job!!!
Thank you!
Everyone is doing that 3d printing shit You have my respect for making it with cardboard .😁
Thank you!
Не развалится ли такая конструкция в тепле?😃
Nothing will heat up in this setup!
How do we connect the 0 part of LED??
Watch the video and check the connections details link in the video description.
Ws2812b is expensive bro
not if you buy from Ali express
How to set the time? There is no push button to set.
Since it's just a simple clock, I didn't add push buttons. Time is set while uploading the code. The RTC Module holds the time for many years.
Need bootloader Arduino nano?
I have used Arduino Nano board, so simply upload the code!
wher is the diagram
Check the connection details here github.com/manjuhm/LED-Clock
@@ArtCraftandKnowledge you haven't the LED Connection Part ?
@@brois2956 Check the connection details here github.com/manjuhm/LED-Clock
Please help me
I’m doing this as my project in my university
Copy your error here
@@ArtCraftandKnowledge
Arduino: 1.8.13 (Windows Store 1.8.42.0) (Windows 10), Board: "Arduino Nano, ATmega328P"
In file included from C:\Users\maria\Documents\Arduino\libraries\sketch_apr06a\sketch_apr06a.ino:2:0:
C:\Users\maria\Documents\Arduino\libraries\FastLED\src/FastLED.h:14:21: note: #pragma message: FastLED version 3.004.000
# pragma message "FastLED version 3.004.000"
^~~~~~~~~~~~~~~~~~~~~~~~~~~
sketch_apr06a:20:1: error: 'RTC_DS3231' does not name a type; did you mean 'DS3231'?
RTC_DS3231 rtc;
^~~~~~~~~~
DS3231
C:\Users\maria\Documents\Arduino\libraries\sketch_apr06a\sketch_apr06a.ino: In function 'void setup()':
sketch_apr06a:31:8: error: 'rtc' was not declared in this scope
if (!rtc.begin()) {
^~~
sketch_apr06a:36:7: error: 'rtc' was not declared in this scope
if (rtc.lostPower()) {
^~~
C:\Users\maria\Documents\Arduino\libraries\sketch_apr06a\sketch_apr06a.ino: In function 'void loop()':
sketch_apr06a:46:18: error: 'rtc' was not declared in this scope
DateTime now = rtc.now();
^~~
exit status 1
'RTC_DS3231' does not name a type; did you mean 'DS3231'?
Invalid library found in C:\Users\maria\Documents\Arduino\libraries\sketch_apr04a: no headers files (.h) found in C:\Users\maria\Documents\Arduino\libraries\sketch_apr04a
Invalid library found in C:\Users\maria\Documents\Arduino\libraries\sketch_apr05a: no headers files (.h) found in C:\Users\maria\Documents\Arduino\libraries\sketch_apr05a
Invalid library found in C:\Users\maria\Documents\Arduino\libraries\sketch_apr06a: no headers files (.h) found in C:\Users\maria\Documents\Arduino\libraries\sketch_apr06a
Invalid library found in C:\Users\maria\Documents\Arduino\libraries\sketch_mar04a: no headers files (.h) found in C:\Users\maria\Documents\Arduino\libraries\sketch_mar04a
This report would have more information with
"Show verbose output during compilation"
option enabled in File -> Preferences.
Why didn’t you give information about chip you connected, I nearly subscribed
What is the chip you are referring?
All the information is present in the video and the code & schematics are present in the description!
Connection kese kiya vo to batao
Check the description for the connection details
Bro code link please bro
Check the connection details here github.com/manjuhm/LED-Clock
GOT THIS ERROR AFTER UPLOADING "RTClib.h"
Arduino: 1.8.13 (Windows Store 1.8.42.0) (Windows 10), Board: "Arduino Nano, ATmega328P"
In file included from C:\Users\maria\Documents\Arduino\libraries\sketch_apr06a\sketch_apr06a.ino:2:0:
C:\Users\maria\Documents\Arduino\libraries\FastLED\src/FastLED.h:14:21: note: #pragma message: FastLED version 3.004.000
# pragma message "FastLED version 3.004.000"
^~~~~~~~~~~~~~~~~~~~~~~~~~~
Sketch uses 7656 bytes (24%) of program storage space. Maximum is 30720 bytes.
Global variables use 650 bytes (31%) of dynamic memory, leaving 1398 bytes for local variables. Maximum is 2048 bytes.
An error occurred while uploading the sketch
avrdude: stk500_recv(): programmer is not responding
avrdude: stk500_getsync() attempt 1 of 10: not in sync: resp=0xa4
avrdude: stk500_recv(): programmer is not responding
avrdude: stk500_getsync() attempt 2 of 10: not in sync: resp=0xa4
avrdude: stk500_recv(): programmer is not responding
avrdude: stk500_getsync() attempt 3 of 10: not in sync: resp=0xa4
avrdude: stk500_recv(): programmer is not responding
avrdude: stk500_getsync() attempt 4 of 10: not in sync: resp=0xa4
avrdude: stk500_recv(): programmer is not responding
avrdude: stk500_getsync() attempt 5 of 10: not in sync: resp=0xa4
avrdude: stk500_recv(): programmer is not responding
avrdude: stk500_getsync() attempt 6 of 10: not in sync: resp=0xa4
avrdude: stk500_recv(): programmer is not responding
avrdude: stk500_getsync() attempt 7 of 10: not in sync: resp=0xa4
avrdude: stk500_recv(): programmer is not responding
avrdude: stk500_getsync() attempt 8 of 10: not in sync: resp=0xa4
avrdude: stk500_recv(): programmer is not responding
avrdude: stk500_getsync() attempt 9 of 10: not in sync: resp=0xa4
avrdude: stk500_recv(): programmer is not responding
avrdude: stk500_getsync() attempt 10 of 10: not in sync: resp=0xa4
Invalid library found in C:\Users\maria\Documents\Arduino\libraries\sketch_apr04a: no headers files (.h) found in C:\Users\maria\Documents\Arduino\libraries\sketch_apr04a
Invalid library found in C:\Users\maria\Documents\Arduino\libraries\sketch_apr05a: no headers files (.h) found in C:\Users\maria\Documents\Arduino\libraries\sketch_apr05a
Invalid library found in C:\Users\maria\Documents\Arduino\libraries\sketch_apr06a: no headers files (.h) found in C:\Users\maria\Documents\Arduino\libraries\sketch_apr06a
Invalid library found in C:\Users\maria\Documents\Arduino\libraries\sketch_mar04a: no headers files (.h) found in C:\Users\maria\Documents\Arduino\libraries\sketch_mar04a
This report would have more information with
"Show verbose output during compilation"
option enabled in File -> Preferences.
Make sure you place the libraries in the proper folders and restart Arduino IDE.
And check your Board settings as below
support.arduino.cc/hc/en-us/articles/360016478240-Error-avrdude-stk500-recv-programmer-is-not-responding
In file included from C:\Users\maria\Documents\Arduino\libraries\sketch_apr06a\sketch_apr06a.ino:2:0:
C:\Users\maria\Documents\Arduino\libraries\FastLED\src/FastLED.h:14:21: note: #pragma message: FastLED version 3.004.000
# pragma message "FastLED version 3.004.000"
^~~~~~~~~~~~~~~~~~~~~~~~~~~
Sketch uses 7656 bytes (24%) of program storage space. Maximum is 30720 bytes.
Global variables use 650 bytes (31%) of dynamic memory, leaving 1398 bytes for local variables. Maximum is 2048 bytes.
Invalid library found in C:\Users\maria\Documents\Arduino\libraries\sketch_apr04a: no headers files (.h) found in C:\Users\maria\Documents\Arduino\libraries\sketch_apr04a
Invalid library found in C:\Users\maria\Documents\Arduino\libraries\sketch_apr05a: no headers files (.h) found in C:\Users\maria\Documents\Arduino\libraries\sketch_apr05a
Invalid library found in C:\Users\maria\Documents\Arduino\libraries\sketch_apr06a: no headers files (.h) found in C:\Users\maria\Documents\Arduino\libraries\sketch_apr06a
Invalid library found in C:\Users\maria\Documents\Arduino\libraries\sketch_mar04a: no headers files (.h) found in C:\Users\maria\Documents\Arduino\libraries\sketch_mar04a
Got this after uploading
Its showing done uploading with this message down
Did you make the connections? Is LEDs lighting up? I still see the errors with your libraries. Remove all the duplicate libraries. Libraries should be in the Libraries folder with their original name
You all guys are too advance. I don't know what the code it is and everything. This is totally new to me.. but I really like to make one.
If you are very new to Arduino and never used, I would suggest you try some basic codes for LED or something to know how it works. Then you can try these kind of projects. Check my other videos!
Show your modules joint
Please check the description. I have posted a link to connection details.
Login korna hoga
No need to login
Ok I can try but said to login
Same clock but 12hours I need your arduino code please bro send me
Check the connection details here github.com/manjuhm/LED-Clock
I need code sir....
Check the description of the video for the link
Has anyone counted how many times this terrible music from the sims was repeated?
помогите пожалуйста поместить в 168 ардуино и как вы соединяли светодиоды?прошивкуdrive.google.com/file/d/1k7y0YRlqka2MLDCglB8LE09mzzuZbUNB/view
Check this for difference between 168 and 328.
forum.arduino.cc/index.php?topic=81818.0
I never used 168 chip. I guess code will run fine. If memory is less them use 328 board. And LED connection part is in the description of the video!
@@ArtCraftandKnowledge я понимаю параметры ардуин . дело в том что что выше моя прошивка залняется всего на 101 процент . как ее можно уменьшить не задевая основных функций часов . да кстати я вашу прошивку не смог скомпилировать .
Check for the libraries. Install the required libraries. You can check the errors while compiling!
@@ArtCraftandKnowledge а как проверить библиотеки я я добавлял какие были
Compile the code. See the error what is missing and download and install them from internet!
Please give arduino code
Please check the description of the video.
This links for arduino code?
github.com/manjuhm/LED-Clock
Yes
There is no switch to adjust the time, how to adjust the time?
In this version, it's updated in the code and the time will be stored in the RTC module
you haven't the LED Connection Part ?
Check the connection details here github.com/manjuhm/LED-Clock