You're living my dream as a 14yr old. I was buying leaf blowers on ebay and gluing tarps to plywood. Never got one that could quite slide freely with weight on it.
If you stuck a cowel around that propeller that will increase the efficiency, more pressure and more lift, whilst simultaneously decreasing your risk of getting chopped in half if one of those blades flies off
Putting a propeller in a duct is tricky business. To get any efficiency benefit, you need to maintain a really tiny gap between the duct and prop tips. More than that, and the duct becomes a net negative. It will however help protect him.
You've probably thought of / tried this already, but to balance the front / back: 1) Close some of the holes in the front to direct/force more air pressure to the rear. 2) Add a scoop to the fwd thrust fan to catch some air and redirect underneath for added rear support while in motion.
3. Two rudders, each bigger than the current rudder. 4. Either the main (downward) motor/prop assembly needs to be in the center, or there must be a counterweight (perhaps a human counterweight) in the front. Otherwise your steering will be even wonkier than it already has to be, due to hovercrafts just being like that. :)
Really enjoyable video as usual, thank you. I’ve always wanted to speed build build a full size electric hovercraft too, I can’t wait to see how it turns out. I’ve built a few RC hovercraft, here are some thoughts in case they’re useful: - Ripstop (kite material) is an awesome skirt material. Super tough and light. - rounded corners make less bulges at the skirt base, they are where holes appear. - foam sheets sandwiched between wood are strong, quick and easy. Good for floating purposes. - lift fans are more about pressure than airflow. Two blades leak a lot upward. Wingtips are key, most pressure is lost there. Squared off ends really close to the housing avoids this. I cut a 5 blades ends square. You might get around wingtip leaking by simply mounting the prop just under the plywood and narrowing the opening a few cm. that’d save building the duct too. - a really badly sewed finger skirt is better than a bag, it’s a pain in the arse to make but it doesn’t fill with water on a lake. I’ve been meaning to try out making one like this: Two long strips of Ripstop laid one on top of the other, a taller one for the outside of the skirt and shorter one for the inside, lined up at the base. Sew lines top to bottom to make each segment. Cut apart at the base to make ‘feet’ to conform to the ground/water. Perhaps then sub divide each foot with some stitches to make the pressure on the foot side higher than the inlet side to even pressure inside the bag and keep it inflated when a bit is lifted from the ground. Might be terrible though. - you could add two extra fins on the frame with wire connects for serious turning power. Hi to anyone who read this far! 🎉
10:55 this is not gyroscopic procession but only the torque of the rotor acting on the frame (same way as an helicopter but with less effect cuz the propeller mainly provides pressure here and not as much mass flow)
Nicely done! Just two points... - It's not gyroscopic precession causing the yaw to the left. It's just plain old torque from the prop. - You'd be way better off taking a couple of inches off the prop tips vs. having them extend beyond the hole. You get most of your thrust from the outer 1/3rd of the prop.
Dear PCBway, Your marketing team is exceptional. I turn to UA-cam to stay sane, and my favorite UA-camrs consistently recommend your company. Though I'm a marketing professional, I'm inspired to delve into your field, researching your industry's abbreviations. Your commitment to ethical advertising is impressive, setting you apart. Your team is more than professionals; they're passionate advocates for an ethical approach. I extend my heartfelt appreciation to your marketing team for their commendable efforts. Please continue collaborating with UA-camrs, especially in the RC and airplane communities, as it's a testament to your unwavering commitment to quality and innovation. Keep up the great work!
He is not even remotely trying to build a durable hovercraft. He is building the cheapest version possible that hovers, and then we watch it, and then he can buy some nice stuff for his house and go on a holiday. It falls into the category of building a foam aircraft carrier so that you can accidentally land an RC plane on it, call that some how a success, and make a 33 minute video about it so that there is lots of space for commercials and advertisement. Some of these channels have sponsorship deals that earn them 50.000 dollar. So it is no surprise that they come up with these type of videos. It is seems that some of these channels are just creating content for the advertisement. They start with original ideas, of which you could think that it might be interesting to do them yourself, but eventually they run out of original practical ideas, and then you get this type of content. So that is why there are no sensible materials used for this video. Good materials cost more and it takes longer to get them. More costs is less profit.
@@insAneTunAEach channel has its USP. I’m sure there are lots of high quality hovercraft builds, I’m not watching them. Simon builds stuff quickly for maximum effect and learning, with minimum build time. It’s something I could imagine building. You should see Jake Carlini’s builds ! Also great fun to watch.
@@kitsandham7001 Right, so you are easy to impress. In that case I can only advise Simon to build a plywood car in the same way as he build that "hovercraft". Or a plywood boat, or a plywood buss, or a plywood house, or a plywood tank. The possibilities a limitless. 🤣😂
@@insAneTunAyou clearly have never built anything, good bad or otherwise. That’s why you don’t get it. I’ve built everything from house extensions to platinum and diamond wedding rings, I’ve made stuff from almost any fabrication material you can name. Carbon fibre to cotton. Yet still I love Simons builds.
Having made several RC & full sized hovercrafts as a kid, a finger-skirt really is the way to go. A bag skirt by itself really lacks the ability to conform to uneven terrain & transition to different surface types.
@@dalepower632 with a finger skirt you have many short separate skirt sections attached around the circumference of the hovercraft's deck. Each section inflates & presses up against the neighboring section to form a seal. I don't know how to describe it very well -you're probably better off doing an image search for "hovercraft finger skirt"
Got to agree. I sewed up a really (really) rough finger skirt out of Ripstop for an 80cm RC one, it was so much better than the bag type which filled with water. Do you think it’s possible to lay two strips of Ripstop down an just sew lots of straight lines for each finger? Maybe separated at the base for flexibility?
Good work. I've built a few models but not that big! I've used a 12 blade air con fan rather than 2 blade propeller for lift. For the rudder, it's better to use a balanced rudder, that is 25% of the area forward of the pivot and 75% behind. It takes the load off the servo and linkages and provides finer control. For skirts, I used garden pond liner. Easier to repair if damaged. Always fun to experiment though.
What a progression from your first videos to now, man the editing the humour and also your English , you did improve everything ! And I'm not even English, awesome work keep doing what you do!
Awesome! Some ideas: 1. Rather than adding EDF's to the rear, maybe you could angle the rear motor downwards a bit, so it also provides upward force to lift itself and counteract its own weight. 2. The rear motor frame can be made much more rigid by adding some diagonal supports on the frame. Square frames are inherently unstable since they have degrees of freedom, while triangles are inherently fixed because they have no degrees of freedom. #fax #enhineerigh 3. Maybe adding a shroud to the motors would significantly increase their efficiency. And unfortunately also make it a bit safer ;) That way you can also add some mesh on top of it to prevent leaves from getting in. 4. Put the batteries in the front to balance weight.
I had the strangest realization while watching this video, i literally used to live a few houses away from the school where you were testing the hovercraft. I also used to build crazy stuff in my garage while living there like battlebots and different kind of robots 😄
Might go instead of dowels pvc pipe for verticle pieces and maybe engineer in some cross pueces not for support air passages for a emergency pump up ?what yu think idea maybe put holes all the way across horizontal pieces or jjust let it flow out ends can plug ends or unplug ends of pc for air flo!!!
Soo iskipped forward and just for lack of context.....at 12:40 seeing the exposed fan spinning at high speed soo flowers to his person is absolutely terrifying lmao...I love it and applaud you sir
You still need an air-guide around the horizontal propeller to prevent air escaping to the sides. But not too tight. That will probably increase the efficiency a lot.
Ahhh, I love everything about you and your videos. I love Sweden and the sound of the language. The men are beautiful as are the women. My straight brother used to call them the Swedish connection. Your videos are so inspiring and fun to watch. Great work mate. Love from Canada
There were plans for a mini stand on hovercraft in the back of old Popular Mechanics and Popular Science magazines in the olden days, I ordered them and my dad helped me build it. The hover portion was powered by an old vacuum cleaner motor, and the thing worked great on concrete as well as grass-only problem was you had to keep an extension cord hooked to it at all times. I wonder if a design like that would be fun for you to recreate.
"So I drilled the foam in. What does that mean? That means I put 50 screws through the LED strip." Bro I fricking died 🤣that is something I would end up doing and felt that one.
Good job man. But you don't have a problem with gyroscopic precession, It's just that your propeller is acting a bit like a reaction wheel. The torque you apply to the propeller to spin it creates a reaction torque that is spinning your hovercraft in the opposite direction.
That common red colour, Swedish country houses are painted with, was very popular when I worked as a painter at a window factory. The common name was literally "svensk-rød/swedish-red" or as I used to call it "svensk-rød som jävlar svenskar"😂 greetings and love from a Danish brother, Simon!😊
Some raised "ducting" around the main lift fan may help it a bit.... and it would help for safety, making it harder to accidentally stick a toe into the blades.


The editing 🤌🏼
Do you mean his editing style is good or he faked the video?
@@AmbrisRiktar2808 his editing style is superb 👏🏼🤌🏼
@@AmbrisRiktar2808lmao wdym fake?
You're living my dream as a 14yr old. I was buying leaf blowers on ebay and gluing tarps to plywood. Never got one that could quite slide freely with weight on it.
Didn't know you're here
Your videos are equally as amazing brother.
If you think this is cool, you should take a look at Peter Keogh's skirtless hovercraft. It's a manned craft that actually hovers. Without a skirt.
Thanks for the great videos & ideas Simon!
???!!
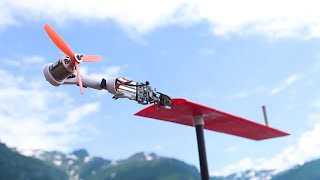
If you stuck a cowel around that propeller that will increase the efficiency, more pressure and more lift, whilst simultaneously decreasing your risk of getting chopped in half if one of those blades flies off
this!
+5
cowl :)
Putting a propeller in a duct is tricky business. To get any efficiency benefit, you need to maintain a really tiny gap between the duct and prop tips. More than that, and the duct becomes a net negative. It will however help protect him.
My guess is this will be in part 2
Looks like you have built a very nice leaf collector!
It's always a good day when Simon uploads 😁
Yeah 100% agree
You've probably thought of / tried this already, but to balance the front / back:
1) Close some of the holes in the front to direct/force more air pressure to the rear.
2) Add a scoop to the fwd thrust fan to catch some air and redirect underneath for added rear support while in motion.
3. Two rudders, each bigger than the current rudder.
4. Either the main (downward) motor/prop assembly needs to be in the center, or there must be a counterweight (perhaps a human counterweight) in the front. Otherwise your steering will be even wonkier than it already has to be, due to hovercrafts just being like that. :)
6:35 hands down the coolest moment on UA-cam in 2023
i was gonna type "6:35 hell yeah" but your's fine too
If John Wick were a carpenter.
Really enjoyable video as usual, thank you.
I’ve always wanted to speed build build a full size electric hovercraft too, I can’t wait to see how it turns out.
I’ve built a few RC hovercraft, here are some thoughts in case they’re useful:
- Ripstop (kite material) is an awesome skirt material. Super tough and light.
- rounded corners make less bulges at the skirt base, they are where holes appear.
- foam sheets sandwiched between wood are strong, quick and easy. Good for floating purposes.
- lift fans are more about pressure than airflow. Two blades leak a lot upward. Wingtips are key, most pressure is lost there. Squared off ends really close to the housing avoids this.
I cut a 5 blades ends square.
You might get around wingtip leaking by simply mounting the prop just under the plywood and narrowing the opening a few cm. that’d save building the duct too.
- a really badly sewed finger skirt is better than a bag, it’s a pain in the arse to make but it doesn’t fill with water on a lake.
I’ve been meaning to try out making one like this:
Two long strips of Ripstop laid one on top of the other, a taller one for the outside of the skirt and shorter one for the inside, lined up at the base.
Sew lines top to bottom to make each segment. Cut apart at the base to make ‘feet’ to conform to the ground/water.
Perhaps then sub divide each foot with some stitches to make the pressure on the foot side higher than the inlet side to even pressure inside the bag and keep it inflated when a bit is lifted from the ground.
Might be terrible though.
- you could add two extra fins on the frame with wire connects for serious turning power.
Hi to anyone who read this far! 🎉
10:55 this is not gyroscopic procession but only the torque of the rotor acting on the frame (same way as an helicopter but with less effect cuz the propeller mainly provides pressure here and not as much mass flow)
Exactly right, the motor drives the propeller and causes the frame to rotate in the opposite direction.
Leaving part under the paint bucket unpainted was a nice touch!
never stop with cutting stuff like a magician.
Nicely done! Just two points...
- It's not gyroscopic precession causing the yaw to the left. It's just plain old torque from the prop.
- You'd be way better off taking a couple of inches off the prop tips vs. having them extend beyond the hole. You get most of your thrust from the outer 1/3rd of the prop.
here for this :) ...gyroscopic precession would come from a change of pitch or roll, which is obviously not happening.
Thanks
Great production value. I appreciate the longer runtime of the video, please keep up long form content
Dear PCBway, Your marketing team is exceptional. I turn to UA-cam to stay sane, and my favorite UA-camrs consistently recommend your company. Though I'm a marketing professional, I'm inspired to delve into your field, researching your industry's abbreviations. Your commitment to ethical advertising is impressive, setting you apart. Your team is more than professionals; they're passionate advocates for an ethical approach. I extend my heartfelt appreciation to your marketing team for their commendable efforts. Please continue collaborating with UA-camrs, especially in the RC and airplane communities, as it's a testament to your unwavering commitment to quality and innovation. Keep up the great work!
Entertaining as always. Looking forward to part 2!
you should use damp proof membrane it comes in large sheets/rolls and is thicker than what you have
He is not even remotely trying to build a durable hovercraft. He is building the cheapest version possible that hovers, and then we watch it, and then he can buy some nice stuff for his house and go on a holiday. It falls into the category of building a foam aircraft carrier so that you can accidentally land an RC plane on it, call that some how a success, and make a 33 minute video about it so that there is lots of space for commercials and advertisement. Some of these channels have sponsorship deals that earn them 50.000 dollar. So it is no surprise that they come up with these type of videos. It is seems that some of these channels are just creating content for the advertisement. They start with original ideas, of which you could think that it might be interesting to do them yourself, but eventually they run out of original practical ideas, and then you get this type of content. So that is why there are no sensible materials used for this video. Good materials cost more and it takes longer to get them. More costs is less profit.
@@insAneTunAEach channel has its USP. I’m sure there are lots of high quality hovercraft builds, I’m not watching them.
Simon builds stuff quickly for maximum effect and learning, with minimum build time.
It’s something I could imagine building.
You should see Jake Carlini’s builds ! Also great fun to watch.
Or Ripstop (kite material) easier to work with.
@@kitsandham7001 Right, so you are easy to impress. In that case I can only advise Simon to build a plywood car in the same way as he build that "hovercraft". Or a plywood boat, or a plywood buss, or a plywood house, or a plywood tank. The possibilities a limitless.
🤣😂
@@insAneTunAyou clearly have never built anything, good bad or otherwise.
That’s why you don’t get it.
I’ve built everything from house extensions to platinum and diamond wedding rings, I’ve made stuff from almost any fabrication material you can name. Carbon fibre to cotton.
Yet still I love Simons builds.
Very cool! cant wait for part 2
Having made several RC & full sized hovercrafts as a kid, a finger-skirt really is the way to go.
A bag skirt by itself really lacks the ability to conform to uneven terrain & transition to different surface types.
A finger skirt would be strips of material hanging down? I don't know the term.
@@dalepower632 with a finger skirt you have many short separate skirt sections attached around the circumference of the hovercraft's deck. Each section inflates & presses up against the neighboring section to form a seal.
I don't know how to describe it very well -you're probably better off doing an image search for "hovercraft finger skirt"
Got to agree.
I sewed up a really (really) rough finger skirt out of Ripstop for an 80cm RC one, it was so much better than the bag type which filled with water.
Do you think it’s possible to lay two strips of Ripstop down an just sew lots of straight lines for each finger?
Maybe separated at the base for flexibility?
Absolutely epic bro! Love the build, looking forward to the next upload
Your transition effects are always on point
Good work. I've built a few models but not that big! I've used a 12 blade air con fan rather than 2 blade propeller for lift. For the rudder, it's better to use a balanced rudder, that is 25% of the area forward of the pivot and 75% behind. It takes the load off the servo and linkages and provides finer control.
For skirts, I used garden pond liner. Easier to repair if damaged.
Always fun to experiment though.
Yes agree on the rudder.
I’ve had great success with Ripstop fabric. It’s so light and tough.
What a progression from your first videos to now, man the editing the humour and also your English , you did improve everything ! And I'm not even English, awesome work keep doing what you do!
Im an Engineer and i cant stress enough how big of a death trap that is. Please, build a cover at least for both propellers.
At 11:30 He said he was going to " Make it safer " In Part 2. :o)
Carbon Fiber props can shatter pretty spectacularly. FPV pilots have a reason why they don't use them anymore.
@@isaackvasager9957 Darwin Award contraption in its present form.
You made a great leaf collector! Congrats
Man I'm such a fan of your work, amazing as always.
Pun intended?
Awesome! Some ideas:
1. Rather than adding EDF's to the rear, maybe you could angle the rear motor downwards a bit, so it also provides upward force to lift itself and counteract its own weight.
2. The rear motor frame can be made much more rigid by adding some diagonal supports on the frame. Square frames are inherently unstable since they have degrees of freedom, while triangles are inherently fixed because they have no degrees of freedom. #fax #enhineerigh
3. Maybe adding a shroud to the motors would significantly increase their efficiency. And unfortunately also make it a bit safer ;)
That way you can also add some mesh on top of it to prevent leaves from getting in.
4. Put the batteries in the front to balance weight.
Dude those cuts well placed when doing something time consuming are just so fun XDDD
dude the editing deserves an oscar!
You drilling through the Led strip... 50 times is the most relatable thing ever.
You finally made something that works!! Awesome!
I had my doubts, but i was wrong. That rig is a beast. Looking forward to part 2 !!!
Very good project. I’m looking forward to Part 2. And your English is far better than my Swedish.
I really enjoyed the confidence your where showing while building it. And that reflected on the video as well. Thanks for sharing✌️
Fab as always! Good luck with the big finish!
Awesome project. I can see you having so much fun with it.
Thanks, will be back for part 2!
👍💪✌
The tape to line up the screws, thanks for the idea !
Love your channel, builds and mindfulness that allows you to keep your limbs! 😀
Seeing you grow up before our eyes!
Awesome! Looking forward to Part 2!
You could angle the propeller 90° so it points forwards and then have some ducting redirect the air downwards
I had the strangest realization while watching this video, i literally used to live a few houses away from the school where you were testing the hovercraft. I also used to build crazy stuff in my garage while living there like battlebots and different kind of robots 😄
coolest build yet. mesmerizing
It's time for Simon, and you know what to do folks, just relax and inhale 👍👍
thats a fun project. looking forward for the next part :D
1:46 When the fear of being in a spinning prop sandwich scares the metric out of you.
Might go instead of dowels pvc pipe for verticle pieces and maybe engineer in some cross pueces not for support air passages for a emergency pump up ?what yu think idea maybe put holes all the way across horizontal pieces or jjust let it flow out ends can plug ends or unplug ends of pc for air flo!!!
I start watching this wondering how many ESCs you are gonna blow this time. ;-) And happy to see you did another video :) Live your humor!
ove it! I think if you channel the horizontal propeller you will gain efficiency and safety
Yes, is this not the "normal" way of doing builds like this?
@@TheStuartstardust plus where is the fun in SAFETY? 😮
@@cloudpandarism2627 the fun in safety is not getting sliced in half by the "carbon" blades
@@__estrogen_ i was totally not joking. jeeeez haha
The best UA-cam in existence. Thanks for the content!!!
I think 7:17 sums up how I feel about those exposed props 😅 looking forward to seeing the "safer" in part two
Woah, I must have missed the video where this massive workshop and all the printers appeared!
Well done! Next: Calais to Dover on an Electric RC Hovercraft
Please cover that propeller! It's too dangerous even at testing stage security is first.
this is so much hard work and dedication!! love tou brothr
great idea and a lovely video!
Soo iskipped forward and just for lack of context.....at 12:40 seeing the exposed fan spinning at high speed soo flowers to his person is absolutely terrifying lmao...I love it and applaud you sir
Church free flight test! Nice! 😊
You still need an air-guide around the horizontal propeller to prevent air escaping to the sides. But not too tight. That will probably increase the efficiency a lot.
Bro you’re insane!!!
A rideable leaf blower, awesome!
I enjoyed watching the liverstreams! More please.
Nice video as always Simon!
this is insane super frickin cool!
10:33 been there done that have the t-shirt.
Ahhh, I love everything about you and your videos. I love Sweden and the sound of the language. The men are beautiful as are the women. My straight brother used to call them the Swedish connection. Your videos are so inspiring and fun to watch. Great work mate. Love from Canada
cool project! missed you Simon!
Dude! We share the same name! I just started restoring some old vintage RC's. Your videos are awesome! Keep it up man!
That's so cool, I've just built and rc hovercraft. Would love to build a full sized one
Can’t wait for when he builds a full scale race drone and flies around sitting inside it!
At this point I'm happy you alive and well.
There were plans for a mini stand on hovercraft in the back of old Popular Mechanics and Popular Science magazines in the olden days, I ordered them and my dad helped me build it. The hover portion was powered by an old vacuum cleaner motor, and the thing worked great on concrete as well as grass-only problem was you had to keep an extension cord hooked to it at all times. I wonder if a design like that would be fun for you to recreate.
You could add a scoop that takes some of the air from the rear fan and directs it under the skirt
Can't wait for part 2
I like the buttery biscuit base.
That's one nice remote controlled leaf blower :D
I guess by now your neighbors don't even bat an eye or wonder what's hoping on. "Simon is at it again!"
Nice work
Hope you put more time in planning next time. Good luck
Nice leaf blower!
Very cool, but be careful, you might want more shielding on those blades.
As a big fan of gore videos, I have to disagree with you...
😈
@@Alfred-Neuman I just don’t want him to end up on r/LearningFromOthers
"So I drilled the foam in. What does that mean? That means I put 50 screws through the LED strip." Bro I fricking died 🤣that is something I would end up doing and felt that one.
Your videos are incredible my friend
Good job man. But you don't have a problem with gyroscopic precession, It's just that your propeller is acting a bit like a reaction wheel. The torque you apply to the propeller to spin it creates a reaction torque that is spinning your hovercraft in the opposite direction.
I’ve been waiting for this video since ever.
Thanks for your Videos!! Love them!
Nice job waiting for part2
Riktigt ballt projekt! Du har gjort det igen! Ser fram emot part 😃
That common red colour, Swedish country houses are painted with, was very popular when I worked as a painter at a window factory. The common name was literally "svensk-rød/swedish-red" or as I used to call it "svensk-rød som jävlar svenskar"😂 greetings and love from a Danish brother, Simon!😊
Pretty neat project! I'd change the misleading thumbnail though, could upset some people haha
Dual contrarorating EDFs is definitely the way to go
i think you should print it - we'll see us in three years ;) - i love the way you try thinks and things
Not gyroscope presssion. You are thing of Newton's 2nd law. Love your vids.
great way to pick up the dead leaves :-)
Some raised "ducting" around the main lift fan may help it a bit.... and it would help for safety, making it harder to accidentally stick a toe into the blades.
Idk what scares me more
The open blades
The fact that its radio controlled
Ir the terrifying low hum of the 2 bladed props
beautiful video , can you also make a video about using 18650 cells in a racing quad
10:29 😂😂😂
Love your sense of humor, keep it up! ✊😌