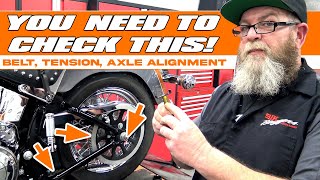
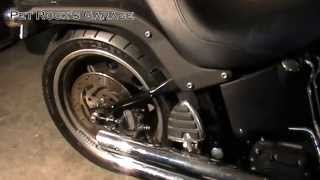
How To Remove & Install Rear Wheel & Tire on Harley Davidson | Biker Motorcycle Podcast

Вставка
- Опубліковано 9 лют 2025
- If you appreciate this free video, please consider making any purchases using our affiliate links. No additional cost to you.
J&P Cycles: www.tkqlhce.com...
Revzilla: www.anrdoezrs.n...
Motorcycle Superstore: www.tkqlhce.com...
Amazon: www.amazon.com/...
OUR OFFICIA AFFILIATE BANNER PAGE: www.lawabidingb...
OFFICIAL ARTICLE AND MORE VIDEOS: www.lawabidingb...
VIDEO-These are tutorial videos on how to remove and install the rear wheel on your Harley Davidson motorcycle. We used a 2011 Harley Street Glide and a 2014 Harley Street Glide Special in these videos, but it is the same for most models & you will definitely be able to do this in your garage or workspace. Start saving your money now by not having to rely on a motorcycle shop to remove the rear wheel from your Harley Davidson motorcycle.
Next time you need to replace the rear tire on your Harley-do it yourself. Then you can simply take the rear wheel with tire to any motorcycle shop with a tire machine and have them put the new tire on. Take it back to your garage or shop and put the wheel back on your Harley and ride on! Have the pure satisfaction or wrenching on your own Harley. This video is made by bikers for bikers.
OFFICIAL ARTICLE AND MORE VIDEOS: www.lawabidingb...


Good video. I just did my 2016 Road Glide Ultra today. I remove the lower shock bolts and tie the shocks up out of the way then raise and lower the bike with the scissor lift to get to the axle nuts. Don't need to remove the mufflers that way and can also get the 36mm socket on the axle nuts. The biggest chore was getting both snail cams to stay in place when tightening the axle nuts. I have the tension tool and got it just right after a few tries. Next item is a new lift table. My 17 year old Harbor Freight table puked it's seals trying to lift the big girl.
100%
I really like the way you take your time explaining every step thank you good job
Ryan, great video and coming from a retired L.E.O. of 34 yrs and an avid motorcycle rider who wrenches on his own bikes, I noticed that you flipped that spacer around without realizing it but as we both know that on the left side spacer you can reverse it but on earlier models it only goes one way brother. Watch your video and slow it down when you're lowering that rear wheel and you yourself will notice what I'm saying. Stay Safe out there & Never Forget: Strength in Numbers & The Thin Blue Line!!!
Good video. Thanks for taking the time and show how it's done. I was cringing (24:38) when the caliper was smacking into the rim. I always try to prevent scratches and damage when ever possible. That being said, I love your documentaries. Stay safe
This video was extremely helpful. I needed to replace the rotor and brakes on my 16 EG and my dad kept telling me, "watch the spacers, watch the spacers." guess he had a bad experience losing them or something. This was perfect and the best tutorial I found as are all of your videos. Thanks!!
Ttfztczfzzttzzffztz T zttzztztztztztzfsfFvzxvg vxgz "c
I really appreciate your videos. Watching these have saved me a ton of money and like you've said I know that the job was completed correctly because I did it. Best and most thorough on the internet.
Daniel, thank you so much. I appreciate your kind words. Glad we could help!
Ride safe & Ride Often!
Here is a link to a bunch of our useful Free vids: www.lawabidingbiker.com/freevideos
Here is a link to some of our useful for purchase videos: www.lawabidingbiker.com/buyvideos
Want Answers & Information Fast? And help support us at the same time? Do you like the content we provide?
Our patrons get answers to their questions/comments/feedback in less than 24 hrs and are part of our Private Facebook Group. If you are interested in being in this exclusive group you can get all the details at ==> www.lawabidingbiker.com/patreon
If you haven't subscribed to the Law Abiding Biker Podcast make sure to do so. Listen in as we talk weekly about issues/items like this & so much more. You can listen on iTunes (Apple/IOS), Stitcher Radio (Android), or any other Podcast App ==> www.lawabidingbiker.com/podcast
Join our free email club at /www.LawAbidingBiker.com/EmailClub. Only relevant content will be sent from time to time. Email club members are the first to find out about free or for sale content are given special coupon codes.
Thanks for the video it helped me to remove and install my wheels so I could get new tires. Saved me a a lot of money...
I great videos I'm new Harley rider bought my bike 5 months a go I can seriously say I like all your videos and learned a lot from them ,thanks for making them from Phoenix AZ
You're most welcome! Enjoy that Harley.
Ride safe & Ride Often!
Here is a link to a bunch of our useful Free vids: www.lawabidingbiker.com/freevideos
Here is a link to some of our useful for purchase videos: www.lawabidingbiker.com/buyvideos
Want Answers & Information Fast? And help support us at the same time? Do you like the content we provide?
Our patrons get answers to their questions/comments/feedback in less than 24 hrs and are part of our Private Facebook Group. If you are interested in being in this exclusive group you can get all the details at ==> www.lawabidingbiker.com/patreon
If you haven't subscribed to the Law Abiding Biker Podcast make sure to do so. Listen in as we talk weekly about issues/items like this & so much more. You can listen on iTunes (Apple/IOS), Stitcher Radio (Android), or any other Podcast App ==> www.lawabidingbiker.com/podcast
Join our free email club at /www.LawAbidingBiker.com/EmailClub. Only relevant content will be sent from time to time. Email club members are the first to find out about free or for sale content are given special coupon codes.
Great video - two notes - there are 3 wheel bearings on the back wheel / belt rear sprocket - doesn't hurt to spin those bearings to check for smooth operation. Harleys seem to need wheel bearings about every 2nd to 3rd tire change (in my experience) Shop can press those bearings in when they are changing the tire out for you. Also good to check rotational slack on rear sprocket to wheel --- up to 1/2" rotation is acceptable after that the rubber inserts should be replaced.
Needed this to remove rear wheel, saved me $$$$ by removing wheel to take it and have new back tire mounted!! Thanks!!!
You're most welcome Steve!
Ride safe & Ride Often!
Here is a link to a bunch of our useful Free vids: www.lawabidingbiker.com/freevideos
Here is a link to some of our useful for purchase videos: www.lawabidingbiker.com/buyvideos
Want Answers & Information Fast? And help support us at the same time? Do you like the content we provide?
Our patrons get answers to their questions/comments/feedback in less than 24 hrs and are part of our Private Facebook Group. If you are interested in being in this exclusive group you can get all the details at ==> www.lawabidingbiker.com/patreon
If you haven't subscribed to the Law Abiding Biker Podcast make sure to do so. Listen in as we talk weekly about issues/items like this & so much more. You can listen on iTunes (Apple/IOS), Stitcher Radio (Android), or any other Podcast App ==> www.lawabidingbiker.com/podcast
Join our free email club at /www.LawAbidingBiker.com/EmailClub. Only relevant content will be sent from time to time. Email club members are the first to find out about free or for sale content are given special coupon codes.
Hey Ryan great vid! I have changed FL rear tires many times alone and I remove the rear shocks completely after the saddlebags. With a jack under the rear tire like you had I can raise or lower the tire so the shaft and nut clear the mufflers and saddlebag supports for removal. Fast and easy and I don't disturb the mufflers or supports plus after the tire is off I can do a quick check of my swingarm sideplay. Just my 2 cents...
Great video! I’m about to change my rear tire for the first time! Thank you!
Here is a tip if you have this type of bike lift to work with, instead of raising the tire up and down, try lowering the bike to the tire, again if you have this type of setup with the belly jack there. a lot easier then trying to do it with the jack on the tire. Great Video Ryan.
Thanks, yah, have done it both way. Both work. Ride safe! Thanks for watching.
Switching to Michelin Commander 3 on my RGS. The rep at Sturgis convinced me to give Michelin a shot. I got 15k on my Dunlop rear, the comparison with the Commander 3 was incredible. Boasting 17k+ on the 3.....
Thanks a lot for the precious video. ✌️ I usually remove the lower screws of the shock absorber instead of mufflers and saddlebag rail. So the rear fork is free and i can remove and install the axle. What do you think about this procedure?
Thanks, my friend. A great help. Stan Big Island Hawaii. If you are ever here, you got a place to stay. My wife and I are on the south side.
Stan, glad you enjoyed the video. We are grateful for your invitation. Mahalo!
Ride safe & Ride Often!
Here is a link to a bunch of our useful Free vids: www.lawabidingbiker.com/freevideos
Here is a link to some of our useful for purchase videos: www.lawabidingbiker.com/buyvideos
Want Answers & Information Fast? And help support us at the same time? Do you like the content we provide?
Our patrons get answers to their questions/comments/feedback in less than 24 hrs and are part of our Private Facebook Group. If you are interested in being in this exclusive group you can get all the details at ==> www.lawabidingbiker.com/patreon
If you haven't subscribed to the Law Abiding Biker Podcast make sure to do so. Listen in as we talk weekly about issues/items like this & so much more. You can listen on iTunes (Apple/IOS), Stitcher Radio (Android), or any other Podcast App ==> www.lawabidingbiker.com/podcast
Join our free email club at /www.LawAbidingBiker.com/EmailClub. Only relevant content will be sent from time to time. Email club members are the first to find out about free or for sale content are given special coupon codes.
If you lower the rear wheel (lower the rear jack) you can get the axle out without removing the saddle bag support. If you push the break pistons in the caliper will come off without having to bang it with a hammer. Open the bleeder and push the caliper inboard. That will pust the break pistons in. (Use check valve) Or take top of master cylinder. If you open bleeder not much break fluid comes out. You can do this 2 or 3 times before you have to add fluid. Also you didn't mention making sure the index pin on the speed sensor was seated in the notch on the caliper swing arm. (Fig 3-9 in the 2014 classic maintenance manual) You would be doing a better service to your followers if you made use of, and referenced the maintenance manual. They have little tidbits in there that you don't mention.
Very informative
You guys are the best. Thanks for all the great videos. Doing your own work is the only way to be sure its done right. I bought a 2010 Ultra classic, one owner, with VIP service contract its whole life. I couldn't believe all the things the Harley Stealership did wrong. Now that the bike is in my care it will be done correct. Also, sidenote I bought your phone grip and have to say it is the best i have ever purchased.
thanks for the shout out
This was the First time removing a wheel this video was great ! Thank you very much!!
I have the same lift. I love that thing. Helps when I do my Bros Harley or my dad's Indian chieftain. I even put my sport bike (race bikes ) on it time to time. I recommend getting one. It will definitely pay for it's self. Great video man
Thanks Anthony!
ありがとうございます!
Your awesome!!! Humbled by that. Thanks so much!
I just paid an indy $1100 for two Dunlop American Elites aNd I took the wheels off and took them to him!!! Never again. Im buying a NoMar and doing the entire she-bang myself moving forward. Its just getting ridiculous to pay a Motorcycle wrench to do anything. Thanks for the video. Great stuff
No- Mar tire changer is not very expensive. All manual, but, very effective. Even has a bead breaker on it. Just drill holes in the floor, install anchors, and bolt down.
Great video. You can use your table and scissor jack instead of floor jack. Bring the bike to the tire, instead of the tire to the bike.
+Ron Kosanovich Yup and thanks for commenting. Always many ways to skin a cat. Thanks for being involved.
Ride safe & Ride Often!
Here is a link to a bunch of our useful Free vids bro: www.lawabidingbiker.com/freevideos
Here is a link to some of our useful for purchase videos: www.lawabidingbiker.com/buyvideos
Want Answers & Information Fast? And help support us at the same time? Do you like the content we provide?
Our patrons get answers to their questions/comments/feedback in less than 24 hrs and are part of our Private Facebook Group. If you are interested in being in this exclusive group you can get all the details at ==> www.lawabidingbiker.com/patreon
If you haven't subscribed to the Law Abiding Biker Podcast make sure to do so. Listen in as we talk weekly about issues/items like this & so much more. You can listen on iTunes (Apple/IOS), Stitcher Radio (Android), or any other Podcast App ==> www.lawabidingbiker.com/podcast
Join our free email club at /www.LawAbidingBiker.com/EmailClub. Only relevant content will be sent from time to time. Email club members are the first to find out about free or for sale content are given special coupon codes.
Great tutorial, I would suggest taking the side covers off too, less of a change of hitting it while doing other things. I also just take the brake caliper off 1st. I use a wood shingle to spread the pad. It makes it easy to reinstall the wheel. I can also just replace the pads, while I'm doing this other work. It's also a good opportunity to measure the rotor thickness. The anti-seize is great idea. I use it on O2 sensors, spark plugs and axles. I really appreciate all your good videos.
Super glad the video was helpful Michael!!
Ride safe & Ride Often!
Here is a link to a bunch of our useful Free vids: www.lawabidingbiker.com/freevideos
Here is a link to some of our useful for purchase videos: www.lawabidingbiker.com/buyvideos
Want Answers & Information Fast? And help support us at the same time? Do you like the content we provide?
Our patrons get answers to their questions/comments/feedback in less than 24 hrs and are part of our Private Facebook Group. If you are interested in being in this exclusive group you can get all the details at ==> www.lawabidingbiker.com/patreon
If you haven't subscribed to the Law Abiding Biker Podcast make sure to do so. Listen in as we talk weekly about issues/items like this & so much more. You can listen on iTunes (Apple/IOS), Stitcher Radio (Android), or any other Podcast App ==> www.lawabidingbiker.com/podcast
Join our free email club at /www.LawAbidingBiker.com/EmailClub. Only relevant content will be sent from time to time. Email club members are the first to find out about free or for sale content are given special coupon codes.
Thanks for keeping it real and not just pulling the mufflers off. I also pull the brake caliper and the side panel before I drop the wheel, just to make it easier to re-install the wheel and brake disc. and put the caliper back on after the wheel and axle are installed. Just noticed a lot of weight on that wheel with the new tire...What are your thoughts on a product called "Ride On"? I also rotate the wheel after installing the drive belt because I have tightened the axle only to find the belt was not in the cogs and had to readjust the belt. I also replace muffler clamps because I have had them come loose after re-using them. Again, Great video.
Thanks for the upload on the news and improved rear wheel video.
After getting half way through the video I'm thinking to myself when it comes down to my turn to do this job, I'm going down to Harbor Freight and invest in a tool called a lady slipper..
That should help to line everything up in one shot by acting like a temporary axle.
Rock on!
Great video. Maybe you could use that jack to lift the tire a little and the axle might slide out easier?
Just did my first rear tire by myself. Not as hard as it seemed. Did have a few friends over to help out. I would highly recomend haveing a helping hand but can be done by your self.
Remove the lower shock bolt from both sides and swing them back out of the way. That way you can raise or lower the frame with the jack to get the clearance you need and the tire stays on the ground.
Thanks for the video. Even if I pay a shop, I get a better feel for what is involved.
You bet Mike. Glad you liked the video. Thank you for commenting. Ride safe & Ride Often!
Here is a link to a bunch of our useful Free vids bro: www.lawabidingbiker.com/freevideos
Here is a link to some of our useful for purchase videos: www.lawabidingbiker.com/buyvideos
Want Answers & Information Fast? And help support us at the same time? Do you like the content we provide?
Our patrons get answers to their questions/comments/feedback in less than 24 hrs and are part of our Private Facebook Group. If you are interested in being in this exclusive group you can get all the details at ==> www.lawabidingbiker.com/patreon
If you haven't subscribed to the Law Abiding Biker Podcast make sure to do so. Listen in as we talk weekly about issues/items like this & so much more. You can listen on iTunes (Apple/IOS), Stitcher Radio (Android), or any other Podcast App ==> www.lawabidingbiker.com/podcast
Join our free email club at /www.LawAbidingBiker.com/EmailClub. Only relevant content will be sent from time to time. Email club members are the first to find out about free or for sale content are given special coupon codes.
Thankyou, thankyou! This is very helpful. Now I can start on my 2002 Springer belt replacement.
U betcha!! Much luck with your project
I had to mount and balance my own tires on my 1983 Harley Davidson Flt Harley Davidson dealerships won't mount them for Harley Davidson owners unless you buy a tire off then. I bought bead breaker, tire irons and balancer from Harbor Freight they all worked great. 1983 was the first year for tubeless tires Harley Davidson's the hardest part of the job by far was getting that tubeless tire bead to seat on the rim.
Thanks for sharing Jasper. I can say that totally depends on each dealership. Our dealership will mount and balance regardless of where you bought the tire.
I use a 3/4" x 8" long wood dowel to kinda help hold things in place before putting the axle in from the left side. If the dowel is a tight feeling fit, sand it down so that you can easily push it in by hand ONLY.
Love your content, very well done. I know you don’t own one by might know some one who does, but I wish you had more on the Tri-glide!
Zip ties worked great for getting stuff up and out of the way
My rear tire looks just like yours! Got 12,800 out of mine. Getting ready to do this this weekend.
Thank you Ryan!
Faster to just remove the bottom shock bolts then let the wheel drop below the exhaust to access the axle bolt. You can do that before you jack up the bike.
thank you very much this video will save me a plenty of money and will give me a peaceful mind, thanks again, if you could do a video about how to remove the rear fender i will be appreciated
Our pleasure, and we hope do so some vids on removing fenders and other tins here in the near future.
Ride safe & Ride Often!
Here is a link to a bunch of our useful Free vids: www.lawabidingbiker.com/freevideos
Here is a link to some of our useful for purchase videos: www.lawabidingbiker.com/buyvideos
Want Answers & Information Fast? And help support us at the same time? Do you like the content we provide?
Our patrons get answers to their questions/comments/feedback in less than 24 hrs and are part of our Private Facebook Group. If you are interested in being in this exclusive group you can get all the details at ==> www.lawabidingbiker.com/patreon
If you haven't subscribed to the Law Abiding Biker Podcast make sure to do so. Listen in as we talk weekly about issues/items like this & so much more. You can listen on iTunes (Apple/IOS), Stitcher Radio (Android), or any other Podcast App ==> www.lawabidingbiker.com/podcast
Join our free email club at /www.LawAbidingBiker.com/EmailClub. Only relevant content will be sent from time to time. Email club members are the first to find out about free or for sale content are given special coupon codes.
Wow, you are awesome, so detail, methodically and clear!
Wow, thank you!
Ride safe & Ride Often!
Check out this UA-cam Channel as we have a ton of free videos for you!
Check out our useful for purchase videos: www.lawabidingbiker.com/buyvideos
BECOME AN ECXLUSIVE MEMBER-GET BENEFITS:
www.lawabidingbiker.com/patreon
Leave a flat donation:
www.lawabidingbiker.com/donate
Shop in the Official Law Abiding Biker Store:
shop.lawabidingbiker.com
Subscribe to the Law Abiding Biker Podcast: www.lawabidingbiker.com/app
Join our free email club:
www.lawabidingbiker.com/emailclub
I want to say Thank you for doing this video, I used it to remove the rear tire to replace my bearings. I did everything you showed in the video, now the abs light is flashing. Any help on that. I really appreciate anything you can share.
Great video everything start to finish AWESOME MAN😊
Can’t you just remove the shock bolts on the lower end and lower the jack until you can get to the axle bolt
Great video, I was wondering if you can show where you placed the jack and how you tied down the front end when the bike was lifted just before you broke the wheel nut loose to remove the axle.
Once again thanks for sharing the knowledge
Remember you can remove your bottom shock bolts to be able to get around your saddle bag hardware & exhaust way faster
Great video lots of answer to my problems
Great to hear!
Heyyyy Ryan ....I'm lookin' for another bike and I was reading on good and bad years of Street Glides ... and they say "2014" is a good year. So, how do you like yours? 😎
Great video...makes me think I could do this job, but things usually don't go so smooth for me ha ha. Might try it some day.
Heck yah. Love hearing that the vids are helpful and bikers are wrenching on their own bike and saving money.
Ride safe & Ride Often!
Here is a link to a bunch of our useful Free vids bro: www.lawabidingbiker.com/freevideos
Here is a link to some of our useful for purchase videos: www.lawabidingbiker.com/buyvideos
Want Answers & Information Fast? And help support us at the same time? Do you like the content we provide?
Our patrons get answers to their questions/comments/feedback in less than 24 hrs and are part of our Private Facebook Group. If you are interested in being in this exclusive group you can get all the details at ==> www.lawabidingbiker.com/patreon
If you haven't subscribed to the Law Abiding Biker Podcast make sure to do so. Listen in as we talk weekly about issues/items like this & so much more. You can listen on iTunes (Apple/IOS), Stitcher Radio (Android), or any other Podcast App ==> www.lawabidingbiker.com/podcast
Join our free email club at /www.LawAbidingBiker.com/EmailClub. Only relevant content will be sent from time to time. Email club members are the first to find out about free or for sale content are given special coupon codes.
Me too I’d need a bike stand and 1 7/16 biG wrench, minimum...headed to local shop or dealer for this one.
Great video. I changed the tires on my '02 Electra Glide for many many years. Watching this video reminded me of why I switched to a 2-1 exhaust. LOL. I always hated taking the right side muffler off. I'm curious though, to avoid having to take the saddlebag supports off, couldn't you have just lowered the wheel a little more?
Awesome videos. I am encouraged to do the work on my Harley to save money.
Glad to hear it! We're all about wrenching on our our rides. Ride safe & Ride Often!
Here is a link to a bunch of our useful Free vids bro: www.lawabidingbiker.com/freevideos
Here is a link to some of our useful for purchase videos: www.lawabidingbiker.com/buyvideos
Want Answers & Information Fast? And help support us at the same time? Do you like the content we provide?
Our patrons get answers to their questions/comments/feedback in less than 24 hrs and are part of our Private Facebook Group. If you are interested in being in this exclusive group you can get all the details at ==> www.lawabidingbiker.com/patreon
If you haven't subscribed to the Law Abiding Biker Podcast make sure to do so. Listen in as we talk weekly about issues/items like this & so much more. You can listen on iTunes (Apple/IOS), Stitcher Radio (Android), or any other Podcast App ==> www.lawabidingbiker.com/podcast
Join our free email club at /www.LawAbidingBiker.com/EmailClub. Only relevant content will be sent from time to time. Email club members are the first to find out about free or for sale content are given special coupon codes.
Excellent video. I went thru the removal last night and had a bit of a struggle (even with a table lift and drop out). I needed my daughter to pull the plate on the drop out while I held the wheel. The floor jack is a great idea! My only question is: Why did you bother with the caliper before you put the wheel back on? I just moved it out of the way and plan on installing it after the axle is back in place. The caliper is designed to go on and off without removing the wheel, so I figure that will be easier.
That's just the way I was taught to do it. If leaving the caliper on works and saves time then I say do it. I'll try it next time myself. You may have taught me a tip. That's what we are all about; bikers helping bikers. Ride safe & Ride Often!
Here is a link to a bunch of our useful Free vids bro: www.lawabidingbiker.com/freevideos
Here is a link to some of our useful for purchase videos: www.lawabidingbiker.com/buyvideos
Want Answers & Information Fast? And help support us at the same time? Do you like the content we provide?
Our patrons get answers to their questions/comments/feedback in less than 24 hrs and are part of our Private Facebook Group. If you are interested in being in this exclusive group you can get all the details at ==> www.lawabidingbiker.com/patreon
If you haven't subscribed to the Law Abiding Biker Podcast make sure to do so. Listen in as we talk weekly about issues/items like this & so much more. You can listen on iTunes (Apple/IOS), Stitcher Radio (Android), or any other Podcast App ==> www.lawabidingbiker.com/podcast
Join our free email club at /www.LawAbidingBiker.com/EmailClub. Only relevant content will be sent from time to time. Email club members are the first to find out about free or for sale content are given special coupon codes.
To clarify, I mean remove it before starting anything else and wire tie it out of the way.... then put it back on after the wheel is in place. It just gets one more of the "moving pieces" out of the way.... you have to make sure there's enough slack on the ABS sensor because it's wire tied to the brake line, but seems easy enough. And yes... bikers helping bikers, and you've been a big help! Tire goes back on tomorrow.
I did the same; remove caliper first and reinstall last. One less moving part while lining up the wheel.
Another trick is I removed one shock and the bottom bolt on the other so I could raise the wheel and get the axle out without pulling mufflers and saddlebag bracket. Once axle is out I put bottom bolt back temporarily to hold swingarm until ready for reinstall. It's a lot less work than pulling the mufflers.
First time doing both my front and rear wheel removal on my '18 Street Glide. With it not being a Street Glide Special (no ABS brakes), is there a spacer that takes the place of the ABS sensor on the brake caliper side ??? Got the rear wheel back on fine, but the wheel seems to be binding up and the caliper looks like it's awfully close to the wheel. Hope you can help me out on this. This past weekend I ordered the service manual for my bike, but I won't receive it for at least 10 days. Thanks in advance.
Hey Ryan, I have a 2015 street glide special it's seems like my back wheel is not centered when I'm riding it's seem my front forks are a slight bit off to the left is it possible the back wheel is not centered?
Just a question. Would it be easier to remove the shock
Harbor freight you can get a tire changer and motorcycle attachment for about 80 for both. 1 maybe 2 uses and its paid for.
But the rest of the time it sits somewhere in the way. Some folks may have the space, but I don't.
I drive an 2009 road king classic spec for rear axle 95 - 105 ft lbs Nice video :)
We appreciate it. RK from LAB
Ride not drive.Road King Special over here as well.
You the man Ryan, just did this on my own just to see if I was capable. Thank you for allowing me to gain confidence with working on my bike 👍
Great Video Tutorial. Nicely done.
tomduncan1970 Thanks and I really appreciate you taking the time to comment. Ride safe
Ride safe & Ride Often!
Here is a link to a bunch of our useful Free vids bro: www.lawabidingbiker.com/freevideos
Here is a link to some of our useful for purchase videos: www.lawabidingbiker.com/buyvideos
Want Answers & Information Fast? And help support us at the same time? Do you like the content we provide?
Our patrons get answers to their questions/comments/feedback in less than 24 hrs and are part of our Private Facebook Group. If you are interested in being in this exclusive group you can get all the details at ==> www.lawabidingbiker.com/patreon
If you haven't subscribed to the Law Abiding Biker Podcast make sure to do so. Listen in as we talk weekly about issues/items like this & so much more. You can listen on iTunes (Apple/IOS), Stitcher Radio (Android), or any other Podcast App ==> www.lawabidingbiker.com/podcast
Join our free email club at /www.LawAbidingBiker.com/EmailClub. Only relevant content will be sent from time to time. Email club members are the first to find out about free or for sale content are given special coupon codes.
Nice work! Explained well!! Thank you.
Thank you Dave. Much appreciated.
Ride safe & Ride Often!
Here is a link to a bunch of our useful Free vids: www.lawabidingbiker.com/freevideos
Here is a link to some of our useful for purchase videos: www.lawabidingbiker.com/buyvideos
Want Answers & Information Fast? And help support us at the same time? Do you like the content we provide?
Our patrons get answers to their questions/comments/feedback in less than 24 hrs and are part of our Private Facebook Group. If you are interested in being in this exclusive group you can get all the details at ==> www.lawabidingbiker.com/patreon
If you haven't subscribed to the Law Abiding Biker Podcast make sure to do so. Listen in as we talk weekly about issues/items like this & so much more. You can listen on iTunes (Apple/IOS), Stitcher Radio (Android), or any other Podcast App ==> www.lawabidingbiker.com/podcast
Join our free email club at /www.LawAbidingBiker.com/EmailClub. Only relevant content will be sent from time to time. Email club members are the first to find out about free or for sale content are given special coupon codes.
would it make sense to loosen things before putting it in the air?
Fantastic job
Thank you, bro...great tutorial!
Stock rear shocks? How can you handle that sub standard rear suspension?
When I changed my rear tyre on the 2010 Ultra Classic and reinstalled back, I noticed the pulley sprocket did not close over the isolator rubber. There was a gap of about 1mm between wheel and pulley. Thought it my close when torquing up the cone nut.
It didn’t. Also I had forward/backward movement of 3mm on belt pulley before wheel moved.
Tomorrow taking it apart again as when riding it was squealing as I speeded up. Something is rubbing.
Same way I done my bike Tyre. It is a great tutorial.
Awesome!!
your the man!! i will be donating something, info much appreciated hope everything goes your way this week!!🖒
Thanks we definitely appreciate it. www.lawabidingbiker.com/store
thanks ryan great content! I just bought an 06 ultra classic and i need to replace the back tire as well. this video helped a lot #flippinstoop
Thanks for the excellent video. I removed my rear wheel without marking the cams. Can you suggest a baseline adjustment before I start checking deflection? Thanks so much.
What bike do you have?
@@RyanUrlacher Good morning Ryan, thanks so much for responding. I have a 2006 Road Glide. I removed the wheel almost 3 years ago due to full overhaul and customization. I'm finally ready to reinstall.
Correct belt deflection on a touring model on the side stand is 1/4 to 5/16". With the rear wheel in the air it is 3/16 to 1/4". This is with 10# of pressure applied to the belt at the window at the lower belt guard.
Ride safe & Ride Often!
Check out this UA-cam Channel as we have a ton of free videos for you!
Check out our useful for purchase videos: www.lawabidingbiker.com/buyvideos
BECOME AN ECXLUSIVE MEMBER-GET BENEFITS:
www.lawabidingbiker.com/patreon
Leave a flat donation:
www.lawabidingbiker.com/donate
Shop in the Official Law Abiding Biker Store:
shop.lawabidingbiker.com
Subscribe to the Law Abiding Biker Podcast: www.lawabidingbiker.com/app
Join our free email club:
www.lawabidingbiker.com/emailclub
@@RyanUrlacher Thanks for the measurements. Is on the sidestand recommended more so than back wheel in the air? Same either way as long as the measurements are within spec?
Rubber mechanic gloves helps grip the exhaust slip-on to twist them off.
My rear tires keep cracking on the tread side, factory Dunlop tires on a 2017 ultra limited . Is this a common problem ?
Great videos as always! I have the same V&H Exhaust. I bought some quite baffles but I could not get the originals out. Have you ever taken the baffles out?
I have not
Hi from Russia! Very helpful video.
+Alex Nikishin Our pleasure. Shout out to Russia. Ride safe & Ride Often!
Here is a link to a bunch of our useful Free vids bro: www.lawabidingbiker.com/freevideos
Here is a link to some of our useful for purchase videos: www.lawabidingbiker.com/buyvideos
Want Answers & Information Fast? And help support us at the same time? Do you like the content we provide?
Our patrons get answers to their questions/comments/feedback in less than 24 hrs and are part of our Private Facebook Group. If you are interested in being in this exclusive group you can get all the details at ==> www.lawabidingbiker.com/patreon
If you haven't subscribed to the Law Abiding Biker Podcast make sure to do so. Listen in as we talk weekly about issues/items like this & so much more. You can listen on iTunes (Apple/IOS), Stitcher Radio (Android), or any other Podcast App ==> www.lawabidingbiker.com/podcast
Join our free email club at /www.LawAbidingBiker.com/EmailClub. Only relevant content will be sent from time to time. Email club members are the first to find out about free or for sale content are given special coupon codes.
good job. now I know I got it right when I did my bike.
Thank you!
Ride safe & Ride Often!
Check out this UA-cam Channel as we have a ton of free videos for you!
Check out our useful for purchase videos: www.lawabidingbiker.com/buyvideos
BECOME AN ECXLUSIVE MEMBER-GET BENEFITS:
www.lawabidingbiker.com/patreon
Leave a flat donation:
www.lawabidingbiker.com/donate
Shop in the Official Law Abiding Biker Store:
shop.lawabidingbiker.com
Subscribe to the Law Abiding Biker Podcast: www.lawabidingbiker.com/app
Join our free email club:
www.lawabidingbiker.com/emailclub
I saw a guy on a Fatboy one day ridding on a rear tire with the belts showy. I felt bad for the guy and thought about helping him get a new tire. Then he came out of the convinces store with a 12 pack of beer.
I need to see a video on a 1995 type
Excellent, thank you for this
U betcha
Ride safe & Ride Often!
Here is a link to a bunch of our useful Free vids: www.lawabidingbiker.com/freevideos
Here is a link to some of our useful for purchase videos: www.lawabidingbiker.com/buyvideos
Want Answers & Information Fast? And help support us at the same time? Do you like the content we provide?
Our patrons get answers to their questions/comments/feedback in less than 24 hrs and are part of our Private Facebook Group. If you are interested in being in this exclusive group you can get all the details at ==> www.lawabidingbiker.com/patreon
If you haven't subscribed to the Law Abiding Biker Podcast make sure to do so. Listen in as we talk weekly about issues/items like this & so much more. You can listen on iTunes (Apple/IOS), Stitcher Radio (Android), or any other Podcast App ==> www.lawabidingbiker.com/podcast
Join our free email club at /www.LawAbidingBiker.com/EmailClub. Only relevant content will be sent from time to time. Email club members are the first to find out about free or for sale content are given special coupon codes.
Good vid - I also use anti-seize on my slip-ons. Anti-seize is good for over 2000 degrees. Makes removal next time easier.
+harley62t Thanks for commenting. Ride safe.
Ride safe & Ride Often!
Here is a link to a bunch of our useful Free vids bro: www.lawabidingbiker.com/freevideos
Here is a link to some of our useful for purchase videos: www.lawabidingbiker.com/buyvideos
Want Answers & Information Fast? And help support us at the same time? Do you like the content we provide?
Our patrons get answers to their questions/comments/feedback in less than 24 hrs and are part of our Private Facebook Group. If you are interested in being in this exclusive group you can get all the details at ==> www.lawabidingbiker.com/patreon
If you haven't subscribed to the Law Abiding Biker Podcast make sure to do so. Listen in as we talk weekly about issues/items like this & so much more. You can listen on iTunes (Apple/IOS), Stitcher Radio (Android), or any other Podcast App ==> www.lawabidingbiker.com/podcast
Join our free email club at /www.LawAbidingBiker.com/EmailClub. Only relevant content will be sent from time to time. Email club members are the first to find out about free or for sale content are given special coupon codes.
if you backed off the belt tension er with the wrench you wouldnt have to pry the adj off the nut side
Thanks John. Appreciate the info bro.
Ride safe & Ride Often!
Here is a link to a bunch of our useful Free vids: www.lawabidingbiker.com/freevideos Here is a link to some of our useful for purchase videos: www.lawabidingbiker.com/buyvideos Want Answers & Information Fast? And help support us at the same time? Do you like the content we provide?Our patrons get answers to their questions/comments/feedback in less than 24 hrs and are part of our Private Facebook Group. If you are interested in being in this exclusive group you can get all the details at www.lawabidingbiker.com/patreon If you haven't subscribed to the Law Abiding Biker Podcast make sure to do so. Listen in as we talk weekly about issues/items like this & so much more. You can listen on iTunes (Apple/IOS), Stitcher Radio (Android), or any other Podcast App www.lawabidingbiker.com/podcastJoin our free email club at /www.LawAbidingBiker.com/EmailClub. Only relevant content will be sent from time to time. Email club members are the first to find out about free or for sale content are given special coupon codes.
Nice video! Can you tell me what torque I need for the rear axle (riding a Harley Davidson Street Glide 2018). Thank you!
Final torque spec is 95 to 105 foot pounds.
Ride safe & Ride Often!
Here is a link to a bunch of our useful Free vids: www.lawabidingbiker.com/freevideos
Here is a link to some of our useful for purchase videos: www.lawabidingbiker.com/buyvideos
Want Answers & Information Fast? And help support us at the same time? Do you like the content we provide?
Our patrons get answers to their questions/comments/feedback in less than 24 hrs and are part of our Private Facebook Group. If you are interested in being in this exclusive group you can get all the details at ==> www.lawabidingbiker.com/patreon
If you haven't subscribed to the Law Abiding Biker Podcast make sure to do so. Listen in as we talk weekly about issues/items like this & so much more. You can listen on iTunes (Apple/IOS), Stitcher Radio (Android), or any other Podcast App ==> www.lawabidingbiker.com/podcast
Join our free email club at /www.LawAbidingBiker.com/EmailClub. Only relevant content will be sent from time to time. Email club members are the first to find out about free or for sale content are given special coupon codes.
I've seen the shock bolt removed instead then just raise the frame to get the axle bolt
Aren't the graduations on the belt tension window 1/8" each? The window is about an inch tall, with 9 graduations.... ???
Thanks Ryan, another great video..
Thanks for the shout out Norm!! We've got a ton of videos like this.
Ride safe & Ride Often!
Here is a link to a bunch of our useful Free vids: www.lawabidingbiker.com/freevideos
Here is a link to some of our useful for purchase videos: www.lawabidingbiker.com/buyvideos
Want Answers & Information Fast? And help support us at the same time? Do you like the content we provide?
Our patrons get answers to their questions/comments/feedback in less than 24 hrs and are part of our Private Facebook Group. If you are interested in being in this exclusive group you can get all the details at ==> www.lawabidingbiker.com/patreon
If you haven't subscribed to the Law Abiding Biker Podcast make sure to do so. Listen in as we talk weekly about issues/items like this & so much more. You can listen on iTunes (Apple/IOS), Stitcher Radio (Android), or any other Podcast App ==> www.lawabidingbiker.com/podcast
Join our free email club at /www.LawAbidingBiker.com/EmailClub. Only relevant content will be sent from time to time. Email club members are the first to find out about free or for sale content are given special coupon codes.
anything on bleeding 2014sgs front calipers i want to swap them out with chrome ones! heard it could be done if you don't turn on the ignition. thanks again!!
Not by itself at this point. It's included in out handle bar install videos. It's pretty simple though. Disconnect the front brake lines, swap out calipers and reconnect the brake lines. Bleed the brakes with a vacuum pump such as a Mitivac. Make sure to have someone keeping the master cylinder full as you bleed the line with the vacuum pump.
Ride safe & Ride Often!
Here is a link to a bunch of our useful Free vids: www.lawabidingbiker.com/freevideos
Here is a link to some of our useful for purchase videos: www.lawabidingbiker.com/buyvideos
Want Answers & Information Fast? And help support us at the same time? Do you like the content we provide?
Our patrons get answers to their questions/comments/feedback in less than 24 hrs and are part of our Private Facebook Group. If you are interested in being in this exclusive group you can get all the details at ==> www.lawabidingbiker.com/patreon
If you haven't subscribed to the Law Abiding Biker Podcast make sure to do so. Listen in as we talk weekly about issues/items like this & so much more. You can listen on iTunes (Apple/IOS), Stitcher Radio (Android), or any other Podcast App ==> www.lawabidingbiker.com/podcast
Join our free email club at /www.LawAbidingBiker.com/EmailClub. Only relevant content will be sent from time to time. Email club members are the first to find out about free or for sale content are given special coupon codes.
Its a lot ezer to unbolt the bottom shocks 2 bolts 👍
Is it best to take pipes off from motor or halfway pulling apart in middle of pipes
We recommend just sliding the mufflers off the headers.
Ride safe & Ride Often!
Check out this UA-cam Channel as we have a ton of free videos for you!
Check out our useful for purchase videos: www.lawabidingbiker.com/buyvideos
BECOME AN ECXLUSIVE MEMBER-GET BENEFITS:
www.lawabidingbiker.com/patreon
Leave a flat donation:
www.lawabidingbiker.com/donate
Shop in the Official Law Abiding Biker Store:
shop.lawabidingbiker.com
Subscribe to the Law Abiding Biker Podcast: www.lawabidingbiker.com/app
Join our free email club:
www.lawabidingbiker.com/emailclub
I had to plug my tire from a screw, the tire only has 6000 miles on it.. would you recommend replacing the tire?
You guys are awesome.
I was looking and I like your videos. What I like to know what is the torque specs on the 2016 road glide special
+REESE Tibbs Hello there. Depending on what part of the bike you are referring to they vary. You can find to torque specs in the maintenance manual. We do refer to the manual when we need a specific number when we are working on a project.
Ride safe & Ride Often!
Here is a link to a bunch of our useful Free vids bro: www.lawabidingbiker.com/freevideos
Here is a link to some of our useful for purchase videos: www.lawabidingbiker.com/buyvideos
Want Answers & Information Fast? And help support us at the same time? Do you like the content we provide?
Our patrons get answers to their questions/comments/feedback in less than 24 hrs and are part of our Private Facebook Group. If you are interested in being in this exclusive group you can get all the details at ==> www.lawabidingbiker.com/patreon
If you haven't subscribed to the Law Abiding Biker Podcast make sure to do so. Listen in as we talk weekly about issues/items like this & so much more. You can listen on iTunes (Apple/IOS), Stitcher Radio (Android), or any other Podcast App ==>www.lawabidingbiker.com/podcast
Join our free email club at /www.LawAbidingBiker.com/EmailClub. Only relevant content will be sent from time to time. Email club members are the first to find out about free or for sale content are given special coupon codes.
While you had the mufflers off would have been convenient time to give them a polish and protecion with some of that old time, but good stuff, Quick Glo. Another great video. Thks.
The graduation marks on my 2017 Road King measure 1/8 inch per mark.
Correct, they have changed it from model to model and year to year. check your marks/manual
Personally, I think I would remove the slip ons before jacking up the bike. No worry about bike dislodging from jack. Sorta like, loosening wheel nuts before jacking to change a car tire. Just my opinion.
No abs and spacers where taken of before I got to it
Thanks for the video.
You are welcome!
Ride safe & Ride Often!
Check out this UA-cam Channel as we have a ton of free videos for you!
Check out our useful for purchase videos: www.lawabidingbiker.com/buyvideos
BECOME AN ECXLUSIVE MEMBER-GET BENEFITS:
www.lawabidingbiker.com/patreon
Leave a flat donation:
www.lawabidingbiker.com/donate
Shop in the Official Law Abiding Biker Store:
shop.lawabidingbiker.com
Subscribe to the Law Abiding Biker Podcast: www.lawabidingbiker.com/app
Join our free email club:
www.lawabidingbiker.com/emailclub
you get good tyre miles i get around 4k out of a rear
Yah, so dependant on so many environmental factors on life of tires.
@@RyanUrlacher Chip seal roads (like down south) are murder on motorcycle tires....
i have a 2014 fatboy and was told the rear brakes need to be replaced.i checked your website and dont see a video for that.do you have one? thanks
No we do not at this time. I would estimate it cannot be to different from the touring models. I have done it and did not have any issues that come to mind although it has been a few years. You can get online manuals for a really decent price as well. RK from LAB.
thanks for the info
Yes we do. Rear Brake Pad Replacement video we did ==> ua-cam.com/video/sn8TeEzw2RI/v-deo.html
Yes we do. Rear Brake Pad Replacement video we did ==> ua-cam.com/video/sn8TeEzw2RI/v-deo.html
AWESOME tutorial
Rock on. Thanks for the shout out.
Ride safe & Ride Often!
Here is a link to a bunch of our useful Free vids: www.lawabidingbiker.com/freevideos
Here is a link to some of our useful for purchase videos: www.lawabidingbiker.com/buyvideos
Want Answers & Information Fast? And help support us at the same time? Do you like the content we provide?
Our patrons get answers to their questions/comments/feedback in less than 24 hrs and are part of our Private Facebook Group. If you are interested in being in this exclusive group you can get all the details at ==> www.lawabidingbiker.com/patreon
If you haven't subscribed to the Law Abiding Biker Podcast make sure to do so. Listen in as we talk weekly about issues/items like this & so much more. You can listen on iTunes (Apple/IOS), Stitcher Radio (Android), or any other Podcast App ==> www.lawabidingbiker.com/podcast
Join our free email club at /www.LawAbidingBiker.com/EmailClub. Only relevant content will be sent from time to time. Email club members are the first to find out about free or for sale content are given special coupon codes.
I don't put a lot of miles on my bike, with that said it is a 04 Dyna and the original tire is still on the bike. I am concerned of the age since it is 13 yrs old, do you consider this a problem ?
Yes, replace it. It's old and rubber brakes down over time.
What brand of tires do you use
www.lawabidingbiker.com/dunlop-american-elite-michelin-commanderii/
Great video. Thank you!
Thanks for watching. Rick from LAB.