2024 Supplies list - 5x 20” by 30” foam board ($4 each at dollarama) 1x white poster board (60c at dollarama) Velcro ties - $2 Rug gripper - $3.50 Mounting squares - $1.25 Clear packing tape - $2 Plastic table cloth - $1.25 LED lights x 2 - $4 So consumables are $34.60 before tax or $39 after tax
Non-fusible interfacing you can find in the sewing section of stores like Joanns, Michaels and Wlamart works great as a diffuser and if you put the holes on the sides and use the lights like I did you have less chance of burning things up. I bought 2 1000 lumen Husky brand lights at Home Depot for light and cut holes in the sides to have light coming in that way instead and can add a third on top if I want. The lights are @$19 ea and have a handle that lets you prop them up next to the box on the sides so you don't have to find a way to rig them.
You crushed it man as an 18 year old reseller this puts me ahead of the game I just made mine and use the exact same light (scored 3 of them for 40$ on eBay) and it’s a game changer my only tweak was not making it foldable And making it as wide as the card stock
Nice tutorial! I'm a Product Design student and being able to have cheap solutions like this really saves my life 😂 Thank you! Definitely making one as soon as I get the materials 💪🏻
Can it work if I use the velcro ties only and not tape it. I don't think I can figure out how to do the beveled edges. So can I cut each piece separate (front, back, sides, top, bottom) and then just velcro to join them and unhook the velcor to take apart?
Hi Barbra. Yes you can definitely do it that way. It is a pretty flexible design. I did find these velcro adhesives and they may be a good option. But just be sure they work for your application before buying them. You may also find a great option at the local dollar store in your area. amzn.to/3RX7Pov Let me know how it goes.
Cool video, thanks for sharing! Why do some other DIY Light Boxes have also lights coming from the sides and not only from the top. Whats the difference?
Great question Stephanie. Benefits to having other lights on the sides is so you can fill in unwanted shadows. Downside can be you don’t have control of those lights in some cases. Having white or silver on the sides can act as a bounce to fill the the shadows as well. Always depends on the look you’re going for.
Thank you for this video! I am definitely going to make this. I am also curious about the folding stand that you have the light ox on. I have a small office and space is at a premium. Would you happen to have a link for it? Thanks!
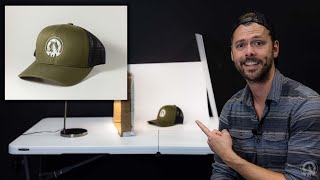
Thank you. So glad you liked the video and will be able to make use of it. The stand I used was a piano stand (Canada Link: amzn.to/3wHVzkk ). (US Link: amzn.to/3iHbxD6 ). Good luck in your build.
You can pause the video and see the package " . . . Table Cloth" Those stores also have "foggy white" plastic drop sheets for painting in the hardware section. One pack is a lifetime supply. You would have enough to diffuse an entire living room window's sunlight if necessary.
The foam core is probably 3/16 in. As for the online plan, unfortunately that site is now done. I would have to do some digging to find it. If I do, I will update the link.
I'm ALWAYS in Dollarama getting solutions to dozens of small requirements related to photography. I don't know what I want until I see it. Then I spy girl's hair bands or garden lamp posts and I'm seeing it as what I need for some project I've been ruminating about.
Great question. You will see in the diagram at this link (camerazone.ca/2020/06/05/diy-lightbox) there are edges that are indicated as beveled. This means they are cut at an angle so that they can fold into each other as you see me doing t 2:08 in the video. Hope this helps.
Just a thought. You can eliminate the step of going back and cutting a bevel if you just cut the boards at a 45 degree angle when you initially cut it into a square.
This is the one that I used fi you are looking for a simple bright option. There are many other lights that can be used as well, but this a good low budget option as long as you have the battery for it. The Canadian link does not include the battery. You can however use the LED Light powered via DC or Sony NP-F550/750/970 battery. Any questions, please let me know. Amazon Canada - amzn.to/3Rcflvq (battery not included) Amazon USA - amzn.to/3e2z02H (battery included)
What if I wanted to take pictures from above and in front like you? Is there a similar way to make it for photos from above even if I had to make 2 photo boxes?
You can do a top down with a whole in the top and a removable side so you can put your product in it. Light still stays on top or offset to the side to give a little shadow to make it less flat looking. Really depends on what your subject is. Good luck.
Do all the same things shown in the video except make the 2 sides and back taller. If you want it to be square still, just make all the sides bigger and the same size. Good Luck.
Hi friend, 😊 Sorry to disturb you at this time. Have you ever wanted to take a picture of something, but don't have a good light box? With a good photography lightbox, you can easily create brilliant photos! Now we ( A seller on amazon) want to invite you to test lightbox. The purpose of this event is to collect the experience and suggestions of customers on the product so that we can better improve the product. If your photography/online sales project needs our product, please let me know, then we talk about it. It is for free. Looking forward to hearing from you! 🤝 Best wishes


I’m an industrial designer going in the E-commerce world, this video is pure gold! Thank you!
You're very welcome. Good luck with your e-commerce.
The best "DIY LIGHTBOX " of youtube. Congrats
Thank you André
Well done! Finally someone showing how to build a Lightbox correctly
I can't download, either!
Good info. The light in your link is no longer available. You might want to post an alternative as an update. I like that this is foldable!
Thank you. A collapsible light box was what I was looking for. Your directions were easy to follow and the box came out great!
2024 Supplies list -
5x 20” by 30” foam board ($4 each at dollarama)
1x white poster board (60c at dollarama)
Velcro ties - $2
Rug gripper - $3.50
Mounting squares - $1.25
Clear packing tape - $2
Plastic table cloth - $1.25
LED lights x 2 - $4
So consumables are $34.60 before tax or $39 after tax
Is the tablecloth white, to diffuse light, please?
this is awesome, thank you so much for filming the whole process and putting this video together
My pleasure!
Non-fusible interfacing you can find in the sewing section of stores like Joanns, Michaels and Wlamart works great as a diffuser and if you put the holes on the sides and use the lights like I did you have less chance of burning things up. I bought 2 1000 lumen Husky brand lights at Home Depot for light and cut holes in the sides to have light coming in that way instead and can add a third on top if I want. The lights are @$19 ea and have a handle that lets you prop them up next to the box on the sides so you don't have to find a way to rig them.
You crushed it man as an 18 year old reseller this puts me ahead of the game I just made mine and use the exact same light (scored 3 of them for 40$ on eBay) and it’s a game changer my only tweak was not making it foldable And making it as wide as the card stock
Great work. So glad to hear this was useful for you. Great tweak as well. If you have a link to your work, post it here. Would love to see it.
Would you share the link for the lights you got off of ebay
@@avflyguy links are in the description on Amazon.
heyo thanks for solving my product image problems!
Nice tutorial! I'm a Product Design student and being able to have cheap solutions like this really saves my life 😂 Thank you! Definitely making one as soon as I get the materials 💪🏻
So glad to hear it was helpful for you. Good luck with your future career in Product Design.
This is exactly what I was envisioning! Thanks for posting the tutorial!!
this project is dope. I cant wait to make one for my products. thank you for sharing.
I tried this. I messed up with the tape at first & my exacto knife wasn't sharpe enough but I got it together!👍😄
Wow, excellent video! I feel confident to build a light box now
Fabric interfacing is a great diffuser.
Best tutorial and materials I have seen. 10/10
So many useful ideas, thank you.
Just made this today and it turned out awesome, thank you for sharing!
That’s great. Hope you get good use out of it.
how much did it cost you to make
Thank you! This was clear and easy to follow.
Amazing video, thanks a million!!
Can it work if I use the velcro ties only and not tape it. I don't think I can figure out how to do the beveled edges. So can I cut each piece separate (front, back, sides, top, bottom) and then just velcro to join them and unhook the velcor to take apart?
Hi Barbra. Yes you can definitely do it that way. It is a pretty flexible design. I did find these velcro adhesives and they may be a good option. But just be sure they work for your application before buying them. You may also find a great option at the local dollar store in your area. amzn.to/3RX7Pov Let me know how it goes.
@@TownleyVM Those are awesome. Thanks
@@TownleyVM Thank you
Cool video, thanks for sharing! Why do some other DIY Light Boxes have also lights coming from the sides and not only from the top. Whats the difference?
Great question Stephanie. Benefits to having other lights on the sides is so you can fill in unwanted shadows. Downside can be you don’t have control of those lights in some cases. Having white or silver on the sides can act as a bounce to fill the the shadows as well. Always depends on the look you’re going for.
Thank you for this video! I am definitely going to make this. I am also curious about the folding stand that you have the light ox on. I have a small office and space is at a premium. Would you happen to have a link for it? Thanks!
Thank you. So glad you liked the video and will be able to make use of it. The stand I used was a piano stand (Canada Link: amzn.to/3wHVzkk ). (US Link: amzn.to/3iHbxD6 ). Good luck in your build.
Thank you! 👌🏻❤️
Great tutorial but, what did you use for diffusing the light? Table cloth?
You can pause the video and see the package " . . . Table Cloth" Those stores also have "foggy white" plastic drop sheets for painting in the hardware section. One pack is a lifetime supply. You would have enough to diffuse an entire living room window's sunlight if necessary.
Yes, exactly
Great video. What thickness foam board did you use? Metric is fine - I'm Irish! Also the link to your plans is broken. Thanks.
The foam core is probably 3/16 in. As for the online plan, unfortunately that site is now done. I would have to do some digging to find it. If I do, I will update the link.
@@TownleyVM Thanks for the reply. That's 5mm in metric.
Really well made! I am going to make it one tomorrow see how it will come out! Thanks :)
Nice video. Thanks for inspiration. But where I live, 6 foam desk of 20x20 costs 50 dollars so I will search for cheaper alternative
Wow, $50 dollars? Where do you live?
Corrogated plastic from some used poster
@@TownleyVM I'm looking for anywhere to get the foam board for under $20
@@Enlilbtc I found mine at the dollar store. max price there was $1.50
@TownleyVM I'll take a peek!
Amazing work!!
Amazing video!!! Thanks for sharing🙏🤗
Reusing old Christmas lights might work too?
Ya, that's a great suggestion. Love the idea.
I tried to download the diagram but the site cannot be found.
Spot on thank you
Nice!You could also use your microwave to take pics.
Interesting. Ever thought of doing that.
Interfacing from the fabric store might make a good diffuser...
I can't find the link to the light you mentioned in the video in the description :(
Here it is. Sorry, somehow it is not in the description anymore. Canada: amzn.to/3jZI4rY USA: amzn.to/3GOtxYZ
@@TownleyVM what? A reply within practically minutes, to a question on a years old video? Wow! 🙂 Thanks a bunch!
I'm ALWAYS in Dollarama getting solutions to dozens of small requirements related to photography. I don't know what I want until I see it. Then I spy girl's hair bands or garden lamp posts and I'm seeing it as what I need for some project I've been ruminating about.
Thank you for your idea¡¡ It's fantastic¡¡
The way he whipped out everything you’ll need made me laugh.
Glad to hear you were entertained :)
Question what do you mean by a bevel? I'm visual and I really could not see what it look like or how to do it.
Great question. You will see in the diagram at this link (camerazone.ca/2020/06/05/diy-lightbox) there are edges that are indicated as beveled. This means they are cut at an angle so that they can fold into each other as you see me doing t 2:08 in the video. Hope this helps.
@@TownleyVM are you cutting all the way thru it or leaving some of the foam board on there? Is it kinda like a step if that makes sense?
@@lmhorton911 it’s a 45 degree angle cut. Then when the 2 edges come together, they will form a corner.
Gotcha that makes sense! Thanks I'll be making mine soon.
Just a thought. You can eliminate the step of going back and cutting a bevel if you just cut the boards at a 45 degree angle when you initially cut it into a square.
HI! nice tutorial, what kind of light do you use? Best!
I can’t find the light you used in the link. Can you tell me what light it is?
This is the one that I used fi you are looking for a simple bright option. There are many other lights that can be used as well, but this a good low budget option as long as you have the battery for it. The Canadian link does not include the battery. You can however use the LED Light powered via DC or Sony NP-F550/750/970 battery. Any questions, please let me know.
Amazon Canada - amzn.to/3Rcflvq (battery not included)
Amazon USA - amzn.to/3e2z02H (battery included)
@@TownleyVM thank you!
Can someone please help translate what is he calling the white boards? White foam cort, cork or chord boards? Never heard of these before.
These are white foam core. Paper outside and foam in the core (middle). Hope this helps.
@@TownleyVM ohhh ok thank you I’ll have to look them up much appreciated 🙏🏽
nice tutorial thankyou
What if I wanted to take pictures from above and in front like you? Is there a similar way to make it for photos from above even if I had to make 2 photo boxes?
You can do a top down with a whole in the top and a removable side so you can put your product in it. Light still stays on top or offset to the side to give a little shadow to make it less flat looking. Really depends on what your subject is. Good luck.
Soooo helpful ,thx alot
why don't you bevel all the edges?
couldn't make sense to me why only some edges had bevel cuts
won't the container have disproportionate connections?
Hi sir diagram website page is no open
gold
Where did u buy the light?
Link is in the description.
I was wondering how i can make the light box a little taller . my product is 23 inches tall
Do all the same things shown in the video except make the 2 sides and back taller. If you want it to be square still, just make all the sides bigger and the same size. Good Luck.
What kind of light did you use for this lightbox?
I used this light ua-cam.com/video/7NiOivkwm8o/v-deo.html
How do you fix the shadows under the product?
More light
Thank you!!!
hey the diagram schematics link does not work
I like This 🌺🌺
Your graph does not show to bevel the bottom of the back but it needs it
If you spend $65 on the light you linked.....why not just buy a light box?
Right
I was broke didn’t want to spend 100$
I worked warehouse for 12hr two days a week wanted to sell Computers 🖥
So glad to here it helped.
That light itself costs more than an actual light box
Hi friend, 😊
Sorry to disturb you at this time.
Have you ever wanted to take a picture of something, but don't have a good light box?
With a good photography lightbox, you can easily create brilliant photos!
Now we ( A seller on amazon) want to invite you to test lightbox.
The purpose of this event is to collect the experience and suggestions of customers on the product so that we can better improve the product.
If your photography/online sales project needs our product, please let me know, then we talk about it. It is for free.
Looking forward to hearing from you! 🤝
Best wishes
$20? I don't think so. 6 foam sheets cost like $5 per sheet, so $30 there. Your cheap LED light, $68$. Your setup actually costs over $100.
Anyone else think all that is over 20 bucks? Lol love the video tho thanks!!
Dollar store is a great place for creative DIY.