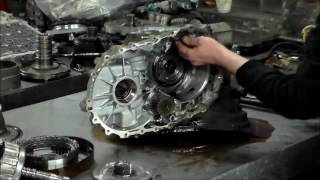
Nissan Automatic Transmission Overhaul RE4F04B

Вставка
- Опубліковано 4 лип 2024
- Nissan Automatic Transmission Overhaul RE4F04B
سرفيس نيسان و اصلاح الفتيس الاوتوماتيك
Precautions for Overhaul
DURING PREPARATION
1. Use the Genuine NISSAN A/T fluid or equivalent.
2. Perform the unit overhauling in a clean and dust-free room.
3. Before disassembly, clean the outside of the A/T unit using a steam cleaner or white gasoline to prevent sand or mud from entering into the unit.
Take care not to blow the steam into the unit and do not allow rubber parts to come into contact with gasoline.
4. After cleaning the exterior of the A/T unit, remove the torque converter and drain the fluid.
5. Perform disassembly and assembly of the A/T unit with bare hands or use elastic gloves.
6. Do not use cotton work gloves and rags to avoid waste thread (lint) contamination. Use lint-free paper.
7. Before removal or disassembly of the A/T unit, confirm the conditions as they are.
8. When replacing a part, use genuine NISSAN service parts.
9. Do not reuse the drained A/T fluid.
10. Dispose the drained A/T fluid according to your local waste disposal regulations.
DURING OVERHAUL
1. Use proper SSTs if it is so instructed. Take care to maintain safe conditions and do not perform any unreasonable operation.
2. Take care to keep the cleanliness of a fitting surface and frictional surface.
Disassembled components should be cleaned, and their original positions should be identified.
3. When loosening the bolts and nuts, be sure to loosen these from the outer side and in a crisscross pattern. If a specific procedure is instructed in the Service Manual, follow the instructions.
Disassembly and Inspection of Unit
1. Remove and inspect torque converter
Torque converter one-way clutch inspection:
The one-way clutch can be turned in one direction, but it cannot be turned in the reverse direction.
2.Set the manual valve position to the P position
The purpose of setting the manual valve position to the P position:
This makes it easier to take out the PNP switch from the transaxle case. A projection part is on the back side.
3. Remove control valve assembly
Three different lengths are used for the control valve assembly fixing bolts.
4. Remove manual valve
Be careful not to drop the manual valve.
5. Remove two return springs and two accumulators
Caution for using compressed air:
A strong blast of air will push the accumulator piston out along with
a splash of oil. Cover the area with lint-free paper and blow air little by
little to avoid this.
6. Remove the O-ring from the input shaft assembly and oil pump with a gasket.
Input shaft check:
Move the input shaft up and down and also right and left, before removing the oil pump. If it has excessive free play, some components are not in the standard condition.
7. Remove brake band
Caution:
After removing the brake band, always secure it with a clip as shown on the right.
To prevent brake linings from cracking or peeling, do not stretch the band unnecessarily.
8. Remove the front sun gear and needle bearing.
Be sure to distinguish the direction of the needle bearing.
9. Remove the low one-way clutch and the front planetary carrier assembly
Caution:
When removing the snap ring, cover it with lint-free paper to avoid the snap ring from jumping out.
When removing the low one-way clutch, a hook that is made of a wire will help.
Make sure that the low one-way clutch rotates only in the clockwise direction.
10. Remove the low and reverse brake piston
Check the front planetary carrier, the low and reverse brake piston, retainer and the needle bearing for damage or wear.
Be careful about the direction of the needle bearing.
Measure the clearance between the planetary gears and the planetary carrier with a feeler gauge.
Replace the front planetary carrier if the clearance exceeds the specified limit.
The clearance is shown in the Service Manual
nissan 350z repair, nissan silvia repair, nissan gtr r35 repair, sunny n16
nissan z 2020 service
سيرفس نيسان ، نيسان بيكب، نيسان ٢٠٠٤
MP1,2,3 برنامج اكواد اكتروس
• MP1,2,3 برنامج اكواد ا...
برنامج اكواد اعطال اكتروس ام بي4
• برنامج اكواد اعطال اكت...
Facebook
/ eslam.elmasry.2020
Twitter
/ eng_mech2009


Nice. Good info with clear tutorial
It's hard work,all the best
Thanks 😊
Disculpe me puede decir para que modelo es esa transmisión
«Мануал» мог быть хорошем вот только тут небольшая часть работ выполнена
Excuse me, do you know if this has the oil cooler filter transmission? or in this model dont have?
В этой модели его нет. Можно установить самостоятельно.
May I ask what's the recommended fluid for these transmissions?
Matic fluid d