How To Fix A Bent Corner On A Wall. DIY DRYWALL REPAIRS.

Вставка
- Опубліковано 7 сер 2024
- Removing and repairing a bent corner metal on sheetrock or drywall, Cutting out, installing, and patching damaged corners. Simple sheetrock and drywall repair tutorials for the DIY homeowner or professional painter or handyman. Drywall installation tips. All the sheet rock repair hacks and hacks fixing drywall you can handle.
The drywall tools and supplies I use are available right here: paintlifesupply.com
Educate Empower & Equip
House painting tutorials and instructions for everyone!
The Idaho Painter on UA-cam offers all the interior and exterior home painting, sheetrock repairs, and carpentry tutorials you will ever need. Let us teach you the secrets that professional painters, drywallers, and finish carpenters don't want you to know. We have all the home improvement painting instructions and hacks you could ever want. My DIY painting channel offers simple to follow tips on home painting, paint sprayer operations, texturing, wall repairs, home improvements, product evaluations and more.
The Idaho Painter is brought to you by Paint Life. Visit us at paintlifesupply.com


Thanks for helping me train my newer guys. I always tell them to watch a few of your videos. You make us professional painters look good. I have 23 years experience, and am still always learning and developing new techniques.
Always appreciate a good verse. Great instructional video. Thanks for the help!
Great video and AWESOME verse! Thank you for posting!
Perfectly articulated bended corner wall repair video. Thanks a lot Chris!!
One of the differences between professionals and amateurs in any trade is simply preparation. The finished product is always determined by the proper process and preparation. Keep up the good work, man!
I will be trying my hand at repairing a corner in my home, this is a great video, thanks for sharing!
You are welcome, hope it turns out good! :)
Awesome and informative! love the scripture! :) we are DIYers. and loved all the tips in tricks of the trade!
a tip i found useful for this type of repair is if you have the corner bead with the paper tape edge. you can stick it to the wall with a can of spray adhesive before mudding it.
hey you're the man! I've recently hired new people that have the skills to do this but needed the direction and I'm not always around so I'm like hey watch this video you will be a pro afterwards!
Very helpful! Thanks for posting!
Love the videos! The blooper was a neat touch. Adds some humor!
I know I'm way late to the party here . . . just found your wonderful channel. Couple of things I do: 1) see how the corner of your bead was hanging out on the top right? I clip all those corners off at a 45 degree angle. Makes them lay down in there better and not hang out. I do it on the plastic corners too. 2) Also, on the metal corners, you can hand bend them in a little, past 90 degrees, which will also help hide the edges.
Thanks for sharing, much appreciated!
Love the added verse!
Absolutely GREAT!
Great video, I have to do one this week end!
Hey man thanks for all the help, i had watched your painting video and this. Has helped me out tons! Love from Ohio!
Thanks for the video! That 5min mud is great, you just gotta move fast with it depending on ambient temperatures. Also, I know time is money and you probably went a little faster to make a quick video, but letting the mud set a little longer will prevent gumming up your sanding sponge or paper. That "texture spraying body posture @9:18" is common, LOL. Shows you know your stuff! Thanks again!
You need to put mesh tape on each side of the corner bead to prevent cracks and also when mixing hot mud water always goes first in the pan then the powder helps to prevent clumps
Nice Job. Clear and simple. Mad Dog
Exactly what I needed to know, thanks!
Thanks for watching Kirsten!
Great video!!!
Chris your the master!
Great job adding that scripture. Planting seeds!
I been painting over 25yrs have my own business like you. great vid love how you do your jobs the right way and you never cut corners. Liked that scripture thrown in as well made me look it up lol.
God bless bro.
Ken
Thank you for the support! God Bless :)
Ken T he said "never cut corners" haha. Seriously I agree. Great video. Very professional.
Great video. Well done 👍
Like how u put bloopers hella funny 😂😂
Thanks very much! This is very helpful. What would be different in the process for rounded corners?
mix with a 2" knife or a wood shim. that way you can pull across the pan.
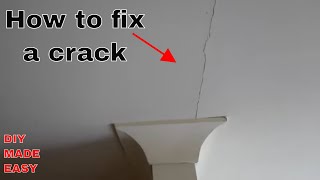
Thanks for your VID, I have to replace a Bull nose corner thats pulling itself away from the wall (Cracking).
Great verse, and great video. I have to do this exact repair.
Please do!
Thanks!
Perfect, I have the same problem, I cut the corner in a small section and is rusty for a water filtration
Chris - I truly found your video the most helpful on a 90 degree corner repair - I really need your help on what the differences are in repairing rounded bullnose corners - I get it that removing the dented in piece is the starting place and cutting a new piece that overlaps 1/4" but after that what is different? Do you have a video on rounded bullnose repairs?
my question is can dap pach amd stick work as well for the metal to cover back up the metal. Im painting my walls right now and I can see the metal in certain spots on the corners. So I got the Dap and patch tube to fill little pin holes from hanging things and filled those in with that. So can I use the same stuff for it or do I need to go buy some else diff from home depot.
good tops like always TY
tips***
Well he'll when I did my corner walls it took me 4 hours to make it look right!! I didn't use the oil base spray you used instead I tried to cover the steel corner edge with putty and then sanded it to try and make it look straight. I wish I saw your video before I finushed....grrr. thank you for sharing. 😚
lol, sorry I hope it still turned out good!
Love your videos Chris. I have learned quite a lot from your painting tips especially, and I utilize them in a lot of my rehab work. As a little tip with hot mud.... put the water in the pan first, then sprinkle the compound into the water. It will mix faster and smoother. Pro-Form 5 is much more workable than USG and you can tool it very smooth with a 6" knife as it sets off and and eliminate sanding when texturing. I rarely have to pick up a sanding sponge with texture type repairs.
Thanks for sharing!
Dude... Everyone knows that's a meatloaf pan! LOL
Good vid!! THANKS!
Thanks for the tips on repairing it my self.
Thanks for the verse Hebrew 13:16 it's encouraging word.
Hi quick question have you any tips for removing old water paint from pvc Windows without damaging the pvc
I understand it says 5 minute. I got to be fast at mixing before it hardens right? I'm asking, being a new drywall learner.
I am trying to install beading with only a few studs to work with,my problem is a lot of the angle does not lie flat against the Sheetrock,how can I secure that?
i like the video thanks ,im trying to do this at my brothers house, but i ran into a couple of issues maybe you can help me . after cutting the metal i have it meeting the bottom of the metal that was left on the wall after it cut it , i heard you say let it over lap ,with what i did ,will that cause a issue, or will i be ok doing this ? the metal that i put on the wall sit a little less then a quarter of a inch below the the wall ,but so does the metel that was up there before .do you just put enough dry wall mix (im using the already made tub of it ) or am i missing something at this point ,in the video it appears that its a very thin coat of drywall mix, mine will have to be much thicker to even out with the wall itself. also i used drywall nails not drywall screws ,is this ok ? it appears to be on there tight . lastly, how far down should i go below the trim board at the floor ,im doing a area almost identical as you are doing . thank you for any info you might be able to give me .
sanding the texture a little after it dries is good for knocking down the high spots, but a method I use that seems to work well is that as the texture is setting up I'll drag my wide drywall blade over the texture gently holding it fairly flat it to even out the texture.
A method that works well with water based texture but not so much with oil based. Seems to stick to the blade every time I try it.
Can you make a video on cutting in on popcorn ceiling?
Here on the West Coast, we have "hangers" and "tapers", but no "sheet rockers". Also, I've never seen anyone pour water into the tray from a 5 gallon bucket. We dip the tray into a bucket with water, and then have a sponge to add a little more water if needed. 2 buckets, one is always clean water for mixing and the other for cleanup. And though I've never tried it myself, I'm told that if you use the cleanup water for mixing, it will kick off the mud quicker, for instance if you're using 20-minute mud. One of my guys doesn't get very concerned if he has a few lumps in his mix, he just spreads it on the wall and mixes the lumps as he goes, right on the wall. You have to be very careful with sanding down orange-peel because it flattens the texture. You can be certain that the original finish was not sanded down. The best way to blend the repair with the surrounding area is with a damp sponge. I'm not as good as my guys that do it all the time, but I try to learn from them as much as I can. Thanks for the video. I, for one, always appreciate the Scripture verses.
Awesome, thanks for sharing David!
I have a basement finished by a professional contractor but there’s a problem. When t he house was built they put metal corners at the base of the finished stairs. With this remodel the contractor just butted up new drywall to the metal corner. Now after a few years there’s a visible bulge where that metal is. Do I float the whole wall out 1/8” or dig the metal corner out and patch?
I fixed my garage wall with this video because I had this issue. I have zero experience repairing drywall. I mean ZERO. I had to buy all the tools. It doesn't look perfect, it certainly isn't the mangled mess it was before. I need to paint still. See photo below. Thank you!!!!!!
J.Ellis
What if you’re walls are not textured?
need your opinion again, what sheen do you use most in bedrooms / livingrooms ? Duration Home Matte any good ?
Robert D eggshell
So you said you cut your bead about a quarter inch longer -- Is that for overlap? It kinda looks like its overlapped when you mud. I guess the thickness of the overlapped bead can be feathered out to disappear if thats the case? can be I just don't want that corner to be an eyesore when I'm done:) Thanks for the vid homie.
I like to use a crown stapler to attach the bead to the wall. Makes it easier to get it straight
Awesome thanks for sharing Chuck!
i was wondering what that metal piece was in my wall. my dog chewed a hole into a corner of the drywall and also ate a bunch of the drywall behind the metal corner. ate a gap in the drywall about half an inch to maybe an inch wide, by 8 inches long. what should i use to fill that gap before putting a new corner metal on?
Drywall topping compound
We had to remove about 2 feet of all the drywall in the house due to flooding from Harvey. The house has round corner and we will have to cut and replace it. How is round different from square? Do you have a video for that?
+Steven Sanchez there are two corner metals. Round and square. Buy round and it is a simple fix
nice
Thank you!
Can you use plastic corner bead on wall? Because I had a crack corner in my living room.
Hey, thank you for being here with us! Due to the overwhelming amount of messages we get each day, we have created an amazing community through a private FaceBook group called Paint Life Mafia. Join us for private live shows and much more. Only members will be allowed to enter and interact in the group, creating a tighter knit community of painters. Each tier has different perks, depending on what you are looking for. Click here to learn more about this EXCLUSIVE group and join: facebook.com/groups/2305219262837596/
Special Thanks - Chris Berry, The Idaho Painter
great ending to this video....makes it more 'real' to know you have a laugh sometimes
lol, thanks for watching!
best and faster way to mix your mud is a stir stick..way faster and paper tape on the side of the metal makes it much stronger...
jimmy davila i thought i was the only one to use stir sticks. Lol way faster and keeps mud off the handle and my knife clean untill use
Do you have any videos on tips on how to remove a square corner and install a bullnose rounded one?
We do not yet, but that is a good idea
Home Improvement How To's what steps do you recommend to do so?
Maybe a video on both how to switch from corner to bullnose and bullnose to corner. I have regular corner beads on my walls but bullnose around my windows and doors. It is making me crazy trying to figure out how to put trim around my doors and windows.
I don't have any of these tools. I have three corners that are in need of repair. Would it be cheaper & more cost effective to hire someone else to come and fix them?
Yes, it would be cheaper
about how much would it cost to have someone come out an do this?
I say go and get the items yourself at Lowe’s or home depot and rewatch the video and do it yourself. In the the long run it’ll be cheaper because you’ll know how to fix it again and do it yourself if need be. That’s part of being a manly man and ladies love handy man that fix they own stuff! Especially when it’s done right. You’ll be proud if you learn this. I say go for it bro! 👌🏾 and you’ll build up your tool collection this way
Dont you use the Paper/plastic corners in the states?
We have a hard plastic corner with a layer of paper on the outside and on the inside its a adhesive that activates once it gets wet. So on new plaster corners we just spray with dash of water and wait 10 seconds, then place it. 20 seconds later the new perfect corner is not gonna come down unless the building falls.
Michel we have many types of corners. slam technologies makes a nice paper one with silicone that's pretty strong and easy to install.
Robert Stubblefield Nice ;)
Can you put thinset over it to tile?
Yes. Thanks for the question or comment. All our questions are now answered on our Facebook group "Paint Life Members". Join that group and you will receive all the help you need. Hope to see you there.
What is “hot” mud? Meaning it’s mixed and ready to go?
Hey, thank you for being here with us! Due to the overwhelming amount of messages we get each day, we have created an amazing community through a private FaceBook group called Paint Life Mafia. Join us for private live shows and much more. Only members will be allowed to enter and interact in the group, creating a tighter knit community of painters. Each tier has different perks, depending on what you are looking for. Click here to learn more about this EXCLUSIVE group and join: facebook.com/groups/2305219262837596/
Special Thanks - Chris Berry, The Idaho Painter
It's lit 🔥🔥🔥🔥🔥🔥
+The Idaho Painter just saying it's a good video
Mud pan buddy 👍🏼
Appropriate bible verse for doing any job! Thanks for the help.
Glad it was helpful!
is there anything a good batch of hot mud can't fix?
+The Idaho Painter i had a caved in lathe and plaster ceiling to fix after a plumbing leak and i even used hot mud on the plaster and paper. people that are regulars at the restaurant i did this repair in still give me compliments over a year later.
If you put water first its easier to mix your mud.
Why is it called hot mud?
because it has portland cement in it, and will kick off and harden up when activated with water
No mesh tape or paper tape
Please i need work i will move to where u are i am 10 years of painting business i consider myself a clean and a professional painter i got a 695 greco and a 550 titan with a 3200 mti power washer i got all the tools and professional tools and the skill of prep on ext and int wood work such as stain laqer refining wood all types of dry wall repais and stucco matching texture plesse. Let me knw
Check out our applications on our website idahopainter.com
not much typing skills:))
To all homeowners remove your baseboard remove your bead starting from the bottom of your baseboard when you get to the top of your ceiling make sure that you cut where the bead next to your ceiling and wall so it is a clean rip and then just replace the piece of bead and apply of couple coats sand in between prime touch up and finished. No old bead and new lines up 100% perfect. Yes 95 if your walls are textured like orange peel. But high end paint grade. Do not do this. Also dry mud "powder" needs to be whipped with a drill and paddle for a minimum of 2 minutes. Then let it set for 2-3 , then whip again. If you buy a box of all purpose pre-made you can use it for the hole job. Thin down the mud use the tip of the fingers too splatter it on. Then use your finishing knife in the direction of the texture. I'm a pro you are not!
Love the Bible Verses
I don’t remember drywall work from Hebrews.
why dont you have kneepads built in your paints?
I have never heard of that
Home Improvement How To's this is what i mean goo.gl/images/c9265I
As soon as I seen the Bible verse I hit the follow
I absolutely hate drywall 🙄
Hot mud? What’s so hot about it is it sexy
lol, yes it is
Hahaha
Clean your workspace
Stick to painting boss
We do like painting
Drywall is not your strength , and @mikethepainter talking to much shit about you boss