Three Variations on Making a Simple Cylindrical Slab Cup With Three Different Handles

Вставка
- Опубліковано 13 вер 2024
- This video demonstrates how to make three variations of a simple cylindrical slab mug using a pattern as a guide. I recommend this for people of the beginner and intermediate levels working in clay. I am using a slab which I texture in this video- but of course, you can make without texture. My ceramics II students have a textured slab set project for which this technique really lends itself. The pattern I used was 11" long by 3.5" high.
The first mug is shown in detail of the construction process. I am using a beautiful MKM roller to add my texture to the clay after I lightly dusted it with cornstarch. I use the Kemper SWB scratchwire brush for scoring the slabs and handles. (See my doc below for links to the MKM rollers and tools). Off camera, I build the other two. When the forms are built, then I show the stretching and shaping of the forms to create the two variations of the straight slab. One shows a footring. I also show how I make handles with texture from the carrot slam method. (Learned this first from Sandi Pierantozzi… check out her gorgeous work!) I texture the handles, and cover the handles and cups together to allow to get leatherhard overnight. The next day, I show how I attach the handles. When everything is finished, I don’t believe I mention it, but SLOW DRYING is of the greatest importance for even drying. Don’t ever allow your cups with handles to dry uncovered quickly… it is the surest way to get cracking at your handles!
For the great tools I used in the video (including the MKM rollers and the wooden Kemper tools) check out this link to a live Googledoc I continually update with lots of my favorite tools on Amazon using my associate links! (also some non-amazon suggestions on here!)
docs.google.co...
In this video, I am using standard 153, a nice midrange firing stoneware.
Check out my other slab mug videos as well!
I have a round slab cup with a squared bottom:
• Creating a Round Slab ...
And a tripod slab cup:
• How to make a Tripod T...
I am a public high school ceramics teacher at William Mason High School in Mason, Ohio. (Mason is currently the largest high school in Ohio!) As a potter, I have been working in clay for over 30 years, and I have been teaching for over 28 years, the past 20 have been specifically teaching high school ceramics. I love what I do! I have my own studio in my home basement, where I work on my personal pottery for my Etsy site; www.etsy.com/s...
I started my UA-cam channel a few years ago, to make videos to help my students if they are absent and miss a demo, or if they would like to explore more advanced techniques independently. I have been amazed to reach such a wider audience than my own students!
Please subscribe to my channel if you would like to receive channel updates, or would like to learn more about clay and studio processes!


I'm currently taking a pottery class and my instructor definitely didn't explain the usefulness of the building elements as well as you did! Shes still lovely, but thanks so much for this so I could educate myself some more! We have unstructured/unassisted studio time on saturday and I'll definitely take advantage of the cornstarch trick, using a beveled edge, and adding an internal coil, none of which I'd heard about before this video (to be fair I've taken two classes total in my life haha.) :)
It is so satisfying ,from one perfectionist to another, to not have questions following a tutorial. Aahhh. Thank you
You are so welcome! :)
You are an excellent instructor. Thank you! I hope you are back with your students. I would definitely take your class. :) Thank you for your generosity!
I was face to face in person with my kids all of last year, and will be again this year. Probably still wearing masks... but at least it's way better than it was in spring of 2020!!!
Thank you!! I’m majoring in art teacher education and my wheel throwing class just got turned into hand building from home so this really helped!☺️
I admire you! You are an excellent instructor! I wish I was in your class: A++ I took introductory ceramics years ago and didn’t learn half of these techniques. I’m taking another class soon and I’m happy I found your channel. Thank you so much for making these videos!!!
Thank you, I like the way you teach...step by step techniques. 😊😊😊
My favorite video to learn basic ceramic skills.Great explanations and lots of tips.
Thank you.
So well explained for beginners. Thanks so much
Thank you so much for an extremely informative video! Very much appreciated!
Thank you so much for all the extra tips and inspiration,,,all the very best ❤
Stan Karan. I’m leading my art students through a pottery unit and you are the backbone of the entire thing lol
I'm so grateful I found you 🙌
Hubs and son are joining me in the pottery shed this weekend to each make a mug for our Mother’s Day gift in the UK which is March. Thank you for the lesson x
Thanks for sharing this great video with so many tips!
Thank you so much for sharing! I’m starting my own ceramics UA-cam channel and this is inspiring.
Extremely helpful. Thank you!
Thanks, I really enjoyed that and learned a lot!
Thank you so much for your easy to follow video(s). Superb demo and narrative. One thing I noticed when you attached the first handle to the very first mug, that the lower end of the handle was actually quite close to the bottom of the mug. From my own experience this could result in the mug being "glued" to the kiln when glazing, unless you have of course some small pegs or similar underneath, which will raise the mug above the support the mug is resting on.
Good observation! It’s really not as close as it appeared. Considering the bottom edge had a bevel on it, it’s a good three eights of an inch away from me bottom of the pot. And with the way that I glaze and wax, I had enough room. I do always caution my students not to put the handles to close though, as that rookie mistake is getting that handle glaze stuck!
Nice presentation. Re: foot, If you have time to wait for clay to firm up a little you can use your funnel , after forming foot ring, on the outside of the funnel. You then get round and some flair from the center.
great suggestion!
Thank you for this information packed video.
Spectacular presentation. Thank you!👌💯
Thank you só much! Great video! Great teacher!.
Your students are lucky to have you!!!!!!!!
✔️thanks
This is cool you guys do it similar to how my teacher taught my class
GENIA!!!!!!!!!!!!👋👋👋👋👋🥰
Great video. Quick question: I really dislike seams on mugs, is this the trade off when using a patterned roller or is there a way to hide it? Cheers.
Is it possible to fill in that side crack with slip?
Hi,I wonder that why you left the seam of slab without sticking each other ma'am?
Love your videos, very helpful ❤️
Great vid
Wow
Good morning teacher, the small cilinder you using to make a texture is it made by ur self? Is it wood, or biscuit? Thanks for your kindness.
That’s a wooden texture roller by Mkm pottery tools: mkmpotterytools.com/rollers4clay/
You often refer to a video description and Google docs. That's what's confusing me! Where do I find them or are they just for your students?
Amazing work,which kind of clay do you use
This video is one I did for my kids at school- there we use Standard 225, a really nice light brown cone 6 stoneware! At home, I use a cone 6 b mix from laguna! )
You had mentioned you would link the template, but I don't see it here?
Oh, yeah- that one I just wrote the measurements in the video description since it was just a rectangle! The pattern I used was 11" long by 3.5" high.
Thanks for your reply. Sorry if I'm being dense but where is the video decription? I'm not only new topottery but to you tube as well!! I love your videos and have learned a lot.
So, when you’re looking at the video, it’s always the body of text I type which shows up under the video. On a phone- you might have to scroll to see it. On a computer it’s easier to see! If on a phone... when viewing the video, look to the right of the video title. There’s a teeny little arrow to a drop down that contains the video description! I hope that helps!!! :)
Love your very clear instructions! I can’t find the texture roller you used. It’s very cool! Can you help?
Hmmmm.... I am also not finding that particular one on their website... but check it out, they have equally gorgeous ones. They are fantastic! mkmpotterytools.com/product-category/rollers4clay/big-hand-rollers/
Love the videos! How do you handle the clay so much without messing up the pattern?
Super gently!!! I spread my fingers out to distribute the pressure more evenly on the clay to try to prevent denting or squishing the designs and texture!
Thanks for the video. I'm a retired History teacher and I'm taking a clay class to keep my certificate valid. I have one question; when you put the handle on you mentioned it was "bone" dry. Does that term refer to the cup being somewhat hard? I'm guessing if you attempted to attach it while it was soft it would smash it.
Not bone dry- that is completely dry. I attached the handle and cup together when they were both leatherhard! :) that’s the consistency of cheddar cheese!
@@KaransPotsAndGlass What’s the normal time to reach leather hard? 🧀
I really like your texture roller. Where did you get it?
I got it at my local supplier when I visited! Here is the manufacturer's website: mkmpotterytools.com/product-category/rollers4clay/big-hand-rollers/
How thick did you open the plate? Thanks
❤️❤️❤️❤️❤️❤️❤️❤️
What rolling pin do you use and do you have any recommendations re: rolling pins and thickness guide sticks?
Hi! I do use a large rolling pin- if you check out my googledoc of links, you will find a large rolling pin on there! (You can do a document search for rolling pin) docs.google.com/document/d/1XbYPQjjJnHrQG5xyWGMHZkEcZj5N8VnUAbFZdJRrRmU/edit?usp=sharing . The hardwood slab sticks I use aren't on Amazon, but I get mine from Cornelle Studio Supply- and they are linked at the end of the document. I used 1/4" thickness strips for the mugs! :)
The tool you used (Xiem) is pronounced as “sim” It’s on their website. Hope that helps.
Thanks, Lana!!! I’d not noticed that on their site! 😊
@@KaransPotsAndGlass I have always struggled to pronounce that brand - now I know, thanks :)
@@chadritzer9952 Lol- glad I wasn't alone!!!
Do you mind telling what clay you use?
Of course! In this video, I am using standard 153, a nice midrange firing stoneware. Most of the details you can find in the video description! :)
Great video and explanation. Do you have any links to your templates. This one is straight forward, but others are a little more involved
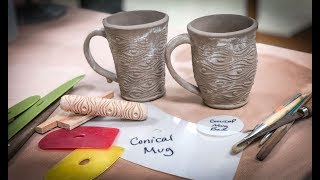
Hi Janice- I currently do not... but that is something I will consider making! Most of the templates exceed the standard size of paper... I do have a video which shows how to create a conical pattern if that would help you to make your own! :) . ua-cam.com/video/ehipFC_XqS0/v-deo.html
Janice- here is a link to a conical cup pattern I made today if you find it helpful! docs.google.com/document/d/1SNZK-m7Ea22-vEZNWyDysZK5X9xTqOiPqwI40xWVzKc/edit?usp=sharing
May I know what clay do you use for this?
Xeim is pronounced ZEM~ it is here in my area~ next door~~ in Pasadena.
Why did you leave such an open (gappy) seem? It would have been easy to close up
I believe I address that decision in the video. By saying the seam has a gap implies it is separated, or perhaps the middle of the wall is showing. However, that isn't the case. It absolutely is closed up. The two beveled edges meet. They are textured, and each side is pressed firmly into one another at the seam. The inside is fully blended. I made a specific aesthetic decision not to attempt to blend the seam over since there is texture- and it would have detracted from the original texture. If it were smooth, I would be inclined to blend it. It is my personal preference to allow the process to be revealed, and show the seam- it announces that it is handmade and made from a slab. I like the work to be able to speak its structure to the user.
where to find google doc and video link that you refer to?
Those are located in the video description!
So appreciate your response however, there is no text under the video. Don't want to bother you anymore so I'll just watch and rewatch the video till I get it!!
I responded on a different comment yesterday- if you’re on a computer it’s easier to see- if you’re on a mobile device- look for the little arrow drop down to the right of the vide title when you’re watching it. Click the drop down, the video description is there.
Thank you so much for this video, can you guide me how to fire my pieces if i don't have the kiln? I am a beginner :)
You can look for a private or community studio or an individual potter with a kiln which might be able to fire them for a fee. Try searching the internet for pottery -Ceramics studios or potters near you that might be able to!
What kind the plastic you make your templates? Where I can buying it? Thank you for teaching 🤗
Hi Marcia- I buy it on Amazon! It is on the googledoc in the video description! It is mylar- sold by the foot. I love it for the patterns for my students- it is strong and never wears out. Here is a direct link which is the same one in the google doc! www.amazon.com/gp/product/B008FPARI2/ref=as_li_tl?ie=UTF8&tag=karanspotsand-20&camp=1789&creative=9325&linkCode=as2&creativeASIN=B008FPARI2&linkId=cf95913aedf147ae07460c6b283aae80
Nope! That would work, but see my comment above!
@Ray Medhus yes! good ideas! In my classroom- I started using the mylar, as we have the ability to wash them in the sinks when the kids get them messy! :)
Thank you so much 🤗
Show the new machine that centers clay in an out.
Do you mean the strong arm attachment? I don’t have one!
about how long do you let it wait to get leather hard?
How quickly the pots dry depends upon the humidity/moisture in the environment around the pieces. If I have my kids store the pieces covered on a plastic tray in their cabinet... sometimes with a dry towel in the bag, it can be leatherhard overnight- and ready for them the following school day. If they store on wood, it may get too dry, as handles on a wood ware board will potentially lose too much moisture. Or, if you are working in a studio longer than my students, you could leave it uncovered for an hour or two and it could be completely leatherhard... ready for handle attachment the same day. Just get to know your particular studio setting, where you store them, the overall humidity of the air, etc.
Thank you so much! That was very helpful!
@@KaransPotsAndGlass
Which clay do you use?
Good morning! I usually have this information listed in the video description. In this case it’s 153 stoneware
What does grog do?
Grog adds porosity and a bit of strength when building and firing.
What are the dimensions of the template you are using.
I added it to the description now . (I didn't have it at home when I uploaded it over the weekend)- it was 11" x 3.5"
What cone do you fire these mugs
I normally use a cone 5/6 clay. I bisque fire to cone 04, and glaze fire to the final temp (my Coyote glazes are 5/6). Unfortunately, I recently discovered my 153 is not fully mature at cone 6- so I will be switching my classroom clay this year to one that vitrifies or matures at 6.
KaransPotsAndGlass when I did ceramics years ago and poured my molds, the green ware firing was cone 04 and bisque ( glaze firing) was cone 05 or 06. Can the clay mugs be fired the same way or is this specific to the glazes you’re using. Thanks in advance
@@irenedanylewycz1596 It is specific to the CLAY body. Once you determine your clay body, then you use the glazes to match that firing cone. So, if you want to lowfire, just use lowfire clay bodies and glazes! :). I do all my bisque to 04, and then depending on the clay, I use different glazes and fire to the specified cone of that clay and glaze. I hope this helps?? :)
What size is your template? Thanks.
Hi Amy- I most always have those things in the video description... this is what I have written...The pattern I used was 11" long by 3.5" high.
C😑is ⛪
I can make an aircraft in same time..
Awesome! I can’t make an aircraft, but I can make beautiful handmade works of art that people can enjoy using every day! :)
@@KaransPotsAndGlass I wanna marry you. Please
Lolololol!!! My husband wouldn’t like that much!! Haaa!