In this video, I demonstrate how you can use the new masking features in Lightroom to edit the background, midground, and foreground of a picture independently of one another. ** I am an affiliate for all of the companies listed EXCEPT Affinity Photo. The Best Sky Images I've Seen Available -- Ocudrone - bit.ly/3vtDpjR *Save 10% with Discount Code: Anthony10 Please read my Code of Ethics Statement: onlinephotographytraining.com/code-of-ethics/ Tap into Adobe's Creative Cloud: bit.ly/2zwQ0nW Anthony Morganti’s MUST HAVE applications: At least one Non-Destructive RAW Editor Lightroom - bit.ly/2zwQ0nW Capture One - captureone.38d4qb.net/y1Djy (Save 10% with Promo Code: MORGANTI10 - Expires Nov 18, 2021) Luminar - bit.ly/2JUJxKw (Save with the Promo Code AM16) On1 Photo RAW - bit.ly/2zJmA9I (Save 20% with Promo Code: AM17) Exposure X7 - bit.ly/2U8UxrK (Save 10% with Promo Code: AnthonyMorganti) PhotoLab 5: tidd.ly/2HhiN9X At least one FULL Editing App: Photoshop - bit.ly/2zwQ0nW Affinity Photo - affinity.serif.com/en-us/photo/ My MUST-HAVE Plugins: Topaz Gigapixel AI - bit.ly/3cDqa5J Topaz Sharpen AI - bit.ly/3cDqa5J Topaz Denoise AI - bit.ly/3cDqa5J *Save 15% on all Topaz Labs apps - use the Promo Code: AMDISC15 or instead of Topaz Denoise AI: On1 NoNoise AI - bit.ly/2zJmA9I (Save 20% with Promo Code: AM17) Nik Silver Efex Pro 2 - tidd.ly/3dc4gYm The Best Sky Images I've Seen Available -- Ocudrone - bit.ly/3vtDpjR *Save 10% with Discount Code: Anthony10 My MUST-HAVE Mac Utility: CleanMyMac X - Info: bit.ly/3jtVpU3 To save 10% on your purchase of CleanMyMac X: 1. Visit the CleanMyMac X store: bit.ly/3bEMuMx 2. Scroll down to the very bottom of the page and click on "Enter it now" under "Already have a coupon code?" 3. Paste the promo code TONY10 and hit "Verify" 4. The prices will be reduced, and you’ll be able to select the license and proceed with the payment ** Note that all of the promo codes listed above may not work on sale products. *** I am an affiliate for all of the companies listed EXCEPT Affinity Photo. Please read my Code of Ethics Statement: onlinephotographytraining.com/code-of-ethics/ Please follow me on Instagram: instagram.com/anthonymorganti/ View my recommended gear list: www.amazon.com/shop/anthonymorganti As an Amazon Associate, I earn from qualifying purchases. I use this software to record my screen and make parts of my screen enlarge and zoom out so you can see it: Screenflow: telestream.pxf.io/DMrW2 Unsure of how to price your photography? Check the 2019 Guide to Pricing Your Photography: amzn.to/2S1CiU7 I am an affiliate for all of the companies listed EXCEPT Affinity Photo. Please read my Code of Ethics Statement here: onlinephotographytraining.com/code-of-ethics/ Thank you!
@@doghouseriley4732 email me. Go to my website, onlinephotographytraining.com and click on the little envelope on the right hand side of the main page.
Thanks so much for yet another great tutorial, Anthony. I love this new masking feature in Lightroom, and you made it so much easier to understand and use. :)
Thanks Anthony for demonstrating the new Lightroom masking features. I find them a lot easier to target certain areas and improve the post processing of my images.
Anthony, thanks for another very useful and inspiring video. This is a really great idea with eliminating the mask using a brush in the clipping areas.
This was an especially useful video. I’m still working my way through the new masking tool upgrades, but I really like what they add to Lightroom Classic.
Thank you for another great video!!! I am loving the new masking in Lightroom!! And this video helped out a lot, looking for word to more videos like this one
I am finding it to be very helpful to label the individual masks (Sky, foreground, midground) rathern than just Mask 1, 2, 3. That makes it much quicker to go back later and fine-tune.
Thanks, Again, Anthony. SO helpful. I am using all the masking tools right now. One issue I am having is that my subtract brush is not very effective. i have go over the areas again and again. It works great if I shrink down the brush to a tiny dot. What am I doing wrong. Some density slider, perhaps? You are the best!
Looking forward to an update, in the sense that you can auto-update to select subject mask when you have a batch of similar images, and you want to update the mask as you do with the other settings
Outstanding. One area of confusion for me. When you have a landscape photo like that and you know you want to work on the sky and other areas separately do you go straight to the masking panel first without making any global tone adjustments? Seems this would be the way to go and then possible go back to the basic panel afterwards to possibly adjust the tone cure, vignettes etc. Am I reading this right? Thanks in advance for a reply.
Anthony, thank you for another very informative video. Am I correct that when using the masking there is a limited number of adjustments that can be made to the masked area? IE Only what shows in that one adjustment panel, no HSL or Tone Curve or Color Grading, etc? Also the Option key doesn't have the same effect on White/Black point adjustment in Masking as it does otherwise (showing the areas being clipped), do you know if its by design?
Anthony - In the video, you mentioned that you did not like to have clipping in the highlights and you used a minus/remove brush to eliminate the additional clipping in the sky that your edits of the mask introduced. However, this still left the small bit of clipping that was originally in the photo prior to the masking. Do you think that using the spot removal tool would have been an acceptable way to remove it?
I find the New Masking features in LR and CR to be phenomenal, but there’s one issue I’ve noticed that I haven’t seen anyone mention, maybe it’s only me that notices this, but the issue is that when you’re making these adjustments with the masks in LR & CR, it is not using the same full Raw data it would be using if you was just editing in the basics panel, curves, HSL, camera calibration…etc. I know because I tested it by making an adjustment in the basic panel, then resetting and starting over again and created a linear gradient mask over the imagine and used the same settings I used when I edited it only in the basic panel. The first edit with the basic panel clearly looked different, it used more Raw data information than it did when I made the linear gradient mask adjustment. So It seems like when you’re editing with masks it’s editing it almost like a jpeg(but obviously better), but it isn’t using all the same raw data that it would be using if you just edited it in the basic panel. So I would like to know your thoughts on this. Thank you! P.S. i figured out a way to edit only the Raw data, and that is by opening up the image From LR or CR into PS as a smart object, then go to select > smart object > and click on > New smart object to create a second smart object layer. Now you can double click on the layer and it opens up in CR so you can edit different parts of that same full raw photo, and create masks in PS. Doing it this way uses all of the Raw data. Or that’s what it seems like to me. Anyway would love to hear your feed back! Thank you!


In this video, I demonstrate how you can use the new masking features in Lightroom to edit the background, midground, and foreground of a picture independently of one another.
** I am an affiliate for all of the companies listed EXCEPT Affinity Photo.
The Best Sky Images I've Seen Available -- Ocudrone - bit.ly/3vtDpjR
*Save 10% with Discount Code: Anthony10
Please read my Code of Ethics Statement:
onlinephotographytraining.com/code-of-ethics/
Tap into Adobe's Creative Cloud: bit.ly/2zwQ0nW
Anthony Morganti’s MUST HAVE applications:
At least one Non-Destructive RAW Editor
Lightroom - bit.ly/2zwQ0nW
Capture One - captureone.38d4qb.net/y1Djy (Save 10% with Promo Code: MORGANTI10 - Expires Nov 18, 2021)
Luminar - bit.ly/2JUJxKw (Save with the Promo Code AM16)
On1 Photo RAW - bit.ly/2zJmA9I (Save 20% with Promo Code: AM17)
Exposure X7 - bit.ly/2U8UxrK (Save 10% with Promo Code: AnthonyMorganti)
PhotoLab 5: tidd.ly/2HhiN9X
At least one FULL Editing App:
Photoshop - bit.ly/2zwQ0nW
Affinity Photo - affinity.serif.com/en-us/photo/
My MUST-HAVE Plugins:
Topaz Gigapixel AI - bit.ly/3cDqa5J
Topaz Sharpen AI - bit.ly/3cDqa5J
Topaz Denoise AI - bit.ly/3cDqa5J
*Save 15% on all Topaz Labs apps - use the Promo Code: AMDISC15
or instead of Topaz Denoise AI:
On1 NoNoise AI - bit.ly/2zJmA9I (Save 20% with Promo Code: AM17)
Nik Silver Efex Pro 2 - tidd.ly/3dc4gYm
The Best Sky Images I've Seen Available -- Ocudrone - bit.ly/3vtDpjR
*Save 10% with Discount Code: Anthony10
My MUST-HAVE Mac Utility:
CleanMyMac X - Info: bit.ly/3jtVpU3
To save 10% on your purchase of CleanMyMac X:
1. Visit the CleanMyMac X store: bit.ly/3bEMuMx
2. Scroll down to the very bottom of the page and click on "Enter it now" under "Already have a coupon code?"
3. Paste the promo code TONY10 and hit "Verify"
4. The prices will be reduced, and you’ll be able to select the license and proceed with the payment
** Note that all of the promo codes listed above may not work on sale products.
*** I am an affiliate for all of the companies listed EXCEPT Affinity Photo. Please read my Code of Ethics Statement:
onlinephotographytraining.com/code-of-ethics/
Please follow me on Instagram: instagram.com/anthonymorganti/
View my recommended gear list: www.amazon.com/shop/anthonymorganti
As an Amazon Associate, I earn from qualifying purchases.
I use this software to record my screen and make parts of my screen enlarge and zoom out so you can see it:
Screenflow: telestream.pxf.io/DMrW2
Unsure of how to price your photography? Check the 2019 Guide to Pricing Your Photography:
amzn.to/2S1CiU7
I am an affiliate for all of the companies listed EXCEPT Affinity Photo. Please read my Code of Ethics Statement here:
onlinephotographytraining.com/code-of-ethics/
Thank you!
Still no DxO Photolab 5 review, very disappointing. Must have been out 2 months of so and appears to be outselling most others.
@@doghouseriley4732 email me. Go to my website, onlinephotographytraining.com and click on the little envelope on the right hand side of the main page.
Thanks so much for yet another great tutorial, Anthony. I love this new masking feature in Lightroom, and you made it so much easier to understand and use. :)
Oh I love LIGHTROOM just because of you. You make it so easy for us to learn. Thankyou
Thanks Anthony for demonstrating the new Lightroom masking features. I find them a lot easier to target certain areas and improve the post processing of my images.
Thank you for demonstrating the scope of this tool. Amazing
Thank you so much for your recent videos about the new masking feature; they explain it clearly in a readily understandable way and are really useful.
Anthony, thanks for another very useful and inspiring video. This is a really great idea with eliminating the mask using a brush in the clipping areas.
This was an especially useful video. I’m still working my way through the new masking tool upgrades, but I really like what they add to Lightroom Classic.
Good demonstration Anthony.
Very, very useful. So much to learn, but am enjoying experimenting with the new features.
This is a great helping video. the demonstration is full of help. thank you very much
Thanks Anthony, you make it easy to understand.
Thank you for another great video!!! I am loving the new masking in Lightroom!! And this video helped out a lot, looking for word to more videos like this one
Good job explaining the masking tools!
Amazing. Thank you so much, Anthony. Fantastic.
Another great one Anthony 👍👍
Thanks for a great overview workflow on masking!!
I am finding it to be very helpful to label the individual masks (Sky, foreground, midground) rathern than just Mask 1, 2, 3. That makes it much quicker to go back later and fine-tune.
Thanks, Again, Anthony. SO helpful. I am using all the masking tools right now. One issue I am having is that my subtract brush is not very effective. i have go over the areas again and again. It works great if I shrink down the brush to a tiny dot. What am I doing wrong. Some density slider, perhaps? You are the best!
hey nice channel mate.. calm and clear
Great video Anthony! Any chance you could do video about intersecting in a mask?
Disregard the request. I saw your Deep Dive tutorial on Masking and it was excellently explained there! Thanks!
This is great tutorial!! Thank you!!
Looking forward to an update, in the sense that you can auto-update to select subject mask when you have a batch of similar images, and you want to update the mask as you do with the other settings
Great lesson! Always the best!
Wow. Amazing
Beautiful. This is Lightroom Classic? I don’t have this version. Do I need to reinstall Lightroom Classic?
Outstanding. One area of confusion for me. When you have a landscape photo like that and you know you want to work on the sky and other areas separately do you go straight to the masking panel first without making any global tone adjustments? Seems this would be the way to go and then possible go back to the basic panel afterwards to possibly adjust the tone cure, vignettes etc. Am I reading this right? Thanks in advance for a reply.
Thanks!
Thank you Carl!
Anthony, thank you for another very informative video. Am I correct that when using the masking there is a limited number of adjustments that can be made to the masked area? IE Only what shows in that one adjustment panel, no HSL or Tone Curve or Color Grading, etc? Also the Option key doesn't have the same effect on White/Black point adjustment in Masking as it does otherwise (showing the areas being clipped), do you know if its by design?
Anthony - In the video, you mentioned that you did not like to have clipping in the highlights and you used a minus/remove brush to eliminate the additional clipping in the sky that your edits of the mask introduced. However, this still left the small bit of clipping that was originally in the photo prior to the masking. Do you think that using the spot removal tool would have been an acceptable way to remove it?
Excellent class ❤️👍👌👌
The BEST!
LR just dropped another update
I was surprised to see halos develope on the poles...
I find the New Masking features in LR and CR to be phenomenal, but there’s one issue I’ve noticed that I haven’t seen anyone mention, maybe it’s only me that notices this, but the issue is that when you’re making these adjustments with the masks in LR & CR, it is not using the same full Raw data it would be using if you was just editing in the basics panel, curves, HSL, camera calibration…etc. I know because I tested it by making an adjustment in the basic panel, then resetting and starting over again and created a linear gradient mask over the imagine and used the same settings I used when I edited it only in the basic panel. The first edit with the basic panel clearly looked different, it used more Raw data information than it did when I made the linear gradient mask adjustment. So It seems like when you’re editing with masks it’s editing it almost like a jpeg(but obviously better), but it isn’t using all the same raw data that it would be using if you just edited it in the basic panel.
So I would like to know your thoughts on this. Thank you!
P.S. i figured out a way to edit only the Raw data, and that is by opening up the image From LR or CR into PS as a smart object, then go to select > smart object > and click on > New smart object to create a second smart object layer. Now you can double click on the layer and it opens up in CR so you can edit different parts of that same full raw photo, and create masks in PS. Doing it this way uses all of the Raw data. Or that’s what it seems like to me.
Anyway would love to hear your feed back! Thank you!
Very helpful. So much to learn!
🥇👏
Not sure what “clipping” was or wasn’t explained. So most of the video didn’t makes sense
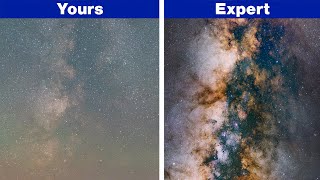
Please stop using these clickbate thumbnails. You will be so much more respected for it. By me to begin with :-)
Thanks!
Again, thank you so much Robert!
Thanks!
Thank you Tom!