Thanks so much! I just started taking my electronics course this semester and our professor gave us our kits and said "You figure it out." This helped a LOT.
Outstanding video for new users! Thank you Im embarrassed that I never learned how to use one of these. I have built 100's of "gizmos" all by soldering them up. I truly feel like I was trying to invent the wheel now.
Brilliant. I had no idea you had a youtube channel. I have just ordered my first ever breadboarding kit ( and other bits)from you on ebay. I am 45 and new to electronics but I have plenty time on my hands as Im disabled, so I am taking in tons of info. This is going to be a fantastic hobby for me. Very good video buddy.
Hey Kenny. I hope its all going well. Welcome to the fascinating world of electronics. Its nice to see a 40 something joining in, Ill be a 50 something soon :O
Thank you for your reply. The package arrived very quickly. I've made a few basic circuits with the 555 and flashed my first Leds with transistors too. I'm just annoyed that I did not order more components at the time as there are so many circuits to play with online but I do not have all the parts, lol.
I must take the time to comment my thanks for this video because despite NOT being completely new to circuitry, in as much as I can read basic - intermediate schematics (although cringe on some with IC's even though I know they make it easier) and understand the basic functions of most of the components used I haven't had much experience designing, building or testing circuits and recently set out to expand my "paper" understanding, in order to start producing basic but purposeful devices. So I ran out and got me some breadboards to ..as you put it..."prototype" some circuits for projects I am taking on, as well as to free hands when testing components working together, and despite having some background in a retail consumer electronics chain as a manager, (I was principally the COMPUTER guru of the area and never got down and dirty with circuits) and I was at a complete LOSS as to how to START.... NOTHING....and I mean NOTHING, no instructions come with many of them, even from one of the best sources for as long as I can remember, Radio Shack, who has rather pricey ones at that,,don't even include the most basic instruction sheet to indicate HOW/WHAT DIRECTION the holes are pinned/connected.... or maybe saying...indicating which way the rails actually run, so I can be sure of whether I am connecting one thing to the other, or isolating a component for being pinned to it's other side of itself instead of the intended component it should be connected to for there being no directional indicators that specify which direction to wire parallelly or serially. So THANK YOU for the insight and bonus of illustration/demonstration circuits to quantify the concepts mentally, so that I can form the rules I need to follow to use it correctly and be able to tell my testing is valid, and not failing because I didn't know if something was hooked to the other or not for the lack of indicators. Although I was a little surprised at your griping about hooking in the buzzer, for being experienced enough to TEACH this in a video and not know or think to advise the following...So a NOTE TO NEWBIES...IF you MUST use a braided/twisted wire (because a component is hard wired with it like this buzzer/beeper) instead of solid, Use Solder to TIN the ends of your wire with a "hot" fine tipped iron so it will suck the solder into the braid and cool to a "solid like" consistency, and if needed, rather than applying more heat and risking melting the insulation trying to correct for any flaws in tinning, simply file/sand the tips to be smooth if any air bubbles were caught in the cooled solder as sometimes happens from the flux used to condition/clean the wire ends so they will insert easily but still hold firm...You can also use a AWG step or two higher/smaller since the solder can also be used to add girth to the end...if the board calls for 20 AWG you can probably get away with up to 26 AWG wire...the solder mix ratio and metal types will be what determines how much it will add to the thickness. Back to the drawing...err....Breadboard LOL ... I would have thought they could have at least indicated which direction each section's rails are running in some way. And NO the numbers and letters running along side do not make it any more obvious for lacking anything to indicate their purpose and for all we know they could be for tracking any number of intentions, and when it comes to electrical...one does NOT want to ASSUME anything. I would just add, with respect to production values...keeping in mind how many of us Yanks will likely watch your videos, to consider that it's helpful when shooting videos, to either compensate for this in editing, or else be more aware that when speaking especially with ANY type of accent be it UK AU or the deep south of the USA this already increases the difficulty in understanding what is being said, , let alone when your voice drops at times, and especially if the recorder isn't "auto levelling" or something, and I had to go back at a number of points to catch what you said....but that personal peeve notwithstanding. WELL DONE and a positive contribution to the community...now I can make fake free energy videos like the other clowns and get tons of views while producing nothing of value to make $$ from Google! LOL! (JK) NOT!! LOL! Cheers and keep the info coming, this was my first of your videos and was enough to get me to check out your others...depending on what I find it might even result in a subscribe, but for now it at least gets a up thumb!!!
i know its late but could the LDR (photoresistor) be used so that its like an open circuit when light is on it and closed circuit when light is off it?
Nice video mate. I'm new to electronics and I'm just getting into ham radio hobby. So I'm trying to understand how different electrical components work. Thanks for sharing very informative and I have subscribed to your channel 👍 ace mate
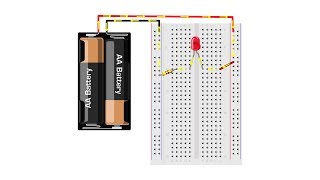
at 4:05 when you put the battery into the rails (+and - on the same side) wont that create a short curcuit? or are the plus and minus not directly connected on the sides?
I don't get mini breadboards though!! There are no outside points.. I'm such a noob to this and nothing I can find helps. All I have is a mini breadboard, so advice would be great!
Very nice, i've tried with similar op amp - Ne 5532, with the same disposition but, i think the op amp is died after that...you can make a short tutorial for the ne-5532 then? thx a lot ! XD
Thank you for the video! I've got a quick question. Let's say I need to connect three components electrically. I know that they would all go in the same 'row.' I just wanted to verify that the the order doesn't matter as far as left to right is concerned?
***** It's an amplifier circuit with a microphone and speaker that uses a potentiometer as the volume control. The next part of the project is using a transformer, full wave rectifier, and zener diode to get +- 15V out of the wall outlet!
bipolar power supply op. amps are a bit more complicated but much more interesting to get sounds... Need patience of course :) Do you have some tutorials by this theme? I've learned few cool things from Adamsky Ajull's channel. But things are tricky... and lead to really cool sounds (imagine Mini-Moog or similar quality with more possibilities).
thanks for the informative video! with the colorful breadboards, like in the beginning of the video, are the two rows on each side the 'power rails' where they go the opposite direction like on these type or how do they work?
Hello Andrew, Please tell details second project in this video without potentiometer because I can't find on your website details and this project.. please
(HELP) I need a timer (like a 555 timer) so when i turn off the 12 volt stitch it waits 10 scents then dims off. do you have any ideas of how i can make that? thanks
the sounds ive heard so far are a bit limiting in the sense that a pcb may hold more info and in order to make a crazy never heard before pedal i'd need a bread board the size of a kitchen table? i dont know.....i'd love to make a pedal that sounds like all my pedals in one......noisey and unpredictable....so im tryin to figure things out just seems id need a huge breadboard compared to combining a bunch of pcb
I don’t understand why you connect pin 2 to pin 7 instead of 6. Can you explain that please? We need more information about the logic of your placement of connections.
Am I missing something? On the 2nd buzzer project, if we are supposed to learn how to transfer the info from the schematic to the board, don't we need to see the schematic side by side as you place each component on the board?? Otherwise, it's just you telling us what each component is without making any sense....and please don't say that this is "a simple circuit", remember how hard it was when you were learning to read?
I get what you are saying, but when I was a student all my electronics teachers said simple circuit. This video takes me back to the 1970s. Yep, I still have it!
Well I got it to work but I had to watch carefully and with some guessing worked out which way things went, but it would help if you told use where the positives and negatives go and what resisters your using also how to work out where number one terminal on the IC and how to identify them, don't forget your teach beginners.
you audio is extremely low. I have my computer volume to the highest as well as the UA-cam volume to the highest and it still seems like you are whispering
I bought a Tinkerkit breadboard PCB Module It was something that seemd to be the normal breadboard when i purchased it (The arduino store had sold out the other breadboards) But i have purchased a normal breadboard right now from amazon, that will come next week.
I will probbably find a other use of the once that was not acualy a normal breadboard. I will try to remember that site in the future. Does the site suport International shipping?
This is so crappy. i.e. Missed the power rails and hooked them up 1st. Loopy jumper wires so you can't see where the circuit goes. Don't connect components directly into power rails. etc etc.
I don't get mini breadboards though!! There are no outside points.. I'm such a noob to this and nothing I can find helps. All I have is a mini breadboard, so advice would be great!


Thanks so much! I just started taking my electronics course this semester and our professor gave us our kits and said "You figure it out." This helped a LOT.
you sound relaxed through the video and it made me relaxed
This is how UA-cam tutorials should be! Excellent! Thank you 🙏
Excellent demonstration. Liked the modular approach to connect the LDR circuit with the buzzer 👍
I thought the current was vertical on the breadboard lol. No wonder why I was having so many issues. Thanks for taking one apart and clarifying this!
Outstanding video for new users! Thank you Im embarrassed that I never learned how to use one of these. I have built 100's of "gizmos" all by soldering them up. I truly feel like I was trying to invent the wheel now.
Fine presentation,simple and to the point. Thank you.
Great intro video for a noob like me! Easy to follow and I like your voice and teaching style =)
Awesome explanation, been making some guitar pedals withouth breadboarding first, that's the reason why some aren't working. I need to get one ASAP!
Brilliant. I had no idea you had a youtube channel. I have just ordered my first ever breadboarding kit ( and other bits)from you on ebay. I am 45 and new to electronics but I have plenty time on my hands as Im disabled, so I am taking in tons of info. This is going to be a fantastic hobby for me. Very good video buddy.
Hey Kenny. I hope its all going well. Welcome to the fascinating world of electronics. Its nice to see a 40 something joining in, Ill be a 50 something soon :O
Thank you for your reply. The package arrived very quickly. I've made a few basic circuits with the 555 and flashed my first Leds with transistors too. I'm just annoyed that I did not order more components at the time as there are so many circuits to play with online but I do not have all the parts, lol.
:O
Cool thanks for this, I'll try to buy from your shop whenever I can since you've taken the time to post tutorials on UA-cam and I'm UK based!
Thanks for the video, it was very easy to follow.
I must take the time to comment my thanks for this video because despite NOT being completely new to circuitry, in as much as I can read basic - intermediate schematics (although cringe on some with IC's even though I know they make it easier) and understand the basic functions of most of the components used I haven't had much experience designing, building or testing circuits and recently set out to expand my "paper" understanding, in order to start producing basic but purposeful devices.
So I ran out and got me some breadboards to ..as you put it..."prototype" some circuits for projects I am taking on, as well as to free hands when testing components working together, and despite having some background in a retail consumer electronics chain as a manager, (I was principally the COMPUTER guru of the area and never got down and dirty with circuits) and I was at a complete LOSS as to how to START.... NOTHING....and I mean NOTHING, no instructions come with many of them, even from one of the best sources for as long as I can remember, Radio Shack, who has rather pricey ones at that,,don't even include the most basic instruction sheet to indicate HOW/WHAT DIRECTION the holes are pinned/connected.... or maybe saying...indicating which way the rails actually run, so I can be sure of whether I am connecting one thing to the other, or isolating a component for being pinned to it's other side of itself instead of the intended component it should be connected to for there being no directional indicators that specify which direction to wire parallelly or serially.
So THANK YOU for the insight and bonus of illustration/demonstration circuits to quantify the concepts mentally, so that I can form the rules I need to follow to use it correctly and be able to tell my testing is valid, and not failing because I didn't know if something was hooked to the other or not for the lack of indicators.
Although I was a little surprised at your griping about hooking in the buzzer, for being experienced enough to TEACH this in a video and not know or think to advise the following...So a NOTE TO NEWBIES...IF you MUST use a braided/twisted wire (because a component is hard wired with it like this buzzer/beeper) instead of solid, Use Solder to TIN the ends of your wire with a "hot" fine tipped iron so it will suck the solder into the braid and cool to a "solid like" consistency, and if needed, rather than applying more heat and risking melting the insulation trying to correct for any flaws in tinning, simply file/sand the tips to be smooth if any air bubbles were caught in the cooled solder as sometimes happens from the flux used to condition/clean the wire ends so they will insert easily but still hold firm...You can also use a AWG step or two higher/smaller since the solder can also be used to add girth to the end...if the board calls for 20 AWG you can probably get away with up to 26 AWG wire...the solder mix ratio and metal types will be what determines how much it will add to the thickness.
Back to the drawing...err....Breadboard LOL ...
I would have thought they could have at least indicated which direction each section's rails are running in some way. And NO the numbers and letters running along side do not make it any more obvious for lacking anything to indicate their purpose and for all we know they could be for tracking any number of intentions, and when it comes to electrical...one does NOT want to ASSUME anything.
I would just add, with respect to production values...keeping in mind how many of us Yanks will likely watch your videos, to consider that it's helpful when shooting videos, to either compensate for this in editing, or else be more aware that when speaking especially with ANY type of accent be it UK AU or the deep south of the USA this already increases the difficulty in understanding what is being said, , let alone when your voice drops at times, and especially if the recorder isn't "auto levelling" or something, and I had to go back at a number of points to catch what you said....but that personal peeve notwithstanding. WELL DONE and a positive contribution to the community...now I can make fake free energy videos like the other clowns and get tons of views while producing nothing of value to make $$ from Google! LOL! (JK) NOT!! LOL!
Cheers and keep the info coming, this was my first of your videos and was enough to get me to check out your others...depending on what I find it might even result in a subscribe, but for now it at least gets a up thumb!!!
Can't wait to have the starter kit in my hands! Good job Mr. Mallinson!
Thank you so much. I am stupid at electronics and this vid means I can make a great start to my project. His accent at 1:26
The way he says 'little line'
I'm a complete novice, but my project involves a tapehead connected to a LM386 and to sound output :-). This sure is a kickstart.
I wish I was as smart as you :(
By the way, your accent is great. Greetings from Texas, USA
He ain't smart, you are DUMB!
@@yasserarafat9873 Sir 🙇♂️🙇♂️🙇♂️🙇♂️
Great primer on these! Thanks.
very nice and clear accent, thanks.
***** you are welcome.
what resistors are you using
i know its late but could the LDR (photoresistor) be used so that its like an open circuit when light is on it and closed circuit when light is off it?
perfect simple to the point
Nice video mate. I'm new to electronics and I'm just getting into ham radio hobby. So I'm trying to understand how different electrical components work. Thanks for sharing very informative and I have subscribed to your channel 👍 ace mate
Thank You very much, sir!
Where can I find more circuits which can be made with the equipment from your starter kit?
Nice! Just bought your beginner kit!
at 4:05 when you put the battery into the rails (+and - on the same side) wont that create a short curcuit? or are the plus and minus not directly connected on the sides?
I don't get mini breadboards though!! There are no outside points.. I'm such a noob to this and nothing I can find helps. All I have is a mini breadboard, so advice would be great!
how would the light resistor or whatever its called, work if u made this into a circuit and encased it would it have to be clear or something
Very nice, i've tried with similar op amp - Ne 5532, with the same disposition but, i think the op amp is died after that...you can make a short tutorial for the ne-5532 then? thx a lot ! XD
nice project for keeping that fridge closed!
Im new at this, but wouldn't the buzzer work without the timer?
Thank you for the video! I've got a quick question. Let's say I need to connect three components electrically. I know that they would all go in the same 'row.' I just wanted to verify that the the order doesn't matter as far as left to right is concerned?
Awesome! Thank you! I got my project working thanks to this video xD
***** It's an amplifier circuit with a microphone and speaker that uses a potentiometer as the volume control. The next part of the project is using a transformer, full wave rectifier, and zener diode to get +- 15V out of the wall outlet!
Thank you!
What are the dimensions in inches (L x W x thickness) of larger breadboard, and where can I purchase this size? Thank you!
Brilliant. Thank you.
bipolar power supply op. amps are a bit more complicated but much more interesting to get sounds... Need patience of course :) Do you have some tutorials by this theme? I've learned few cool things from Adamsky Ajull's channel. But things are tricky... and lead to really cool sounds (imagine Mini-Moog or similar quality with more possibilities).
thanks for the informative video! with the colorful breadboards, like in the beginning of the video, are the two rows on each side the 'power rails' where they go the opposite direction like on these type or how do they work?
Hello Andrew, Please tell details second project in this video without potentiometer because I can't find on your website details and this project.. please
Schematics are hard to read if you are a beginner. I don't get them. I really need help on one of them.
What are the resistors that you use, I mean the resistance in ohms
(HELP) I need a timer (like a 555 timer) so when i turn off the 12 volt stitch it waits 10 scents then dims off. do you have any ideas of how i can make that? thanks
Helped me a lot!!!
now this is more like it, how to . good one
thanks a lot, Andrew
the sounds ive heard so far are a bit limiting in the sense that a pcb may hold more info and in order to make a crazy never heard before pedal i'd need a bread board the size of a kitchen table? i dont know.....i'd love to make a pedal that sounds like all my pedals in one......noisey and unpredictable....so im tryin to figure things out just seems id need a huge breadboard compared to combining a bunch of pcb
I don’t understand why you connect pin 2 to pin 7 instead of 6. Can you explain that please? We need more information about the logic of your placement of connections.
Am I missing something? On the 2nd buzzer project, if we are supposed to learn how to transfer the info from the schematic to the board, don't we need to see the schematic side by side as you place each component on the board?? Otherwise, it's just you telling us what each component is without making any sense....and please don't say that this is "a simple circuit", remember how hard it was when you were learning to read?
I get what you are saying, but when I was a student all my electronics teachers said simple circuit. This video takes me back to the 1970s. Yep, I still have it!
Easily explained here: ua-cam.com/video/6VLSmmUyDxI/v-deo.html
@@raspberrypiprojects8513
Stop spamming!!!
What is a situation where you would want to use breadboard for prototyping?
How did u make that sound . I'm confused
Can you tell me what equipments do i need to build a circuit a complete set :)
2:20
why have you used a resistor?
Thanks for the video. I've subscribed.
Is a 830 point breadboard too big for my first breadboard?
Just be mindful that some larger breadboard have split power rails half way along.
Thank you sir.
Can we use 230v ac in breadboard
Well I got it to work but I had to watch carefully and with some guessing worked out which way things went, but it would help if you told use where the positives and negatives go and what resisters your using also how to work out where number one terminal on the IC and how to identify them, don't forget your teach beginners.
Thank u so much
I completely understood the part of the video. when you went to the next circuit, I was lost feeling dumb
What are the wires used in this? I mean the type of the wires. I need to buy them. :)
Jumper wires
+Youtub3rz -Tube Thank you! :)
+Mouni Raghuram no problem
Amazing my friend ♥♥♥♥♥
Nice to meet you ♥♥♥♥♥
Best wishes for you ♥♥♥♥♥
Keep it up .............. ♥♥♥♥♥
Website is not available
sir how can we construct simple quiz display on breadboard
Thanks :)
Can you places an led sideways ?
thanks
yes
WHat is the name of the book you are using called at 4:24
***** Thank you so much and its cheap too
8 didn't go to 4 in the diagram? also 7 to 2?
What is the book you have called
4:24
MUITO BOM.
you audio is extremely low. I have my computer volume to the highest as well as the UA-cam volume to the highest and it still seems like you are whispering
that buzzer gave me a headacch
Simulate some circuits! Stumble Upon: androidcircuitsolver/app.html
Your voice sounds like Sean Bean
Got lost at the "ambitious part" sadly. XD
Bad audio. Why do most videos on breadboards ( electronics ) , have bad audio ? 🔊🔉🔈
excellent :) new sub :) I will checkout a few videos :)
lol i melted a broken one the other day using the mains power
999 likes lol
im lost
Spoiler: Sean Bean dies at the end
to simple but ok
huh
I'm a bit annoyed right now, since i managed to buy the wrong type of breadboard.
I bought a Tinkerkit breadboard PCB Module
It was something that seemd to be the normal breadboard when i purchased it (The arduino store had sold out the other breadboards)
But i have purchased a normal breadboard right now from amazon, that will come next week.
I will probbably find a other use of the once that was not acualy a normal breadboard.
I will try to remember that site in the future.
Does the site suport International shipping?
This is so crappy. i.e. Missed the power rails and hooked them up 1st. Loopy jumper wires so you can't see where the circuit goes. Don't connect components directly into power rails. etc etc.
Great start part to the video then you go full out and don't explain anything to do with the buzzer and I'm just left here completely lost..
I have never felt more stupid. Is there like a pre-beginner video somewhere? Maybe one for toddlers would be suitable.
I know right? I need beginner beginner stuff!
the sound of video sucks
Your audio quality is very bad that is why people are having hard time learning...
you plug this cable into number 6 and that cable into 2 and this cable into the minus
eh i learnt nothing from this you explained nothing
do you have any idea how loud that buzzer is with headphones in.... on the bright side my hearing aids will be delivered tuesday
What is the book you have called
4:24
IC 555 Projects by E.A. Parr
I don't get mini breadboards though!! There are no outside points.. I'm such a noob to this and nothing I can find helps. All I have is a mini breadboard, so advice would be great!
***** Oh, I get it now.. But is there a way to hook up 2 leds easily? Thanks.
***** Thank you so much! Now I can finally get started on some electronics! :)