Це відео не доступне.
Перепрошуємо.
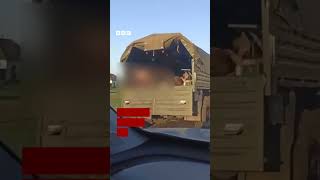
Arduino for Lego Trains #1: Introduction

Вставка
- Опубліковано 18 сер 2024
- This beginner's guide explains the process, parts and code needed to automate your Lego 9V trains with an Arduino.
Parts list:
1 x Arduino (preferably a Mega)
1 x L298N motor controller
1 x 12V DC Power supply
1 x Lego Technic 9V cable
1 x Lego train set
some male-to-female wires
and some 0.35mm (28AWG) wire.
The code section describes how to drive a simple motor using the Arduino Mega's PWM pins.
Features Lego set 4563.


Our Villaging site has several train enthusiasts in different scales, so I have directed them to your channel. Some of them also dabble in ARDUINO, so they should find your channel most enlightening. Cheers!
you really know your storytelling. good job ;)
Who needs mindstorms when you have an arduino
True... now we are at 350 for the newest model and an ultrasonic sensor costs 10-50 instead of 5 for an Arduino one.
Sometimes you can get two Unos for one LEGO sensor... I'm out LEGO.
Great tutorial!
These are 8 (UA-cam) exactly what I have been for...
Hi, I also have had a lego train for many years and have often dreamed of being able to set up computer control of it so I was delighted when I came across your videos. So far , I have purchased an arduino mega, some ribbon wire and the L298N motor control module. Having just re-played the video I noticed that you use special connectors to connect the ribbon wire to the L298N module. I would be very grateful if you could tell me what these connectors are called so I can order some. Many Thanks
can you please add a close up of the wiring, especially the power supply, please?
I have a collection of 9volt trains, i must build something !!! :)
Hi, exciting!
What I am confused is about your custom-made cable. Why you need that cable to be exact?
Thanks
Jerry
Jerry MJ Thanks for watching! You need the cable to connect the motor controller (L298N) to the lego train tracks. Lego 9V tracks get power from this connector: www.bricklink.com/PL/5306c01.jpg , which you can see at the start of the video. The custom cable means you don't need to modify this connector.
Arduino Lego Trains Thank you for the reply. If I have an IR train, this portion of the customization is not applicable to me, right?
Jerry MJ that's correct. However, you will need this cable if you want to build the motorized track switches in tutorial #3: ua-cam.com/video/h-5FmGfYzRs/v-deo.html
+Jerry MJ I am no expert, but I am curious to know if it would work. But would it be possible to use the decoding tool in Video #7 to learn the codes sent by the IR remote on different channels to and send those codes out with the arduino to control multiple trains?
I am new to electronics, arduino, programming, and IR, but its what I was thinking.
Love the humor
Hey man, first of all just want say thanks and really amazing job on the series of vids...they have been immensely informative, well produced and an awesome help in getting started with Arduino and Trains when starting from scratch. Great job !!! 😀Your series has inspired me to start my own tinkering and Lego trains project. So a quick random question for you (and I really don't mean to ask / bother)...all your examples use a L298(N?) motor driver with 3 H-bridge pins per channel (i.e. with a dedicated brake pin). Any idea how you would brake / stop a motor on a driver with only 2 H-bridge pins per channel (direction & PWM) ? I seem to have picked up a driver (DFRobot L298P) with no dedicated brake pin 😕
I've never heard reference to a "brake pin' before. All motor controllers provide two wires per motor, so that they can supply + and - to make the motor spin. On the other side, they have two input pins (from the arduino) so that you can specify which output pin is + and which is - : this allows you to specify direction, and whether the motor is running at all (if both pins are -, the motor can't run). There is also a PWM input pin to control motor speed, making three inputs and two outputs per motor. If you want to brake a motor, you just flip the polarity of the output pins momentarily, which you program into your software.
I've just looked at the schematic for the DFRobot L298P, and I see exactly that: four screw terminals to connect to the motors themselves, plus at least six pin connections for your +, - and PWM pins on the arduino.
Yeah my apologies for being a "n00b" and that reference to the "brake pin", my bad...still learning all the terminology...I didn't word that correctly. What I meant was, as you mentioned the two dedicated pins for + and - (allowing to control direction and "brake" / disable) and a PWM pin for speed = 3 pins. Get that, and see that in your examples, on the official Arduino motor controller shield examples, and most other examples out there. Why I was confused and mentioned the "2 pin" thing (1 x direction and 1 x PWM), is that the official documentation / how-to from DFRobot on the L298P page only mentions 2 pins per channel and only shows 2 pins in their sample code, plus no mention of IN1, IN2, etc...just E1, M1, E2, M2.
See here: www.dfrobot.com/wiki/index.php/Arduino_Motor_Shield_(L298N)_(SKU:DRI0009)
So they are saying: "The speed control is achieved through conventional PWM which can be obtained from Arduino’s PWM output Pin 5 and 6. The enable/disable function of the motor control is signalled by Arduino Digital Pin 4 and 7". And their sample code shows this, hence I was all a bit confused when tried to reconcile to your examples :) I mean its fine now, I kinda figured it out and I have everything working using the 2 pins for channel (1 for direction and 1 for PWM) and I am "braking" by simply setting the PWM value to 0...which is a "coast" brake, but is fine for what I need and everything is working. I was just initially rather curious as their example code did not use the 3 pins...so I was like "ummmm how the heck do I brake ?" LOL :)
Through a multimeter, I have also noticed a drop off of around 3 volts (i.e. so 9v -> 6v) at the motor terminals on the shield, and hence to the rails. I have read that this kind of voltage drop-off is a rather common problem with the L298 driver (or H-bridge drivers in general), and many see this happening. I have to assume then that this is why you use a 12V power source in your examples / setup ? (so you can guarantee 9V to the rails ?). Cheers for the tips, help...and once again for these pioneering videos, Justin.
Does the power supply have to go into the motor controller or can it go into the arduino? I'm just tentative about defiling the end of a power cable like that.
You do need to put power into the motor controller first. I bought the appropriate socket to match my psu's plug, and simply ran two wires from that to the motor controller. It cost pennies.
Are there circuit diagrams for the hardware wiring, if so would they have them for me?
4:53 quick question what is that little red button on the arduino board is that like a power button so you could toggle it if you want to
The L298N motor controller directly controls the Lego Train's motors or it gives the orders to the Lego Train's remote and then the Lego Train's remote controls the motors ? (excuse me my sentence is not very correct because I don't speak English very well)
It directly controls the trains. These trains are controlled through the track, not through a remote.
So if I have a train controlled by a remote the L298N will directly control the motors too ?
Great video . . Would this setup work with a 12v transformer?
the power supply I use is 12v, so there shouldn't be any problem
Thanks for the quick reply! .. I also recently rediscovered my old 1980's train set which amazingly still works.
Hi dot dot Hi Arduino Lego Trains! Did your grinders work properly (12 Volt system)? I have actually problems with that, try to fix it with a alittle bit of soldering.
P.S.: The Videos are really great!
Hello
thanks for the movie on youtube. it looks good. Do you also have an idea to drive a Lego RC train, for example: 7897
greetings Wil Wilkes
that train uses infra red light, so you will need an IR LED to control it.
You are using the old Lego trains. My question is : can I do these smart things you describe in your videos with these type of trains ? If yes , which of your ideas ? Could Arduino and the L298P achieve the same result with the newer Lego 12V models which have onboard power as opposed to track based power function? I don't want to buy the L298P and Arduino and not be able to use them.
Check out the videos number #11 and higher. They are all based on the newer 9V trains with battery packs. Lego has not made 12V trains in nearly 40 years.
@@ArduinoLegoTrains I have a similar question. Could you explain how to connect the newer 9V trains to Arduino and the Motor Controller? (Where do the C1, C2, GND, 9V wires all go in and How to set the speed for these new 9v trains?) I've looked at video #11 but still cannot find how to wire the newer 9V trains. Thank you for the great videos and help!
could you please let me know the model number of the train set you have used, I guess you are controlling the train speed by PWM is that right?
Hey, the description of each video lists the model number. This particular set is 4563. And yes, all Lego trains (9V, 12V or Power Functions) require a PWM pin to control.
Where does the power for the track come from? Did the Motor controller get the power from a power supply, or from the arduino? I'm a bloody beginner....
look at the 4min mark. The blue wires are coming from the power brick (generic 12v 1a unit), and the green/brown wires go to the standard lego 9v track power connector.
I will be honest I have not yet watched all your videos so you might have one over this question but looking at your titles I don't think you do. Do you know if you can (and if so how) to have two or more arduino's communicate wirelessly?
I haven't covered it in these videos, but I plan to in the future. Arduino projects usually use nRF24L01 radio boards for wireless communication, and two arduinos can communicate using their MOSI/MISO pins. This page has a lot of great information on this: arduino-info.wikispaces.com/Nrf24L01-2.4GHz-HowTo
I have started to build an amazon shopping cart of stuff and I had some in it already, glad to see I was on the right path. However 1 part I am having trouble finding is the light sensor from video 2. When I look up the one you are using I find sound sensors.
I use a generic photoresistor module. There are plenty on amazon; the only difference is the length of wire between the photoresistor and the module's circuit board.
I see you plug in the 2 power supply wires into the motor control but I don't see where that is going.
The two blue wires on the motor controller go to the two wires of the power supply shown at 0:48. It's a generic 12V 1A power brick.
+Arduino Lego Trains did you have to create an adapter to go between them?
It's up to you. If you have a power supply with a standard barrel connector then you can either buy the appropriate socket from an electronics store and wire that to the motor control, OR use tape and wires directly to the barrel for an unsafe and extremely temporary solution.
Since these power supplies are so cheap, I just cut the barrel connector off.
Is it save to use a 12V power supply. I tought it is a 9v motor?
Awesome
I love trains
how do you program it on a computer? how do I hock it up to the computer
The arduino has a Usb socket. Plug it into your PC and download the arduino IDE from the arduino website. It's that easy!
Nice
how can i implement it with a L298P?
As far as I know, L298P works exactly the same way as L298N. If this is a shield, you just need to change the pin numbers in the code for IN1, IN2 and ENA.
can i apply this to my DC model train?
Absolutely. Just make sure you adjust the ENA value for the size of your train, so that you don't make it go too fast.
can i use arduino uno and arduino motorshield?
Sure! The only real difference between the Uno and Mega is the number of output pins. The Motor Shield uses exactly the same chip as the motor controller in these videos (L298). So just make sure you change the pin values in the code to match your Motor shield, and everything will work perfectly.
i don't know what will i replace in the pin values it's not working... can you help me out?
At the top of the code it says:
int IN1 = 23;
int IN2 = 24;
int ENA = 7;
For your motor shield, replace this with:
int IN1 = 12;
int IN2 = 9;
int ENA = 3;
and connect your two motor wires to the channel A terminals on your motor shield.
Advise if this can be possible except Lego
can anyone write the list of the components .. please ?
Hi! You need:
1 x Arduino (Nano, Uno, Mega...)
1 x L298N motor controller
1 x 12v 1A power supply (connects to L298N)
1 x Technic 9V power wire (which you must cut)
1 x Lego 9V or 12V train (NOT Power Functions or RC)
and some wires to connect L298N to Arduino.
Well, you need a laptop/PC to program the Arduino, and a USB cable to connect to it, but yes - that's all you need to produce the results in this video.
Check out the other videos for more interesting examples!
Is the 12v 1A power supply enough to power the entire box shown in video 10?
Top