Perfect! Thanks for the follow up comment. If you need help tuning the bl touch (because I didn't cover it in this video) let me know! I plan on future Klipper videos(pressure advance, manual mesh, input shaping) but if you need the info quicker I can help.
@@bromptonchris Pretty much worked just like this video but be prepared to put in bucket loads of time calibrating and fine tuning if you want good results. Yesterday I setup "pressure advance" On to my 2nd print since and would have to say that was the single best tweak for print improvement.
Hey Leo, first, thank you so much for this video. It gave me the confidence to undertake this upgrade to my Aquila g32. I used a Dell Wyse 5070 ($45 on ebay) with Ubuntu Server and a 120GB m.2 sata SSD and 8GB ram. You expressed an interest in the outcome. To compare your pi, your install of klipper took 17 minutes, mine too less than 2. Moonraker took less than a minute, and fluidd took around 15 seconds. Looking at the system utilization in fluidd, i could probably run 4 or 5 printers off of this. Your instructions were so great that a linux newbie like me could do it. Webcams are not installed with the current version of KIAUH so I followed another video to get that running. Thanks Leo!
That's great!! There was a user on the Discord who was trying to get Klipper running in the Dell Wyse, so I'll let them know you had success with it! I would think the Dell could easily run 4-5 printers just like you said, Klipper really does not require a lot of processing power, it's so cool. I actually just (like yesterday lol) released a video on setting up cameras with CrowsNest. Hopefully that's what you used because that service is so simple and works great. Thanks for dropping me a line to let me know how it worked out.
@@PrintsLeo3D oh no! I missed it! The video I watched was just all the commands and files to make to set up mpeg streaming as a service. 😣 I should have waited 1 more day!
As long as you got it working is all that matters! The video is there for you if in the future you are having any issues, crows nest is nice and simple.
I ran into two issues when setting up Klipper. (Great video, just some tips for others) 1.) Couldn't connect, serial port is correct - Check dmesg. Make sure linux recognizes a usb device - Make sure the firmware has ALL the correct options. The bootloader needs 28KiB of mem, this isn't the default 2.) Negative Temp Readings - You could have broken thermistors, use your warm hands to see if they can read temperature differences - BL Touch, if installed, must be configured. Leo has a config on his website you can reference Thanks for the video! It's a great tldr; Shout out to Alex for plugging your page
John awesome content! Thank you so much for contributing and all your points are spot on. One other thing to consider if your printer won't connect/having trouble getting a serial port, is to uninstall BRTTYL. From the terminal of the host device run: sudo apt-get remove brltty Thanks to @BCutty from the channel that always hits this point home!
Thank you Hien! Anytime anyone sees the above user posting any info on my videos take it as verifiable fact! They know there stuff! Also I miss you guys in the Discord, hopefully everything quiets down for me soon and I can jump back in.
Thanks as always for the content - very helpful. Re: N32 and this video, 'Build for Nation N32G45x MCU' option is no longer there following your guide But there are two options under Processor model: N32G452 & N32G455. I chose the first one but no idea if its going to work or not.
Be aware that the bootloader offset NEEDS to be 28kb, in my cae the default value was set to 8 KiB and i didn´t notice that (just saw the 8 and thought it was correct). It took me several attempts and looking around on internet until i found another post with someone that specifically made it clear that it should be 28 Kib. After that all works.
I thought I covered this in the where I go through the entire firmware image and the changes that need to be made, but you're the second person to bring this up. I'm sorry about that, sometimes it's the forest for the trees. I have so much info to put together and get right I thought I covered it but it's possible I edited that small section out. Apologies, I'm going to make an addition to the description that highlights this.
I appreciate that I just hate to have people have to search around for the answers I should have supplied. Thanks for watching and for letting me know about the issue. Cheers.
@@Shinare73 yes, but all these "should look like this" was for the rest of the settings and as standard the offset is set to 8 kb. If you focus on the stuff that he tells to change, then it is not easily visible that it says 28 in his video because of the 8 is common between both values. Anyhow, as said, I got it working and it is just something missed in the tutorial to say that the offset value needs to be changed as well.
@@PrintsLeo3D and I am grateful for your work. It's hard to persevere as a small creator that puts in the work and doesn't make much off it but you do a very good job man keep up the good work! Your underated me too lol but let go to the big ship together!
@@PrintsLeo3D Got that inch to buy a bamboo that I can't afford so I bought a Pie 2 w instead to get Klipper on and be happy with what I got. but all the fiddling makes those bamboos seem pretty tempting! love your ninja turtles themed printer. We grew up on the good stuff. Never would have thought I'd be into all this stuff but FPV drones got me hooked. you ever try them?
Great Vid Leo! Up until today, I didn't even realize this existed. (Got my X2 Last week) I'd love to see more details on BL Touch and accelerometer configurations.
Thank you so much Chris! I am going to have more videos featuring the different aspects of Klipper and some more aspects of setting up your printer configuration so don't worry it's coming ! Thanks for watching and commenting!
@@PrintsLeo3D Looking Forward to it. Say, I can't seem to find your macros listed on your website. Can you shoot me a link to the page with the macros you use in the video?
I haven't had a chance to update the website yet. I'm on a family vacation right now, trying to slowly update things late at night. I'd say check back every few days. I should have them all up by the middle of next week latest.
Oh wow, did I promise that in this video lol? I will certainly add it to the list. I got swept up in some of the Klipper-focused calibrations , like Pressure Advance and Input Shaping. I have to remember to round the catalog out and hit all the calibrations we need.I am looking to make a good deal of Klipper content upcoming so this will make the mix! Thanks for reminding me and the inspiration!
Absolutely I have been trying to work on small portions here and there (for the camera one out, working on pressure advance and input shaping next). Anything in particular you are looking to see ?
@@PrintsLeo3D honestly I’m a complete newbie where klipper is concerned. I’m looking at setting up my voxelab with klipper and have no clue about settings where config is cincerned
@@PrintsLeo3D and I probably should mention I’m getting the manta m4p with cb1 and screen. This is going to be put together end of February as I’m currently upgrading to dual z axis and stripe direct drive
Wow sounds like a fun project. Getting a configuration together is usually pretty straightforward, there's usually always a 'vanilla' file you'll be able to use as a base, and then can make amendments from there. If you're interested in some more Klipper info in general you can check out that page on my website (www.printsleo3d.com/klipper). There are links there to the configurations I use in my printers as well as some useful macros ( macros are blocks of commands that can perform a ton of different functions in Klipper, from calibrating hot end temps to automating bed leveling!). I think that is a pretty good start, but going forward I am going to be making more and more intro or setup videos for Klipper. This firmware is feature packed and high performance so you're in for a treat! Also if you have discord you can join mine (link in description), it's basically a live discussion with me and others who are going through the same things you are!
@@PrintsLeo3D haha nope! Did you try the hotend upgrade for the S2? Hoping someone gets Alex FW to work on the D1. Seems that the touchscreen is the showstopper.
I haven't tried it yet on the S2 and I need to. The stock hot end is still working for me but I don't know for how long. Someone I was talking to was having a hard time finding the red lizard hot end, I think they were going to try and do a custom workaround like yours!
Great video. Helped me a lot. One thing you didn't mention when adding you bltouch config is that you need to adjust your stepper z too. [stepper_z] endstop_pin: probe:z_virtual_endstop #position_endstop: 0.0 I'm surprised your printer homed correctly without it.
Jonathan thanks so much for the comment, that's what this section is about, picking up the pieces I forget lol it definitely would not have homed correctly, I either added it afterwards, it it's possible I was doing some voiceover of another printer.cfg for that section. I'm not sure anymore as it's been awhile.
Excellent video as always very thorough. I'm not sseing your BLTouch config or macros settings on your site? I also noticed on your Aquila printer settings,you have it as 235x235,mine is 220x220.?
I was in such a rush to get this video finisihed I haven't had time to update my website quite yet. I was hoping no one would be fast enough to check lol. I will be adding everything as soon as I find time (hopefully within the next few days). In the interim if you need something specific you can reach my by email (printsleo3d@gmail.com) or discord(link in description) and I'll forward you the info! Thanks again for watching and commenting!
Just to let you know I just today received my Elegoo Saturn 2 When I was told I may have to wait until January 2023 for it to be delivered? But I have it now and It sure is a bit different to learn about doing printing compared to my 4 FDM printers! It sure is a big Resin Printer. Lots to try t learn now so different to FDM.
That's a great way to end the year! I like the idea of trying to different 'mediums' of 3d printing. This way you get to know both aspects of SLA and FFF which probably in some way help your ability to create in both. I tried dipping my toes into resin (not actually, that stuff is toxic lol) a while ago and it didn't quite click with me. After seeing what they are capable of though I am considering take another look. If I didn't have so much going on I might have already pulled the trigger lol I hope that printer works out for you, I know it's a big one. Let me know how it turns out, I'd love to see some prints!
@@PrintsLeo3D Thanks Leo. I done a test print of two Chess Rooks ( castle ) Come out looking so good. in this nice water washable Mint Green Resin. The Saturn 2 has a plug in usb type fan and carbon filter tower that sits in the case cover area next to the tank. Still smelly with it even though the resin is said to be low odder than Normal resins. I have to do more model now the slicer is working? I love to show you the models later on when they are done. BTW. I found a great Eco type re-usable Kitchen Towel for using with the printer resin mess. It is a Bamboo version which you use then put in the washing machine and wash it like clothing, It can be re-used this way 160 times per sheet. Saving 60 normal kitchen rolls of normal paper. when you done the 160th wash and use yu then throw it in the normal waste. So cool saving the money and the planet since Bamboo grows super fast compared to trees. Cheers. 😁
Looks like you're finding ways to make this work for you! Getting me tempted to take the plunge lol I'll see how your prints turn out first I think. The slicer is a wrinkle I didn't consider. Probably have to 're-learn' a few things based on how the SLA printers print. Interesting stuff though, probably a fun adventure!
@@PrintsLeo3D Hi Leo.. Have a Happy New Year now we are not far away from the end of 2022. Gone quick this has. I Ordered a wash & cure system by Elegoo from Amazon which was said to be the new V2 version of a single base unit with two top units, one for washing and one for curing. Just before I received it, I saw Uncle Jessy video review of it, and he has the older system I was going to get which is 2 units one for washing and the other for curing! I had not ordered those because I thought the newer single system V2 was a bigger size I needed for the Saturn 2 build plate? But then I saw the two different systems together on his worktop and saw in fact the older one of the two units was bigger than the V2 after all? So I checked with Elegoo and they said yes the 2nd type of the older one was the right sized one ( the Mercury XS version ) Seems the Mercury X version of it was not big enough for my Saturn 2 plate. the X unit was for the older Saturn size. So when I got the V2 I had to return it unopened and get a refund. I then had to Order the Mercury XS from Elegoo because it was cheaper to do than buying it here in the UK from others. I just got the XS and it is amazing wash & curing two unit system, I even got a plug in UV pen light with safety UV glasses too. Now I sliced some STL files on the Resin software as you can use normal FDM models just use the resin slicer and I am printing them and washing & curing too. Let you know how I do later. Cheers. 😉
Marlin 2 and 32 bit boards has come a long way to making things a lot better. Klipper still has advantages, but more powerful 32bit controller boards make the advantages of using a Raspberry Pi a lot less as the controllers are getting close to the Raspberry Pi in processing power. That said, Klipper has a lot of other advantages as it was written from scratch a lot more recently than Marlin. Marlin is slowly getting features, and even when this video was released, Marlin had Input Shaping, S Curve and Linear Advance, but all settings are stored in EEPROM and flashing is needed each time, and both the Flash memory and EEPROM on the controller have a limited number of write cycles, and many will exceed those write cycles after a couple of years of tinkering and upgrading.
Yea, the raw power that Klipper was offering those older boards is not as dramatic nowadays with those 32 bit boards. That being said for me it's the ease and uniformity that Klipper offers that makes it a great choice. The ease of making changes to your configuration as well as being able to have nearly complete (remote) control of your printer is really a wonder. If memory serves me Marlin implemented IS December of 2022, although I am not sure if it allowed for an automatic calibration through the use of an accelerometer. Whichever you prefer I think the future looks bright for 3d printing.
Thanks Leo - amazing video. Made it really easy to get Klipper/Fluidd running on my Aquila X2 H32 + old RPi2. Just one question - will there be a version where the screen works as it no longer functions (I knew it wouldn't - but here's hoping for a fix...) Keep up the great work!
Steve thanks for the kindness I appreciate that! There is a project that gets the screen to work but I believe the functionality is limited and it requires a little bit of soldering(I think). If you want I can dig around for some links and forward them to you!
@@PrintsLeo3D Thanks for the reply Leo. If you have the links to hand, that would be great. In the meantime, I've also got my webcam working + created a manual bed mesh by using your other videos. Once again, superb work!!
For the config file used within Klipper all the chips can use the same config. The only difference between the chips is when you are flashing the printer. I have a sample config in my website if you need one.
According to comments online, the N32 chip/support should now be mainland, part of the official Klipper code. I am currently trying it out to see if that is the case.
Hmm, looks like that was not the case, the same bug is still there that the temperature is not correctly shown. So i´ll have to flash back to the custom firmware instead. A shame as the custom firmware is stull on older 0.10.xx while the new one is 0.11.xx and we get warning that not all Mainsail features are supported unless upgradig firmware to 0.11.xx
Rickard, yes I was under the impression that the N32 version was pushed to the main Klipper branch. Someone on my discord was able to use it, there was actually two options for the N32 chip when selected. I am going to be looking into this shortly. Is the Stas N32 firmware still only the .10 branch ?
@@PrintsLeo3D Yes, Stas N32 is still only on 0.10, that was the main reason why testing the 0.11 from klipper repo. None of the temperatures was reported with the official klipper firmware so i reverted back for now with the Stas 0.10 version again. Could be that i need to do anything else, but i havn´t checked if that is the case or not. In my case it is an Aquila S2.
Very interesting information! Thanks Rickard! I did not know this, and it's great to learn because I know some people have had similar issues this may help clear up. Hopefully they can get an N32 version pushed to the main branch soonas 0.11 has some great features (as you know).
A really informative video. I have a N32 Aquila that I'd like to turn into a high-quality miniature printer. Is there any benefits to using a Pi over something like a Creality Sonic Pad? It would seem like a Sonic Pad would make this process slightly easier.
It would definitely seem like that lol unfortunately the problem with 3rd party companies using Klipper firmware is they never use it properly or give you untethered access. Also, they curate the devices they sell to their machines, so if it's not a Creality device you're using it's an uphill battle. So you'll end up getting a very sloppy version of Klipper that is hard to use and will likely frustrate you. If you did want to use a 3rd party device I would recommend the BigTreeTech Pad 7. It allows much easier and more complete access to Klipper and will ultimately give you a better experience. Alternatively you could use any device that runs Linux, it doesn't need to be a pi. A lot of people are using older laptops or even tv boxs (like the Inovato Quadra) to run Klipper with ease. Whichever way you go good luck! I would strongly suggest against the Creality Pad.
Hi Leo, great video. I was hesitant to install Klipper but after watching your video, went ahead and installed it. the only problem I am experiencing is when I do my first bed leveling the probe (CR Touch) sits outside of the print bed and the hot end smashes the plate I copied the configuration example for the Aquila BL touch sprite in the fluidd config file. Thank You
George, I'm happy this have you the extra push to install Klipper! It's really an awesome experience once you get passed the learning curve. I have an additional video that is bl touch specific that can probably help you out with your current error. I would give that video a shot and see if it helps! If not let me know, and we can diagnose it .
Glad this was helpful. Its hard getting all the correct info in one spot so I can understand if another tutorial didn't work out for you. I try my best even if I don't always succeed the way I would like. Hearing that this helps is a great boost though, so thank you!
You did a great job with this tutorial! Could you maybe include instructions as to what kind of SD card is suitable for 3D printing? I discovered the extra high speed/capacity card I had was not a good choice for this application.
Zane, thanks so much for the kind words!! That's a great idea for some additional information, probably something I could add to my website as well. I have gone as low as running some of my pi zeroes on the 8gb card that came with my printer. At this point I would recommend a minimum of 16gn and probably a high end of about 32gb. I'll get some more detailed info for you and let you know!!
This is a great video, very educational. I do have a question though. i have the Aquila s2 pro that comes with a sensor and not a probe and has the n32 chip. Will this work for my printer as it is now or will I need to switch to a probe?
Hey Toad! Klipper can use just about any sort of bed probe. Bl touch, inductive, proximity, KlackEnder, klicky, Euclid, etc the only difference between them all is how they will be defined in printer.cfg the bl touch would be defined under the heading [bl_touch] and the other probes would be defined under the section [probe] but for all intents and purposes they are basically the same.
For Aquila X3 users, to get the Induction Probe to read properly replace the "[bltouch] section with: [probe] pin: ^PB0 z_offset: 0.0 #this will get calculated and commented out after calibration
You're welcome! Thanks for watching, it's a long video so even if you watched only some chunks I appreciate it! Hope this helps, and if you decide to go with Klipper and need more assistance let me know.
Does the Pi Zero have enough power to run Klipper? Or will I nee the Pi Zero 2W? Just trying to find a very economical way to get Klipper up and running on my Aquila. Thank You for the great video!
Pi zero has more than enough power to run Klipper, but you'll be limited in some of the services you can take advantage of. For instance running a webcam (beadies maybe a pi cam) is going to not be an option. You'll also need to use a front end like Fluidd or Mainsail as opposed to Octoprint because if it's processing needs. If you're looking to just get up and going then the pi zero is a nice compact option. What I have been recommending is the Inovato Quadra. It's about $35, you'll need to buy a small USB extender and a wifi dongle to make it work comfortably (adds another $20 maybe). That has more than enough processing power to run two printers and webcams. I have a video on that device if you're interested.
@@PrintsLeo3D I purchased the Pi Zero W today and the Trianglelab USB adxl345 Accelerometer. I blame you entirely for getting me to go down this rabbit hole...LOL I have a G32 Aquila running a CR Touch... do I need to do anything special or just follow your instructions? Thanks!!!!!!!!!!
This rabbit hole is deeeeeep lol 😆 shouldn't need a thing specialz juat follow my videos and you should be good. Just take extra special care when creating the firmware image for the G32 , pause the video when I say "this is the setup for a G32" and make sure you copy everything identically! Good luck !
These shelves are from Costco and made by a company called Whalen. They don't always have these style of shelves in stock a lot of time the shelf itself is made of rods with large gaps between them. Those shelves are actually a little more heavy duty while the shelves I'm using can sway a little if you have a few bed slinging printers going on them. That being said I've been using them for a few years now and j think they're terrific as long as you know they aren't super heavy and solid and they may move from time to time.
Hey i know that this is an old video but I was looking for some help. I'm at the part of installing klipper with KIAUH but it is stuck. In the video you mentioned that it took 17 minutes but mine has been stuck at the line "unpacking libnewlib-arm-none-eabi (3.3.0-1.3)..." for the last 45 minutes or so. Have I done something wrong? How can I get around this? Any help is appreciated.
@@PrintsLeo3D I'm using a RPi zero 2 w and I am doing this on a Windows laptop. I know that the RPi is not overheating or anything and it has power and all that. I can't think of anything that would cause this. It is a brand new pi, literally opened the amazon package 4 hour ago. Edit: also it still hasn't made any progress after 2 hours
@@PrintsLeo3D Is it possible for me to stop it and just start over? I don't want to unplug it or close the program and damage it in the same sense that you don't just pull a sd/usb out of a computer without ejecting it. Is there a way for me to stop it without damaging the system?
Hey Leo. I've been running into some issues that I've been trying to troubleshoot the last few days. I followed your videos on installing klipper on my h32, setting up bl touch, and pressure advance calibration. All seem fine. I've always used cura so I was pretty familiar with that. Like your tutorials, all settings start print and end print in the print config. I turned off coasting, acceleration and jerk control in cura or made sure that they were disabled. I sliced the same file one with cura and other with prusa. The prints don't come out the same. Prusa prints fine with it being to scale of model with dimensions. However cura, it prints wider and squished. Circles are more oval too. However this doesn't occur when I sliced it with prusa. Tension on my belts are fine. I used both slicers to see what was the difference or what was causing it. I much prefer cura over prusa for various reasons. I had relative extrusion disabled and enabled in cura. Same result. I don't have absolute mode in my print config.
Hmm that's kind of a weird one. There's a lot going on here, so I'll try and cover a few bases. Whenever moving from one slicer to another non-derived slicer the 'base' settings will usually vary. When I say 'non-derived' I mean two completely separate slicers, which is the case you are running into. For instance slic3r, prusa, and orca slicer are all derivatives of one another and will likely have similar base settings. While Cura is it's own creation and will behave differently. One thing I am curious about is your Print_Start macro. With Cura if you are not passing any heating variables to the start macro it's ok, as Cura will notice that and add in some heating gcode. Prusa on the other hand, will not do that. So I am just curious what your Start_Print macro looks like and how it's set up in each of the slicers. The deformation you are referring to seem like what we would normally see when one of the axes' stepper motor rotation distances are off. Most often you'd see this with people using Marlin, they would print an XYZ cube and it would be half the size. That's because the rotation distance (esteps in marlin) are not correct and the z motor is not moving the correct amount. That's not something that is usually set or affected within the slicer though. You said you're familiar with Cura so is this something that just started happening? Is it only since the move from Marlin to Klipper? Let me know and hopefully we can narrow this down. To be honest, right now what I would start leaning to recommend is the move to Orca Slicer. It's a derivative of PrusaSlicer and it's got a lot of really nice tools for our Klipper enabled 3d printers. This may be the time to make the move, but it has to be something you are comfortable and ready to do.
hi i just followed this video but i am getting an error that says Printer is not ready The klippy host software is attempting to connect. Please retry in a few moments. please help
@@PrintsLeo3D yes and that is what i put in the printer.cfg though im not sure if it being /dev/serial/by-id/usb-1a86_USB2.0-Serial-if00-port0 is a problem?
Connor sorry, sometimes UA-cam doesn't notify me when there are replies to comments I already replied to. The reply you got with that command was likely correct for your board. When you input it you probably restarted the firmware , which saves the info and then uses it, which then for Klipper up and running. Glad you're off and away now !
Hi Leo, great video. Although I use an Ender 3 with a different mainboard I was able to get everything running on my printer. Great job on this! When I am slicing several different models in Cura, I am not seeing much of a time improvement. I have increased the travel speed, acceleration, min layer time, and jerk settings. What am I missing?
Steve, even with the increase in speeds it's likely Cura won't give you accurate time estimates. I think there might be a module you can download from the marketplace to get more accurate times. That being said you should still be seeing an increase in print times I hope 😃
@@PrintsLeo3D I printed a few small things things with faster speeds and seemed to be 10-15% faster. I still need to tweak some settings to get the most out of it. One other note, using slightly faster settings than what I was using with Marlin, I printed my best Benchy yet! Its almost perfect.
Yea it's crazy how the quality doesn't dip but increases with Klipper even with the higher speeds! With my Enders I start at 100mm/s on the walls (80mm/s outer wall) and I keep acceleration to 3000mm2/s Also import to note that input shaping and pressure advance are the keys to maintaining high speeds/accelerations while keeping awesome print quality
I wish I had seen this video a while back, before I started any part of Klipper install. I eventually latched on to KIAUH which was a fantastic boon. I am however confused, given in the first parts of the video you talk about how the Pi does the donkey work of all the heavier math and how this passes info on to the marlin(if I understood that bit, maybe not), to print out a model. However you then go into detail about flashing the firmware onto something. That lost me entirely given the earlier statements of how Klipper works. Could you please clarify for me(being confused) what you are flashing, given I thought it was the pi that sent the commands direct to the Marlin firmware. My printer is under warranty so I don't want to jeopardise that.
Michael I'd love to clarify. First thing would be that Klipper firmware and Marlin firmware are two different entities, and they do not work together. With Marlin firmware (most of stock printers run this) the printers mainboard does all the work. Computational work, maintains heat, moves steppers, etc. With Klipper firmware a more powerful processor will do all the computational work, and then just send commands to the printers mainboard for them to carry out. This lightens the load that the printers mainboard needs to carry. For this to happen the Klipper host device (a raspberry pi, Linux computer, etc) need to be flashed with Klipper firmware AND the 3d printers mainboard needs to be flashed with Klipper firmware. This way the mainboard and the host device can communicate because they are both using Klipper. So you'll be performing two separate flashes, one to flash Klipper onto whatever host device you use (I use a pi in this video), and then a second to flash Klipper onto the mainboard of your 3d printer. I hope this clarifies it, if not just ask me anymore questions I'm happy to help.
Thanks that explains it much better and is understandable to me now. I guess I will be buying a new driver board to perform this so that the warranty is not invalidated. I would probably opt for the Manta M4P given it can piggy back a Pi. Loved the video and it should be a go to for anyone who needs to learn how to do this. 💗
Thanks Michael I appreciate the kind words, and I'm glad I can help! Usually whatever mainboard you have can be flashed back to stock firmware (Marlin). That may alleviate the need to buy a new board if you're worried.
@@PrintsLeo3D Thanks again, that would be useful except I don't know how to backup the present Marlin Firmware on the board. Given the printer is Aquilla X2 based it has a heated bed and bl touch along with a modified Marlin firmware.
Well if you wanted to explore it more let me know. Usually Voxelab will offer current firmwares for their printers on their official website. I've also made some customized firmwares for the Aquilas myself.
Yea that's a really good idea. A lot of it can be done through your front end of choice (Fluidd or Mainsail) but there can be some edge cases and other issues that would be worthwhile to cover. Great idea!
Hey Man! I know it's been a while since you posted this video, but do you know how much of this would be the same for an X2, and what I might need to change?
The X2 is basically the same exact printer I worked on in this video. The only added a few extra bells and whistles to it, but the bones and hardware are mostly the same. The most important part is to double check what chip you have in your printer, because that would be the only difference. So double check that info and follow this video, you should be fine . If you run into any issues join the Discord and we can help.
Nothing really has changed, except you might *not* have to change repositories for the N32 chip, as I believed Stas' branch has been pulled to the main Klipper branch. As for using a PC everything is identical with the exception of the operating system you're going to use of course. My people I speak to use Linux Mint as the PC operating system of choice.
that ip address you entered when connected to your printer for fluid, i don't recall you ever using that one during your tutorial. You said, "Enter the ip address that we've been using." I have a h32 and was following along up until then. I went over to your website for your written instructions concerning connecting to the printer with setup and that's seems vastly different for the video at that point. I'm pretty confused about that part. So I'm stuck.
The ip address I'm using in this video is going to be from what you'll be using. Whatever up address you used while setting up the pi (the one used to SSH. For instance) will be the same ip address that you enter into the address bar of your webpage to access the front end. Let me know if this helps.
I was able to figure that out after I ate dinner. I was following your video pretty closely. When you set your pi up wirelessly in the beginning and the one you used, it wasn't the same when you put into your browser ending....242.41 vs .....1.154. So I had found that part confusing along with you literally saying to input the ip address that was being used throughout the video 😊 (wasnt a static ip i guess and the tutorial wasnt done all at once). I thought i missed something. I skipped the parts that weren't applicable to H32. Anyway, when i got back, logically it just made sense it was just inputting my pi's ip address into the browser to access fluid so I was able to resolve that. Maybe for a few people, this might be worth noting as this was my 1st time using a pi with my printer, so it was all new to me. I later had issue with getting the serial id. I kept getting an error message when running the command "ls /dev...". I didn't connect my usb cord between my pi and printer initially. I reran the ls command and it gave me the information. I also rebooted my pi prior. One or the other made it work, I'm suspecting not having the usb connected. I had to make sure that my usb cable that I was using was a data cable and not just a charging cable as a sanity check. Another issue was updating the firmware. I formatted my card as explained with defaults. My 1st micro sd card wouldn't work as the printer booted normally. I tried another micro sd card, prepared it in the same manner, and it worked. Thanks for responding quickly as I didn't expect that. More importantly, thanks for taking the time to provide information in the manner that you do, and it definitely shows the passion that you have in willing to share. This information here has motivated me to use my printer more 😊
I had a feeling you were gonna get there on your own with this one. I know how tough it can be trying to get all these different systems up and running and working together, but I promise once the ship is in the water it gets a lot easier to steer lol For this video I think I had to do some of the setup parts of the tutorial while I wasn't home so I was using my phone's hotspot. Then at some point I was able to get home and finish the thing. That's probably why I have two ip addresses. You're right about the cable. It needs to be plugged in for the pi to give a return address, and it does need to be capable of data transfer. So smart on you for checking on that feature. The SD card issue is unfortunately something we have to deal with. Some of these boards don't like smaller cards, some of them won't work with larger cards. There's never a way to tell and it can be a huge headache. Apart from that we then have to make sure everything is properly formatted and the files are all named correctly. So this process can handcuff some people. That being said you're now over the hump, and it all should be downhill from here. They'll be some growing pains getting used to the new front end but ultimately will be well worth it. If you have more issues as you navigate Klipper I emplore you to join the Discord. Just about everyone there now runs Klipper so it's full of really helpful people. I'm happy to help and glad you're getting more time on your printer. High praise and I appreciate it.
Yes absolutely can! Steve gotthardt created a repository that worked for that chip, but I believe that the main Klipper branch have now included it! I could be wrong but I'll double check. Either way if you follow the steps of I go over in this video for the H32, it will bring you to Steve's repo and it all should be updated from there ! If you need help let me know
Hi Leo, thanks again for another great video!!!, recently I bought a Creality Sonic Pad, I'll may be using it for my Anycubic Vyper, but I have a G32 Aquila with BLTouch and Marlin and plan in using it for the Aquila instead, can you provide insight on how can we do it? Thanks
Hey Carlos, while I don't have any direct experience with the sonic pad a few people I've spoken to have, and it isn't the best 'out of the box' Klipper answer out there for the Aquilas. You're on luck though because of all the chips the G32 is the one that should be the easiest to use with the Sonic Pad. The pad will have you create the firmware image to flash onto your printer, and for the G32 chip you can set it up right from the pad (exactly as I did in this video, make sure not to skip the 28kib bootloader). After that the pad should walk you through the remaining steps. The printer.cfg is the document Klipper used to operate your printer , you'll need a boiler plate copy for the Aquila, and I have it on my website for you to copy and paste. If you have any troubles while you're going through the process let me know!
@@PrintsLeo3D What printer.cfg file I should use? (I have a G32 chip running Marlin and BL Touch, and all metal dual gear extruder), Do I have to modify the .cfg file?.
Carlos I have a vanilla .cfg on my website you can use (under the Klipper section). I also have some macros you can use for the bl touch. You'll need to add 3 sections for the bl touch : [bltouch] , [bed_mesh], and [safe_z_home] all of which you can get on my website!
Hi. Great video. I seem to have an obscure board in my Aquila D1. I need to find the pin mapping for my board which is labeled as "FFP0261" inside of the printer. Most of the pin mappings that I can find online, are for a different board inside of the Aquila D1. Any suggestions? I keep getting and ADC error, so I think my pin mapping is wrong using the example printer.cfg's that I can find. Any help is appreciated.
Unfortunately I don't own a D1 and if the board is not public it will be very hard to find a pin mapping. Companies like BigTreeTech provide all the pin malpings we need to make this process easy, but private companies , like Voxelab, will rarely release this information. You can try emailing the company or seeing if anyone else has mapped the pins to a board similar to this.
@@PrintsLeo3D Thank you sir. I have done both-- I've just emailed BTT for help getting their Klipper Pad 7" to work with the Voxel D1, and I've ordered a new BTT SK3 Mini controller board, just in case to replace this very obscure controller. The Aquila D1 with all its linear rails is a beast of a hardware build, that just begs for Klipper. Keep up the good work please.
@@PrintsLeo3D I had a super quick response from Alexey and he sent a bare bones printer.cfg for my Aquila D1 with the N32G455 on the FFP0261 mainboard. I'd like to share it with you, if you'd like to add it to your collection.
My Aquila D1 is finally running with Klipper using a BTT 7" Pad. It is spectacular with the D1's structure and its linear rails. It was a major challenge, but your work and comments here steered me in the correct direction.
I'm working on loading Klipper on my S2, I've got the Klipper image flashed to the Raspberry, and the firmware loaded on the printer. I'm running into an issue now where they are not talking to each other, I'm also seeing mcu unable to connect, does this mean there is something wrong with my PI? thanks!
Hey Ben! Usually when they are not 'talking' to each other that's indicative of a bad flash. Not always the case but in my experience that's usually where it goes wrong. When you say they aren't talking I am going to assume you ran the ls /dev/serial/by-id/* and got no results. I would go back to my video and find the portion where I show the flash image for each chip. A lot of people miss the correct bootloader section (I think it's 28KiB off the top of my head). If you're still having issues you can go to my website and download an image for the chip you have and see if that works. Those are known good firmware images for Klipper, so if that doesn't work than maybe you have a bad cable or something similar.
I followed thia guide on my Aquila X2 and my extruder is retracting instead of extruding. Plus it just sits way to long before the start if the print job.. Any help would be awesome. Also if it helps I have a micro swiss direct drive installed and not the stock head.
Thanks for leaving a comment here and also reaching out through email. being able to see read through your printer.cfg always helps diagnose issues like this. Glad you were able to get it working properly and you can start to enjoy Klipper! For anyone reading this that may have a similar issue, it came down to just inverting the dir_pin of the extruder(adding or subtracting an '!' before the pin). After a few attempt and some Saving and Restarting it took care of itself!
will this work on an aquila c2 with h32 chip? the screen is not a color screen? also, if i try this on my other aquila with the color screen what happens on that? does the control screen become unusable? i did notice that is did not look like it was working. let me know. thanks
It's been a little bit since I have dealt with the Aquila C2s but if memory serves me correct this will not work with that printer. It doesn't have anything to do with the screen but the ability of the mainboard. Again it's been a while but I don't remember the C2 being Klipper-capable. As for a normal Aquila's screen, yes it does become unusable after moving to Klipper. You will be controlling your printer from a webpage (whether on your phone or computer) and the screen will no longer operate (as it works based on an encoder which Klipper does not use). It may seem like a downgrade at first, but trust me everyone that has made this move and felt that way has quickly told me that it becomes a non issue once they start using the webpage for communication. Hope this helps and good luck!
@@PrintsLeo3D I actually just got Klipper installed on my C2 printer. I followed along with the tutorial with a couple of minor differences. There's a klipper_C2.bin file and a link to C2 config files in SteveGotthardt's repository that you have linked. So I used those instead and it worked with no issues. Thank you so much for the tutorial btw! I'm very excited about the browser dashboard and calibrating this thing into a clean printing speed demon.
hello nice video but on my voxelab aquila x2 h32 chip it said klipper failed to install and im stuck i have no idea what to do next please assist thanks
I'm trying to get the firmware image with KIAUH for an n32 chip, but there is no N32G45x option, instead after selecting the micro controller architecture as stm32, I get the N32G455 and N32G452 chip models. Should I select one of them, and if so does it make a difference which one?
Thays a great questions and too be honest I don't really know off the top of my head. I would say the safest bet would be to visually inspect the chip that's in your printer and it should have the correct chip labelling stamped onto it. That way you can be 100% which one it is. That's the way I would handle it 👍
hi Leo , i install debian on my orangepi zero3 , i install klipper , moonraker, mainsail with kiauh , i flash klippero1.bin with your share link (because my machine is voxelab x2 ). everything ok . but i have a issues..when i used the command " ls /dev/serial/by-id/* " No such file or directory , i try with kiauh with number 4 then 5 to get mcu id ,so it have massage "no mcu found " .what can i do to connect my voxelab x2 help please .
I would double check by trying another USB cable. Also might be worth it to try and reflash the firmware. Of course because there are 3 different chips in these Aquila you need to make sure you flashing the correct one for your chip. Whenever you don't detect an MCU it is usually evidence that the printer itself was no flashed properly. You can also try reformatting the SD card you used to flash, or use another one entirely . Format is FAT32, 4096 bytes.
Im loving your videos, learning tons (my sprite it's on its way), I'm totally null on programing and over here on Mexico raspberries pi is way to expensive, I do have an old android phone, would you ever do a video tutorial for using an old android phone instead of the raspberry?
Hey, thanks for the kind words and I'm glad you're liking these videos! Running Klipper on an Android device is unfortunately not as straightforward as you would think. However there is another great option and that's any device that can run Linux, like a laptop or the Inovato Quadra! I have a video on the Quadra but I'm not sure if they ship to Mexico. The alternate option to that is a T95 TV box, which is basically the same thing as a Quadra just unbranded. The install for that is so straightforward if you're interested here's the video link: ua-cam.com/video/RfMvLEUjkB0/v-deo.html If you have any other questions or need help with the install let me know !!
@@PrintsLeo3D yeah I saw it, sadly they do not ship to Mexico, I found the PI4B CB1 from btt it might be an alternative, but as said, null on programing I am haha
I have never ran into this issue while using KIAUH. What you can try is issuing a ' make clean' and see fi that works. Right when you SSH into your device first run a command to enter the Klipper folder: cd klipper the terminal line should now end in '/klipper:' which shows you're in the correct folder. now run the following line: make clean this should clean up any existing build parameters that were left over. If for some reason you're still having an issue let me know I can flash some firmware and send it to you just to get you started!
im using a linux pc instead of a pi and i have an n32 chip, I can't find the klipper repo .txt file in the kiauh file. Does anyone have any ideas what i should do
I took Your advice and decided to go with a rasp pi instead of the sonic pad. Do you have any videos on doing this on the pi on the Aquila x2 with the sprite pro/cr touch set up ?
This video is going to be sufficient for you! Installing Klipper is basically two seperate installations. Flashing Klipper onto an MCU (a pi in your example which this video uses). Then flashing Klipper onto the mainboard of your printer (and this video covers that as well -all chips N32/H32/G32). The specifics of your printer (hot end, probe or no probe, bed size, max temp) are all handled by a single file that you have access through the Klipper webpage. That file is called the printer.cfg I have example configurations (known as configs or .cfgs) for the Aquila (which can be used for the X2) which include printers with bed probes, and even the Sprite extruder. It's all houses on my website which I should have linked in the description. If I didn't it's PrintsLeo3D.com
Morning Leo, I’ve been banging my head against the wall for two straight days. I follow your klipper/AquilaX2 step by step and as soon as I get to the build only section to build the fw I do not get the yellow pop up window… I just get another green CLI command line with blue~/ kiauh$. I have been unable to go any further than this. Since I have the same exact printer as you down to the Sprite extruder I downloaded your firmware file and tried flashing that. When I get everything supposedly to a place where everything is good and printer connected to the pi I am left with “klippy not connected”. Frustrating as heck lol. Was up to 3am last night and back at it at 7am today till now and cannot get any further. I’ve reformatted and recompiled everything 5 times and no bueno. I am not sure what I am missing but I am going to figure this out if it takes all weekend. This will not beat me. 💪 😑
Why don't you send me an email and we can walk you through with some screenshots. Better yet, if you want, join the Discord and start a new Help thread. This way more minds than just mine can get on top of this 🧠 good luck
Hey Amir! This Aquila does have an aftermarket hot end, it's actually the Sprite Pro Extruder from Creality. During calibration I found the max volumetric flow rate was around 14mm3/s. The stock MK8 hot end of the Aquila is likely somewhere just shy of that (10-12mm3/s maybe) which is still pretty good output. That all being said the speeds I am reaching in this video should be attainable with an Aquila with a stock hot end setup. I don't have any stock hot ends on my printers anymore so I can't say for certain but I would imagine you can at least reach speeds of 100mm/s, as that's what my Aquila S2 maxes out at with it's stock(proprietary) hot end. For instance if the stock hot end had a flow rate of 10mm3/s, and you were printing at a layer height of 0.2 with a line width of 0.4 (0.4 stock nozzle) you could theoretically max out at a speed of 125mm/s (10 / 0.2 / 0.4 = 125mm/s) Obviously there are a lot of variables that determine your max speeds so this is a rough estimate!
@@PrintsLeo3D thanks for the detailed response, really appreciate it. I'm going to have to read it a few times , really appreciate you taking the time to respond.
The default is 8KiB, and I believe that because there's a few bootloader's available through Klipper for various boards so they give you that option. For the Aquila setup, as well as some of the Enders, the bootloader should be set to 28KiB. I appreciate you getting to that point in the video, whether you used the chapter markers or watch it through. Thanks you!
According to my results it shouldn't. This is the setting I used to flash Klipper on both my Aquilas (stm32 and N32). My STM32 aquila flashed successfully back to Marlin yesterday, I can't remember when I reflashed Marlin to my N32 but I believe I did. If you want me to double check I will.
Damn you! 😉. I've read about Kipper a while back but...I have so many projects I'm working on! I didn't want get sidetracked on learning Klipper and flashing the Aquila. Already using octoprint which I'm really happy with but... Better prints..and I suspect I have vibration issue.... So tempting! Also just watched 3DprintSOSs unbox and build of the new Aquila D1 and.... It looks saaaaweeeet! I got extra Pi boards. I bought up some over the summer, mostly from Europe for just this reason. That and who knows what tragedy or issue the moronic leaders of our ruling class are gonna manufature next! 😉
Lol Klipper is a black hole, you've been warned! Klipper can be a journey that's for sure, and if you have the pis then I don't think you have many excuses. It can take some getting used to at first, there's always going to be growing pains, but once you get it dialed in it's really a night and day difference. You can also flash Marlin back as easily as you flashed it the first time. If you have Octoprint you know how awesome it is to be in remote control of your printer, and with Klipper you get all that plus more! You'll lose some of the Octoprint plugins you may have grown fond of, but as far as I know there's nothing on Octoprint you can't make work on Klipper too, it's so versatile. I don't know anything about the D1 yet, but give me a good ole Aquila and some Klipper and I promise you'll be happy with the end results! Good luck if you decide to join the adventure, if not it will always be there waiting for you. If you need any help just drop me a message. Keep on printing !
I would try and use an alternate SD card, or perhaps reflash whichever one you tried to use(fat32/4096bytes). My S2 is also an N32 chip and it worked perfectly well. The only alterations you'll need to make us within the printer.cfg file is to bring the max temp up to 300c, which is as easy as editing the number within [extruder] after the Max_temperature parameter and writing in 300!
@@PrintsLeo3D I sorted it. bad USB cable. It runs like a dream now. thanks for the video. I followed most of the instructions. There is now a working Hc32.cfg file which I used instead of the N32. cheers
I haven't done a Klipperscreen install yet, but when I do I will probably be installing it through KIAUH, just how I installed the other components of Klipper. I would start there, go to the Klipperscreen docs, and then search for anything specific to that touchscreen. Also another avenue of information might be the Discord. There's a few people in there that have set up Klipperscreen and they may be able to offer some advice. The link to the Discord is in the description. Good luck and let me know how it goes !
Leo, do you know if this will work if I'm using a Wyse thin client rather than a pi? I was watching another video and I installed klipper but didn't notice that the N32's use diff repositories. i dont know how id change the repo with winSCP since the Wyse thin clients are basically a mini pc
Ruben, I'm not sure how to access the directories on the thin clien, but I'm sure there must be some way to do it. Either way, I got you covered! I have a created firmware image for the N32 chip and it's available on my website. Created the image doesn't have to be done on your device, it just usually is because the process is all done together. The only caveat is my image is from a Klipper version about 6 months ago. I don't think that should give you any issues, if it does give you some let me know and I'll create a new image for you with the latest version of Klipper. www.printsleo3d.com/klipperaquila
@@PrintsLeo3D wait quick question then, if I flash the N32 firmware can I still use the printer without using klipper until I get the repo working or will it not work until I get klipper connected.
Yes, and it's simple! All you need to do is reflash Marlin onto the Aquila and you're good to go. Of course you need to flash firmware that's compatible with your board/chip, but going back and forth is no problem.
I keep getting this random error. I have installed this on two Voxelab S2 printers. Both with have this issue. Any idea what is causing this ? [Lost communication with MCU 'mcu' Once the underlying issue is corrected, use the "FIRMWARE_RESTART" command to reset the firmware, reload the config, and restart the host software. Printer is shutdown]
Jeff was Klipper running for you effectively and this happened or you haven't been able to get it running yet? Are both printers sharing the same MCU? What MCU are you using (pi, Quadra, PC, etc)?
@@PrintsLeo3D Both printers have separate Raspberry Pi Zero W. Both motherboards in the printers are the H32 boards. Klipper was running. The last 3 prints I have tried all failed. Tried new power supply and different cable.
Are you running any other services? Like a webcam service or something similar. I've never had an issue with my Pi zeros not having enough power, but maybe it's a possibility if you bare overloading it ?
Yes, absolutely! I have Klipper running on my S2. Direct drive considerations are usually handled in the slicer (retraction distance and such). So you shouldn't have any problems with it. If you have questions with the process or setup let me know.
The bl touch S2 should all be good to go, no need to add anything. The one thing you'll want to do is double check the X and Y offsets for the bl touch are correct and then adjust them if necessary. The adjustment is done through the menu systems, and if you need to know how to measure it I have a UA-cam short that shows a very easy and accurate way
Hi i just install klipper on my Aquila x2 n32 but i cant get my bed or extruder to heat up, are the pin right or do you know what they should be for my n32 or the sensor pin number everything else is working but wont heat up many thanks if you can help. Plus am trying to use a sonic pad with my printer, so which bin file is best to use off the web site or the one the sonic pad makes up is that the reason why the printer.cfg is not working right.
Hi Wayne! I'm sorry for the slow response but I was on vacation and had no cell service. So if you were to use my example printer.cfg than all the pins would be correct for your (N32) board. As far as how the sonic pad works, I am not sure exactly how the flash and .cfg get generated but I would go with the .cfg I provide as I can confirm it works. This may be easier if I see the printer.cfg so going forward email may be a better option for help(printsleo3d@gmail.com).
Hi many thanks for getting back to me. I managed to get it working but if keep losing connection to the sonic pad and the web page so i dont know if its the sonic pad not happy with my printer. You should have a go its a right pain and you cant get any help from the makers of the pad or the printer. Thanks again
All 3 sometimes its not very stable, plus it stops half way through printing and it wont save the printer profile so i got to go through the setup part every time. And you cant do a auto bed level on the pad its say there no data but you can do one on the web page side.
Yikes. Did you use the pad to flash your mainboard? It's possible that flash was not correct, especially considering the N43 requires a particular repository.
Unfortunately I'm not familiar with the nonopi K2, so I can't really say OS wise. If you can figure out which OS to flash every other step should be identical. Hopefully you figure it out and let me know if you do so I can add it to the list!
Couldn't make it run anything only ubuntu core but i duno if i can install klipper in ubuntu core this nanopi k2 board is so powerful but it actually suck
Hey man , im trying to do the same thing here with the OrangePi Zero 2 on my Aquila S2 N32 but right near the end i have a problem with the MCU error and the thing is that i already tried everything here but there doesnt seem to be a /dev/serial/ .... etc folder for me so when i try to do the ls /dev/serial/by-id/* command i cant find anything . i dont know what to do . any iideas ?
Lol Peter! That's how those things go sometimes. It's possible one of the services needed to restart (or boot) in order to get everything running. I'm glad you decided to make the transition to Klipper, and if you need any help let me know.
@@PrintsLeo3D i think it was winSCP , for some reason i didn't turn it on while trying the MCU step and thus couldn't find the folder , ohh well , thanks man absolutely , klipper rocks man , i just gotta get the probe into the cfg and should be good to go. 😉👍
I have an Aquila X2 H32, Neither 01 or C2 are working for me. The screen never glitches, but the raspi doesnt see the printer on serial and the old firmware is gone.
Are you nesting the file in a folder labelled 'firmware' , with nothing else on the SD card? Might be worth reformatting the SD card (fat32/ 4096 bytes). Can always try a different SD card if you have one. There's also a plain ole klipper.bin file available on the GitHub you can always give a shot.
@@PrintsLeo3D *think* i might be further now.. I can see the device connecting in dmesg, but the {ls /dev/serial/by-id/*} command doesn't work - no such directory.
@@superiorhydrogen4395 oh yes, ended up needing the 01 firmware, and a fresh install of Raspbian. If you need more help, let me know. I went through a lot of stuff trying to figure it out.
If you're following this on a Mac, do yourself a favor and press CMD+SHIFT+. to show hidden files and delete them before pluggin the sd card into the Aquilla for firmware flashing. I spend and hour or more trying to figure out what I was doing wrong, and why the Aquilla wasn't flashing the firmware but instead showing the normal main menu.
Yo, Ryan!!!! This is amazing info !!!! I run into a lot of users who have issues using MACs when flashing and I have to imagine this is the reason. I am going to take this info and add it to the description and just keep it in mind going forward. Awesome tip, thanks for dropping in!
Hey there Leo, im having an issue here when doing the serial error fix. Im getting this, Pi@KlipperPi:~ $ ls /dev/serial/by-id/* ls: cannot access '/dev/serial/by-id/*': No such file or directory Any advice? Thanks
This can be the result of a few things. Usually it's a bad flash of the mainboard, but it can also be a result of a bad USB cable. I'd recheck the image you used to flash your printer. What type of printer are you running ?
Ok, so I tried this again today, (was testing marlin) found an estep vaule that worked(95steps/mm) then converted it. got 33.68421052631579. Don't know why it is so different to yours of the same printer. Did you have custom extruder?(Edit: never mind, it is ok.)
Yea you're absolutely right, I have a dual gear extruder on mine, so my base E-steps we're somewhere in the 400s! Glad you figured it out, I mean you were right the whole time, it was me who was confusing lol!
Hi @Leo, but once I installed klipper for the N32 chip, I no longer receive updates!! Klipper has arrived at 0.11, enabling the exclusion of objects, but on v0.10.0-802-g09612f8c which is the latest in the repo you recommended, it never downloads the new version for me? How can I do??
If you used KIAUH to install Klipper (and it's other parts) you should be able to update Klipper directly from that menu. I was able to upgrade my Aquila to the newest firmwares to take advantage of exclude_object. Let me know if you need more guidance in order to do that.
Hi Leo, I installed klipper using kiauh, and I set as a repo what you indicated in the video (custom repo for N32 chip), and klipper works great. Now, though, I need the exclude objects function, but if I check the updates, I can't find the 0.11 but it's still at the one indicated in my previous message. How do I force the update, how did you do it?
@@PrintsLeo3D Hi Leo, I run the update both from the front-end and from KIAUH (I also updated the kiauh script), but both always give me the same version of Klipper
Thanks for this Video, got some questions for you. I have an Aquila Pro, the default firmware is garbage. The printer stops printing in the middle of a print and doesn't tell you why. The mainboard is a different from the Aquila X2 board. The pro has an N32 chip on it, it is a Nation N32G455 to be exact. There is no usb on this board. The usb is on the board for the screen. A mainboard replacement on the Voxelab website only shows the mainboard for the screen. If you download the firmware from the Voxelab website it is a handful of files and the way to manually update the firmware is to have all these files on the root of the USB stick (no microSD anywhere). File types include tar.gz, tar.xz and a couple of disc images. Anyways I'd like to try and put klipper on this thing. I have an SKR mini e3 v3 to use but I'd like to give this a shot if I can. The config for the N32 chip says the chip is an N32G452, so I'm guessing this won't work. What are your thoughts?
Hey sorry I was slow to respond, I wanted to try and gather as much info as I could about the Aquila Pro so I could try and help you. I don't own an Aquila Pro so I have no first hand knowledge but I have been told the firmware is 'proprietary', or at the very least, is unable to be manipulated by the end user. I know that was one of the gripes when it was released. For that reason I could not confidently say if this would be able to readily flash Klipper. Both chips are Nations Tech, and from the manufacturer documentation I don't see all that mich difference (that being said I am not sure exactly what I would be looking for), but if there are differences between them could be game breaking. If I had a Pro I would give it a shot but I don't know if I'd recommend a hail mary install to see if it works. The SKR mini e3v3 can absolutely handle Klipper, but there's a lot that goes into swapping over to a new mainboard that might give you pause. Some people also have issues with flashing the newer SKR minis, and usually it's do to fining the correct SD card as they can be finicky. If you have any other questions let me know and I'd be happy to help.
@@PrintsLeo3D I've already got two printers with the E3 V3, one with Klipper and one with Marlin that I compiled from scratch. Shouldn't be a problem if I swap out the existing board on the printer. My brother sent me a photo of he X2 replacement board and the N32 chip was the exact same on the Pro so I'll give it a shot and see what happens. The only thing I'm worried about is that the main board of the Pro doesn't have a usb port, the touch screen has that so I assume it is doing it as as pass through. If it doesn't work it's probably going to be because of that. I'll let you know what happens. My only thing I don't know with regards to switching to klipper is the Pro uses a servo and button for auto bed leveling, don't know who to set that up in Klipper.
Oh wow that's great, I didn't know you had some experience with those boards under your belt. I would hope flashing Klipper is the same on both the boards regardless of the USB connection, but it's possible you could run into some sort of file type error. I emailed Voxelab hoping they could answer some questions for me but I haven't heard back yet. If you can find out how that probe is connected to the mainboard you should be able to define a section in the printer.cfg for your servo probe based on the pin numbers
Keep me updated and if you need help along the way let me know. Usually email (printsleo3d@gmail.com) and discord(link in description) are the quickest ways to get to me
have you figured out how to use this display to show the temp and stuff. I know the screen will pretty much be useless except for displaying temps and stuff.
On my Ender 3s with the older led style displays, i have converted them to show temp and such. I have not tried yet with the Aquila display. The difference is that the Aquila display has its own firmware, so I am sure it's not as straight forward as it was with the Enders. I do know some people have found a way to make the screen work in a usable way, but it was a pretty complex procedure. I can find some links if you're interested?
@@PrintsLeo3D Don't sweat it.....I can do some stuff but if it is going to be complicated, I will pass. I will just stick with using my phone. I appreciate it anyways, many thanks.
I am trying to set up a sonic pad with aquila x2 n32 chip. I have tried for a week with no joy. It needs someone wiser than I am to make a video so I can follow it.
Yvonne, tell me about it lol I bought the sonic pad to educate myself in hopes of helping everyone else, but I just never found the time to open it up and get rolling with it :( however I would suggest joint my Discord, there's a link in the description. If you aren't familiar with Discord it's a free app download. It's basically a forum style messenger where people who are interested in the same topics can talk and share ideas. I have a few people on there who own sonic pads and are way more familiar than me, I even think one may may be running an N32 chipped Aquila! As for the firmware, I can compile the correct firmware for you, it's just a matter of flashing it. I don't know how the pad flashes, but like I said others on the discord do! I wish I could help right from here but I think that's the best way! Hope to talk to you there and thanks for watching
for some odd reason my G32 is stuck on the "Voxelab" logo after I flash the firmware and I can't get klipper to connect to the printer from there any help?
The screen is normal, once we flash Klipper onto the Aquila the screen no longer works. As for Klipper not connecting, what error is it showing ? Are you able to reach Fluidd through a web browser ?
@@PrintsLeo3D im getting Printer is not ready The klippy host software is attempting to connect. Please retry in a few moments. even after the serial port fix and yes I can access Fluidd from browser
That certainly sounds like the firmware upload didn't quite take to the printer. First I want to make sure you created the correct firmware image (which would be to use the small asterisks that says giga device as well as other parameters). Would we be able to communicate through email (printsleo3d@gmail.com) or discord (link in description), as it's easier for me to send images to help when solving this error. Discord is better for fast communication but email is fine as well
I'm not sure what the fix was, I get a lot of people who reach out to me during the week so it's hard to keep track. If you're having an issue like this I would do a sanity check on a few things. Make sure the USB cable you're using from the pi to printer is capable of data transfer. Make sure you flashed the correct image for your board (ie double check the chip). When setting up the firmware image make sure you set the bootloader to 28KiB. Let me know if the problem still isn't solved.
Anyone have issues with their thermistor readings? I installed Klipper onto a N32, set my hotend thermsistor type to the one I am using (non-stock HT-NTC 100K clone) in printer.cfg, and left the bed thermistor alone (stock). However, in Fluidd both thermistors hover around 0 degrees and sometimes dip below (which caused MCU stop errors at first until I lowered the minimum to -100). My ambient is closer to 16 to 24 degrees and I verified both read correctly in Marlin... My guess is there might be differences in the ADC amplifier on my particular N32 motherboard? Just dipping my toes into the Klipper pool now, anyone have any ideas?
Figured out the issue. It does look like some later commits broke the ADC logic as I suspected. I went back to git commit 6e8f5a9 in the stas2z/klipper-aquila-n32 repo which is the commit on the aquila-n32 branch right before this video was released. Now temps look correct.
I don't know why I didn't get the original comment notification but I got notified of your reply, so sorry for the late response. I don't think I would have been able to identify this as quickly as you did, but I do remember there being some sort of weirdness (technical term lol) with some of the no stock thermistors but I thought it was taken care of with a previous push. Also, while I don't use the specific thermistor you are using, I remember reading some configurations from other users and they had to set the thermistor up differently. This is from the LDO website as a recommend config outside of the [extruder] section. [thermistor Trianglelab-NTC100K-B3950] temperature1: 25 resistance1: 103180 temperature2: 150 resistance2: 1366.2 temperature3: 250 resistance3: 168.6 Either way I am glad you found the solution and I'll keep this in mind going forward if anyone else runs into a similar issue.
@@PrintsLeo3D Thanks for the reply. I appreciate all the information you are disseminating. Unfortunately, while the Klipper documentation is rich, finding answers to questions on Google yields a lot of people asking questions, and the answer usually being something like "just do the thing you already should know how to do" or "go on Discord". So I highly appreciate videos like the ones you have made and hope you continue making them. I ended up getting everything setup. I wanted to note that all your steps worked great on the repurposed Chromebox that I am running Debian on. Ran into some mcu communication issues because the MicroUSB cable was too long and isn't filtered, but fixed it with a shorter cable. But then at the last minute, I accidentally touched a probably poorly "grounded" chassis of a portable LCD monitor to the heated bed. It went pop, no magic smoke but the printer restarted, and then my bed wouldn't heat up past 25 degrees anymore without crashing the mcu. RIP N32. So I started all over with a spare G32 motherboard I had, and now I have everything setup including pressure advance and resonance compensation. Running into what looks like under-extrusion or cooling issues when bridging top layers, but I think that's nothing I can't handle with some tuning or maybe upgrading to better cooling solution. Also seeing Z artifacts, but I think that's just because I never tuned my layers to the threads on my Z rod or maybe its wobbling a bit. Either way, I should be able to fix it. I have two more Aquilas I plan to Klipperize, but they are heavily modified (Ender Extender for one, Ender BLV kit for the other) and also I'm out of Aquila boards now so they are gonna get SKR Mini E3s. For what it's worth, my hotend thermisistor ended up measuring closest to "NTC 100K MGB18-104F39050L32" and I ended up not needing to set any resistance values!
Awesome stuff! Seems like you are more than equipped to be able to navigate all the twists an turns Klipper might throw your way (well minus a few extra mainboards lol). Like most things finding accurate and thorough information can be hard, also considering how quickly some of this information can change. As for your issue, cooling is certainly something to look at (whether it's the issue at hand or not I couldn't say). If you start finding some of the high ends of speed or accelerations that Klipper can offer you, you'll find cooling to be the one aspect that may hold you back. Good luck going forward with your other printers and I hope it works out! Keep me in the loop !
I have C2, using raspberry pi 3 no wifi module, so using in on cable. i do get half way through the video but when it comes to building firmware new window doesnt show up. anyone help? i just get this [✓ OK] Dependencies already met! make: *** No rule to make target 'clean'. Stop.
Luke, check what mainboard you have . I think the C2 doesn't have a board equipped out of the box to run Klipper. To find out what board you have you'd need to remove the bottom of the electronics cover and check out what is written on the board and chip. You'll want to make sure the power is off while you're doing this.
I know the N32 from my video was it's own fork from Stas. Since this video Kevin has incorporated Stas' N32 branch into the main Klipper repo. If you want to make sure all is working, you can download my N32 firmeare from my website, this should work but will not be up to date. You'll know it works though. Then we can figure out how to set up the newest version of the N32 firmware because I think the image is setup a little differently.
Absolutely, I'd prefer you joined the Discord and talked through there(link in description), because there's more people there (maybe some with a C2) that can help. If you don't know enough about Discord then you can email me PrintsLeo3D@gmail.com
Hey Leo, top video once again. I couldn't see it mentioned by anyone else, but early on, just after you've logged in for the first time, you update your pi - ua-cam.com/video/a6ru0mH3F8M/v-deo.html sudo apt-get update However, you are missing a command (in the video, in the description, and in the text on your website) which should follow the one above; sudo apt-get upgrade The first command updates your list of repositories with the latest package versions. The second command compares what is installed on the pi versus what is available from the repositories, and selects a list of upgrades accordingly. On running the second command, the pi will tell you what packages need upgrading, and ask if you want to proceed. Go ahead and answer "y" to upgrade the necessary packages, then you're ready to go with the next step, which is cloning the git repository.
Josh you're a legend!!! Thank you, I must be getting lazy in my old age, just trying to rush through it 😂 whenever I talk about everyone lending a hand this is exactly what I'm about! Everyone pitching in to make this place better! I'm gonna make all the necessary addendums and give you credit, thank you!!!
@@PrintsLeo3D no trouble at all 😃 . I'm almost at the end of the video on my X2 H32. I'm a little surprised I got it working, but I have the printer connected to Fluidd which means I'm almost there! I'll post up what worked for me to help out any others with the same printer.
I'm not surprised ! Coming in it looks like a complicated install, but when you brush back all the layers it's pretty straightforward. Glad your basically up and running! If you need anything else at this point of the install, like a config or some other related questions, I'm here !
OK, so here's what I did for my X2 H32 chip. 1. .bin file SteveGotthardt has updated their page mentioned here - ua-cam.com/video/a6ru0mH3F8M/v-deo.html. The page in the video says "it might work with the X2 by changing the printer.cfg". This statement has been removed in the latest version of that github page, and there is no mention of the X2. Despite what the page now says (klipper_O1 - for original aquila, klipper_C2 (also X1 or others)) you still need the klipper_O1.bin file as mentioned in this video. I can confirm that I can connect to my X2 H32 printer using that bin file. I tried the klipper_C2.bin file to start with (because the updated page kind of suggests that's what you need for the X2), but I could not connect to the printer with that .bin file. 2. printer.cfg At the bottom of the SteveGotthardt github page, there is a link to their collection of printer.cfg files. github.com/SteveGotthardt/klipper/tree/hc32f460_work/config There are 4 .cfg files on that page. These two are identical: generic-voxelab-aquila-v1.0.3.cfg and printer-voxelab-aquila-2021.cfg, and both are largely identical to the stas2Z .cfg from the video, but they do have a commented out section for BL Touch which may save some time (I haven't tested yet). 3. I got an error 'GCode path from Klipper does not match expected location'. It's not quite obvious, but follow the hint in the error and add this section somewhere to your printer.cfg, save and restart, and the error goes away; [virtual_sdcard] path: /home/pi/printer_data/gcodes You should be good to go from here. I'm up to the calibration chapter, ua-cam.com/video/a6ru0mH3F8M/v-deo.html, if I come across any X2 H32 gotchas I'll post them up.
Wayne, the Cura profile you used previous to installing Klipper will work fine. The only edit you will need to make is to the start and end gcode sections. With Marlin the start gcode section added commands to the beginning of each print, and the end gcode section commands for the end of each print. With Klipper those sections are now controlled through macros, which should be handled in your printer.cfg I'm not sure if that's where the Sonic Pad puts them though. I would recommend joining the PrintsLeo3D Discord if possible (link in description). There's a few members there using the Sonic Pad (I reached out to ask them this specific question for you today), and I am going to be opening one up and starting with it soon. So there's always someone that is willing to help!
That's usually a pretty easy fix, may e the spelling is off (print_start instead of start_print for example). Diagnosing something like this is easiest if you can share pictures/files, so I always ask to do this through email (printsleo3d@gmail.com) or discord (link in description). Discord being the easiest
Your content is great has helped me enormously to configure my Aquila with the N32 board, only I have a question in the Fan configuration where you put the Pin : PA0 I have read that it activates the two ventilated both plate and filament, as I can do to separate it that pin is the filament and that pin is the motherboard
Saulo, I'm not too sure what you're question is asking but I think I have an idea. The one dilemma wit the fan setup for the Aquila is that the parts cooling fan and the mainboard cooling fan are on the same circuit. Meaning they cannot be controlled separately (without some intervention on our part ).
Steve! This is might not be the answer everyone expects (or wants to hear) but I would say my absolute go-to printer is my BambuLabs X1 Carbon. It's been pretty rock solid for me, can do multicolored prints, and usually prints everything faster than any other printer I have. That being said I run my Original Aquila (Sprite extruder), Aquila S2, and about 2 other Ender 3 Pros (4.2.2 dual belt mod) daily as well, and they are all performing amazing for me. Each of those is running Klipper, and outside of my X1C I would say my next go to printer would be the OG Aquila. That being said they are all great! Awesome question, thanks for asking!
@@PrintsLeo3D Thanks for the response I love My Aqilas as well But I now have a new favorite the Kingroon kp5l it's wonderful, I haven't lost a single print on it so far. and it prints beautifully I hope you get a chance to review it Ill mention it over on the kingroon Website.
I've heard a lot of really good things about their little KP3s, so I'd be interested to see the bigger version. Glad it's working for you and if I get the opportunity in the future I'll give it a shot !
hi, being the complete noob that i am; i'm going to ask this: how do i check and change the bootloader? did everything that you said but the Pi wont talk to Aquila.
Hey sorry I didn't make that clear enough in the video, aot of people have point that out to me. I really wish I could go back and edit something in. Either way I'm glad you were able to find it ! Good luck and happy printing !
So you installed Klipper, moonraker, and Fluidd onto your pi. Then you created a firmware image edit your printer and flashed that onto your printer, correct ? Which chip do you have in your Aquila? We're you able to run the serial command I'm the pi and did it return the serial address of the printer that was plugged into it ?
Yep … did all of that. I followed you instructions to the letter. The only thing I missed was the bootloader part, soo tried to make the firmware again with the right bootloader after everything was installed, but it didn’t work. Could it be because I flashed my printer over Alex’s firmware? Going to start from the beginning again tomorrow. I’ll let you know. But for now …sleep wel all😉 great job btw…
Absolutely!! That's a great question too. Part of Klippers power comes from its versatility. Anything that can run Linux can run Klipper. A lot of people are using old PCs and laptops nowadays because of the pi pricing and scarcity. I haven't used my old laptops yet but most people I've talked to use Linux Mint as the OS of choice to run Klipper on.
As far as PC specs? You'd want the PC to be dedicated to running Klipper. It's not a must but you don't really want to be running a print, and watching Netflix, and cruising the web on the same PC, in case you drop data while the print is running and it can cause issues. If you have a PC that is just dedicated to Klipper, you could pull something out of your closet from 2008 and it would work lol it doesn't need a lot of power at all
Hey thanks for watching and for the feedback. The mic situation is tough, I have been trying so many different mic solutions and nothing has been reliable and great sounding. This video is my most recent using a wireless mic setup through my phone. It's not perfect but it works reliably which is good, then I have to do a ton of post processing work to even get the audio to how it was in this video. As for the video, this is my second attempt at filming with my phone, a Samsung S21, and in my opinion it's better than the camera I was using before this. That being said I still can't seem to find something that produces the quality I want. The search continues.
@@PrintsLeo3D dont get me wrong thats not a hate ;) just point things to improve, idk but ur ressolution is 1080p and other chanels have same but is a big difference with image quality, idk to much about video editing etc but maybe is codec related? ps. lot of too chanels pin under video what set up they use maybe there is way to go ;) good luck with chanell ur explanation is so clear that even newbie can understand what are you talking about. Finger crossed for more subs, here u have one more ;)
I didn't think it was hate at all, I really appreciate it! You could have watched the video, thought the quality was poor and decided to move on, but instead you let me know the aspects you didn't like and that only helps me improve. So thank you! I have gone through about 3 different setups now and I really don't feel that I've been able to get that crystal clear picture other channels get, so I am always trying to find new ways to get there. Like I said this video was my first (or second?) recorded with my phone, which gives crystal clear video. I am going to keep exploring and trying to find something that works. It's funny you mentioned other peoples' setups, after your comment I went to another channel to try and see if they had the information lol Thank you again for the comments and the encouragement !
Honestly it's not really that hard, but everyone's comfort level is different, and then you have to consider if all goes well you have a printer with new firmware you have to get used to lol I love Klipper, right now I wouldn't stay on Marlin based firmware, but that's for me and my situation, and everyone is different. Thanks for watching , and if in the future you are considering making the leap I'll be here to help, or better yet join the Discord and talk to some of the people on there that have made the leap (some reluctantly) and you can hear what they think and how their process was. Thanks for commenting!
Too Complex and pricey for me.. I have to just stick to fighting with my 3 printers and I will dissemble my Tronxy X5SA as I tried for ages to get it to work and print even getting the new black leveling sensor and it still crashes into the bed or try's to print 5 mm above the bed. So it be taken apart and used for spares. Shame as it has a big print area.
Unfortunately I don't have any experience with Tronxys. The Klipper install is honestly not that tricky, I don't want the length of video to scare you, I installed Klipper on my CR10 while sitting on the couch watching a movie a few nights ago lol
A what now? I had never heard of this and just looked it up, seems impressive! Is this almost an alternative to a Voron if you already have a Tronxy ? Is it comparable?
@@PrintsLeo3D It’s really comparable. They have a Facebook group, and a discord if you’re interested in building one. You can even get a serial like the voron. Depending on how far you go with the upgrade, the speeds you can print at are insane.
Tell me about it. I'm making a video right now about the Inovato Quadra! A low cost pi alternative that is super simple to setup. Currently cost $25 plus $10 shipping within the US! Video should be out very soon
@@PrintsLeo3D alright, small question about this upgrade. does it actually install in the printer itself or do u just leave it hanging outside the printer? If you install it inside, please show it in the video how you mount it, thx :)
Do you mean the raspberry pi or the Inovato Quadra? Either way, they both are mounted outside of the printer. They have a small enough footprint where it isn't an eyesore. With my Ender 3s I hook the raspberry pis directly to the mainboard, so there's no power plug or USB necessary. I might look into that for the Aquila also as it should be just as easy.
@@PrintsLeo3D with a raspberry and having multiple printers i would understand it having it easily switchable to other printers, but if the quadra is so cheap i don't see any reason not to neatly tuck it away :x less chance of the cat playing with it
Faster speed? You take the computational tasks from the printer controller (which are highly optimized and compiled into machine code) and move them to a rasppery pi where they are executed as a SLOW F'KIN PYTHON script! Python, ffs, a dead slow, INTERPRETED language! How the F would you gain anything? The speed was limited by the mechanics of the printer itself anyway. The only thing you'll probably achieve will be spending more money on an additional raspberry pi computer and adding an unnecessary layer of complexity (and more ways to fail) to your printer. PS. I really laughed at your analogy with sheets of paper. The main computation is ALREADY done by the slicer. Marlin only executed the resulted G-CODE anyway, which consists of elementary control insrtuctions (linear movement, heating, etc). Not much "computation" left to do. Marlin flawlesly handled these tasks even in 8bit MCUs (like an ordinary arduino), and it does them even better with the newer 32bit controllers. Also, Marlin now handles pressure advance (which is an overrated gimmick, anyway) and input shaping - by itself (those even work on older 8bit controllers).. So what are you talking about???? PS2. If you really need remote access (and video surveillance) you can alternatively use an Octoprint server and the good old trusty Marlin firmware.
This comment feels really rude, but still has some information to be gleaned or at least discussed. The way it reads though feels very impolite. I love 3d printing and I love this community and I want to connect and help or get help from people who want to do it in a polite way. I urge you to open a new thread on the Klipper Discourse (klipper.discourse.group/) and share your opinions there, as I am sure they will open a greater discussion.
Yes! That's one of the additional edits you need to make in printer.cfg I thought I went back and covered that but if not thank you for adding this! I am making a bl touch mesh video that is going to go over the set up there as well!


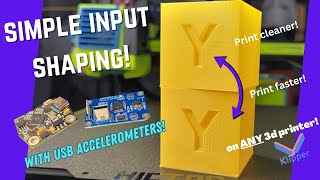
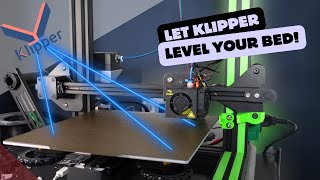


This hobby keeps being more educational than I agreed to 😆 🤣 😂
Tell me about it in lol! Everytime I think I'm deep enough it sucks me in more 😂 thanks for watching!
Thanks for the video. Spent most of last night setting this up on a Aquila X2 with a bltouch and H32 chip. Can confirm it works perfectly
Perfect! Thanks for the follow up comment. If you need help tuning the bl touch (because I didn't cover it in this video) let me know! I plan on future Klipper videos(pressure advance, manual mesh, input shaping) but if you need the info quicker I can help.
I'm about to set my X2 with Klipper. Did you need to do anything special to get it up and running?
@@bromptonchris Pretty much worked just like this video but be prepared to put in bucket loads of time calibrating and fine tuning if you want good results. Yesterday I setup "pressure advance" On to my 2nd print since and would have to say that was the single best tweak for print improvement.
Thanks @crag, I didn't see this comment. I plan on adding the necessary calibration videos coming up shortly!
@@PrintsLeo3D Looking forward to them. Thanks for your great aquila vids
Hey Leo, first, thank you so much for this video. It gave me the confidence to undertake this upgrade to my Aquila g32. I used a Dell Wyse 5070 ($45 on ebay) with Ubuntu Server and a 120GB m.2 sata SSD and 8GB ram. You expressed an interest in the outcome. To compare your pi, your install of klipper took 17 minutes, mine too less than 2. Moonraker took less than a minute, and fluidd took around 15 seconds. Looking at the system utilization in fluidd, i could probably run 4 or 5 printers off of this. Your instructions were so great that a linux newbie like me could do it. Webcams are not installed with the current version of KIAUH so I followed another video to get that running. Thanks Leo!
That's great!! There was a user on the Discord who was trying to get Klipper running in the Dell Wyse, so I'll let them know you had success with it! I would think the Dell could easily run 4-5 printers just like you said, Klipper really does not require a lot of processing power, it's so cool. I actually just (like yesterday lol) released a video on setting up cameras with CrowsNest. Hopefully that's what you used because that service is so simple and works great. Thanks for dropping me a line to let me know how it worked out.
@@PrintsLeo3D oh no! I missed it! The video I watched was just all the commands and files to make to set up mpeg streaming as a service. 😣 I should have waited 1 more day!
As long as you got it working is all that matters! The video is there for you if in the future you are having any issues, crows nest is nice and simple.
I ran into two issues when setting up Klipper. (Great video, just some tips for others)
1.) Couldn't connect, serial port is correct
- Check dmesg. Make sure linux recognizes a usb device
- Make sure the firmware has ALL the correct options. The bootloader needs 28KiB of mem, this isn't the default
2.) Negative Temp Readings
- You could have broken thermistors, use your warm hands to see if they can read temperature differences
- BL Touch, if installed, must be configured. Leo has a config on his website you can reference
Thanks for the video! It's a great tldr; Shout out to Alex for plugging your page
John awesome content! Thank you so much for contributing and all your points are spot on. One other thing to consider if your printer won't connect/having trouble getting a serial port, is to uninstall BRTTYL. From the terminal of the host device run:
sudo apt-get remove brltty
Thanks to @BCutty from the channel that always hits this point home!
Heyo, trying to find the location for a CR touch with stock hotend, would the sprite config work?@@PrintsLeo3D
Leo you the man! I can wait to get it going! Love the shirt too!
Thanks Carlos! I saw this shirt on the rack a few weeks ago and couldn't resist lol hope this helps you get Klipper started !
Heads up, you no longer need the special N32 repo as that has been merged into mainline Klipper in Pull Request 6116.
Thank you Hien! Anytime anyone sees the above user posting any info on my videos take it as verifiable fact! They know there stuff! Also I miss you guys in the Discord, hopefully everything quiets down for me soon and I can jump back in.
Thanks as always for the content - very helpful.
Re: N32 and this video, 'Build for Nation N32G45x MCU' option is no longer there following your guide But there are two options under Processor model: N32G452 & N32G455. I chose the first one but no idea if its going to work or not.
@@ewanmonro8687 were you able to get this working?
@@ewanmonro8687 hey, same boat here. did either of them work?
Thanks Leo, you always make great content, very thorough.
Thank you so much! Your support is always appreciated!
Be aware that the bootloader offset NEEDS to be 28kb, in my cae the default value was set to 8 KiB and i didn´t notice that (just saw the 8 and thought it was correct). It took me several attempts and looking around on internet until i found another post with someone that specifically made it clear that it should be 28 Kib. After that all works.
I thought I covered this in the where I go through the entire firmware image and the changes that need to be made, but you're the second person to bring this up. I'm sorry about that, sometimes it's the forest for the trees. I have so much info to put together and get right I thought I covered it but it's possible I edited that small section out. Apologies, I'm going to make an addition to the description that highlights this.
@@PrintsLeo3D No problems, I got it working in the end
I appreciate that I just hate to have people have to search around for the answers I should have supplied. Thanks for watching and for letting me know about the issue. Cheers.
To be fair, he did say multiple times "should look like this" and offset is clearly visible. hehe
@@Shinare73 yes, but all these "should look like this" was for the rest of the settings and as standard the offset is set to 8 kb. If you focus on the stuff that he tells to change, then it is not easily visible that it says 28 in his video because of the 8 is common between both values.
Anyhow, as said, I got it working and it is just something missed in the tutorial to say that the offset value needs to be changed as well.
love you leo! Going to spend a day trying to follow this on livestream if you don't mind! link and credit back to you!
Absolutely!!! I am happy you're finding this useful and if you need any help or guidance with any of it let me know! Much appreciated!!
@@PrintsLeo3D and I am grateful for your work. It's hard to persevere as a small creator that puts in the work and doesn't make much off it but you do a very good job man keep up the good work! Your underated me too lol but let go to the big ship together!
Thank you, thank you! Really you're too kind and I appreciate every word of it!
@@PrintsLeo3D Got that inch to buy a bamboo that I can't afford so I bought a Pie 2 w instead to get Klipper on and be happy with what I got. but all the fiddling makes those bamboos seem pretty tempting! love your ninja turtles themed printer. We grew up on the good stuff. Never would have thought I'd be into all this stuff but FPV drones got me hooked. you ever try them?
Thank you and happy Holidays! :)
Happy holidays!! Thanks for watching and stopping by to comment and share some love!
@@PrintsLeo3D well had to do it😁 just used you video to try klipper on my aquila. Works like a charm 🤘
That's what I'm talking about!! Glad it worked out for you!
Great Vid Leo! Up until today, I didn't even realize this existed. (Got my X2 Last week) I'd love to see more details on BL Touch and accelerometer configurations.
Thank you so much Chris! I am going to have more videos featuring the different aspects of Klipper and some more aspects of setting up your printer configuration so don't worry it's coming ! Thanks for watching and commenting!
@@PrintsLeo3D Looking Forward to it. Say, I can't seem to find your macros listed on your website. Can you shoot me a link to the page with the macros you use in the video?
I haven't had a chance to update the website yet. I'm on a family vacation right now, trying to slowly update things late at night. I'd say check back every few days. I should have them all up by the middle of next week latest.
Waiting patiently for the video guide on rotation steps :)
Oh wow, did I promise that in this video lol? I will certainly add it to the list. I got swept up in some of the Klipper-focused calibrations , like Pressure Advance and Input Shaping. I have to remember to round the catalog out and hit all the calibrations we need.I am looking to make a good deal of Klipper content upcoming so this will make the mix! Thanks for reminding me and the inspiration!
Great video. I’m new to klipper and would love to see a klipper tutorial
Absolutely I have been trying to work on small portions here and there (for the camera one out, working on pressure advance and input shaping next). Anything in particular you are looking to see ?
@@PrintsLeo3D honestly I’m a complete newbie where klipper is concerned. I’m looking at setting up my voxelab with klipper and have no clue about settings where config is cincerned
@@PrintsLeo3D and I probably should mention I’m getting the manta m4p with cb1 and screen. This is going to be put together end of February as I’m currently upgrading to dual z axis and stripe direct drive
Wow sounds like a fun project. Getting a configuration together is usually pretty straightforward, there's usually always a 'vanilla' file you'll be able to use as a base, and then can make amendments from there.
If you're interested in some more Klipper info in general you can check out that page on my website (www.printsleo3d.com/klipper).
There are links there to the configurations I use in my printers as well as some useful macros ( macros are blocks of commands that can perform a ton of different functions in Klipper, from calibrating hot end temps to automating bed leveling!). I think that is a pretty good start, but going forward I am going to be making more and more intro or setup videos for Klipper. This firmware is feature packed and high performance so you're in for a treat!
Also if you have discord you can join mine (link in description), it's basically a live discussion with me and others who are going through the same things you are!
@@PrintsLeo3D sweet thank you soooo much and yes I’m definitely joining your discord the more information the better
Interesting! Great video Leo!
Thanks Ray!! Your ears must be ringing, I was just talking to someone via email last night about your upgrade to the S2 hotend!
@@PrintsLeo3D haha nope! Did you try the hotend upgrade for the S2? Hoping someone gets Alex FW to work on the D1. Seems that the touchscreen is the showstopper.
I haven't tried it yet on the S2 and I need to. The stock hot end is still working for me but I don't know for how long. Someone I was talking to was having a hard time finding the red lizard hot end, I think they were going to try and do a custom workaround like yours!
@@PrintsLeo3D Ali Express has them. If redesigning will involve a few parts. It's doable and designed with what I bought.
I'm actually going to tell them about the Ali express route, as your design has been standard thus far. Thanks Ray!
Great video. Helped me a lot. One thing you didn't mention when adding you bltouch config is that you need to adjust your stepper z too.
[stepper_z]
endstop_pin: probe:z_virtual_endstop
#position_endstop: 0.0
I'm surprised your printer homed correctly without it.
Jonathan thanks so much for the comment, that's what this section is about, picking up the pieces I forget lol it definitely would not have homed correctly, I either added it afterwards, it it's possible I was doing some voiceover of another printer.cfg for that section. I'm not sure anymore as it's been awhile.
Thanks for this comment!
Oh boy,been waiting on this.😁
Excellent video as always very thorough. I'm not sseing your BLTouch config or macros settings on your site? I also noticed on your Aquila printer settings,you have it as 235x235,mine is 220x220.?
It's worth the wait, Klipper is awesome!
I was in such a rush to get this video finisihed I haven't had time to update my website quite yet. I was hoping no one would be fast enough to check lol. I will be adding everything as soon as I find time (hopefully within the next few days). In the interim if you need something specific you can reach my by email (printsleo3d@gmail.com) or discord(link in description) and I'll forward you the info! Thanks again for watching and commenting!
@@PrintsLeo3D I'll check it later.
Just to let you know I just today received my Elegoo Saturn 2
When I was told I may have to wait until January 2023 for it to be delivered? But I have it now and It sure is a bit different to learn about doing printing compared to my 4 FDM printers!
It sure is a big Resin Printer. Lots to try t learn now so different to FDM.
That's a great way to end the year! I like the idea of trying to different 'mediums' of 3d printing. This way you get to know both aspects of SLA and FFF which probably in some way help your ability to create in both. I tried dipping my toes into resin (not actually, that stuff is toxic lol) a while ago and it didn't quite click with me. After seeing what they are capable of though I am considering take another look. If I didn't have so much going on I might have already pulled the trigger lol I hope that printer works out for you, I know it's a big one. Let me know how it turns out, I'd love to see some prints!
@@PrintsLeo3D Thanks Leo. I done a test print of two Chess Rooks ( castle ) Come out looking so good. in this nice water washable Mint Green Resin. The Saturn 2 has a plug in usb type fan and carbon filter tower that sits in the case cover area next to the tank. Still smelly with it even though the resin is said to be low odder than Normal resins. I have to do more model now the slicer is working? I love to show you the models later on when they are done. BTW. I found a great Eco type re-usable Kitchen Towel for using with the printer resin mess. It is a Bamboo version which you use then put in the washing machine and wash it like clothing, It can be re-used this way 160 times per sheet. Saving 60 normal kitchen rolls of normal paper. when you done the 160th wash and use yu then throw it in the normal waste. So cool saving the money and the planet since Bamboo grows super fast compared to trees. Cheers. 😁
Looks like you're finding ways to make this work for you! Getting me tempted to take the plunge lol I'll see how your prints turn out first I think. The slicer is a wrinkle I didn't consider. Probably have to 're-learn' a few things based on how the SLA printers print. Interesting stuff though, probably a fun adventure!
@@PrintsLeo3D Hi Leo.. Have a Happy New Year now we are not far away from the end of 2022. Gone quick this has. I Ordered a wash & cure system by Elegoo from Amazon which was said to be the new V2 version of a single base unit with two top units, one for washing and one for curing. Just before I received it,
I saw Uncle Jessy video review of it, and he has the older system I was going to get which is 2 units one for washing and the other for curing! I had not ordered those because I thought the newer single system V2 was a bigger size I needed for the Saturn 2 build plate?
But then I saw the two different systems together on his worktop and saw in fact the older one of the two units was bigger than the V2 after all? So I checked with Elegoo and they said yes the 2nd type of the older one was the right sized one
( the Mercury XS version ) Seems the Mercury X version of it was not big enough for my Saturn 2 plate. the X unit was for the older Saturn size.
So when I got the V2 I had to return it unopened and get a refund. I then had to Order the Mercury XS from Elegoo because it was cheaper to do than buying it here in the UK from others.
I just got the XS and it is amazing wash & curing two unit system, I even got a plug in UV pen light with safety UV glasses too.
Now I sliced some STL files on the Resin software as you can use normal FDM models just use the resin slicer and I am printing them and washing & curing too.
Let you know how I do later. Cheers. 😉
Marlin 2 and 32 bit boards has come a long way to making things a lot better. Klipper still has advantages, but more powerful 32bit controller boards make the advantages of using a Raspberry Pi a lot less as the controllers are getting close to the Raspberry Pi in processing power.
That said, Klipper has a lot of other advantages as it was written from scratch a lot more recently than Marlin. Marlin is slowly getting features, and even when this video was released, Marlin had Input Shaping, S Curve and Linear Advance, but all settings are stored in EEPROM and flashing is needed each time, and both the Flash memory and EEPROM on the controller have a limited number of write cycles, and many will exceed those write cycles after a couple of years of tinkering and upgrading.
Yea, the raw power that Klipper was offering those older boards is not as dramatic nowadays with those 32 bit boards. That being said for me it's the ease and uniformity that Klipper offers that makes it a great choice. The ease of making changes to your configuration as well as being able to have nearly complete (remote) control of your printer is really a wonder. If memory serves me Marlin implemented IS December of 2022, although I am not sure if it allowed for an automatic calibration through the use of an accelerometer. Whichever you prefer I think the future looks bright for 3d printing.
Thanks Leo - amazing video. Made it really easy to get Klipper/Fluidd running on my Aquila X2 H32 + old RPi2. Just one question - will there be a version where the screen works as it no longer functions (I knew it wouldn't - but here's hoping for a fix...) Keep up the great work!
Steve thanks for the kindness I appreciate that! There is a project that gets the screen to work but I believe the functionality is limited and it requires a little bit of soldering(I think). If you want I can dig around for some links and forward them to you!
@@PrintsLeo3D Thanks for the reply Leo. If you have the links to hand, that would be great. In the meantime, I've also got my webcam working + created a manual bed mesh by using your other videos. Once again, superb work!!
Hello, I am just wondering if you can tell me where to find the h32 config file, should I just use n32 version?
For the config file used within Klipper all the chips can use the same config. The only difference between the chips is when you are flashing the printer. I have a sample config in my website if you need one.
@@PrintsLeo3D I got it running, thank you for your help
According to comments online, the N32 chip/support should now be mainland, part of the official Klipper code. I am currently trying it out to see if that is the case.
Hmm, looks like that was not the case, the same bug is still there that the temperature is not correctly shown. So i´ll have to flash back to the custom firmware instead. A shame as the custom firmware is stull on older 0.10.xx while the new one is 0.11.xx and we get warning that not all Mainsail features are supported unless upgradig firmware to 0.11.xx
Rickard, yes I was under the impression that the N32 version was pushed to the main Klipper branch. Someone on my discord was able to use it, there was actually two options for the N32 chip when selected. I am going to be looking into this shortly. Is the Stas N32 firmware still only the .10 branch ?
@@PrintsLeo3D Yes, Stas N32 is still only on 0.10, that was the main reason why testing the 0.11 from klipper repo.
None of the temperatures was reported with the official klipper firmware so i reverted back for now with the Stas 0.10 version again.
Could be that i need to do anything else, but i havn´t checked if that is the case or not. In my case it is an Aquila S2.
Very interesting information! Thanks Rickard! I did not know this, and it's great to learn because I know some people have had similar issues this may help clear up. Hopefully they can get an N32 version pushed to the main branch soonas 0.11 has some great features (as you know).
A really informative video. I have a N32 Aquila that I'd like to turn into a high-quality miniature printer. Is there any benefits to using a Pi over something like a Creality Sonic Pad? It would seem like a Sonic Pad would make this process slightly easier.
It would definitely seem like that lol unfortunately the problem with 3rd party companies using Klipper firmware is they never use it properly or give you untethered access. Also, they curate the devices they sell to their machines, so if it's not a Creality device you're using it's an uphill battle. So you'll end up getting a very sloppy version of Klipper that is hard to use and will likely frustrate you. If you did want to use a 3rd party device I would recommend the BigTreeTech Pad 7. It allows much easier and more complete access to Klipper and will ultimately give you a better experience. Alternatively you could use any device that runs Linux, it doesn't need to be a pi. A lot of people are using older laptops or even tv boxs (like the Inovato Quadra) to run Klipper with ease. Whichever way you go good luck! I would strongly suggest against the Creality Pad.
Hi Leo, great video. I was hesitant to install Klipper but after watching your video, went ahead and installed it. the only problem I am experiencing is when I do my first bed leveling the probe (CR Touch) sits outside of the print bed and the hot end smashes the plate I copied the configuration example for the Aquila BL touch sprite in the fluidd config file. Thank You
George, I'm happy this have you the extra push to install Klipper! It's really an awesome experience once you get passed the learning curve. I have an additional video that is bl touch specific that can probably help you out with your current error. I would give that video a shot and see if it helps! If not let me know, and we can diagnose it .
Thanks for this vid, it was very helpful. Last time, I tried with another tutorial but the thermistor not work.
Glad this was helpful. Its hard getting all the correct info in one spot so I can understand if another tutorial didn't work out for you. I try my best even if I don't always succeed the way I would like. Hearing that this helps is a great boost though, so thank you!
@@PrintsLeo3D I made a Timelapse of a print with klipper, if you want, you can take a look. Thanks for posting this vid.
You did a great job with this tutorial! Could you maybe include instructions as to what kind of SD card is suitable for 3D printing? I discovered the extra high speed/capacity card I had was not a good choice for this application.
Zane, thanks so much for the kind words!! That's a great idea for some additional information, probably something I could add to my website as well. I have gone as low as running some of my pi zeroes on the 8gb card that came with my printer. At this point I would recommend a minimum of 16gn and probably a high end of about 32gb. I'll get some more detailed info for you and let you know!!
This is a great video, very educational. I do have a question though. i have the Aquila s2 pro that comes with a sensor and not a probe and has the n32 chip. Will this work for my printer as it is now or will I need to switch to a probe?
Hey Toad! Klipper can use just about any sort of bed probe. Bl touch, inductive, proximity, KlackEnder, klicky, Euclid, etc the only difference between them all is how they will be defined in printer.cfg the bl touch would be defined under the heading [bl_touch] and the other probes would be defined under the section [probe] but for all intents and purposes they are basically the same.
For Aquila X3 users, to get the Induction Probe to read properly replace the "[bltouch] section with:
[probe]
pin: ^PB0
z_offset: 0.0 #this will get calculated and commented out after calibration
Excellent video, thank you for the effort!
You're welcome. I'm updating my website with all the Klipper Configurations and macros I'm using if you need them!
Thank you leo you are the best man !
You're welcome! Thanks for watching, it's a long video so even if you watched only some chunks I appreciate it! Hope this helps, and if you decide to go with Klipper and need more assistance let me know.
Does the Pi Zero have enough power to run Klipper? Or will I nee the Pi Zero 2W?
Just trying to find a very economical way to get Klipper up and running on my Aquila. Thank You for the great video!
Pi zero has more than enough power to run Klipper, but you'll be limited in some of the services you can take advantage of. For instance running a webcam (beadies maybe a pi cam) is going to not be an option. You'll also need to use a front end like Fluidd or Mainsail as opposed to Octoprint because if it's processing needs. If you're looking to just get up and going then the pi zero is a nice compact option. What I have been recommending is the Inovato Quadra. It's about $35, you'll need to buy a small USB extender and a wifi dongle to make it work comfortably (adds another $20 maybe). That has more than enough processing power to run two printers and webcams. I have a video on that device if you're interested.
@@PrintsLeo3D I purchased the Pi Zero W today and the Trianglelab USB adxl345 Accelerometer. I blame you entirely for getting me to go down this rabbit hole...LOL
I have a G32 Aquila running a CR Touch... do I need to do anything special or just follow your instructions?
Thanks!!!!!!!!!!
This rabbit hole is deeeeeep lol 😆 shouldn't need a thing specialz juat follow my videos and you should be good. Just take extra special care when creating the firmware image for the G32 , pause the video when I say "this is the setup for a G32" and make sure you copy everything identically! Good luck !
Hello! What shelf unit are you using for those printers? Thank you!
These shelves are from Costco and made by a company called Whalen. They don't always have these style of shelves in stock a lot of time the shelf itself is made of rods with large gaps between them. Those shelves are actually a little more heavy duty while the shelves I'm using can sway a little if you have a few bed slinging printers going on them. That being said I've been using them for a few years now and j think they're terrific as long as you know they aren't super heavy and solid and they may move from time to time.
Hey i know that this is an old video but I was looking for some help. I'm at the part of installing klipper with KIAUH but it is stuck. In the video you mentioned that it took 17 minutes but mine has been stuck at the line "unpacking libnewlib-arm-none-eabi (3.3.0-1.3)..." for the last 45 minutes or so. Have I done something wrong? How can I get around this? Any help is appreciated.
I've never ran into this issue myself. I would ask what OS you are using and what pi?
@@PrintsLeo3D I'm using a RPi zero 2 w and I am doing this on a Windows laptop. I know that the RPi is not overheating or anything and it has power and all that. I can't think of anything that would cause this. It is a brand new pi, literally opened the amazon package 4 hour ago.
Edit: also it still hasn't made any progress after 2 hours
@@PrintsLeo3D Is it possible for me to stop it and just start over? I don't want to unplug it or close the program and damage it in the same sense that you don't just pull a sd/usb out of a computer without ejecting it. Is there a way for me to stop it without damaging the system?
Hey Leo. I've been running into some issues that I've been trying to troubleshoot the last few days. I followed your videos on installing klipper on my h32, setting up bl touch, and pressure advance calibration. All seem fine. I've always used cura so I was pretty familiar with that. Like your tutorials, all settings start print and end print in the print config. I turned off coasting, acceleration and jerk control in cura or made sure that they were disabled.
I sliced the same file one with cura and other with prusa. The prints don't come out the same. Prusa prints fine with it being to scale of model with dimensions. However cura, it prints wider and squished. Circles are more oval too. However this doesn't occur when I sliced it with prusa. Tension on my belts are fine. I used both slicers to see what was the difference or what was causing it. I much prefer cura over prusa for various reasons. I had relative extrusion disabled and enabled in cura. Same result. I don't have absolute mode in my print config.
Hmm that's kind of a weird one. There's a lot going on here, so I'll try and cover a few bases. Whenever moving from one slicer to another non-derived slicer the 'base' settings will usually vary. When I say 'non-derived' I mean two completely separate slicers, which is the case you are running into. For instance slic3r, prusa, and orca slicer are all derivatives of one another and will likely have similar base settings. While Cura is it's own creation and will behave differently.
One thing I am curious about is your Print_Start macro. With Cura if you are not passing any heating variables to the start macro it's ok, as Cura will notice that and add in some heating gcode. Prusa on the other hand, will not do that. So I am just curious what your Start_Print macro looks like and how it's set up in each of the slicers.
The deformation you are referring to seem like what we would normally see when one of the axes' stepper motor rotation distances are off. Most often you'd see this with people using Marlin, they would print an XYZ cube and it would be half the size. That's because the rotation distance (esteps in marlin) are not correct and the z motor is not moving the correct amount. That's not something that is usually set or affected within the slicer though.
You said you're familiar with Cura so is this something that just started happening? Is it only since the move from Marlin to Klipper? Let me know and hopefully we can narrow this down. To be honest, right now what I would start leaning to recommend is the move to Orca Slicer. It's a derivative of PrusaSlicer and it's got a lot of really nice tools for our Klipper enabled 3d printers. This may be the time to make the move, but it has to be something you are comfortable and ready to do.
hi i just followed this video but i am getting an error that says Printer is not ready
The klippy host software is attempting to connect. Please
retry in a few moments. please help
This can be a few issues, but were you able to run the ls /dev/serial/by-id/* line through SSH and get a return?
@@PrintsLeo3D yes and that is what i put in the printer.cfg though im not sure if it being
/dev/serial/by-id/usb-1a86_USB2.0-Serial-if00-port0 is a problem?
can you please reply
never mind i got it to work no idea what i did tho
Connor sorry, sometimes UA-cam doesn't notify me when there are replies to comments I already replied to. The reply you got with that command was likely correct for your board. When you input it you probably restarted the firmware , which saves the info and then uses it, which then for Klipper up and running. Glad you're off and away now !
Hi Leo, great video. Although I use an Ender 3 with a different mainboard I was able to get everything running on my printer. Great job on this! When I am slicing several different models in Cura, I am not seeing much of a time improvement. I have increased the travel speed, acceleration, min layer time, and jerk settings. What am I missing?
Steve, even with the increase in speeds it's likely Cura won't give you accurate time estimates. I think there might be a module you can download from the marketplace to get more accurate times. That being said you should still be seeing an increase in print times I hope 😃
@@PrintsLeo3D I printed a few small things things with faster speeds and seemed to be 10-15% faster. I still need to tweak some settings to get the most out of it.
One other note, using slightly faster settings than what I was using with Marlin, I printed my best Benchy yet! Its almost perfect.
Yea it's crazy how the quality doesn't dip but increases with Klipper even with the higher speeds! With my Enders I start at 100mm/s on the walls (80mm/s outer wall) and I keep acceleration to 3000mm2/s
Also import to note that input shaping and pressure advance are the keys to maintaining high speeds/accelerations while keeping awesome print quality
I wish I had seen this video a while back, before I started any part of Klipper install. I eventually latched on to KIAUH which was a fantastic boon.
I am however confused, given in the first parts of the video you talk about how the Pi does the donkey work of all the heavier math and how this passes info on to the marlin(if I understood that bit, maybe not), to print out a model.
However you then go into detail about flashing the firmware onto something. That lost me entirely given the earlier statements of how Klipper works.
Could you please clarify for me(being confused) what you are flashing, given I thought it was the pi that sent the commands direct to the Marlin firmware.
My printer is under warranty so I don't want to jeopardise that.
Michael I'd love to clarify. First thing would be that Klipper firmware and Marlin firmware are two different entities, and they do not work together.
With Marlin firmware (most of stock printers run this) the printers mainboard does all the work. Computational work, maintains heat, moves steppers, etc.
With Klipper firmware a more powerful processor will do all the computational work, and then just send commands to the printers mainboard for them to carry out. This lightens the load that the printers mainboard needs to carry. For this to happen the Klipper host device (a raspberry pi, Linux computer, etc) need to be flashed with Klipper firmware AND the 3d printers mainboard needs to be flashed with Klipper firmware. This way the mainboard and the host device can communicate because they are both using Klipper.
So you'll be performing two separate flashes, one to flash Klipper onto whatever host device you use (I use a pi in this video), and then a second to flash Klipper onto the mainboard of your 3d printer.
I hope this clarifies it, if not just ask me anymore questions I'm happy to help.
Thanks that explains it much better and is understandable to me now. I guess I will be buying a new driver board to perform this so that the warranty is not invalidated. I would probably opt for the Manta M4P given it can piggy back a Pi.
Loved the video and it should be a go to for anyone who needs to learn how to do this.
💗
Thanks Michael I appreciate the kind words, and I'm glad I can help! Usually whatever mainboard you have can be flashed back to stock firmware (Marlin). That may alleviate the need to buy a new board if you're worried.
@@PrintsLeo3D Thanks again, that would be useful except I don't know how to backup the present Marlin Firmware on the board. Given the printer is Aquilla X2 based it has a heated bed and bl touch along with a modified Marlin firmware.
Well if you wanted to explore it more let me know. Usually Voxelab will offer current firmwares for their printers on their official website. I've also made some customized firmwares for the Aquilas myself.
Can you go over on how to update firmware for future releases
Yea that's a really good idea. A lot of it can be done through your front end of choice (Fluidd or Mainsail) but there can be some edge cases and other issues that would be worthwhile to cover. Great idea!
Hey Man! I know it's been a while since you posted this video, but do you know how much of this would be the same for an X2, and what I might need to change?
The X2 is basically the same exact printer I worked on in this video. The only added a few extra bells and whistles to it, but the bones and hardware are mostly the same. The most important part is to double check what chip you have in your printer, because that would be the only difference. So double check that info and follow this video, you should be fine . If you run into any issues join the Discord and we can help.
@@PrintsLeo3DAwesome! I may give it a shot then. Have you tried anything to have the factory screen work with the Klipperized printer?
Has any of this changed and would it be much different say I was to used an old laptop? N32 and H32 chips
Nothing really has changed, except you might *not* have to change repositories for the N32 chip, as I believed Stas' branch has been pulled to the main Klipper branch.
As for using a PC everything is identical with the exception of the operating system you're going to use of course. My people I speak to use Linux Mint as the PC operating system of choice.
Dude, sick shirt
Thanks, it's one of my faves!
that ip address you entered when connected to your printer for fluid, i don't recall you ever using that one during your tutorial. You said, "Enter the ip address that we've been using." I have a h32 and was following along up until then. I went over to your website for your written instructions concerning connecting to the printer with setup and that's seems vastly different for the video at that point. I'm pretty confused about that part. So I'm stuck.
The ip address I'm using in this video is going to be from what you'll be using. Whatever up address you used while setting up the pi (the one used to SSH. For instance) will be the same ip address that you enter into the address bar of your webpage to access the front end. Let me know if this helps.
I was able to figure that out after I ate dinner. I was following your video pretty closely. When you set your pi up wirelessly in the beginning and the one you used, it wasn't the same when you put into your browser ending....242.41 vs .....1.154. So I had found that part confusing along with you literally saying to input the ip address that was being used throughout the video 😊 (wasnt a static ip i guess and the tutorial wasnt done all at once). I thought i missed something. I skipped the parts that weren't applicable to H32. Anyway, when i got back, logically it just made sense it was just inputting my pi's ip address into the browser to access fluid so I was able to resolve that.
Maybe for a few people, this might be worth noting as this was my 1st time using a pi with my printer, so it was all new to me.
I later had issue with getting the serial id. I kept getting an error message when running the command "ls /dev...". I didn't connect my usb cord between my pi and printer initially. I reran the ls command and it gave me the information. I also rebooted my pi prior. One or the other made it work, I'm suspecting not having the usb connected.
I had to make sure that my usb cable that I was using was a data cable and not just a charging cable as a sanity check.
Another issue was updating the firmware. I formatted my card as explained with defaults. My 1st micro sd card wouldn't work as the printer booted normally. I tried another micro sd card, prepared it in the same manner, and it worked.
Thanks for responding quickly as I didn't expect that. More importantly, thanks for taking the time to provide information in the manner that you do, and it definitely shows the passion that you have in willing to share.
This information here has motivated me to use my printer more 😊
I had a feeling you were gonna get there on your own with this one. I know how tough it can be trying to get all these different systems up and running and working together, but I promise once the ship is in the water it gets a lot easier to steer lol
For this video I think I had to do some of the setup parts of the tutorial while I wasn't home so I was using my phone's hotspot. Then at some point I was able to get home and finish the thing. That's probably why I have two ip addresses.
You're right about the cable. It needs to be plugged in for the pi to give a return address, and it does need to be capable of data transfer. So smart on you for checking on that feature.
The SD card issue is unfortunately something we have to deal with. Some of these boards don't like smaller cards, some of them won't work with larger cards. There's never a way to tell and it can be a huge headache. Apart from that we then have to make sure everything is properly formatted and the files are all named correctly. So this process can handcuff some people. That being said you're now over the hump, and it all should be downhill from here. They'll be some growing pains getting used to the new front end but ultimately will be well worth it.
If you have more issues as you navigate Klipper I emplore you to join the Discord. Just about everyone there now runs Klipper so it's full of really helpful people.
I'm happy to help and glad you're getting more time on your printer. High praise and I appreciate it.
Hi Léo ,My voxelab x2 h32 can it run klipper ?
Yes absolutely can! Steve gotthardt created a repository that worked for that chip, but I believe that the main Klipper branch have now included it! I could be wrong but I'll double check. Either way if you follow the steps of I go over in this video for the H32, it will bring you to Steve's repo and it all should be updated from there ! If you need help let me know
@@PrintsLeo3D thank's ,
Hi Leo, thanks again for another great video!!!, recently I bought a Creality Sonic Pad, I'll may be using it for my Anycubic Vyper, but I have a G32 Aquila with BLTouch and Marlin and plan in using it for the Aquila instead, can you provide insight on how can we do it? Thanks
Hey Carlos, while I don't have any direct experience with the sonic pad a few people I've spoken to have, and it isn't the best 'out of the box' Klipper answer out there for the Aquilas. You're on luck though because of all the chips the G32 is the one that should be the easiest to use with the Sonic Pad. The pad will have you create the firmware image to flash onto your printer, and for the G32 chip you can set it up right from the pad (exactly as I did in this video, make sure not to skip the 28kib bootloader). After that the pad should walk you through the remaining steps. The printer.cfg is the document Klipper used to operate your printer , you'll need a boiler plate copy for the Aquila, and I have it on my website for you to copy and paste. If you have any troubles while you're going through the process let me know!
@@PrintsLeo3D Thanks Leo, I'll try it and let you know. Thanks again!!!
@@PrintsLeo3D What printer.cfg file I should use? (I have a G32 chip running Marlin and BL Touch, and all metal dual gear extruder), Do I have to modify the .cfg file?.
Carlos I have a vanilla .cfg on my website you can use (under the Klipper section). I also have some macros you can use for the bl touch. You'll need to add 3 sections for the bl touch : [bltouch] , [bed_mesh], and [safe_z_home] all of which you can get on my website!
@@PrintsLeo3D Thanks I saw it, so just copy and paste the sections you outlined above to the plain .cfg file?
Hi. Great video. I seem to have an obscure board in my Aquila D1. I need to find the pin mapping for my board which is labeled as "FFP0261" inside of the printer. Most of the pin mappings that I can find online, are for a different board inside of the Aquila D1. Any suggestions? I keep getting and ADC error, so I think my pin mapping is wrong using the example printer.cfg's that I can find. Any help is appreciated.
Unfortunately I don't own a D1 and if the board is not public it will be very hard to find a pin mapping. Companies like BigTreeTech provide all the pin malpings we need to make this process easy, but private companies , like Voxelab, will rarely release this information. You can try emailing the company or seeing if anyone else has mapped the pins to a board similar to this.
@@PrintsLeo3D Thank you sir. I have done both-- I've just emailed BTT for help getting their Klipper Pad 7" to work with the Voxel D1, and I've ordered a new BTT SK3 Mini controller board, just in case to replace this very obscure controller. The Aquila D1 with all its linear rails is a beast of a hardware build, that just begs for Klipper. Keep up the good work please.
Yea if you can get Klipper running on a clean config using that printer you should be golden! Thanks again
@@PrintsLeo3D I had a super quick response from Alexey and he sent a bare bones printer.cfg for my Aquila D1 with the N32G455 on the FFP0261 mainboard. I'd like to share it with you, if you'd like to add it to your collection.
My Aquila D1 is finally running with Klipper using a BTT 7" Pad. It is spectacular with the D1's structure and its linear rails. It was a major challenge, but your work and comments here steered me in the correct direction.
I'm working on loading Klipper on my S2, I've got the Klipper image flashed to the Raspberry, and the firmware loaded on the printer. I'm running into an issue now where they are not talking to each other, I'm also seeing mcu unable to connect, does this mean there is something wrong with my PI?
thanks!
Hey Ben! Usually when they are not 'talking' to each other that's indicative of a bad flash. Not always the case but in my experience that's usually where it goes wrong. When you say they aren't talking I am going to assume you ran the ls /dev/serial/by-id/* and got no results. I would go back to my video and find the portion where I show the flash image for each chip. A lot of people miss the correct bootloader section (I think it's 28KiB off the top of my head). If you're still having issues you can go to my website and download an image for the chip you have and see if that works. Those are known good firmware images for Klipper, so if that doesn't work than maybe you have a bad cable or something similar.
I followed thia guide on my Aquila X2 and my extruder is retracting instead of extruding. Plus it just sits way to long before the start if the print job.. Any help would be awesome.
Also if it helps I have a micro swiss direct drive installed and not the stock head.
Thanks for leaving a comment here and also reaching out through email. being able to see read through your printer.cfg always helps diagnose issues like this. Glad you were able to get it working properly and you can start to enjoy Klipper! For anyone reading this that may have a similar issue, it came down to just inverting the dir_pin of the extruder(adding or subtracting an '!' before the pin). After a few attempt and some Saving and Restarting it took care of itself!
will this work on an aquila c2 with h32 chip? the screen is not a color screen? also, if i try this on my other aquila with the color screen what happens on that? does the control screen become unusable? i did notice that is did not look like it was working. let me know. thanks
It's been a little bit since I have dealt with the Aquila C2s but if memory serves me correct this will not work with that printer. It doesn't have anything to do with the screen but the ability of the mainboard. Again it's been a while but I don't remember the C2 being Klipper-capable.
As for a normal Aquila's screen, yes it does become unusable after moving to Klipper. You will be controlling your printer from a webpage (whether on your phone or computer) and the screen will no longer operate (as it works based on an encoder which Klipper does not use). It may seem like a downgrade at first, but trust me everyone that has made this move and felt that way has quickly told me that it becomes a non issue once they start using the webpage for communication.
Hope this helps and good luck!
@@PrintsLeo3D ok cool. thanks for the info!!
@@PrintsLeo3D I actually just got Klipper installed on my C2 printer. I followed along with the tutorial with a couple of minor differences. There's a klipper_C2.bin file and a link to C2 config files in SteveGotthardt's repository that you have linked. So I used those instead and it worked with no issues.
Thank you so much for the tutorial btw! I'm very excited about the browser dashboard and calibrating this thing into a clean printing speed demon.
hello nice video but on my voxelab aquila x2 h32 chip it said klipper failed to install and im stuck i have no idea what to do next please assist thanks
Sorry for such a late reply. I would have recommended to go to the Discord. Where you able to fix this issue ?
@@PrintsLeo3D yes I made both my voxelab Aquila x2 and ender 3 pro all metal dual extruders and direct drives
I'm trying to get the firmware image with KIAUH for an n32 chip, but there is no N32G45x option, instead after selecting the micro controller architecture as stm32, I get the N32G455 and N32G452 chip models. Should I select one of them, and if so does it make a difference which one?
Thays a great questions and too be honest I don't really know off the top of my head. I would say the safest bet would be to visually inspect the chip that's in your printer and it should have the correct chip labelling stamped onto it. That way you can be 100% which one it is. That's the way I would handle it 👍
hi Leo , i install debian on my orangepi zero3 , i install klipper , moonraker, mainsail with kiauh , i flash klippero1.bin with your share link (because my machine is voxelab x2 ). everything ok . but i have a issues..when i used the command " ls /dev/serial/by-id/* " No such file or directory , i try with kiauh with number 4 then 5 to get mcu id ,so it have massage "no mcu found " .what can i do to connect my voxelab x2 help please .
I would double check by trying another USB cable. Also might be worth it to try and reflash the firmware. Of course because there are 3 different chips in these Aquila you need to make sure you flashing the correct one for your chip. Whenever you don't detect an MCU it is usually evidence that the printer itself was no flashed properly. You can also try reformatting the SD card you used to flash, or use another one entirely . Format is FAT32, 4096 bytes.
The new file for kiauh does not have the repos folder how do i add it ?
Thank you
What would the start gcode be if I was using orcaslicer?
Im loving your videos, learning tons (my sprite it's on its way), I'm totally null on programing and over here on Mexico raspberries pi is way to expensive, I do have an old android phone, would you ever do a video tutorial for using an old android phone instead of the raspberry?
Hey, thanks for the kind words and I'm glad you're liking these videos! Running Klipper on an Android device is unfortunately not as straightforward as you would think. However there is another great option and that's any device that can run Linux, like a laptop or the Inovato Quadra! I have a video on the Quadra but I'm not sure if they ship to Mexico. The alternate option to that is a T95 TV box, which is basically the same thing as a Quadra just unbranded. The install for that is so straightforward if you're interested here's the video link:
ua-cam.com/video/RfMvLEUjkB0/v-deo.html
If you have any other questions or need help with the install let me know !!
@@PrintsLeo3D yeah I saw it, sadly they do not ship to Mexico, I found the PI4B CB1 from btt it might be an alternative, but as said, null on programing I am haha
There's usually a fair amount of guides you can follow, and most of the coding is copy and paste. Hope it works out for you!
hi, great video, but for some reason im not getting any thermals. could you please help? all it says is "Current 0.0c" thanks!
Make sure the printer.cfg is correct for your board. Which Aquila are you using and where did you get the .cfg file?
@PrintsLeo3D I figured it out! The code was spitting me an error, thank you!
Awesome! Good luck and happy printing!
In the Firmware build after selecting "build only" I get this error " make: *** No rule to make target 'clean'. Stop. " any ideas?
I have never ran into this issue while using KIAUH. What you can try is issuing a ' make clean' and see fi that works. Right when you SSH into your device first run a command to enter the Klipper folder:
cd klipper
the terminal line should now end in '/klipper:' which shows you're in the correct folder. now run the following line:
make clean
this should clean up any existing build parameters that were left over. If for some reason you're still having an issue let me know I can flash some firmware and send it to you just to get you started!
@@PrintsLeo3D Same exact reply when I go into the clipper directory and give make clean command.
@@PrintsLeo3D Do you have a discord?
im using a linux pc instead of a pi and i have an n32 chip, I can't find the klipper repo .txt file in the kiauh file. Does anyone have any ideas what i should do
I took Your advice and decided to go with a rasp pi instead of the sonic pad. Do you have any videos on doing this on the pi on the Aquila x2 with the sprite pro/cr touch set up ?
This video is going to be sufficient for you! Installing Klipper is basically two seperate installations. Flashing Klipper onto an MCU (a pi in your example which this video uses). Then flashing Klipper onto the mainboard of your printer (and this video covers that as well -all chips N32/H32/G32).
The specifics of your printer (hot end, probe or no probe, bed size, max temp) are all handled by a single file that you have access through the Klipper webpage. That file is called the printer.cfg
I have example configurations (known as configs or .cfgs) for the Aquila (which can be used for the X2) which include printers with bed probes, and even the Sprite extruder. It's all houses on my website which I should have linked in the description. If I didn't it's PrintsLeo3D.com
@@PrintsLeo3D you are the man. Can’t thank you enough.
No problem! If you need help navigating the site or helping with the config let me know
Morning Leo, I’ve been banging my head against the wall for two straight days. I follow your klipper/AquilaX2 step by step and as soon as I get to the build only section to build the fw I do not get the yellow pop up window… I just get another green CLI command line with blue~/ kiauh$. I have been unable to go any further than this. Since I have the same exact printer as you down to the Sprite extruder I downloaded your firmware file and tried flashing that. When I get everything supposedly to a place where everything is good and printer connected to the pi I am left with “klippy not connected”. Frustrating as heck lol. Was up to 3am last night and back at it at 7am today till now and cannot get any further. I’ve reformatted and recompiled everything 5 times and no bueno. I am not sure what I am missing but I am going to figure this out if it takes all weekend. This will not beat me. 💪 😑
Why don't you send me an email and we can walk you through with some screenshots. Better yet, if you want, join the Discord and start a new Help thread. This way more minds than just mine can get on top of this 🧠 good luck
Hi Leo, I see you have a non-stock hot end, is that why you are able to print at 90mm/sec ? stock hot-end on an Aquila wont be able to do that right ?
Hey Amir! This Aquila does have an aftermarket hot end, it's actually the Sprite Pro Extruder from Creality. During calibration I found the max volumetric flow rate was around 14mm3/s. The stock MK8 hot end of the Aquila is likely somewhere just shy of that (10-12mm3/s maybe) which is still pretty good output. That all being said the speeds I am reaching in this video should be attainable with an Aquila with a stock hot end setup. I don't have any stock hot ends on my printers anymore so I can't say for certain but I would imagine you can at least reach speeds of 100mm/s, as that's what my Aquila S2 maxes out at with it's stock(proprietary) hot end. For instance if the stock hot end had a flow rate of 10mm3/s, and you were printing at a layer height of 0.2 with a line width of 0.4 (0.4 stock nozzle) you could theoretically max out at a speed of 125mm/s (10 / 0.2 / 0.4 = 125mm/s) Obviously there are a lot of variables that determine your max speeds so this is a rough estimate!
@@PrintsLeo3D thanks for the detailed response, really appreciate it. I'm going to have to read it a few times , really appreciate you taking the time to respond.
You're welcome! If you need me to go over any of that in better detail I'd be happy to! I appreciate you asking the question.
Bootloader offset 28Kb? (had 8 by default for some reasson....)
The default is 8KiB, and I believe that because there's a few bootloader's available through Klipper for various boards so they give you that option. For the Aquila setup, as well as some of the Enders, the bootloader should be set to 28KiB. I appreciate you getting to that point in the video, whether you used the chapter markers or watch it through. Thanks you!
@@PrintsLeo3D so this setting will not cause bootloader overwrite? Like when you wana go back to marlin?
According to my results it shouldn't. This is the setting I used to flash Klipper on both my Aquilas (stm32 and N32). My STM32 aquila flashed successfully back to Marlin yesterday, I can't remember when I reflashed Marlin to my N32 but I believe I did. If you want me to double check I will.
will this guide work for the aquila x2?
It absolutely will! Good luck and if you have any trouble let me know
@@PrintsLeo3D have just got my first "second hand" aquila for £50/$65
Damn you! 😉. I've read about Kipper a while back but...I have so many projects I'm working on! I didn't want get sidetracked on learning Klipper and flashing the Aquila. Already using octoprint which I'm really happy with but... Better prints..and I suspect I have vibration issue.... So tempting!
Also just watched 3DprintSOSs unbox and build of the new Aquila D1 and.... It looks saaaaweeeet!
I got extra Pi boards. I bought up some over the summer, mostly from Europe for just this reason. That and who knows what tragedy or issue the moronic leaders of our ruling class are gonna manufature next! 😉
Lol Klipper is a black hole, you've been warned! Klipper can be a journey that's for sure, and if you have the pis then I don't think you have many excuses. It can take some getting used to at first, there's always going to be growing pains, but once you get it dialed in it's really a night and day difference. You can also flash Marlin back as easily as you flashed it the first time. If you have Octoprint you know how awesome it is to be in remote control of your printer, and with Klipper you get all that plus more! You'll lose some of the Octoprint plugins you may have grown fond of, but as far as I know there's nothing on Octoprint you can't make work on Klipper too, it's so versatile. I don't know anything about the D1 yet, but give me a good ole Aquila and some Klipper and I promise you'll be happy with the end results! Good luck if you decide to join the adventure, if not it will always be there waiting for you. If you need any help just drop me a message. Keep on printing !
Awesome video, would this work with my N32 Aquila S2 that is currently running your marlin with the 300c mod?
Im guessing this does not work with the S2 as mine is sitting on just the voxelab logo upon trying to flash the generated firmware.
Yes this will work with each Aquila running these chips.
I would try and use an alternate SD card, or perhaps reflash whichever one you tried to use(fat32/4096bytes). My S2 is also an N32 chip and it worked perfectly well. The only alterations you'll need to make us within the printer.cfg file is to bring the max temp up to 300c, which is as easy as editing the number within [extruder] after the Max_temperature parameter and writing in 300!
i cant get my aquila c2 h32 to connect. msu error. changed the printer cfg to the correct serial. but still nothing.
I will say for a long time I didn't think the C2 was compatible. When you run :
ls /dev/serial/by-id/*
Do you get a return ? Let me know
@@PrintsLeo3D I sorted it. bad USB cable. It runs like a dream now. thanks for the video. I followed most of the instructions. There is now a working Hc32.cfg file which I used instead of the N32.
cheers
Hi do you know how to install klipperscreen on a tft35 rpi touch screen?
I haven't done a Klipperscreen install yet, but when I do I will probably be installing it through KIAUH, just how I installed the other components of Klipper. I would start there, go to the Klipperscreen docs, and then search for anything specific to that touchscreen. Also another avenue of information might be the Discord. There's a few people in there that have set up Klipperscreen and they may be able to offer some advice. The link to the Discord is in the description. Good luck and let me know how it goes !
@@PrintsLeo3D thanks Leo!!
Leo, do you know if this will work if I'm using a Wyse thin client rather than a pi? I was watching another video and I installed klipper but didn't notice that the N32's use diff repositories. i dont know how id change the repo with winSCP since the Wyse thin clients are basically a mini pc
ps. im using a Debian operating system
Ruben, I'm not sure how to access the directories on the thin clien, but I'm sure there must be some way to do it. Either way, I got you covered! I have a created firmware image for the N32 chip and it's available on my website. Created the image doesn't have to be done on your device, it just usually is because the process is all done together. The only caveat is my image is from a Klipper version about 6 months ago. I don't think that should give you any issues, if it does give you some let me know and I'll create a new image for you with the latest version of Klipper.
www.printsleo3d.com/klipperaquila
@@PrintsLeo3D awesome, thanks bro. ill look into editing the repo. yea i agree theirs gotta be a way im just new to this so ill keep digging.
Yea I figured for now you can. Flash using my image so you can get the printer going. Then figure it out later lol
@@PrintsLeo3D wait quick question then, if I flash the N32 firmware can I still use the printer without using klipper until I get the repo working or will it not work until I get klipper connected.
Is it possible to go back to stock aquila firmware if needed?
Yes, and it's simple! All you need to do is reflash Marlin onto the Aquila and you're good to go. Of course you need to flash firmware that's compatible with your board/chip, but going back and forth is no problem.
@@PrintsLeo3D awesome thanks! Going to try this on a Dell Wyse thin client!
Oh wow let me know how it goes I had another discord member attempting the same thing!
I keep getting this random error. I have installed this on two Voxelab S2 printers. Both with have this issue. Any idea what is causing this ? [Lost communication with MCU 'mcu'
Once the underlying issue is corrected, use the
"FIRMWARE_RESTART" command to reset the firmware, reload the
config, and restart the host software.
Printer is shutdown]
Jeff was Klipper running for you effectively and this happened or you haven't been able to get it running yet?
Are both printers sharing the same MCU?
What MCU are you using (pi, Quadra, PC, etc)?
@@PrintsLeo3D Both printers have separate Raspberry Pi Zero W. Both motherboards in the printers are the H32 boards. Klipper was running. The last 3 prints I have tried all failed. Tried new power supply and different cable.
Are you running any other services? Like a webcam service or something similar. I've never had an issue with my Pi zeros not having enough power, but maybe it's a possibility if you bare overloading it ?
@@PrintsLeo3D
Is this going to work with aquila s2 with direct extruder ?
Yes, absolutely! I have Klipper running on my S2. Direct drive considerations are usually handled in the slicer (retraction distance and such). So you shouldn't have any problems with it. If you have questions with the process or setup let me know.
@@PrintsLeo3D alright thx!
I just added a Bltouch i did not switch to klipper yet is there anything different to add or its already set in your files on your website for the S2?
The bl touch S2 should all be good to go, no need to add anything. The one thing you'll want to do is double check the X and Y offsets for the bl touch are correct and then adjust them if necessary. The adjustment is done through the menu systems, and if you need to know how to measure it I have a UA-cam short that shows a very easy and accurate way
Hi i just install klipper on my Aquila x2 n32 but i cant get my bed or extruder to heat up, are the pin right or do you know what they should be for my n32 or the sensor pin number everything else is working but wont heat up many thanks if you can help. Plus am trying to use a sonic pad with my printer, so which bin file is best to use off the web site or the one the sonic pad makes up is that the reason why the printer.cfg is not working right.
Hi Wayne! I'm sorry for the slow response but I was on vacation and had no cell service. So if you were to use my example printer.cfg than all the pins would be correct for your (N32) board. As far as how the sonic pad works, I am not sure exactly how the flash and .cfg get generated but I would go with the .cfg I provide as I can confirm it works. This may be easier if I see the printer.cfg so going forward email may be a better option for help(printsleo3d@gmail.com).
Hi many thanks for getting back to me. I managed to get it working but if keep losing connection to the sonic pad and the web page so i dont know if its the sonic pad not happy with my printer. You should have a go its a right pain and you cant get any help from the makers of the pad or the printer. Thanks again
When you lose connection, do you have to restart the pad or printer? Or will it eventually find the connection again ?
All 3 sometimes its not very stable, plus it stops half way through printing and it wont save the printer profile so i got to go through the setup part every time. And you cant do a auto bed level on the pad its say there no data but you can do one on the web page side.
Yikes. Did you use the pad to flash your mainboard? It's possible that flash was not correct, especially considering the N43 requires a particular repository.
will this work on nanopi k2 ? the same tutorial for installing the os on it
Unfortunately I'm not familiar with the nonopi K2, so I can't really say OS wise. If you can figure out which OS to flash every other step should be identical. Hopefully you figure it out and let me know if you do so I can add it to the list!
@@PrintsLeo3D i did but it only works on 55 inch 4k display ubuntu core is the system that i get picture with and i need to do everything manually
So this is something that can't be reached via SSH?
@@PrintsLeo3D it can but first you need to setup it manually
Couldn't make it run anything only ubuntu core but i duno if i can install klipper in ubuntu core this nanopi k2 board is so powerful but it actually suck
Hey man , im trying to do the same thing here with the OrangePi Zero 2 on my Aquila S2 N32 but right near the end i have a problem with the MCU error and the thing is that i already tried everything here but there doesnt seem to be a /dev/serial/ .... etc folder for me so when i try to do the ls /dev/serial/by-id/* command i cant find anything . i dont know what to do . any iideas ?
nevermind , right after i start looking for help it works now , jeez man 🤣😅
Lol Peter! That's how those things go sometimes. It's possible one of the services needed to restart (or boot) in order to get everything running. I'm glad you decided to make the transition to Klipper, and if you need any help let me know.
@@PrintsLeo3D i think it was winSCP , for some reason i didn't turn it on while trying the MCU step and thus couldn't find the folder , ohh well , thanks man absolutely , klipper rocks man , i just gotta get the probe into the cfg and should be good to go. 😉👍
Awesome! I got Klipper videos now, and more coming to help out! Input Shaping coming in a few days !
@@PrintsLeo3D Super , i will def check them out , thank you
I have an Aquila X2 H32, Neither 01 or C2 are working for me.
The screen never glitches, but the raspi doesnt see the printer on serial and the old firmware is gone.
Are you nesting the file in a folder labelled 'firmware' , with nothing else on the SD card? Might be worth reformatting the SD card (fat32/ 4096 bytes). Can always try a different SD card if you have one. There's also a plain ole klipper.bin file available on the GitHub you can always give a shot.
@@PrintsLeo3D *think* i might be further now.. I can see the device connecting in dmesg, but the {ls /dev/serial/by-id/*} command doesn't work - no such directory.
@@onceagain227 @PrintsLeo3D Any update on this? I'm having the same issue.
@@superiorhydrogen4395 oh yes, ended up needing the 01 firmware, and a fresh install of Raspbian. If you need more help, let me know. I went through a lot of stuff trying to figure it out.
If you're following this on a Mac, do yourself a favor and press CMD+SHIFT+. to show hidden files and delete them before pluggin the sd card into the Aquilla for firmware flashing. I spend and hour or more trying to figure out what I was doing wrong, and why the Aquilla wasn't flashing the firmware but instead showing the normal main menu.
Yo, Ryan!!!! This is amazing info !!!! I run into a lot of users who have issues using MACs when flashing and I have to imagine this is the reason. I am going to take this info and add it to the description and just keep it in mind going forward. Awesome tip, thanks for dropping in!
Hey there Leo, im having an issue here when doing the serial error fix. Im getting this,
Pi@KlipperPi:~ $ ls /dev/serial/by-id/*
ls: cannot access '/dev/serial/by-id/*': No such file or directory
Any advice? Thanks
This can be the result of a few things. Usually it's a bad flash of the mainboard, but it can also be a result of a bad USB cable. I'd recheck the image you used to flash your printer. What type of printer are you running ?
Have you fix it yet , I have issues too
I ran into an mcu error I’ve been trying everything to get it to work but no luck
If you want to post what the error message is I would love to try and help.
Ok, so I tried this again today, (was testing marlin) found an estep vaule that worked(95steps/mm) then converted it. got 33.68421052631579. Don't know why it is so different to yours of the same printer. Did you have custom extruder?(Edit: never mind, it is ok.)
Yea you're absolutely right, I have a dual gear extruder on mine, so my base E-steps we're somewhere in the 400s! Glad you figured it out, I mean you were right the whole time, it was me who was confusing lol!
Hi @Leo, but once I installed klipper for the N32 chip, I no longer receive updates!!
Klipper has arrived at 0.11, enabling the exclusion of objects, but on v0.10.0-802-g09612f8c which is the latest in the repo you recommended, it never downloads the new version for me?
How can I do??
If you used KIAUH to install Klipper (and it's other parts) you should be able to update Klipper directly from that menu. I was able to upgrade my Aquila to the newest firmwares to take advantage of exclude_object. Let me know if you need more guidance in order to do that.
Hi Leo, I installed klipper using kiauh, and I set as a repo what you indicated in the video (custom repo for N32 chip), and klipper works great. Now, though, I need the exclude objects function, but if I check the updates, I can't find the 0.11 but it's still at the one indicated in my previous message. How do I force the update, how did you do it?
When you refer to checking the updates, are you doing that from the KIAUH menu or from the front end ?
Leo, maybe you replaced the "aquila" repo with that of Klipper's original git?
-one addon.....my environment is on linux machine with Ubuntu OS
@@PrintsLeo3D Hi Leo, I run the update both from the front-end and from KIAUH (I also updated the kiauh script), but both always give me the same version of Klipper
Thanks for this Video, got some questions for you. I have an Aquila Pro, the default firmware is garbage. The printer stops printing in the middle of a print and doesn't tell you why. The mainboard is a different from the Aquila X2 board. The pro has an N32 chip on it, it is a Nation N32G455 to be exact. There is no usb on this board. The usb is on the board for the screen. A mainboard replacement on the Voxelab website only shows the mainboard for the screen. If you download the firmware from the Voxelab website it is a handful of files and the way to manually update the firmware is to have all these files on the root of the USB stick (no microSD anywhere). File types include tar.gz, tar.xz and a couple of disc images. Anyways I'd like to try and put klipper on this thing. I have an SKR mini e3 v3 to use but I'd like to give this a shot if I can. The config for the N32 chip says the chip is an N32G452, so I'm guessing this won't work. What are your thoughts?
Hey sorry I was slow to respond, I wanted to try and gather as much info as I could about the Aquila Pro so I could try and help you. I don't own an Aquila Pro so I have no first hand knowledge but I have been told the firmware is 'proprietary', or at the very least, is unable to be manipulated by the end user. I know that was one of the gripes when it was released. For that reason I could not confidently say if this would be able to readily flash Klipper. Both chips are Nations Tech, and from the manufacturer documentation I don't see all that mich difference (that being said I am not sure exactly what I would be looking for), but if there are differences between them could be game breaking. If I had a Pro I would give it a shot but I don't know if I'd recommend a hail mary install to see if it works. The SKR mini e3v3 can absolutely handle Klipper, but there's a lot that goes into swapping over to a new mainboard that might give you pause. Some people also have issues with flashing the newer SKR minis, and usually it's do to fining the correct SD card as they can be finicky. If you have any other questions let me know and I'd be happy to help.
@@PrintsLeo3D I've already got two printers with the E3 V3, one with Klipper and one with Marlin that I compiled from scratch. Shouldn't be a problem if I swap out the existing board on the printer. My brother sent me a photo of he X2 replacement board and the N32 chip was the exact same on the Pro so I'll give it a shot and see what happens. The only thing I'm worried about is that the main board of the Pro doesn't have a usb port, the touch screen has that so I assume it is doing it as as pass through. If it doesn't work it's probably going to be because of that. I'll let you know what happens. My only thing I don't know with regards to switching to klipper is the Pro uses a servo and button for auto bed leveling, don't know who to set that up in Klipper.
Oh wow that's great, I didn't know you had some experience with those boards under your belt. I would hope flashing Klipper is the same on both the boards regardless of the USB connection, but it's possible you could run into some sort of file type error. I emailed Voxelab hoping they could answer some questions for me but I haven't heard back yet. If you can find out how that probe is connected to the mainboard you should be able to define a section in the printer.cfg for your servo probe based on the pin numbers
@@PrintsLeo3D Cross your fingers, going to work on it this week.
Keep me updated and if you need help along the way let me know. Usually email (printsleo3d@gmail.com) and discord(link in description) are the quickest ways to get to me
have you figured out how to use this display to show the temp and stuff. I know the screen will pretty much be useless except for displaying temps and stuff.
On my Ender 3s with the older led style displays, i have converted them to show temp and such. I have not tried yet with the Aquila display. The difference is that the Aquila display has its own firmware, so I am sure it's not as straight forward as it was with the Enders. I do know some people have found a way to make the screen work in a usable way, but it was a pretty complex procedure. I can find some links if you're interested?
@@PrintsLeo3D Don't sweat it.....I can do some stuff but if it is going to be complicated, I will pass. I will just stick with using my phone. I appreciate it anyways, many thanks.
Yea on the enders it's a line in printer.cfg, for this screen it's more than that lol
I am trying to set up a sonic pad with aquila x2 n32 chip. I have tried for a week with no joy. It needs someone wiser than I am to make a video so I can follow it.
Yvonne, tell me about it lol I bought the sonic pad to educate myself in hopes of helping everyone else, but I just never found the time to open it up and get rolling with it :( however I would suggest joint my Discord, there's a link in the description. If you aren't familiar with Discord it's a free app download. It's basically a forum style messenger where people who are interested in the same topics can talk and share ideas. I have a few people on there who own sonic pads and are way more familiar than me, I even think one may may be running an N32 chipped Aquila! As for the firmware, I can compile the correct firmware for you, it's just a matter of flashing it. I don't know how the pad flashes, but like I said others on the discord do! I wish I could help right from here but I think that's the best way! Hope to talk to you there and thanks for watching
@@PrintsLeo3D Thankyou for your kind reply. I will get onto your discord and join the gang!
Awesome! I'd love to be able to help here, but we are better in numbers, and the discord has them :)
for some odd reason my G32 is stuck on the "Voxelab" logo after I flash the firmware and I can't get klipper to connect to the printer from there any help?
The screen is normal, once we flash Klipper onto the Aquila the screen no longer works. As for Klipper not connecting, what error is it showing ? Are you able to reach Fluidd through a web browser ?
@@PrintsLeo3D im getting Printer is not ready
The klippy host software is attempting to connect. Please
retry in a few moments. even after the serial port fix and yes I can access Fluidd from browser
That certainly sounds like the firmware upload didn't quite take to the printer. First I want to make sure you created the correct firmware image (which would be to use the small asterisks that says giga device as well as other parameters). Would we be able to communicate through email (printsleo3d@gmail.com) or discord (link in description), as it's easier for me to send images to help when solving this error. Discord is better for fast communication but email is fine as well
@@PrintsLeo3D What Ended up being the solution to this? I am having the same problem. :(
I'm not sure what the fix was, I get a lot of people who reach out to me during the week so it's hard to keep track. If you're having an issue like this I would do a sanity check on a few things. Make sure the USB cable you're using from the pi to printer is capable of data transfer. Make sure you flashed the correct image for your board (ie double check the chip). When setting up the firmware image make sure you set the bootloader to 28KiB. Let me know if the problem still isn't solved.
Anyone have issues with their thermistor readings? I installed Klipper onto a N32, set my hotend thermsistor type to the one I am using (non-stock HT-NTC 100K clone) in printer.cfg, and left the bed thermistor alone (stock). However, in Fluidd both thermistors hover around 0 degrees and sometimes dip below (which caused MCU stop errors at first until I lowered the minimum to -100). My ambient is closer to 16 to 24 degrees and I verified both read correctly in Marlin... My guess is there might be differences in the ADC amplifier on my particular N32 motherboard? Just dipping my toes into the Klipper pool now, anyone have any ideas?
Figured out the issue. It does look like some later commits broke the ADC logic as I suspected. I went back to git commit 6e8f5a9 in the stas2z/klipper-aquila-n32 repo which is the commit on the aquila-n32 branch right before this video was released. Now temps look correct.
I don't know why I didn't get the original comment notification but I got notified of your reply, so sorry for the late response. I don't think I would have been able to identify this as quickly as you did, but I do remember there being some sort of weirdness (technical term lol) with some of the no stock thermistors but I thought it was taken care of with a previous push. Also, while I don't use the specific thermistor you are using, I remember reading some configurations from other users and they had to set the thermistor up differently. This is from the LDO website as a recommend config outside of the [extruder] section.
[thermistor Trianglelab-NTC100K-B3950]
temperature1: 25
resistance1: 103180
temperature2: 150
resistance2: 1366.2
temperature3: 250
resistance3: 168.6
Either way I am glad you found the solution and I'll keep this in mind going forward if anyone else runs into a similar issue.
Again thanks for finding and more importantly SHARING your fix. This helps everyone out. Thank you!
@@PrintsLeo3D Thanks for the reply. I appreciate all the information you are disseminating. Unfortunately, while the Klipper documentation is rich, finding answers to questions on Google yields a lot of people asking questions, and the answer usually being something like "just do the thing you already should know how to do" or "go on Discord". So I highly appreciate videos like the ones you have made and hope you continue making them.
I ended up getting everything setup. I wanted to note that all your steps worked great on the repurposed Chromebox that I am running Debian on. Ran into some mcu communication issues because the MicroUSB cable was too long and isn't filtered, but fixed it with a shorter cable. But then at the last minute, I accidentally touched a probably poorly "grounded" chassis of a portable LCD monitor to the heated bed. It went pop, no magic smoke but the printer restarted, and then my bed wouldn't heat up past 25 degrees anymore without crashing the mcu. RIP N32. So I started all over with a spare G32 motherboard I had, and now I have everything setup including pressure advance and resonance compensation. Running into what looks like under-extrusion or cooling issues when bridging top layers, but I think that's nothing I can't handle with some tuning or maybe upgrading to better cooling solution. Also seeing Z artifacts, but I think that's just because I never tuned my layers to the threads on my Z rod or maybe its wobbling a bit. Either way, I should be able to fix it.
I have two more Aquilas I plan to Klipperize, but they are heavily modified (Ender Extender for one, Ender BLV kit for the other) and also I'm out of Aquila boards now so they are gonna get SKR Mini E3s.
For what it's worth, my hotend thermisistor ended up measuring closest to "NTC 100K MGB18-104F39050L32" and I ended up not needing to set any resistance values!
Awesome stuff! Seems like you are more than equipped to be able to navigate all the twists an turns Klipper might throw your way (well minus a few extra mainboards lol). Like most things finding accurate and thorough information can be hard, also considering how quickly some of this information can change. As for your issue, cooling is certainly something to look at (whether it's the issue at hand or not I couldn't say). If you start finding some of the high ends of speed or accelerations that Klipper can offer you, you'll find cooling to be the one aspect that may hold you back.
Good luck going forward with your other printers and I hope it works out! Keep me in the loop !
I have C2, using raspberry pi 3 no wifi module, so using in on cable. i do get half way through the video but when it comes to building firmware new window doesnt show up. anyone help?
i just get this
[✓ OK] Dependencies already met!
make: *** No rule to make target 'clean'. Stop.
Luke, check what mainboard you have . I think the C2 doesn't have a board equipped out of the box to run Klipper. To find out what board you have you'd need to remove the bottom of the electronics cover and check out what is written on the board and chip. You'll want to make sure the power is off while you're doing this.
@@PrintsLeo3D I have N32 chip
I know the N32 from my video was it's own fork from Stas. Since this video Kevin has incorporated Stas' N32 branch into the main Klipper repo. If you want to make sure all is working, you can download my N32 firmeare from my website, this should work but will not be up to date. You'll know it works though. Then we can figure out how to set up the newest version of the N32 firmware because I think the image is setup a little differently.
@@PrintsLeo3D is there any way I could contact you besides YT comment?
Absolutely, I'd prefer you joined the Discord and talked through there(link in description), because there's more people there (maybe some with a C2) that can help. If you don't know enough about Discord then you can email me PrintsLeo3D@gmail.com
Hey Leo, top video once again. I couldn't see it mentioned by anyone else, but early on, just after you've logged in for the first time, you update your pi - ua-cam.com/video/a6ru0mH3F8M/v-deo.html
sudo apt-get update
However, you are missing a command (in the video, in the description, and in the text on your website) which should follow the one above;
sudo apt-get upgrade
The first command updates your list of repositories with the latest package versions. The second command compares what is installed on the pi versus what is available from the repositories, and selects a list of upgrades accordingly. On running the second command, the pi will tell you what packages need upgrading, and ask if you want to proceed. Go ahead and answer "y" to upgrade the necessary packages, then you're ready to go with the next step, which is cloning the git repository.
Josh you're a legend!!! Thank you, I must be getting lazy in my old age, just trying to rush through it 😂 whenever I talk about everyone lending a hand this is exactly what I'm about! Everyone pitching in to make this place better! I'm gonna make all the necessary addendums and give you credit, thank you!!!
@@PrintsLeo3D no trouble at all 😃 . I'm almost at the end of the video on my X2 H32. I'm a little surprised I got it working, but I have the printer connected to Fluidd which means I'm almost there! I'll post up what worked for me to help out any others with the same printer.
I'm not surprised ! Coming in it looks like a complicated install, but when you brush back all the layers it's pretty straightforward. Glad your basically up and running! If you need anything else at this point of the install, like a config or some other related questions, I'm here !
OK, so here's what I did for my X2 H32 chip.
1. .bin file
SteveGotthardt has updated their page mentioned here - ua-cam.com/video/a6ru0mH3F8M/v-deo.html. The page in the video says "it might work with the X2 by changing the printer.cfg". This statement has been removed in the latest version of that github page, and there is no mention of the X2. Despite what the page now says (klipper_O1 - for original aquila, klipper_C2 (also X1 or others)) you still need the klipper_O1.bin file as mentioned in this video. I can confirm that I can connect to my X2 H32 printer using that bin file. I tried the klipper_C2.bin file to start with (because the updated page kind of suggests that's what you need for the X2), but I could not connect to the printer with that .bin file.
2. printer.cfg
At the bottom of the SteveGotthardt github page, there is a link to their collection of printer.cfg files. github.com/SteveGotthardt/klipper/tree/hc32f460_work/config There are 4 .cfg files on that page. These two are identical: generic-voxelab-aquila-v1.0.3.cfg and printer-voxelab-aquila-2021.cfg, and both are largely identical to the stas2Z .cfg from the video, but they do have a commented out section for BL Touch which may save some time (I haven't tested yet).
3. I got an error 'GCode path from Klipper does not match expected location'. It's not quite obvious, but follow the hint in the error and add this section somewhere to your printer.cfg, save and restart, and the error goes away;
[virtual_sdcard]
path: /home/pi/printer_data/gcodes
You should be good to go from here. I'm up to the calibration chapter, ua-cam.com/video/a6ru0mH3F8M/v-deo.html, if I come across any X2 H32 gotchas I'll post them up.
Hi has anyone setup a profile for Aquila x2 for Cura with a sonic pad running Klipper cheers
Wayne, the Cura profile you used previous to installing Klipper will work fine. The only edit you will need to make is to the start and end gcode sections. With Marlin the start gcode section added commands to the beginning of each print, and the end gcode section commands for the end of each print. With Klipper those sections are now controlled through macros, which should be handled in your printer.cfg I'm not sure if that's where the Sonic Pad puts them though. I would recommend joining the PrintsLeo3D Discord if possible (link in description). There's a few members there using the Sonic Pad (I reached out to ask them this specific question for you today), and I am going to be opening one up and starting with it soon. So there's always someone that is willing to help!
Hi thanks for getting back to me i tryed the start and stop macros and an error message pop up in Klipper
That's usually a pretty easy fix, may e the spelling is off (print_start instead of start_print for example). Diagnosing something like this is easiest if you can share pictures/files, so I always ask to do this through email (printsleo3d@gmail.com) or discord (link in description). Discord being the easiest
Your content is great has helped me enormously to configure my Aquila with the N32 board, only I have a question in the Fan configuration where you put the Pin : PA0
I have read that it activates the two ventilated both plate and filament, as I can do to separate it that pin is the filament and that pin is the motherboard
Saulo, I'm not too sure what you're question is asking but I think I have an idea. The one dilemma wit the fan setup for the Aquila is that the parts cooling fan and the mainboard cooling fan are on the same circuit. Meaning they cannot be controlled separately (without some intervention on our part ).
what is your favorite go to daily use printer?
Steve! This is might not be the answer everyone expects (or wants to hear) but I would say my absolute go-to printer is my BambuLabs X1 Carbon. It's been pretty rock solid for me, can do multicolored prints, and usually prints everything faster than any other printer I have. That being said I run my Original Aquila (Sprite extruder), Aquila S2, and about 2 other Ender 3 Pros (4.2.2 dual belt mod) daily as well, and they are all performing amazing for me. Each of those is running Klipper, and outside of my X1C I would say my next go to printer would be the OG Aquila. That being said they are all great! Awesome question, thanks for asking!
@@PrintsLeo3D Thanks for the response I love My Aqilas as well But I now have a new favorite the Kingroon kp5l it's wonderful, I haven't lost a single print on it so far. and it prints beautifully I hope you get a chance to review it Ill mention it over on the kingroon Website.
I've heard a lot of really good things about their little KP3s, so I'd be interested to see the bigger version. Glad it's working for you and if I get the opportunity in the future I'll give it a shot !
hi, being the complete noob that i am; i'm going to ask this: how do i check and change the bootloader? did everything that you said but the Pi wont talk to Aquila.
found it
Hey sorry I didn't make that clear enough in the video, aot of people have point that out to me. I really wish I could go back and edit something in. Either way I'm glad you were able to find it ! Good luck and happy printing !
still does not work :(
So you installed Klipper, moonraker, and Fluidd onto your pi. Then you created a firmware image edit your printer and flashed that onto your printer, correct ? Which chip do you have in your Aquila? We're you able to run the serial command I'm the pi and did it return the serial address of the printer that was plugged into it ?
Yep … did all of that. I followed you instructions to the letter. The only thing I missed was the bootloader part, soo tried to make the firmware again with the right bootloader after everything was installed, but it didn’t work. Could it be because I flashed my printer over Alex’s firmware? Going to start from the beginning again tomorrow. I’ll let you know. But for now …sleep wel all😉 great job btw…
mine is not connecting when connecting into my printer
Did you run the ls /dev/serial line over SSH to get the correct serial address?
@@PrintsLeo3D I will check it out, I'll update you once I get there 😂. Thank you for your valuable time! I appreciate it!
No problem , keep me in the loop lol we'll get this to work!
I enter this command ls /dev/serial/by-id/* and says 1s:cannot access '/dev/serial/by-id/*': No such file or directory
well never mind I changed the usb cable that i was using and "voila" it worked. Thanks brother for all your help!
Could i use a pc instead of a raspberry pi
Absolutely!! That's a great question too. Part of Klippers power comes from its versatility. Anything that can run Linux can run Klipper. A lot of people are using old PCs and laptops nowadays because of the pi pricing and scarcity. I haven't used my old laptops yet but most people I've talked to use Linux Mint as the OS of choice to run Klipper on.
@@PrintsLeo3D sweet thanks for the reply whatelse would i need to run klipper on a quila s2
As far as PC specs? You'd want the PC to be dedicated to running Klipper. It's not a must but you don't really want to be running a print, and watching Netflix, and cruising the web on the same PC, in case you drop data while the print is running and it can cause issues. If you have a PC that is just dedicated to Klipper, you could pull something out of your closet from 2008 and it would work lol it doesn't need a lot of power at all
@@PrintsLeo3D so i downloaded linux and all that but i cant find my ip addres so i can connect to mainsail
At the terminal line you should be able to run the command 'ifconfig' and it should list the current IP address.
Great content! but hard to watch and listen whit those quality ;( make some upgrades to camera and mic and it will be top notch!!
Hey thanks for watching and for the feedback. The mic situation is tough, I have been trying so many different mic solutions and nothing has been reliable and great sounding. This video is my most recent using a wireless mic setup through my phone. It's not perfect but it works reliably which is good, then I have to do a ton of post processing work to even get the audio to how it was in this video. As for the video, this is my second attempt at filming with my phone, a Samsung S21, and in my opinion it's better than the camera I was using before this. That being said I still can't seem to find something that produces the quality I want. The search continues.
@@PrintsLeo3D dont get me wrong thats not a hate ;) just point things to improve, idk but ur ressolution is 1080p and other chanels have same but is a big difference with image quality, idk to much about video editing etc but maybe is codec related?
ps. lot of too chanels pin under video what set up they use maybe there is way to go ;)
good luck with chanell ur explanation is so clear that even newbie can understand what are you talking about. Finger crossed for more subs, here u have one more ;)
I didn't think it was hate at all, I really appreciate it! You could have watched the video, thought the quality was poor and decided to move on, but instead you let me know the aspects you didn't like and that only helps me improve. So thank you! I have gone through about 3 different setups now and I really don't feel that I've been able to get that crystal clear picture other channels get, so I am always trying to find new ways to get there. Like I said this video was my first (or second?) recorded with my phone, which gives crystal clear video. I am going to keep exploring and trying to find something that works.
It's funny you mentioned other peoples' setups, after your comment I went to another channel to try and see if they had the information lol
Thank you again for the comments and the encouragement !
Yaaaa, I won't be attempting this.
Honestly it's not really that hard, but everyone's comfort level is different, and then you have to consider if all goes well you have a printer with new firmware you have to get used to lol I love Klipper, right now I wouldn't stay on Marlin based firmware, but that's for me and my situation, and everyone is different. Thanks for watching , and if in the future you are considering making the leap I'll be here to help, or better yet join the Discord and talk to some of the people on there that have made the leap (some reluctantly) and you can hear what they think and how their process was. Thanks for commenting!
Too Complex and pricey for me.. I have to just stick to fighting with my 3 printers and I will dissemble my Tronxy X5SA as I tried for ages to get it to work and print even getting the new black leveling sensor and it still crashes into the bed or try's to print 5 mm above the bed. So it be taken apart and used for spares. Shame as it has a big print area.
Unfortunately I don't have any experience with Tronxys. The Klipper install is honestly not that tricky, I don't want the length of video to scare you, I installed Klipper on my CR10 while sitting on the couch watching a movie a few nights ago lol
The best thing you can do for an x5s is convert it to a vzbot.
A what now? I had never heard of this and just looked it up, seems impressive! Is this almost an alternative to a Voron if you already have a Tronxy ? Is it comparable?
@@PrintsLeo3D It’s really comparable. They have a Facebook group, and a discord if you’re interested in building one. You can even get a serial like the voron. Depending on how far you go with the upgrade, the speeds you can print at are insane.
seems like a raspberry pi almost costs the same as the printer itself -_-
Tell me about it. I'm making a video right now about the Inovato Quadra! A low cost pi alternative that is super simple to setup. Currently cost $25 plus $10 shipping within the US! Video should be out very soon
@@PrintsLeo3D alright, small question about this upgrade. does it actually install in the printer itself or do u just leave it hanging outside the printer? If you install it inside, please show it in the video how you mount it, thx :)
Do you mean the raspberry pi or the Inovato Quadra? Either way, they both are mounted outside of the printer. They have a small enough footprint where it isn't an eyesore. With my Ender 3s I hook the raspberry pis directly to the mainboard, so there's no power plug or USB necessary. I might look into that for the Aquila also as it should be just as easy.
@@PrintsLeo3D with a raspberry and having multiple printers i would understand it having it easily switchable to other printers, but if the quadra is so cheap i don't see any reason not to neatly tuck it away :x less chance of the cat playing with it
There's actually a small space on the front right of my Aquila S2 where it fits completely hidden . Not sure if it's great for air flow but it stows.
Faster speed? You take the computational tasks from the printer controller (which are highly optimized and compiled into machine code) and move them to a rasppery pi where they are executed as a SLOW F'KIN PYTHON script! Python, ffs, a dead slow, INTERPRETED language! How the F would you gain anything? The speed was limited by the mechanics of the printer itself anyway. The only thing you'll probably achieve will be spending more money on an additional raspberry pi computer and adding an unnecessary layer of complexity (and more ways to fail) to your printer.
PS. I really laughed at your analogy with sheets of paper. The main computation is ALREADY done by the slicer. Marlin only executed the resulted G-CODE anyway, which consists of elementary control insrtuctions (linear movement, heating, etc). Not much "computation" left to do. Marlin flawlesly handled these tasks even in 8bit MCUs (like an ordinary arduino), and it does them even better with the newer 32bit controllers. Also, Marlin now handles pressure advance (which is an overrated gimmick, anyway) and input shaping - by itself (those even work on older 8bit controllers).. So what are you talking about????
PS2. If you really need remote access (and video surveillance) you can alternatively use an Octoprint server and the good old trusty Marlin firmware.
This comment feels really rude, but still has some information to be gleaned or at least discussed. The way it reads though feels very impolite. I love 3d printing and I love this community and I want to connect and help or get help from people who want to do it in a polite way. I urge you to open a new thread on the Klipper Discourse (klipper.discourse.group/) and share your opinions there, as I am sure they will open a greater discussion.
endstop_pin: probe:z_virtual_endstop if you want if use the bltouch
Yes! That's one of the additional edits you need to make in printer.cfg I thought I went back and covered that but if not thank you for adding this! I am making a bl touch mesh video that is going to go over the set up there as well!