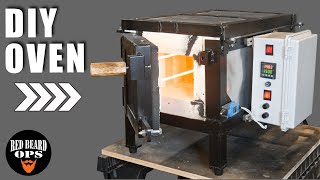
How to Build a PID Controlled Toaster Oven | Full Guide | Round 2

Вставка
- Опубліковано 5 жов 2024
- This is an updated video on how to turn your toaster oven into a PID controlled tempering oven! With a little time and effort I was able to get this oven to hold an extremely consistent temperature with this simple PID control box.
✅Wiring Diagram:
www.dropbox.co...
✅Items:
Inkbird PID Option 1: amzn.to/3aLZkHS
MyPin PID Option 2: amzn.to/2JsbGcU
Inkbird SSR: amzn.to/30T3TdK
Project Box (10''x6''x4'') - amzn.to/2oP2mrM
Female Power Socket - amzn.to/2IqW5cu
Male Panel Socket - amzn.to/2VfcqWV
Power Cord - amzn.to/2ofd0YM
Long K-Type Thermocouple - amzn.to/2IoBrJY
Here is a fuse holder that should work - amzn.to/4eyE2xG
✅Notable How To Videos and Reviews:
GFlex VS Bob Smith Epoxy - • GFlex vs BSI Epoxy Sho...
Build a Knife Vise - • Making a Knife Maker's...
Make a Center Line Scribe - • Making a Knife Maker's...
How to HT 1084 - • How to Heat Treat 1080...
DIY Etcher - • How to Build an Electr... DIY
WEN Sharpener Review - • WEN Sharpener Review &...
Build Venturi Forge Burner - • How to Build a Venturi...
How to Stonewash a Knife - • How to Stonewash a Knife
**************************************************
Subscribe Here: / @redbeardops
**************************************************
#knifemaker
#knifemaking
#redbeardops
Instagram: / redbeardops
Twitter: / redbeardops
0:35 Motivation for Rebuild
2:48 Components Needed
3:54 Setup Project Box
4:21 Mounting SSR & other Panel Components
7:55 Wiring the PID
13:15 Full Wiring Overview
14:10 Tuning Strategy, Tips, & Results
**********************************************************
The information provided on this channel is for entertainment purposes only. Any action you as the viewer takes upon the information on this channel is strictly at your own risk, and I will not be liable for any losses, damages, or personal injuries in connection with the use of this content (including injuries, damages, or losses sustained while you were trying to emulate the actions and projects on this channel). Attempting to emulate any of the actions or projects put forth by this channel should not be done without training and even then, at your own risk.


0:35 - Motivation for Rebuild
2:48 - Components Needed
3:54 - Setup Project Box
4:21 - Mounting SSR & other Panel Components
7:55 - Wiring the PID
13:15 - Full Wiring Overview
14:10 - Tuning Strategy, Tips, & Results
dude if u dont spray the kawool with rigizer u going make your self sick and i mean bad. Because if you dont use rigizer you will inheal the fibers that being burnt and mess up your lungs trust me i seen it first hand what that stuff can do to a mans lung
@@AndrewMurphy8383 Yeah when building my forges I coat it with satanite to seal in the fibers. I figured since the conditions of a toaster oven are very static (no major air flow from a blower or material contact with the insawool) that there wouldn't be a significant amount of harmful fibers thrown up into the air. Could be wrong. A better solution would be to use some jacket insulation like those used to wrap water heaters.
@@RedBeardOps but still even when you use it for toster oven i was told by the company u still want to use rigizer spree as well
How do I become a patreon
Love your shows. More informative than the others. Keep it up
Heatsinks work by radiating heat to the surrounding air. A number of improvements include: Orienting the fins vertically, so air naturally flows up between the fins. Next, use a black heatsink. Black radiates heat much better than bare metal. Lastly, it needs airflow. Consider at least adding vents directly below and above it, so cool air can get in and the hot air gets out. If building in a metal box, just bolt the SSR to a vertical face, using the entire box as the heatsink.
Man this video really helped me to understand the wiring for a PID system. I bought all the components over a year ago to do this exact upgrade to my oven, but was a little intimidated on the exact wiring. Thank you for giving us such a simple and exact tutorial! I'm gonna give it a try this week.
Great to hear! Good luck Rebel!
This is by far the best PID assembly video on UA-cam. Thanks Red Beard!!!
Thanks! Glad you liked it!
Looks good mate. As a sparky I would recommend that you insulate the self tapping screws, wire the fuse before the switch (to protect the switch) and if it were an option, get a smaller switch and mount it on the front where the fuse is for convenience.
Nice tips!
Mr. Keeton, I wanted to let you know I got the new PID and assembled everything today. It works great! Thanks so much for your help with this. Never could have done it without you and your video.
Heck yeah, that's awesome Jim. Really glad to hear it worked out for you! I use mine all the time, couldn't live without it now. 😂
Hey I am having problems setting up my electric kiln, can someone help me out please, I am using REXC100 PID, 2500W heating element, SSR 40 0-32DCV and a LED transformer 20-40DCV....it gets going for a few minutes but then the heating elements stop heating can someone help me please my email is renchasfresh12@gmail.com
Sweet! I need to do this with mine so I can hit my decarb temperature when making cannabutter.
Ooh, smart.
Thanks a bunch. I had watched this before but now I have an application. I recently bought an older burnout oven for knife heat treating which has very crude controls. With your help I am upgrading to PID controls. Thanks again!!!
Will be ordering my parts off your links.
Good luck David! I don't think this would run a heat treat oven with 230v? Works great for a little tempering oven though!
@@RedBeardOps I got my PID control system setup basically following this video & wiring diagram (with minor variations). Bought 95% of the components from your Amazon links. Got the Inkbird PID. The oven I bought is 115V so all the components worked just fine. I got up to 1500F on my first trial. I saw in your recent DL/Knife build challenge video that you had opened the control panel to cool the SSR. My SSR got very hot in the sealed box. I'm looking into a small 115V fan that I can mount to the panel to keep things cooler. I will try just using "P" control & see how it works. I can send photos of my setup if you are interested. Thanks for all the info you share. David Scadlock
Great video, just made my box mostly following your video. Other than a slightly different pin layout on my PID it went great. Thanks again! You make great videos.
Great to hear!
Every YT oven build shows SSRs being bolted to heatsinks, often incorrectly. Heatsinks work by transferring heat from the SSR to the air. Orienting the fins vertically is much better than horizontally because air can flow between the fins. Also, heatsink color matters; black transfers heat much better that bare aluminum. Lastly, if inside a metal box, just bolt the SSR directly to the metal enclosure, preferrable on a vertical surface away from the oven side. Adding ventilation holes above and below to let cooling air in and warm air out is even better. If inside a plastic box, consider a small fan, and if it's 12V, you may be able to run it off the signal controlling the SSR.
So far so good on this oven! Still going strong; thanks for your thoughts.
This is incredibly informative man, at first I was like "There's no way I can accomplish this, idk the first thing about electrical work" But I think if I watch it a few more times, I'll get it. Thank you for posting!!
Good luck sir!
I made mine with a $25 REX C100 w/ SSR and heat sink. It hits 200 deg F in 10 minutes, no overshoot at all and holds either 200 or 400 TO THE DEGREE!
Now my toaster oven is easy to use for wood stabilization or tempering blades
Very nice!
, Thank you. I finally feel like I can actually wire one of these up now. I don't ever wire anything without a pair of needlenose handy, it sure saves the fingers.
Glad it was helpful Ben! Cheers
Good vid, very helpful. I like the ide of having the control away from the oven.
Thank you! Yeah, I agree. I think it's possible to set it up in the side pannel, but you need to be on point with your insulation. I like having it outside of the toaster A.) for the heat but also B.) for the ability to use it with another toaster easily if this one dies. Thanks for watching!
Great instructions. I made the same in a $10 Sheffield plastic ammo box. I added a 12vdc miniature fan in it fed off a 9vdc adapter. A little quieter than using a 12. Wasn't sure if the SSR was gonna get really hot. I put a 2 amp fuse in mine since I'm only using it for a small heater coil, not an oven. I tried hundreds of settings on the Inkbirg and finally lucked out and have the thing with only a 2volt swing using PID numbers. Your right about auto tune. Kept occilating. Still can't believe I got those PID numbers.
Oops. 2 degree F. swing.
Nice. yeah it's hard to get them tuned for sure.
Finally a decent build video on pid controller I built one from your channel to run my liquor still thanks buddy ✌️
Good luck with the still Travis!
@@RedBeardOps Thanks man
this will be my next project your videos are so helpfull really appreciate the time you put in to help other people out after this project im gonna tackle a heat treat oven have you done one? thanks again Mark
Great to hear! I haven't, but it's on my list....
@@RedBeardOps i had a question do i get rid of knobs on toaster oven or just dont use them at all? so know when i turn on oven it will go through the box you built? thanks
@@Anderson-HandForged You can if you adjust the wiring in the toaster so that the knobs are bypassed. You can also turn the knobs to max and it should work the same.
Great job, built this a few weeks ago and it works perfectly. Keep up the good work!
Great to hear!
Wanting to build this myself. One question for you if you don’t mind. How did you wire your toaster oven? Thanks for any help
@@thomasnorton316 I took out the control equipment and wired the elements directly to a switch. You don't need to do this
Super videos you're making. I may take up knife making just to follow.
Wesley Smith lol, thanks! You’d get hooked! Knife making has been an excellent craft / hobby for me. Infinity challenging.
men really great videos i hope one day we can make one video together cheers from Mexico
Thanks for watching! Cheers from Texas
Awesome!!! This is just what I need for my powder coating oven!!!
Glad I could help!
Thank you for your PID Control Wiring Diagram
You are welcome!
Great video, I'm building a paint curing oven. you made it so easy. Thanks
Glad I could help!
Looks good. However, considering the amperage, don't use the PID controller terminals as terminal blocks to put multiple wires together. Use a proper terminal block, they're rated for it. If that terminal loosens, and it probably will because it's not super high quality, you can get heating there and thermal runaway, or just a faulty, intermittent connection.
Good tip!
Nice. Insulated spade connectors FTW. Also, use some needle nose pliers to get to those connections, lol!
Good tip!
Damm! I need a bigger box. And some plugs, i was wiring mine direct to the heater, but I like the idea of plugs better. Cheers mate!
Good luck with your build Tony!
Good job! The only thing I would change is use hot melt glue rather than epoxy. It does the same thing, except if you have to replace that electrical receptacle, you can still get it out.
Good point!
THANK YOU!! I really like this second video! Will this get the oven to 500 degrees? I need to temper most of what I'm making at 460 or above! The oven I have says it will go to 450 but in reality, I can't get it any higher than 400 and that just won't give me what I need. I have extra Kaowool and does it need to go inside the the box of the oven?
Again thanks for the instructional video! You did a great job explaining everything!!!
Hey Kim, glad you found the second video. I think it would be possible to get this oven to 500 with the appropriate insulation, but I haven't tried it. I recently lined the door with adhesive aluminum heat shield and it greatly increased the oven's performance. 500F is pretty hot!
Awesome build, very good information . Thanks. More videos please.
They Jeff, thanks man! Really glad you liked it. Really gives me piece of mind with my heat treating!
Awesome videos guide. Thank you Red Beard.
Glad you enjoyed!
Hello! Thank you so much for the great video!
One thing that wasn’t clear to me is: do you just plug the toaster oven straight in to the PID control box? Do you need to rewire the toaster to bypass the built in temperature controls? Or just turn it to always on and set the built in temp control all the way up?
Thanks again!
You can do it either way... be careful if you re-wire the toaster... this is what I did, but you could just turn it to full blast. The box will control power to the toaster to hit the temp.
Hoping to see some sweet potaters or a pizza get tempered in that beast soon!
Cooked to perfection! While I was going though this process I put a termocouple probe in our kitchen range oven... I tell you what... those things are all over the place!
Sweet build. Thanks for showing us. 👍
Appreciate that Grady!
Great video very well explained.
Thank you so much, this one helps me so much :D, amazing!
Glad it helped!
Excellent video!
Thank you very much! Glad you liked it
Two more questions? After I build this can I plug the oven strait in to this without having to do anything to my oven? Also how did you ground the box with it being plastic
First of all I'm not an electrician so that what I say with a grain of salt... this stuff is dangerous so be carful
a1.) You can plug your oven into this with the max temp selected on bake and the box will turn the power on and off to your oven to get to the temp.
a2.) I wired my elements direct... and bypassed the panel on my oven. This is obviously a little dangerous so once again be carful.
b.) Not a pro at building stuff like this, but I think the system is grounded via the ground on the 3 prong plug.
If you find out more let me know.
Great video it helped me out alot, I am building an oven so I can cure cerakote. My only problem is that I can not seem to get power to my heating element. I have tryed so many different setting. Could you show all the different setting on you maby that would help me out thank you
So on the oven itself you should set it to Bake and max temp. In my case I hard wired past the knobs.
What insulation are you using inside your oven? I was thinking about using ROXUL (stone wool insulation) in mine.
Hey David, I'm using Kao-wool insulation that was left over from my forge. You can get it here - amzn.to/2t07c7v
are all PID controllers wired the same way? I am playing with an inexpensive Rex c-100. I am just wondering if the wires connect in the same # spots.
Thanks for the video!
I think they all are from the save vendor. All the Rexc100s will be the same I think. If you get an inkbird or my pin it will be different. You'll have to look at the manual in that case
I may have missed it, but did you just plug the toaster oven into your controller box, or did you have to modify the wiring w/in the oven itself? Thanks again for another great video! I appreciate the effort you put in to help others in this craft.
Hey Erik, You can do it either way. If you don't modify the toaster you should set it to it's max temp set point on bake and then let the PID controller regulate the on/off to hit the temp. On mine I ended up re-wiring the toaster so the elements turn on full blast when power is supplied to the toaster.
@@RedBeardOps Makes sense. Thank you!
Nice project. A question, you have a heat sink inside a sealed plastic box. Does the temperature inside the box rise and would it be better to ventilate the box to allow the warm air to escape?
Hey David, yes the temperature in the box does raise for sure. I do think a fan would be a great improvement on this design.
Certainly a fan would work but if one had holes or some wire mesh, one might get sufficient convective air flow across the heat sink to cool without the need for the fan.
I made my box from plywood. I had a couple of wire screens that you’ll have seen on computer power supplies. They have 4 rings for screws and they are designed to cover a 3” hole. I used a hole saw to drill a 3” hole in the bottom of the box and another on the top of the box, they are directly below and above the heat sink. I’ll put feet on the box to lift the box off the surface which should allow air to freely enter the box, so air should enter the box from the bottom, pass over the heat sink, then the warm air should rise and exit through the upper hole. Thank you for all the time and trouble you put into this. I don’t have a fuse but Amazon has a small 15A breaker www.amazon.com/gp/product/B002PXG1BC/ref=ox_sc_act_title_1?smid=A1UOBWSFLOXPFW&psc=1 for $6.53 so I’ll put that in when it gets here. I’d include a picture but I don’t know that I can add one here.
Do all PID's need an SSR? Also, is there any other way to tell what the PID is doing besides taking a bunch of plot points and putting them into excel?
Some PIDs have data exports... so you can plug them into a pc live.
I think some PIDs use mechanical relays instead of SSRs...
Sorry if neither of these points are helpful ... I don't know a ton about this stuff other than what I built.
Dude Good Job! Helped me a Ton.
Glad I could help!
Thanks for sharing! I am currently building mine now and will share pics after. One more question...How did you rewire your convection fan? I need to rewire my convection fan and rotisserie to its own power source.
Cool deal! I wired mine to it's own separate switch.
What did you do with the factory wires running to the fan? Cap them or connect them?
David Austin if I remember right I extended them so that they could reach the dedicated switch on the back of my unit. In reality I’m not sure how much the fan really helps the system, but I like the idea of it being there. I separated the fan from the PID controlled system so that it would run full time instead of on and off with the controller. I doubt it would be the end of the world to run it on and off with the controller though,..
I am wiring my box up exactly how you did. Can you send me a wiring diagram of your oven? I see you cut away the top two knobs on your oven and would like to see how you used the PID to control it.
David Austin there is a wiring diagram link in the video description and it’s also in the video. 👍
I’m going to build one of these for my electric smoker. Only I’ll use a toggle switch and put it in front with the fuse. I’ll build the box out of metal since I’m a welder and have the steel.
Nice! Good luck with your build!
That's a huge box for so few components. Proper cable management, component location, component selection and strategic wiring are all key. Never epoxy anything, replaceabilty is paramount. Thise self tapping screws scare me. Onexwire comes loose and it's a shock hazard.
So far so good! It felt tight in there to me, but I'm an armature.
Since I have a hard time wiring a car battery, I would rather pay you to build me one 😁 Actually, I'm not that bad, but my talents stop at wiring electronics. I have a 1.5 hp Harbor Freight Farm Duty motor I bought to use on a homemade power hammer or surface grinder, but right out of the box, I can't make it run. Either nothing or pop breakers. Sad 😞 Great vid again James, thanks brother!
Lol, thanks Wayne! I'm not the best with this type of stuff either. It took a lot of trial and error to get this thing working the way it does. I know this won't be a broadly watched video, but my goal was to really help the person who is trying to figure a PID toaster out on their own. Confidence in your heat treat is a wonderful thing! Thanks as always for watching.
will it go up to 400f? How much would you charge to build me one
I'm not building these for sale, but yes, it gets to 400F
another great video, could this concept be applied to a full size oven with 220v components?
Hey Ken. For sure. Check out my heat treating oven build (220) - ua-cam.com/video/7FalYyVASyw/v-deo.html
Does the box then wire straight into your heating element? Curious to know if there was any other complexities on the oven side. Thanks!
It's designed so that you can plug your oven into it; then turn the oven to max bake and have the box control the power. That being said, in my case I bypassed the oven's control and wired the elements straight to the plug. Do at your own risk!
@@RedBeardOps Ok thankyou!
you're the best menn
Cheers!
question instead of a light switch can you use a on/off toggle? i was gonna start making this today i dont have a light switch but do have extra toggles your videos are awesome im also in the process of building my heat treat oven just waiting on elements and pid when are you gonna make your own?? thanks again bro much appreciated
Thanks man, Yeah I think you should be able to do that no problem as long as it's rated high enough. I'm not an electrician for sure. Man, I'm not sure when, But it's on the list for sure!
How hot does the heatsink for the SSR get? It doesn't melt the plastic you've mounted it to? Thanks for this video.
It does not
Hey, trying to wire this up today but ran into a snag. My inkbird pid doesn't have a #2 slot for the wires to go into. I'd attach a picture to this if I could to show ya. Any advice?
The Inkbird should come with instructions. I'd refer to those.
So the plug you say to connect the oven to... are you just connecting the heating elements?
Basically yes. I'm running the fan off a separate switch. I also bypassed the built in thermostat. So if you want to not worry about that, just set the oven to it's max temp, then plug it into the PID controller box.
@@RedBeardOps ok.. I'm not wanting to use any of the factory toaster oven controls so I wanted to just run the heating elements straight to the ssr
@@anthonystrunk5360 That's what I did. I wired the toaster elements to switch (not necessary though I think)
@@RedBeardOps ok thanks for the info..
How did you hardwire your switch on your oven? Power coming in to your switch then straight to your elements?
That is correct. It's not necessary, but I did it
Hey Red Beard, are you running a separate power supply for the oven fan? Just adding a separate switch for the fan, while isolating it, is still getting it's power through the PID if I'm looking at this correctly. Also, is the idea to run the fan consistently while the oven is running? Thanks again. Great video!
The fan had a separate switch and power plug in this situation. I thought it was a good idea to not have it turning on and off.
All that being said, I don't even run the fan anymore and have great results.
@@RedBeardOps excellent! Thanks for the update.
Hi I am a beginner. What's the function of fuse? I don't understand in the diagram~Thx!
It's to protect the controller I think. Long time since I've looked at this
You do some great tutorials. Some of your Amazon parts links have expired or don't work.
Thanks for the heads up Andy
@@RedBeardOps Amazon US links are not a huge help down here in Tasmania but its always good to help out...
@@AndyCianchi Thank you sir! That's pretty far away from me here in Texas! Cheers sir!
Hey, great info BUT the diagram you show is different than the Inkbird ITC-106-VH because yours shows the thermal couple on 9 & 10 for the REX-C100 and the Inkbird thermocoupler PID pins are 3 & 4. Sorry but I'm new to this stuff. Do you have one for the Inkbird ITC-106-VH.
Hey Alan, I do not. The inkbird should come with a diagram though. If not you should be able to find one online for your specific model.
Is it necesary to use heat sink with the ssr ? I'm using one with low wattage consumption in other project.
I'm no expert, but I wouldn't use it without the heat sink. Gets hot in there
I’m trying to put mine together right now, did you drill a hole in the side of the oven to add the thermocouple
Yep, I sure did.
Hello, Red Beard Ops
Find your work very well what you do is just great. And I've also built a lot of yourself. I am also building a box with the Rex C100 temperature controller and have done everything as shown in your video. Only what I do not understand is how the oven is connected to the socket of the box, what I have to consider how I connect this. Could you maybe give me a tip or a description I just can not get on with it would be nice if you can help me.
lg. from Germany
Michael Becker
Hi Michael from Germany! So the oven has a power cord coming off of it that would normally be plugged into the wall. When you build the box, the PID control box acts as an intermediary between the toaster and the wall socket. The PID box will have a female plug to accept the power cord from the toaster. The box will also have a male cord to plug into the wall. The PID control box will dictate if the toaster is either on or off based on the temperature being read by the probe. Hope that helped.
@@RedBeardOps Hello, Red Beard Ops
Thank you for the quick reply from you that it went so quickly. You just find your work great and I look forward to new objects from you.
Thank you very much and best regards from Germany
Michael Becker
Hello Red Beard Ops
I have installed the controller everything white describe input socket outlet oven, now my problem oven does not switch off to the temperature that I set. do not come into the Meneu with the ATU setting to set it to 1 what am I doing wrong, maybe you can help me do not come back with the controller. would be nice to get advice from you.
lg.Michael
@@sonjabecker2819 Hey man, What controller are you using? Based on our language barrier I doubt I'm going to be able to fix your issue.
How would you make this a 220v? I also live in the US, and I'm adding the same setup to a Kiln. I was told 110v would not be enough.
Check this out Daniel - ua-cam.com/video/7FalYyVASyw/v-deo.html
What size project box did you use?
Hello Sir, the link to the items used is in the description. Cheers! (EDIT: I just realized the link doesn't bring you to the right size any more... I used a 10x4x6 box (inches))
Great video…thanks.
Glad you enjoyed it!
I just build a box following your guide. I used an Inkbird controller. It seems to work great however the temperature reading is very slow. Do you fire up your oven, let it get to temp and stabilise a little then throw in your blades? Just as an example(I'll use Celcius), my multimeter probe reads 50 degrees C while my in oven probe is still at around 30. By the time my multimeter is at 200c, my oven temp probe is around 150. When I read 200c on the oven temp, the multimeter is nearly 240c. Its slow and feels bouncy. Any ideas?
Man, that does seem bouncy. I think you many need to do some "test runs" with a stop watch and graph the results to see what it's doing with different set points. Easiest way is to get it close with your "P" set point alone. Each oven will react a little different since they're insulated different and are different sizes. Depending on your controller you can try the auto tune as well.
Could you show where you got the fuse for he build?
Hey James I had some 15A fusees on hand from Harbor Freight or Radio Shack... can't remember where I bought them. I'm sure you could source some on Amazon.
Will this set up work for a small kiln also?
I'm sure it would. Check out my heat treating oven build for more detail
Thanks
Bro i got the inkbird pid controller but the #2 spot is empty where i need to put the blank wire in that pid controller?
Hey man, I'd refer to the manual, the numbered spots are going to be different than the REX. Cheers
hey there bud, ive got a combined switch and plug in one so three wires coming out... yellow red and blue, yellow is ground.
so ive connected the red to fuse then to 1 on PID then another wire from 1 PID to 1 ssr.
so where do i connect bue wire and ground to? also on my PID controller, there is no number 2 just 1,3,4,5,6,8,9,10,11,12.
any help would be appreicated
Hey Jimi, I'm really not sure. Everything I know was in this video. I'd refer to your PID manual.
Can you put two PID's in project box for a KIln and a toaster oven ?
I'm sure you can!
Does that controller hold its last settings once powered off, or do you have to re-calibrate, set temp every time?
Hey Chad, it holds its previous set points
I dont see the 15 amp fuse in the list. Which one did you get?
I'm fairly sure I bought that item locally. You could probably find it at the hardware store or on amazon.
@@RedBeardOps Ok cool I will try ACE Hardware. Another quick question. When you wired the oven for just a on/off switch did you cut out the fan too?
@@nkcwilliams In my case I put the fan on a separate independent switch. This is not necessary. You could plug in a fully stock oven into this PID control box and have success. You would just want to make sure that the oven is set to ON and BAKE and max out the temp. The PID will essentially turn the oven on and off to achieve the temp desired.
Thank you for this useful video! I would like to connect a heating cable for a dough leavening cell? Do you think the fuse is mandatory? thank you
Hey Luca, I don't think it's mandatory. Just protects the components. I'm not a pro with this stuff though....
@@RedBeardOps thank you! Perfect!
Hi, Hoping your still checking comments on this. I have several questions on this. #1 What did you disconnect on the toaster over to allow the pid to take over. #2 There are several parts you don't list on the parts to buy can you help out with these? They are the heat sink, the fuse and the large job box. Did you get them all on Amazon as well. My toaster overn makes me crazy it varies up to 45 degrees sometimes. I am notelecto mechanically inclined at all. I can wire a house but do not understand this stuff but I want to attempt to make my own pid controller. Any help would be greatly appreciated. Thanks!
Hey Jim.
1.) You technically don't have to disconnect anything on the toaster for this to work. You can turn your toaster on to "bake" and then to it's max temp; then plug it into the PID control box. The PID control box will then regulate power to the toaster to maintain the temperature. On my specific build I took off the "bake dial" and the timer that was built into the toaster. I then wired the toaster to a switch on the front panel that acts as an on/off switch. If I were to plug this toaster into the wall in this condition it would be on full blast.
2.) Here is the project box - amzn.to/2oP2mrM
3.) The heat sink came with my SSR and I bought some fuses locally at the hardware store; but both could be found on amazon.
4.) As far as advise goes. Take your time! Also make sure to print out that wiring diagram so that you can follow along easily. I got my terminal connectors from Harbor Freight and they make the project easier too.
Good luck!
@@RedBeardOps Thank you! Ordering parts now. Your wiring diagram is great. I'm going to give it a shot.
Awesome! But, what's the name of the wire?
I think most of it was 12 and 14 AWG wire
hey Red beard!!! Thank you SO much for these videos. I'm building a sword tgempering oven using a 1500 watt 12 amp element. Would any of your parts change? I only have standard household voltage and thought i should ask b4 purchasing
Man, I really don't know to be honest. The SSR is 40amps so I think it would work.
What were you using to log the temperature?
stop watch and a video camera; brute force
What type of toaster oven is that?
whirlpool i think? any toaster will do. I got this one at a garage sale
What fuse/fuse holder? Thanks
I think something like this should do it:
amzn.to/4eyE2xG
Can you swap out the ssr unit for a contactor?
Hey man, I'm really not sure
One comment. Your running all your current to your pid terminals. A couple of wire nuts or even a terminal block might be wise. If those connections loosen you could melt your pid or at least have nuisance fuse failures
Thanks for the tip!
Got flashing lights on my pid going on and off top and bottom??
Sorry sir, idk
I really enjoyed the video but what do you do to the inside of the toaster oven to attach it to the project box ?
TheRedhawke hey man. In reality you don’t need to do anything to the toaster. You can take a brand new toaster, plug it into the box, turn the power switch on, and then turn the toaster controller to max temp. The PID box will then control the toaster.
@@RedBeardOps Cool, will the onboard timer turn the toaster off or will the PID keep it heating until you turn it off ?
@@TheRedhawke If you have a timer on the toaster that could be an issue. You would have to visit your toaster 1/2 way though your tempering cycle and "top off" that timer again so that the unit does not turn off. What I did on mine was remove the timer and put the whole toaster on an ON/OFF switch so that this was not an issue. If you don't want to deal with this, I'd recommend buying a toaster without a timer or one with a timer much longer than your tempering cycles.
do you have recommendations for fuse on amazon?
I do not
Hey man just getting into knife making and Been watching your videos. I got the pid and other stuff but my pid doesn't have a terminal 2 would you have an idea of what terminal to use with the inkbird pid
I don't, you'll have to refer to the inkBird manual. Sorry about that.
Thank you for taking the time to reply. I got the pid wiring figured out but was wondering do you disconnect the original temperature controller in the toaster oven or just leave it and set it to Max temp
@@jamesleigh1816 Well I don't think you have to if your toaster goes to something like "Max Bake"... what I did on mine was wire the power directly to the elements bypassing the switch... probably not necessary., but it works. Be carful with all this. Cheers
Holly crap man. This pid is so good, I got it all wired up and tested it. My toaster oven would vary a good 15 degree c now it's lucky to vary 0.5 degree c😁. Thank you so much for sharing your knowledge on making knife's I personally have learnt quite a lot watching your videos
@@jamesleigh1816 Very cool! Cheers sir
I got a spark around the male plug and the fuse broken. What happened?
I really don't know; I'd refer back to the wiring diagram and verify you have everything hooked up appropriately.
Hey man, Im trying to make an oven for curing composites and your video seemed a great place to start. I got the inkbird pid controller kit from Amazon and I've got it rigged up to a toaster oven but I'm struggling with really bad overshoot (say 275F for a set point of 200F) and I've tried a ton of different PID settings but nothing seems to have a significant effect. Even with P=1 (minimum), I=1 (minimum allowed by the inkbird) and D=9999 (max allowed) it still overshoots like crazy. Any recommendations?
Thanks!
Hey Brandon, my recommendation is to only control your PID on P (proportional). (I to 0 and D to 0)
Then run some 10-30 min test to see how it performs
Is there an easy pid solution install I’m not an electrician. ?
Hey Tim, I'm not either. You can buy PID control boxes already assembled. This is what I found on ebay without looking too far into the details - www.ebay.com/itm/Plug-Play-PID-Programmable-Temperature-Controller-Box-SSR-Kiln-Annealing-Glaze/122176024466?hash=item1c72422f92:g:RYAAAOSwPhdU1l0M
I wired mine the same way as yours but once it reaches the set temperature it doesn’t stop and keeps heating up. What am I doing wrong ?
You should start by auto-tubing the PID; that could be your issue. It's over shooting your temp
@@RedBeardOps how do I do that ?
@@rasychea It depends on the PID controller you're using. You're going to have to refer to the manual.
well i wired exatctly like you did in video my pid turns on but not my oven???? any ideas???i dont get it no power to ssr light isnt on im using a my pin t series pid i just dont get it
Hey man, I'd suggest going back over the manual for the PID and the wiring diagram. If both of those are right, maybe some faulty equipment?
Great video!
Thank you very much! Glad you liked it. Hope it was helpful!
Man! What do you waiting to make a heat treatment oven?
Lol! I've thought about it. Not sure if it makes sense to buy or build in that case...
@@RedBeardOps look for the D.Comeau tutorial on his blog dcknives. If you already know how to setup the PDI it's going to be easy. The only matter it's the heat element calculation, but the tutorial offers some files to calculate. Take a look!
Cheers! I love that page!
The pid controllers in the description aren’t the same and will be wired differently,if you wanna follow the video get the one he talks about in the video and not the ones in the description. Thank you for the tutorial
Thanks for the clarification, sir!
Hey, I’m trying to help my 18 yr old son get one going for his knife making. Would you be available to coach me a bit and, if so, how would be the best way to connect? THANKS!! Btw, mysterious dude is my son...
@@keithholladay4800 Hey Keith, while the terminals may be different with different controllers, the PID controller is still doing the same thing. (turning the power on and off to the toaster based on the termocouple readings). I'm not an expert with these things for sure.
@@RedBeardOps thanks for the quick reply! So, I have it working, but have no clue what to do as far as regulating the temp. Where might I find that info?
@@keithholladay4800 There should be an auto tune feature. I'd research that for the specific controller you have. You should be able to get it close with that.
Anyone know what was the rating for the fuse?
My memory doesn't go this far back, but I'm fairly sure the fuse is small and just there to protect the PID controller. Probably 1-2 amps?
Here is the saga of my PID oven builds... you could ask these guys for sure: www.bladeforums.com/threads/wiring-a-pid-for-your-tempering-toaster-full-walk-through.1655733/
This thread pre-dates that one and actually has a comment about running a 15AMP fuse.... Guess it's there for surges - www.bladeforums.com/threads/pid-toaster-preliminary-questions.1647527/page-2
I'm debating whether to do this or not.. I'm having a hard time bringing my evenheat temp down enough to temper after quenchig. The fire brick retains so much heat that I overshoot 400°. I came in to check on my first temper cycle today to find the temp sitting at 450°. :(
Damn, I always wondered how fast those would come down to temp. One day I'll have me a nice fancy even heat, but I reckon I'll keep using this PID toaster for tempering.
I place a fire brick into the kiln to draw heat and put a fan in front of the oven. It still takes 20 mins or so to cool down.
@@Aaronyavcm DAMN!
Nice video, but you forgot to show us how the actual roast or toast looks 😋
LOL