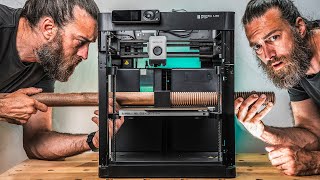
How To Design a Print in Place 3D Printed Hinge in Plasticity

Вставка
- Опубліковано 2 лип 2024
- In this video we are going to look at 2 variations of a 3D printed hinge design in Plasticity. If you are looking to purchase plasticity remember we are an affiliate and the code LEAD10 will get you 10% off at checkout and help out the channel. www.Plasticity.xyz
For this design we are going to walk through how to set up a pivot and talk about the differences between printing them as 2 pieces vs the gaps and tolerance needed to make the same design Print in Place.
There are many styles of hinges but this one prints well at many different sizes and has good engagement. - Навчання та стиль


Thanks for this tutorial! Waiting for the printer to finish to see how the PIP hinge comes up.
Loving your content!
Awesome, thank you! Let me know how it works out for you! Depending on which printer you are using you might find that .125mm gap isn't enough.
@@LearnEverythingAboutDesign needed to tinkered a bit with the tolerance but I got a successful hinge at the third try. Looking forward to implement this in future designs. Thanks again!
@@danielbautistafernandez5331 Glad you got it sorted! How big did you have to go for your gap?
@@LearnEverythingAboutDesign Hi! Sorry for the late reply. Today I went over the tutorial again and I used a gap of 0.16mm. It came out great. Printed in a BambuLab X1C at 0.16mm layer height. Stock settings, just changed wall generator to Arachne. When slicing the hinge, I noticed that the seams (aligned position) were very close to the other piece, so I printed two pieces, one with "aligned seams", and another with "random seams". The second one feels much better and was also easier to break. Thanks again for the tutorial! I will try to design different hinges based on this video.
@@danielbautistafernandez5331 Awesome thanks for sharing!!
Great video, thanks for doing a hinge. I am looking to use Plasticity to design things I can print so this was VERY helpful.
Glad it was helpful!
Thanks for the tutorial! Just bought the software with your coupon code. Really liking this workflow in Plasticity so much better than fusion 360 and alibre.
Awesome and thank you!
Really? Looking at this video, I was continuously thinking "that entire thing takes me 1 sketch and a few extrudes in Fusion or OnShape". Also, when 3D printing hinges, you can have one side go completely through the other one, basically bridging through the hole in the other part. As long as that bridge isn't too long, that will work fine and you can have multiple of such smaller holes/bridges aside each other to get more strength. And fully going through the other piece will make things much stronger than this tapered design.
@@MisterkeTube Yes in a different program you could put all the details in one sketch, but that isn't how plasticity works. You could create all the curves at once if you wanted to but honestly it makes it a bit harder and they aren't in a "sketch". Curves can be joined but not all curves. And yes you can certainly have one side go through the other, but in this case I was comparing the same hinge design that is Print in Place vs printing 2 pieces. The print in place part can be disassembled if needed and would give it the closest comparison. Doing the non print in place variation you couldn't get the pivot to extend through so it wouldn't have been a fair test.
As I stated I generally don't use PiP hinges simply because they limit geometry a bit more having to get both sides of a hinged part to print in a certain orientation. I like the freedom of being able to print the parts and then assemble them allowing for more complexity.
Do you use PiP hinges more than other methods? If i need a strong hinge I would probably add a pin.
Great ! thanks for this video, will have to find time to do this exercice with teach important stuff 🔔 Subscriber
Thanks for the sub!!
This video is unhinged!
I see what you did there :)
wow.... slowest cad operator on youtube. impressive
Um, thank you? :)