SuperHouse #30: Reflash ANY Sonoff, even if you don't know the pinout

Вставка
- Опубліковано 3 гру 2018
- * www.superhouse...
* www.superhouse...
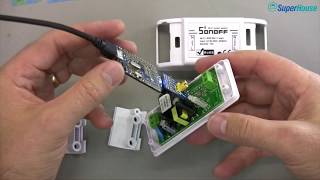
Sonoff is very popular for DIY home automation, but you can make it even better by loading new firmware onto it. Learn how to connect a USB-to-Serial converter to ANY model of Sonoff, even ones that haven't been released yet!
This episode isn't just a series of steps to follow: it's a tutorial on how to reverse engineer the connections to the ESP8266 / ESP8285 microcontroller, and put it into bootloader mode ready to receive new software.
SuperHouse:
- www.superhouse.tv
- / superhousetv
- / superhousetv
Jonathan Oxer:
- / jonoxer
- / jonoxer
Please support me on Patreon for the opportunity to receive exclusive discount codes: / superhouse - Наука та технологія


05:38 Sonoff Basic
19:09 Sonoff POW / TH10 / TH16
22:36 Sonoff 4CH Pro (PSF-D04)
35:18 Sonoff 4CH Pro R2
35:57 Sonoff Slampher
43:20 Sonoff B1
51:38 Sonoff Touch
I almost skipped this one; I've watched way too many Sonoff videos. But that would have been a mistake. I learned a lot about the circuit board of these devices. Thank you!
What excellent timing... I'm about to invest in a dozen or so of these and I planned to scour through your backlog to find where you've talked about them before in hopes of finding some of this information. Thanks from the states for all that you do!
Funny, I've been reading about the Sonoff brand for many years, but never quite knew (or bothered to find out) what they were. For some reason, I simply ignored those 1000s of "Will it work with Sonoff?" posts in DIY HA forums. Thanks for the primer!
Good to have you back Jon...
I discovered your channel last week, looking for some home automation stuffs.
I am really impressed by your explanations, your clear videos and the way things look a lot easier after watching it.
I am big fan, please keep your good work.
Eric Groslevin Thanks Eric! I’m glad it’s helpful
@@SuperHouseTV I just received my first Sonoff device. IT IS A VERY PIN IN THE ... TO PAIRING. Still not working after 1 hour to trying !!!!!! PLEASE PLEASE PLEASE, Make a video about the paring of Sonoff, everything I saw online do not work for me. HELP HELP !
Some people said I need to connect the sonoff directly to my phone WIFI (Itead device, and 12345678 password), but that doesn't work because the app need internet. Bring the phone and sonoff next to the router, same result, DO NOT PAIR !!!!!!
still cannot pairing my first Sonoff (TH10), I now suspect a bad device.
As a long time subscriber to you channel its nice to see you back.
A great comprehensive video which undoubtedly took a long time to create.
While the advanced flasher ( probably not the best phrase to use, but i'll continue..lol) will appreciate the detailed walk though and board trace to the novice like myself *IMHO it made it all sound way more complicated than it is.
I spotted further down the comments that your intending to include Pinout Diagrams for the various models & Firmware links, i think that would be an excellent addition to this tutorial............and dont forget ESP Easy this time lol
Sonny Gallagher I’ll be adding those pinout diagrams when I get back to Australia. I’m in London right now
Thanks Jon, I have a handful of Sonoff devices, still sitting in boxes ready for this.
this is the definitive sonoff guide"! thanks for explaining the basics of the pcb so we can avoid errors while connecting or flashing
Good to see you back
You made my day. Thank you for doing what you do. Good to see you back.
Very helpful, especially for a newbie like me.
Thanks!
Very comprehensive, great work! You could maybe add the video positions for each model in the description, then this could be used as an easy reference. :)
Thanks Ristomatti! I'm planning to add timing links (that's why I put in the black title screens) but I left it uploading while packing to jump on a plane (I'm heading to the airport in a few hours) and haven't got back to it.
I like your video about how to modify the Sonoff switch, However, I just realized recently that these Sonoff stitches does not seem having high build quality and I am glad that I opt with the standard setting, used in Home Assistant. What happened to me is that, after used Sonoff basic switches for few years and some of them became unreliable, kept disconnecting from the WiFi network, until I opened the switches and check the output voltage of the power supply. It was 4.5V, instead of 5V! The electrolytic capacity did not show any deformation, but their ESR is way to high. I replaced both capacitors in Singoff Basis switches and they are working normally now..For any average consumers, they probably won't do that kind of the troubleshooting an repair. However, if they just buy a new one, given such low cost, then you have to redo all modification again, adjusting all automation settings in Home Assistant, it is not a good task!.
Thanks for coming back !!
The world's best teacher
Good to see you back, hope you're well. :)
Great to see you back!
It is incredible to think that a
I think they put the convienient pads on the board for their own programming needs (to get the factory firmware on there in the first place) not thinking that people would hack them to add their own firmware. Their process is shown in a video somewhere (not sure if its Jon's or another Sonnoff Factory tour video). They just drop the board in a jig, press some pogo-pins down and flash them as they come off the production line. Recently, Sonoff have been making revisions to make their products less hacker-friendly, and have stated in forums that they do not support alternative firmware on the devices.
Good video, very instructional, Sonoff needs better software and this seems to be the key. One improvement to the adapter board would be to add a one pin female connector tied to ground so you could plug in the gpio 0 wire first, plug in the adapter and remove the wire afterwards. This way you wouldn't need to fidget with grounding gpio 0 and plugging in the adapter board.
Christopher Guy Yes, that idea has been pointed out a few times now. While I was making the video I thought about adding a GPIO0 header to the adaptor with a button that pulls it to GND. Maybe in a future version :-)
Perfectly explained. Not even one little mistake. Are you a robot?
You might want to do a quick video on the Tasmota web interface, where you set up the device. A lot of people see the user_config.h and freak out, thinking that's how you configure these beasties.
Worth noting, there are a lot of aftermarket Touch switch knockoffs. Some are not only cheaper, but better made. For example, the 3-channel Jinwoo touch switch has a glass face, and an ESP8266-12E module making it easy to replace with a programmed 12-E or 12-F module (assumes you have a bogo pin programmer for the modules, as if anyone has played with an ESP 8266 and *doesn't* have a bogo pin programmer, lol). The 4MiB storage of the 12 series modules eliminates the occasional OTA update size issues with Arend's firmware releases.
Giblet535 Then I think you’ll like the next episode :-)
Your voice reminds me of that series on tv, the secret life of machines :)
Thank you. Welcome back
Good info. Might have been handy to have a spare ground connector on that little interface board.
The square Touch is the EU version, the elongated one is the USA version: I understand yr mix up as everything is the other way around on the northern hemisphere
That's a great idea about a spare ground pad. When I was recording it I thought the same thing while I was hunting around a PCB for a convenient GND connection! If I wanted to be even more fancy, I could put a connector on the interface board with a button to GND, so you can plug it in and use the button on the external board. Hmmm, perhaps in rev 2 :-)
@@SuperHouseTV What might be a better option would be to have a 555 timer set up to hold a pad or jumper to ground for 2 seconds after it gets powered up, and a momentary normally closed button to toggle power for both that 555 and the 3.3v to the device to be programmed. The holding that pad/jumper to ground lets you use a normal jumper wire against the appropriate gpio1 pin contact point on the board while you do the pushbutton on the adapter board to toggle power, and then you've got the gpio1 pin held low to initiate bootloader mode. And it releases immediately after. I'd like to see something like the dupont pins that would "clip" into the holes on the board so that you could do more of this hands free and w/o having to solder things to the board, but if the boards are coming with the oles filled with solder, or not drilled, that won't work. If you're programming a lot of these, a dedicated programmer frame with pogo pins and enough intelligence to recognize that a board is there to be programmed and program it would be nice, but it's likely to be a one-shot tool, which seems to be a lot of work for not a lot of gain.
I'm in the position of getting to figure out replacing 3 dpdt switches
for an exterior light control.
Possibly of more interest as a one-shot system is mapping out what circuit breaker each outlet (and perhaps each light switch) is attached to. The plan is to get a bunch of usb chargers, 3.3 liner adapters, and esp01 modules (will need a capacitor as well I believe, there is a video of someone who's built this somewhere...) program the lot of esp01's to be in mesh configuration, and periodically mesh broadcast how long they have been on, and their serial number. The serial number gets stuck on a label for the module, and each power outlet (or chain of them if I already know there is a chain) gets a module. Walk down the breaker panel and power down each circuit breaker recording the time that the breaker is turned back on, then from the mesh traffic work out which module powered on with which circuit breaker. (Yes this could be done with an mqtt server, trapping the power on event as a message.) Then go back and label the power outlets with the circuit breaker information that controls it. A kit of 50 of these with a module that plugs into a laptop to gather data, (and on which you record what circuit breaker slot you just togeled and when) might be handy for anyone who's just bought a house that they are interested in doing some remodeling at a room by room level. Lights would be handled with a screw in socket adapter for the light socket for anything that doesn't have hard wired in florescent tubes, or build one of these that runs off an 18650 with a light sensor on a pin for those fluorescents to advise when they turn on or off to link that information up to the capture system.
A simpler kit would be a 'tagged out' plug that has a buzzer attached to it that you plug into an outlet that you've turned the breaker off on so that if some helpful family member flips the breaker on for you, while you're working on the ckt, you might get a notice from the buzzer before getting a shock if your hands are not currently touching anything that went hot.
On the regular SonOff 4CH (Not Pro) you can pull GPI-0 to ground with the button labeled E-FW (S1) so it wouldn't surprise me if the same is true of the SonOff 4CH-Pro. Maybe you could verify if this is the case and do a quick followup/update. It would save people the trouble of having to solder that extra wire which looks like it could be a bit tricky for some users. I've been really enjoying your videos. Keep up the great work!
Made a cable and added an extra gnd socket (female) saved me from having to find a gnd connection on the board for gpio0. Excellent video by the way. Thanks a lot. Maybe you can add the extra gnd to the board.
Just got another 5 sonoff basics.... we have moved to R2 of the board! Uses the ESP8285 and has a different design. The through hole for 14 is now only a surface mount pad, and there is another row of surface mount pins... must be test points. A fuse has been added, and the "solder lines" for the AC is now what appears to be a double insulated wire. The previously unpopulated space on R1 for the RF chip has been removed, and also all the empty through hole pins associated with it. Just an FYI for you guys.
It also means we cant upgrade the memory chip :( Correct me if I am wrong, but the esp8285 only has 1Mbyte, so the same as the default R1.
Awesome video - I am a noob and this video really helped me... Subscribed :)
Just thanks from a french watcher
Potential improvement: solder a lead to the GND pin of your the PCB with
the 4-header pin, so you can simply touch it to the GPIO0 test points
if required. That would alleviate the need to solder your lead to the
Sonoff.
Juan Rial Good idea. I’ve also been thinking about adding a GPIO0 header on the adapter with a button, so it can be linked and then hold on the button to drive it low
Nice!!
Yeah, either way would work. Anyway, thanks for the great video, man!
Serendipity! My very first order of four Sonoff Basics arrived today!
Nice to see you back on tinker desk ... 👍🏻
Hi yes great to have you back ! :)
My wife got an iRobot e6 WiFi floor cleaner. Since then, some of my more distant Sonof's have taken to arbitrarily change their MQTT host IP addresses. I guess the iRobot has a mDNS broadcast and Tasmota user_config.h file has a setting that will override the mqtt_host if it hears an mDNS broadcast. You have got to love technology to live with it. 😂
Perfect video!! Where i can buy all the ftdi cable, your board for control?
Great stuff, glad to see you back at it.
Looks like an old stock Sonoff? I think all the newer ones come with the all the holes filled with solder.
Edit: Also the new B1 bulbs that don't have fins on the base have a screw off top, just FYI.
And, the newest version got rid of GPIO14 and provides a test pad for GPIO2 instead. It also gets rid of the power rails on the PDB in lieu of insulated wires for Line and Neutral.
Also the current version of the touch-button switches are all white; only the older ones had the black surround on the edge. The nice thing about the older model is that the backlight turns off completely when the relay is off.
The Hook Up Sounds like a need to order a bunch of updated versions!
Very good video. You would not happen to have a schematic for the Sonoff Basic unit would you? I want to see how to add a one wire temp sensor. Thank you.
well done Jonathan, the coffee is on the way. I was thinking about a different approach to use a test/programming probe clip to access the 8266/8285 direct, as the new modul version like the S26 alway require soldering.
No idea if this will work, but I will order such a clip from Ali and see if this is an alternative way.
Hey!!! Its you!!! Welcome back!
53:27 the text shows "this is EU not US", but rectangular smells like US to me, and also at 54:41 it shows US on the board silkscreen
Welcome back!!!!
Welcome back
The problem with the Sonoff Touch is the requirement for a neutral connection. Many houses don't have neutrals run anywhere near the light switches, so short of doing some rewiring the Touch is not useful as a replacement for a physical switch. I've had to use RF switches controlled by Sonoff RF Bridge. Of course there is then no feedback from the light switch.
leglessinoz This is a problem for every retrofit controller I’ve seen. I want to do an episode about wiring strategies to help work around this. It’s very annoying
There are a couple of wifi enabled switches that can use only an active connection. From what I can determine, they rely on the light bulb itself to complete the circuit to the neutral connection and they leach a tiny bit of power that way. They tend to be more expensive though. I'm pretty sure it's how the RF switches get their power.
Thank you! Great guide 👍
Could you also explain how do you reflash Sonoff BASICR3
Wi-Fi Smart Switch DIY MODE using serial??
Reflash the Sonoff, even if you don't know the pinout.
Find the Sonoff pinout and reflash!
Super instructions
Thanks for sharing👍😀
same good to you back
Aaaaaaand he's back! :)
Hi! Congratulations for the contents!
I would lime to ask you if you can give me some directions how to use a PH sensor instead of temperature sensor in TH10 or TH16. Do you have any idea if i can do it? It will be use for aquarium tank to control the PH instead of temperature!
Excellent video!!
Very Informative video Thank you. Could you also explain how do you flash Sonoff Basic R2 version please
@superHouse - can you clarify how you know which one is the GND again please. Didnt understand the polygon part
Great stuff!
Thanks. I want to increase memory on TH16, original is Bright moon semiconductor T25S80, what is max size it may support and part # of max possible size.
Hi there. In sonoff besic r2 there are inner pins, 3v3, key, LED, k_p and GRD pins. how can I make external physical on/off button and external Led indicator light using these inner pins? Thank you...
Amazing video Jonathan!
Thanks for sharing your knowledge🙏
Is there ANY way to calibrate the humidity sensor (si7021) working with TH16?
I’m super happy with everything around this smart and affordable device but if the sensor doesn’t show the right humidity and temperature then the whole thing becomes useless for me.
What USB cable are you putting into the little homemade interface circuit board? Is it just standard to micro USB? You refer to it as a USB to serial cable but as most laptops etc dont have RS232 then dont think it can be a standard serial input/output.
Great video Jonathan. How do these different firmware packages handle the various functions of the different Sonoff devices? Wouldnt flashing the firmware lose functionality for example with the four-way switch that uses the io expansion processor or the light globe colours?
John Clark I’ll cover that in detail in the next video, which will be about the Tasmota alternative firmware. It’s incredibly well featured, and it knows how to use the slave processor, do channel interlocks, etc
I have power to my sonoff but no matter what I do I cannot get it to flash. I have a sonoff R2 V2 and I use COM3. My lights on my usb serial converter has both lights on. No matter what program I use it just says cannot connect.
I have a sonoff based on ESP8285 soc. Do I have to care about SPI mode or the process above with FTDI through TX/RX and GPIO0 to ground is enough ?
Re: schematic at 4'. Pulling GPIO15 to ground requires a 10k resistor rather than just a short to ground. But pulling GPIO 0 to ground is a short. Why the difference?
Could you just solder a wire on the serial adapter ground connector and use it to trigger bootloader mode?
Great content... thank you very much!
So what else can you make the Sonoff do that it does not already do by flashing it? Seems like you lose the ability to use the basic controller apps if you flash.
Great Video...I have a question.. Can you flash a sonoff switch with the smart life/ tuya firmware?
Hello, I am from Argentina, greetings, I modified the sonoff r2 button and put a ttp223 touch stuck in a blind cover what makes it work as a pulse and can use it as much as with the app as with the touch, what I want is to add a Indicative LED so that when the light is off it is on and when it is on it is off, it would be possible to achieve that where you should weld the LED, thanks in advance
Hi Jonathan, I am not electrically minded at all. Is there some place I can purchase a "serial adapter" that is already built? Where can I get one of those little board (bye Luke Westin) like you have with the power switch on it?
Hey Jonathan, can you buy them two adaptors you were using?
Many thanks!!
That was very insightful! I learned a lot about PCBs watching this video! Very interesting.
Now, I have another generic Chinese smart bulb, that also uses the ESP3866 chip. Can I install tasmota following the instructions? It's very different the pcb, it will need quite some soldering, but I would try
Great Video. Just learning, found your video that might be a great help and wonder where i can get,a usb serial adaptor and your friend specially designed connector for the sonoff prog. Which software would you recommend for multiple home wifi devices . Thanks in advance.
That's ok I have some working on Ewelink and they work ok but I also have the bridge and some 433Mhz door and window sensors so if I convert the switch outlets how do I change the window door sensors as well?
أهلا وسهلا بك مشكور.
I like the circuit board, is the gerber file available?
Amazing work! Keep it up :)
Like your videos. Can I ask if you have info on home insurance? My wife won't let me install the Sonoff basics in fear of insurance backlash.
I came to this video from your Six Sonoff Secrets video where you show upgrading the storage chip. Now here you mention the Sonoff may have a 8266 or an 8285 which has onboard storage. I don't have any yet, so If I order some now, will it be a gamble which chip I get? Or did they switch from one style to the other at some point?
Hi... I've been watching your videos... Super cool stuff you got here. I've been using a few sonoff basic switches these past couple of years and I'm looking at replacing all my home switches but am worried about wifi congestion and signal interference. Do you have any idea how it will be if I have over 50 switches and other Wifi enabled home appliances plus personal computers, phones, tablets, and other devices? Thanks!
Hey mate, love the video, very handy. I have a question about the 4ch R2. I have it in a shed away from my house but only get wifi signal when the roller door is open.. is there a way to extend or solder in a new antenna?
Sonoff (similar to Hue) should release an SDK/API or a custom 'maker' firmware that lets you really dig around with it
Great video Jonathan, I thought it was a live stream and almost didnt watch it at first. Im sad that you didnt show how to do this with a Sonoff S26, which doesnt have the convienient 4 pin header. It has 2 lots of 2 pins on a teeny tiny "micro" daughter board. I'd be intersted in your thoughts on an easy way to flash this as mine has beaten me on every attempt (mostly due to my inability to solder a wire cleanly to each of the 4 very tiny pads),
Todd Wright I don’t have an S26, but a viewer sent me photos so I understand the problem. I need to order a few more Sonoffs because there are some models I don’t have
So nice
What is the material you have on the surface of your workbench? Can your recommend a cheap material that isn't conductive and pretty tough?
Brian Devins-Suresh Here’s a detailed response I prepared earlier :-) www.superhouse.tv/superhouse-vlog-57-esd-mat-for-my-electronics-work-benches/
sir, what is the white strip on touch pad? where it is available.
@jon you rule!
Pogo Pins ?, Have you been successful using a four pin "rig" in an application like this to flash a chip/board?
Hi. I'm in New Zealand. I have a couple of sonoff and a few shelly in my house behind switches. I use home assistant. I also use zigbee2mqtt. I don't have any zwave. I've got quite a lot of dimmable LEDs. Can you recommend a reasonably price dimmable controller for them?
I would like to add an external push button to toggle the Sonoff without modifying the software. The Sonoff push button has four pins. I am trying figure out which pins I need to cross to without having to manually guess and possibly shorting the Sonoff. Can you help me? Thank you
Such a great tut, entaining even I didnt need it. Just opened a really neat and cheap wifi C02 humidty temp monitor, and low and behold I see one of the chips you mentioned, and it has a jack thing already soldered to it?? But will i hack it, smoke come out of it !? The app for it, is useless. Perthings :(
I have a question, that Sonoff can programming with Arduino from download right? if put programmed done from Tasmota what about possible use App eWeLink control to Tasmota?
Peter Scargill's latest firmware has been renamed and it's now ESP-GO, here's the link, please add to description given that link in video cannot be corrected, now :)
bitbucket.org/scargill/esp-go
Thanks, I'll do that. I'm still adding the content to the episode page: I'm going to put in pinout diagrams for various Sonoff models, and I'll add firmware links too.
53:26 - OOPS! That really IS the US version. THe thing that sucks is that they have the writing sideways for a typical US wall switch box mounting. At 1:00:30, you call the EU format (they have the square switch receptacles) the US version - you need an OOPS message here.
Thank you so much for sharing and providing the necessary tools to achieve this, i just hope this is still working on a new model as i just ordred one th16 from Amazon????, i just ordered a set to flash ( i hope) my th16 to have real time temperature reading and alerts through SmartThings Hub for my aquarium as i live in Middle East where temperature can be high, away from home often, i can manage my aquarium. ( recirculation pump and the light , source for heat) using my iPhone, thank you again 😊.
Where did you go? I couldn't find your UA-cam channel for some time, I remember watching videos you did last year including the review of the AutoMower I think.
Hi, i have bought 2 go,comma smart switches, they are like the sonoff basic, but the the pcb differs a little bit.
Is it also possible to reflash the esp8266 chip ? i found the Vcc, gnd, tx and rx pins.
Is there a way back to oryginal SONOFF ewlink firmware?
Hi , i am looking for the video for connecting a zigbee router to mqtt , you where mentioning that there would another video on this subject, but i wasn't able to find it, is there a video made on this topic?, i use domoticz and have wifi , mqtt and z-wave router on it at this moment, i want to replace 433 mhz (crowded band) with zigbee.
Hi mate great video as normal, i am wanting to change my light switchs, i have triedthe basic and i know this will work and i also know that sonoff have there own light swithces but as far as i know we are not allowed to use them is Aus, any other suggestions
what size of spi flash you recommened to replace original, thanks!