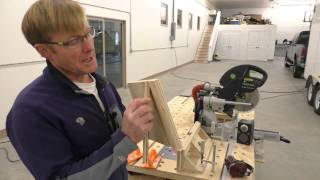
How to Make Custom Size Shims | Any size, any thickness, any length...

Вставка
- Опубліковано 17 кві 2021
- This a video showing how to make a custom shim jig. I needed to make some shims of a very specific size for a housed stringer staircase. In this video we look at how to make the shim jig, and how to use it safely and productively.
My Favorite Tools - Insider Carpentry Amazon Site - www.amazon.com/shop/insider_c...
Support more content like this by becoming a PATREON SUPPORTER - / insider_carpentry
INSTAGRAM - insider_carpentry - Навчання та стиль


Great tip on the painters tape. While doing a quick one piece shim rip, the piece hung up and in an instant the blade sucked it in - dislodged the insert sending it into the blade with shrapnel flying and lodging tiny pieces in my left arm. Damage was only skin deep but burned into my psyche. It was a new saw I hadn’t taken time yet to make a zero clearance insert for! Lesson learned.
Thanks for sharing this. Wow!!!
Been a carpenter my entire life and feel I'm very versed but this guy has some of the best advice for common tasks all the way through complicated tasks even to include running his business. I'd have given anything to be able to work under a carpenter like this my first 10 years in the business. Wish he'd write a book.
I'd be curious to know who he worked under when starting out and how/if that person influenced him. Maybe he was just a badass from birth!?
Revenant64 I'm 65, been pounding nails 46 years and I agree with you.
Great video! Made shims for my housed stair stringers. First time making them, one side housed, the other side open. I've watched many of your stair videos, they are great, thanks so much. Paul
Love the painters tape trick!
I use red vinyl tape for both chop and table saw tonarrow those gaps in my inserts. Even my custom wood and plastic inserts get worn from bevel cuts and instead of putting in a new one I use the vinyl tape. It really holds up well.
Thanks for emphasizing the hypnotic effects of repetitive motions. Can’t be repeated enough!
It's great that you put so much emphasis on avoiding hazardous situations. Your tips are always spot on both for productivity and safety.
I thought this was going to be silly-how hard could it be to cut some shims? I was wrong. The safety awareness alone makes this video highly worth watching.
Painters tap is an excellent tip. You rock when it comes to carpentry!!
The tape idea is genius. Well done and thank you for the video.
I use a similar jig, but have a piece of 3/4 plywood that overhangs the blade. Gap in the back to see the cut piece is seated in the notch, and shy of the point also to verify it is against the jig. Serves as a holddown and provides a little more protection from the blade. A scrap is used to hold the last 4 or 5 shims, allowing all the material to be used.
Of course the blade height must be adjusted to not cut the hold down off.
Like the tape idea!
10:24 OMG, the painters tape is genius 👍🏻 Simple, easy, BUT AWESOME!
Thanks a bunch for that little gold nugget✌🏻
Great advice from a young fella. I remember when I was part way through my carpentry apprenticeship, bout 50 years ago, I got transferred to a City Hi-Rise refurbishment job. Upstairs was a tablesaw and lying face up on the bench were some graphic pictures of someone's severed fingers. The saw was a McKenzie Treadle Saw--Damnably dangerous saws if you came to work with a hangover or were just not paying attention. Probably banned these days I would imagine. But it taught me to always concentrate 101% on the job using a power saw.
Nice van setup, but the best part is how accessible your golf clubs are!
I'm a long time contractor and finish carpenter. This is a fantastic tutorial on a simple project that if done carelessly could cause a lifetime of hurt. Especially the part about repetition and possible injury. I've caught myself in the past doing just that. Thank you
You have some very good tips and you explain everything very well. You are a great teacher as well as finish carpenter. I am a carpenter myself and I enjoy watching your videos. Because as a carpenter you always have to have an open mind to new ideas and ways to improve your work techniques. Because I am very open to new ideas that improves my productivity on the job
Love the tape zero clearance idea. Supper simple! Looking forward to the stair build vids!
Oh man! good start to Sunday morning. Thanks Spencer!
You bet!
In 1998 I bought a new table saw and set it up to do work in
my house as I gutted the entire first floor to the frame. I was in business for 22 years at that point and must have been in “that” zone and still remember that moment my finger made contact with the blade. My wife was upstairs with my two kids who were under 2-1/2 and her mother so she drove me to the hospital and grandma kept them busy. I was so lucky to not lose the finger or do tendon damage but still don’t have proper feeling in the finger tip. See, not being in a customer’s house and being in my own probably took me out of the careful zone.
Please follow all the great safety steps here from Spencer, you never know when things will go south, it happened so fast and unnecessarily, may it never happen to any of you.
I’m now 45 years in business and am 63 years old (much wiser🤦🏼♂️) and that scary incident keeps me thinking safety every time I use a power tool.
Keep these great videos coming Spencer!
Nobody wants to join the "Nub Club"...saw three fingers from a hadwood installer lying in the floor 40 years ago.... I know it crosses my mind almost daily to this day.
Glad you are o.k.
Excellent tips. Complacency is the biggest cause of injury in the shop or on site in my opinion. Thank you for taking the time to make & share the video.
Thanks Spencer! I commend you for your focus on safety!! I have been self employed for 20 years, doing the same general work you do. I see too many great tips and tricks without any concern about safety.
All your videos are top notch!
Excellent. Nice tip on the keeping the push handle short and away from blade...makes sense.
You're so right about repeated tasks being so much more dangerous. I was cutting rabbets on a bunch of panel and I had to walk away to do something else. I found myself going on auto-pilot and didn't want to lose a finger!!
Really good instructional video Spencer,, in particular the discussion about repetitive morrison safely awareness
Such a smart dude. I’d love to see you do a tour of your shop when (if) you have some down time. I’m stuck working in the limited space of my garage, too.
Brilliant as always. Love the tape as a zero clearance 👍🏻👌🏻
That’s a really cool tip. I’m going to try that tomorrow thanks
Awesome Spencer! Great video.
The tape is great
Good way to batch out shims safely👍🏻
The best video for making shims. Thank you!
Hats off to you - even your shims look damn good!
Nice Table saw
i do mine on the miter saw with a zero clearance insert. set it at 1.5 or 2 degrees (depending how thick a shim you need) with a 7 inch piece, make a cut and flip, make a cut and flip, repeat as much as you need. i usually use the biggest piece of wood i can find (2x8 2x10 etc). i can usually bust out a good pile of shims in a few minutes
Spencer, I really enjoy watching your videos. There is always something to learn or improve on. I wanted to point out a mistake I saw at the beginning of the video. CA glue application; the glue should be applied to one of the surfaces and the accelerator should be applied to the other surface. Once the two surfaces are bonded together, spray the accelerator to bonded pieces to cure any CA glue that squeezes out of the joint.
Spraying accelerator directly on the glue before bonding parts together causes the CA glue to cure before contact of the two parts. In my experience with this product, you have up to three minutes to bond surfaces that have accelerator sprayed on one side and CA glue on the other. This is due to the evaporation of the accelerator. Additionally, CA glue instantly bonds to protein. Wood contains a cell-wall structural protein. Applying only CA glue to the joint, pressing it together and then spraying accelerator will cure the glue because the wood is also porous.
On a side note, anyone who uses CA glue should purchase the manufacturer’s de-bonder solvent. This is very helpful for safety removing dried CA glue off of your fingers, hands and other surfaces.
Keep up the good work and I hope that my input only makes you better.
Great video I learn something everytime. Thanks enjoy your Sunday
Thanks, you too!
Well done. I made a similar jig and a jig for cedar shims just to keep my hands away from the blade only after I got bit bc like you said repetition cuts can bite and do!
Very efficient jig, very wise cautions for use. Especially if I intended someone other than myself to use this jig, I'd consider adding a simple holddown to allow the stock to be pushed through the cut without use of the left hand. The holddown would function in the same way as Fastcap's $10M stick. If the jig handle as shown were repositioned forward to the centerline of the shim notch, the holdown could be a simple L-shaped piece connected (hinged) to the top of the handle. It would extend in line with the handle over the blade with a downward leg tall enough to make contact with the stock just on the waste side of the cut. Sandpaper or rubber could be added to the contact surface for better grip. The left hand would be used only to load the stock and remove the shims, well away from the blade. Ergonomically, it would be fairly natural for the right hand to push the jig and hold down the stock at the same time. (Just a thought from someone who has retrieved a very experienced co-worker's fingertips from a Unisaw...)
Welcome back
great job Spencer! you have been more and more inventive with every vid and building up a strong subscriber audience. super happy for your channel
I appreciate that!
More good, useful tips, even if I'm not making a shim jig.
Great video. Thanks
Spencer very thought out & creative yet again: with the safety concerns below I would definitely add any time one is creating a wedge going into a table saw blade/fence- CAREFUL- only done by the highly highly experienced user like yourself, not the generic user
im sure he knows this, but you can make a zero clearance out of scrap wood (poplar or stable wood preferably) easy to take out when you dont need it and you dont have to waste blue tape which is expensive these days. still love the blue tape idea in a pinch, but think that having a designated zero clearance for your table saw makes more sense for carpenters.
thank you for sharing your wealth of information with us, always appreciate!
also if you have a riving knife on your table saw, it wont cut that out. not the end of the world (razor knife?). i just made a zero clearance out of poplar for my dewalt, it has a riving knife you cannot remove. it takes a little bit of thinking, but the process is there to a cheap and effective zero clear that will last you years and look nice
I rarely need a zero clearance. I use the same insert because I almost always have my dust/blade guard/riving knife on. My time is a lot more expensive than blue tape these days.
I'm always amazed at how talented you are.
Clever custom taper jig - and the multiple layers of painter’s tape idea 👍. Tried with one layer - didn’t work. Looking forward to seeing mysterious staircase jig in action. Will be obvious once you demonstrate. Thanks for the video.
Great informative video!
Glad you enjoyed it!
@@InsiderCarpentry I am always willing to learn something new even though I’ll retire soon. Everyone has different ways to finesse things and if I can gain something that’s just great.
Technique is everything.
Nice!🙌
Nice idea. Could use a push pad for the left hand totally eliminating any close contact ☺️
Thank you Spenser I would just love to be around you on a daily basis, your knowledge is priceless. You live where it gets to cold for me, I live in Arizona and I love the heat. Thank you my friend!
The stair company near me has a machine that literally spits shims out for staircases. Thing was like 100k. That being said, I use a jig like this too lol.
I have a similar jig, but I have a piece of plywood going across the sled and over the blade. I run some drywall screw through the only just until they like through. The pointed screws hold down the shim and shim-stock material. This way your fingers stay clear of the blade. You just can not raise the blade too high.
I saw that on another youtube video also. Definitely not a bad idea.
Spencer
You are truly amazing, and I love to watch your videos. But please consider wearing eye protection when using power tools.
When I cut my shims I push each one off the end of the saw onto the floor rather than reach around with my hand. A milk crate on the floor catches them. Safer and quicker.
Just paid 18 bucks cad for a bundle of shims. Time to start making my own.
Yep my dad and grandfather built stairs using key wedges
Great video as always, curious as to why no safety glasses?
Please show us how you make the jig for the very thin shims the you use with stire Tread?
I really enjoy all your content, however this is a lot of engineering for a simple process.
Rip poplar to whatever length you want your shims to be.
On 8 inch long (guessing on your length here),so set your mitersaw around 1.5° for zero to 1/2 taper.
Then cut ,flip board to the other side,cut and repeat.
As long as as you set it up with the correct miter,you cannot mess them up.
We set the mitersaw at 5 degrees ,which gives about 3/4 at the big end.
We only use scraps and never measure, so I can't tell you what each degree will yield per inch in length.
I agree...i make shims like this all the time. But good video though.
I would like to see the build on the stairs and how the template was used.
So to make short 4 in, thin point, shims for crown?
Love the video...how do I get a hoodie?? Thx!!
Yea. I try to get company clothes all the time. Mofos don't come off of them
I would like to see the stringers
Stay tuned. I'll definitely have some videos of that build.
No matter how many times I see it, I physically cringe at the practise in the USA of using a table saw without a blade guard fitted. It just looks so dangerous; an accident waiting to happen. Not a criticism of Lewis, just a observation of the custom practise in the US. In the UK it would be a serious breach of Health & Safety Legislation to use machinery without a fitted guard. It's just so surprising to see this practise in the USA, particular with such a litigious country. As an aside, this is a great channel.
I agree. In general I use riving knife/guard/dust collector, but I removed it for this operation.
Would a Hedgehog feather board help keep ones left hand away from the blade?
Hey Spencer, do you have a video of you making the small stain grade shims you installed in your beams or stair treads if needed? I believe you called them staves maybe?
See my video "One of the greatest carpentry hacks I know"
@@InsiderCarpentry Thanks! You’ve single handedly inspired me to go into the field. Excellent work
I use table saws a lot and they scare me.. which is good. The only close call I ever had was getting my fingernail shaved by a mini router, by not being careful how to keep my fingers out of the way while the bit was still spinning when the routing was done.
Same here. Mini router no problem. Right? Wrong!
I was lucky my router bit had a bearing on the end that brushed up against my fingertip. A simple job where your mind wanders, if it had been a chainsaw I would never be in that situation.
Great tip! but... why do you have to use a guide? why not use the fence?
I know 2 guys who lost fingers making shims. One a carpenter the other a cabinet maker. I think it's the combination of repetition, the small pieces and proximity to the blade. Shims are friggin dangerous.
Hi how do I purchase the items you are using in your videos I want to give you as much credit as possible
Thank you
Usually I have affiliate links in the video description. Thanks!
2p10 ??? Glue??
How can I buy my own bottle and activator ?
Come on Spence, where is the riving knife?
I feel it post more of issue in this situation. I wanted complete zero clearance. No fuss. Not a big deal doing this operation without one.
Perkins brother lost his fingers on a jointer despite being pro carpenter - his main mistake was wearing hearing protection - he did not hear the jointer was still on... never thought of a safety device increasing odds of accident.
I think the main issue there was leaving the machine on while it wasn't in use. I have done the same thing many times. But after Jamie told the story of his accident I never walk away from a machine and leave it running. I'm glad they share the story of that accident.
Wow no riving knife, no push sticks and no blade guard. Accident waiting to happen!
You say its relatively safe and I see your hand next to the blade, makes me cringe. 71 year young carpenter still going strong or at least in my mind I am. I still have all my fingers and yes when I was younger I would run everything thru the table saw down to a inch. I was a macho man . I heard a saying a couple of days ago and its so true. It went something like this. When your not afraid of it is when accidents happen.
I have a very healthy fear of blades. We all have different definitions of safe. I said relatively safe because I know that what is safe for me is not going to be safe or feel safe to everyone.
I'm petrified of my saw. I prethink ever cut. Still have all my fingers.