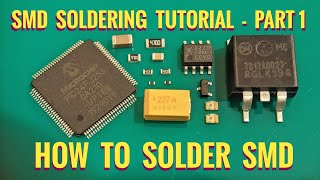
How to Remove SMD Resistors & Capacitors Using a Regular Soldering Iron

Вставка
- Опубліковано 16 гру 2012
- Demonstrates how to quickly remove SMD components without special equipment. Also demonstrates how to use special tweezer irons. Recommended Products:
chipquik removal kit, lead free: amzn.to/1Lrnbsq
rma flux pen: amzn.to/1Xv7XJS
paste flux pen (gel is easier sometimes): amzn.to/247j4NR
hakko tip cleaner: amzn.to/1LrntzL
lead-free solder: amzn.to/1omnbFD
lead-free solder: smaller qty: amzn.to/1omnmRj
tweezers: amzn.to/247jnrQ
wick: amzn.to/247jrI8
10x magnifying loupe: amzn.to/1omnBvv
solder paste syringe lead-free: amzn.to/1omnGPY - Наука та технологія


Dude, you rule - thank you so much for posting this!
While I have decades of amateur soldering experience, as I've gotten older, my eyesight and hands have started to fail me, and working with circuit boards and SMD components is much more difficult than it used to be. Thank you for providing a simple - yet effective - solution for removing pesky microscopic parts without frying the board in the process.
Thanks to you, I managed to tinker around with a vintage iMac over the weekend and overclock it by moving a few resistors around. I've done a good dozen of these procedures over the years, with about a 50% success rate. Never would I have thought to just over-solder it a bit and "slide" the SMD resistor into place. Tried it, worked like a charm, and I was finished in about ten minutes. Best of all, I got to stick with the tools I already had - iron, solder, and flux - without having to invest in something else. One of the easiest, best soldering experiences I've had in years.
Thanks again!
awesome quick tips, I was able to get some SMD resistors off a tightly packed board quickly using the "add solder" method with a regular iron!
Worked perfectly, thanks! For cleanliness using desoldering wick afterwards is great for removing the excess solder.
Repairing my first amp this weekend and along with some of them mosfets, a few of these resistors need replacing too, this helps a bunch!
Good point. As long as you tap the iron tip to shake off the component quickly afterwords, I'd argue that it doesn't get much more heat than with tweezer irons or hot air. I haven't had any issues frying components with this technique, but it's probably a good idea to use other tools if you have expensive or heat sensitive parts.
Thank you so much today i had my first SMD ( size 0 ) to remove..was a bit nervous..but your method is great !!
Excellent technique, worked first time. Thank you!
Worked fine the first time I tryed. Thank you SO MUCH!
Only if you use too much heat, too much force, do it for too long or don't heat enough before forcing the component off... Or if you're using phenolic paper PCBs instead of epoxy boards.
I've used this method a LOT, and sure i've lifted a couple of pads over the years, but usually due to not paying attention.
Nice thx! Good tips, the best so far.
Well Done, much appreciated for this video, Thank You 🙂
Adding solder aids heat transfer not just because of thermal inertia, but because a dry tip placed against a component only has a contact patch of a small point, or at best a thin line. The solder blob provides a wide-area contact that allows much more rapid heat transfer.
Excellent video, thank you.
Good tips.... is there danger of the capacitors to get burnt ? are their bodies plastic or mylar ??? I just dont want to destroy them as the objective is to measure their values
Thanks for this. I've only worked with through-hole parts before, so here goes nothing...
gracias amigo.
Can you really hurt resistors by overheating?, some people use resistors as heating elements.
bro, I love you man! thank you brother!
Could you stack a new one on-top of the burnt out one?
Thank you very much
That looks easy and keeps pads intact
Will try to attempt removing a 0402 0.1uF 6.3v capacitor from an Xbox 360 PCB. What would you recommend for a method? I have both a hot air station and a soldering station.
What would be easiest and/or fastest?
There are no near surrounding components.
I might put on some kapton tape just in case and minimize the risk of other components will let off.
This capacitor is shorted to ground when mounted in. Can something else in that circuit make it short? Or is the capacitor bad itself? Any ways of testing that?
Usually, the ones I encounter have been glued to the board with epoxy before soldering and won't budge even with all of the solder removed.
thank you thank you thank you..my dear friend you save me..its work .....
@neverrth pcb is made of resin material and blow torch would just compleatly destroy the board
Thanks you
Is it ok when replacing the smd side can be switch in any direction when soldering? I mean if there is negative or positive on it.
depends on the component, resistors usually can be soldered either way but diodes can't
What temp should I use?
Is there a way to re use the smd?
thanks
Nice..but i have problem..smd resistor blow..i cant see code..how to know burn Resistor code
Careful with this technique, you risk lifting the solder pads by doing it this way.
If you're using hot air, you can save time by heating the component without the pliers/tweezers there first. The second you touch the pliers to the part you start heatsinking the solder. Much easier to heat the part up, then flick the component away without touching the solder.
I have a general purpose heat gun bought from a hardware store. The nozzle accessories are very poor (one for paint stripping, another one for heating copper pipes etc.) Is there any way I could make my own precision attachment, accurate enough to focus the heat on just an 0805 sized SMD, and not the 30 other components in that area of the PCB?
@@paulf1071 I believe you can use kapton tape
What if i need to desolder the smd cap to use it as a replacement? Won't the solder damage it?
the heat imparted by an additional desolder and solder probably won't damage it, but the more you heat things, the more chance for failure.
i have a smd componnet its like capacitor but its have blue color how i can know what's its type ?
Multimeter, and circuit diagram. Watch some Louis Rossman if you have any further questions until they are answered by what you learn through watching him work.
After you remove the resistors and capacitors do you have to solder jump the pads? Or do you leave them disconnected?
typically you'd be repairing or replacing, so you'd want to put a new component in. Lots of times when you're prototyping you want the ability to switch between using a component, leaving it open, or bridging it.
So I am doing a project with a multirotor. The ESCs that I purchased have capacitors and resistors that do not allow programming via computer software. The fix that I have found is to remove these two components and it will allow me to program. However I couldn't find out if I bridge the gap or leave it open. Thank you for your help.
just as a warning, bridging the gap may break your ESC so make sure you know which to do!
I use this method a lot and haven't damaged a resistor or cap yet. I would agree that it's probably due to the fact it doesn't stay on the tip of the iron longer than 2 seconds.
I suppose yeah... wipe the iron tip straight away, but be care full not to loose the little bugger in the process!
Will a 300 degrees (Celsius) hot air gun be good enough?
Yes, will take longer and you risk damaging neighboring components so I'd use some kind of PCB Heat Shielding Tape and make sure the tip of the hot air gun is thin enough to control the distribution of hot air flow going to a specific PCB component vs covering a group of components due to having a larger width tip on your hot air gun.
Your magical
You didn't mention recommended soldering iron temperature. I saw a similar video on removing 0603 components with this method and they recommended 800-900F.
Unfortunately the temp depends on the board. Lower temps (
@@CuriousInventor makes sense. Obviously want to reduce dwell time but not be nuclear.
Where can i find replacement resistor for my GPU? Will regular hardwares have one?
2011 Macbook?
Do you need flux?
Using two soldering irons is like using low melt solder....instant result
Here in Malaysia it's a throw and buy new one policy... repair work not much in demand.. hence hard to find good soldering accessories at a reasonable price :/
This finally helped me get the busted button of the board of my vape so I don't have to spend another $130 😁
What happened to your webiste? I can't access it. Are you gone?
i have a burnt smd capacitor on my motherboard, how do i identify what type is it i i want to replace it?
I never could. On my car ECU I had to get another Ecu (at least similar brand Bosch) and find the smd ceramic capacitors by color. Dark brown which are also shorter compared to the light brown stuff. I asked on EEVblog but nobody knew.
Sounds like it's by schematic or parts list only.
You should mention that a resistor/capacitor removed in that way is almost definitely fried to death because of sticking to the iron. Not that these SMD parts would be expensive, but if still want to do something with it after desoldering (e. g. measure a capacitors value), you'll have to use a more careful method.
What if you wipe the component off the iron tip immediately after removal from PCB? That's a very short period of exposure to high temperatures (...plus ...wasn't the component put on using high heat in the first place...)
well I did this to quite a few passive components and I never had any issues (in my hobby probects, wouldn't do that in a commercial area)
Now show me how to stick them on :P Everytime I tried those little bastards get knocked off the solder points but the iron :/
desolder bga
Most can be bought off the internet.
And buying new instead of repairing old is not unique to Malaysia, it's common practice in most of the world.
i use a knife tip for this
what is the tip called
Chisel or screwdriver
@@CuriousInventor im broke i only have 30w soldering iron will it work ?
and I can't afford to get new iron
Simple, don't touch the component with your iron, just heat the pad and add solder.
The title says 'regular' iron, then you use a double tip iron... For those who don't have a double tip iron, attach a copper wire to the iron tip: the wire wraps around the tip and makes a 'fork' with the wire ends splitting in such way to reach at same time both contacts of the resistor.
My problem is not having money to buy these beautiful things
I guess I just need more practice :/
Fuckk thanks
Need to remove off my xbox