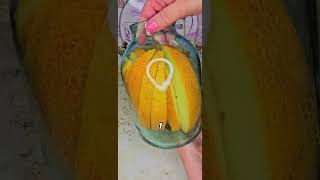
Easy to make ...and fun... wobbly bowl - wood turning

Вставка
- Опубліковано 27 сер 2021
- In this video I will be doing my take on Gary's bowl from Papa 1947...
If you would like to support my channel… you could do so by… buying me a coffee… in the link below… its a one off payment… its not expected but very much appreciated…
www.buymeacoffee.com/AndyPara...
Disclaimer
this is not a tutorial .. this is the way that I like to work… you must only do what you deem to be safe… - Навчання та стиль


Such a fun bowl. The colors are cool circus colors. Lovely idea
Hi Judith...
I'm glad that you liked it...
Yes.. I hadn't thought about it being Circus colours...
I haven't done the 2nd one yet...
Take care...All the best.....Andy
Nice job Andy, keep watching the papa1945 he does some wonderful work and is very experienced as he worked as a pattern maker before he retired
Hi Ron...
Thank you very much...
Yes I always watch Gary's videos...
He is the master of segmented work and his videos are very informative and entertaining...
Take care...All the best.....Andy
Love your creation it's a great wobbly bowl well done great finish time it
Hi Amanda...
I'm glad that you liked the wobbly bowl...
I enjoyed making this one...
Take care...All the best.....Andy
This has been a very enjoyable video. Thank you
Hi Mike...
Thank you... I'm glad that you enjoyed it... this one was fun to make...
Take care...All the best.....Andy
You did get it thin. Nice job. Thank you for sharing. Have a blessed day.
Hi Calvin...
Good to hear from you as always...
I was kind of forced into making the walls thin which was a good thing... I normally leave them on the chunky side... Haha ... but I do like this one...
I hope that you and yours have a blessed day...
Take care...All the best.....Andy
Very nice! I like the colors and the fact you don't waste so much wood!
Hi Jeff...
Thank you very much...I'm glad that you liked it...
And don't forget that you get 2 for 1 ...Haha ...
Take care...All the best.....Andy
Always great videos. Learn a lot.
Hi Yuliya....
Thank you so much... I'm glad that you find them useful...
Take care my friend...All the best.....Andy
Beautiful Piece and interesting process. Full View and Like 👍
Hi Allen...
Thank you very much...
The idea came from Gary at Papa 1947... I modified the method slightly...
It was great fun to work out and make...
Thanks for the full view and like... I'm loving your dedication... if everyone did the same it would be awesome...
Take care...All the best.....Andy
Looks great dear friend, nice job .keep it up.have a nice day. Keep supporting us 👍👍👍💖
Hi Gurkirat...
Thank you for your kind words...I'm glad that you liked it... you have a lovely day too
Take care my friend...All the best.....Andy
@@AndysCornishCreations welcome dear friend, have a beautiful day, take care. Best of luck. Be have a always happy ❤❤😍
Great job. I'm def getting a taste of peppermint lolley.
Hi Mark...
Thank you...
Haha... you are the second person to comment on the fact that it looks like a lollipop... I totally agree
Take care...All the best.....Andy
It turned out so good yes not a lot of wasted wood thank you for sharing your work
Regards
Steve UK London
Hi Steve...
Thank you very much...
Yes... hardly any waste at all...
The idea came from.. The Pappa 1947... Gary's channel...
I just tweaked it a little...
Take care...All the best.....Andy
I also really like the video production. Must be a lot of work. You did great. Nice project.
Hi Richard...
Thank you so much for your kind words... much appreciated...
Take care...All the best.....Andy
And you and yours a happy holiday
Hi Randy...
Thank you very much...
I hope that you and yours have had a lovely Christmas and have a happy new year...
Take care...All the best.....Andy
GREAT JOB, GREAT VIDEO,/////SEE YOU NEXT TIME/////...
Hi Catfish...
Thank you... I'm glad that you liked it... I will see you next time///
Take care...All the best.....Andy
Looking good. 👍
Hi Dave...
Thank you... this was a interesting project to make...
Take care...All the best.....Andy
Very good , Andy ✅✅✅
Hi Moises...
Thank you so much...
Take care my friend...All the best.....Andy
Sehr coole Idee. Grüße aus Deutschland
Hi Lyiness...
Danke sehon ... greetings from Cornwall ...
Take care...All the best.....Andy
Beautiful
Hi Sue...
Thank you very much...
Take care...All the best.....Andy
That is beautiful Andy. I've been wondering how to make a Yin Yang bowl or plate I guess that method would work. Now all I have to do is find someone with a bandsaw. Great video as usual.
Hi Bryan...
Thank you very much...
That would be a very interesting project to make... I think that it would work but I would have to try it...
I'm glad that you enjoyed the video...
Take care my friend...All the best.....Andy
Looks great
Hi Richard...
Thank you very much...
Take care...All the best.....Andy
Great piece. Gives me some ideas! Thanks
Hi Mark...
Thank you very much... I'm glad that you found it useful...
Take care...All the best.....Andy
Brilliant. I just have to try that one Andy
Hi Dennis...
Thank you... yes.. definitely give it a go... they are great fun to make...
Take care...All the best.....Andy
Just come across this ( more plundering of your videos 😉 ). Love the out the box thinking.
From a personal perspective the joints dont matter ,and as previously mentioned hardly noticable.
Nice job.
Hi Barrie...
Please keep plundering !! Haha...
This was an idea from Gary..The Papa 45.. and I modified the process...
I'm glad that you liked it...
Take care my friend...All the best.....Andy
Killer!! Wish my experiments turned out that nice!! 👍👍👏👏👏
Bravo Andy!! 👌👌👌
Hi Roy...
Thank you for your kind words... I'm glad that you liked it...
The inspiration was from Gary at Papa 1947...but I am happy with the result...
Take care...All the best.....Andy
Elsewhere on u tube another turner has created a guide,made from wood, for his parting tool which clamps to his toolrest, he
uses a 50 degree angle.
Thanks for the video.
Hi David...
Thank you very much...
I think that was Gary from Pappa 1947.... I got the idea from him...
Yes the 50 degree angle would have been better...
I will make one of his guides... thank you for your input...
Take care...All the best.....Andy
Оригинальная задумка и исполнение отличное.
Hi Yegor...
Thank you very much... I'm glad that you liked it...
Take care...All the best.....Andy
Experiment or no, Andy, it came out quite nice!
Hi Billy...
Thank you... I enjoyed making this one...
Take care...All the best.....Andy
Love this project Andy and the wood choices too. Stunning. It's a great take on Gary's work. All the best. Ray
Hi Ray...
Thank you very much...
The Padouk and Oak locked good together although I did still get the Padouk bleeding into the Oak... next time I will do as Gary suggests and use an acrylic spray laquer... it seems to work really well...
This is a nice simple project... if you get your rings the correct size... Haha
Take care...All the best.....Andy
I just learned a new technique from you - thank you! ✌🏻🎨☕️
Hi Susannah...
I hope that this technique works well for you... I enjoyed making it and I hope that you enjoy it too...
Take care...All the best.....Andy
Looks great Andy and I really like Padauk. The only way I have of dealing with the bleeding into the other woods is to spray a dusting of lacquer on it a few times. Then I can spray heavier coats.
I just finished a turning where I do that. And the final finish was lacquer but you could use what you want at that point.
Stacking two boards is a good way to get 2 bowls at a time. Especially if you were planning on selling.
I have a few other ideas I will be trying as well.
Cheers,
Gary
Hi Gary...
Thank you very much... the Padouk is a beautiful wood... but the bleeding is a problem...
Do you know.. I have some spray on laquer and I never think about using it... I always go for the wax finish...
I have seen the beautiful results that you achieve using laquer and plan to use it but then forget...
I liked the idea of getting 2 for 1...
Why am I not surprised that you have got some more ideas up your sleeve ... Haha
Take care my friend...All the best.....Andy
Newly subscribed! Excellent job and intriguing process! Beautiful results
Hi Scott...
Thank you so much for your subscription and your support...
I'm glad that you liked the project and hope that you enjoy my eclectic mix of videos ...
Take care my friend...All the best.....Andy
Wow so beautiful wood artwork
Thanks for sharing 💕
Hi Jooshea...
Thank you very much for your kind words
Take care...All the best.....Andy
great go at this!
I have been meaning to try this
😎👍
Hi Luie...
Thank you... this is a fun project to make and I will look forward to seeing your take on it.
Take care my friend...All the best.....Andy
Great little project Andy 😀 and good to see Ivy still keeping an eye on you 😊
Hi Steve...
Thank you.. I'm glad that you liked it...
Ivy is never far away... especially when I have some treets in my workshop... I will have to get some more footage of her for future videos... without the battery running out... Haha
Take care...All the best.....Andy
Interesting video to watch, love the colour combination ☺ 👍
Hi Silverlady...
I'm glad that you enjoyed the video... the colour combination does work well... Rav described it as a big lollipop... Haha
Take care...All the best.....Andy
I really like this bowl! This is something I can do on my midi lathe. Don't worry about the glue lines because it just adds to the mystery of how it was made as well as the tennon being the base is sheer genius. I follow papa 1947 also
Hi Jack...
Thank you very much... this is a great project for a mini or a midi lathe... I hope that you enjoy having a go at making one... just get your rings more accurate than mine...Haha
Gary at Papa 1947 is so very good at this kind of project...
Take care...All the best.....Andy
Andy thanks so much for sharing this idea. I’m new at turning and I’m going to challenge myself to do this. Keep the ideas coming thank you😇👍
Hi Ben...
I'm glad that you liked it...
Welcome to what I think is a great hobby...
I hope that you do give it a go and I wish you success...
Try to make a better job on the measurements of the rings than I did... Haha...
Take care...All the best.....Andy
I love this Andy, great work! Absolutely going to have to try it out one day! Thanks for sharing, all the best mate!
Hi Pog...
Thank you.. I'm glad that you liked it... I enjoyed making this one and I hope that you do too... what's not to like... 2 bowls for the price of 1 ... Haha
Take care my friend...All the best.....Andy
Nice work Andy, will have to give this a go, thanks for the inspiration.
All the best to you.
Regards Jim
Hi Jim...
Thank you very much...
There have been a lot of comments saying that they would like to give this a go... and for me that is what UA-cam is all about... great stuff...
I hope that you enjoy making one as much as I did...
Take care...All the best.....Andy
Looks great, Andy. Worked out well. I was thinking of Gary as I was watching. Take care.
Bill
Hi Bill...
Thank you.. I'm glad that you liked it... Gary's videos were the inspiration for this project... he is sooooo good at this kind of thing...
Take care...All the best.....Andy
Thanks for this bargain video Andy - a two-for-one demonstration ! First the bandsaw wibbly-wobbly horizontal(?) layup and the vertical(?) economy layup methods. And congrats on doing a delicate, thin bowl, which I love. Thanks for the oak-paduk smearing color tip ... need to remember it !! Take care. -Mike😷
Hi Mike...
Thank you for your kind words... everyone likes a 2 for 1 ... Haha
This bowl is so economical on wood... yes ... watch out for that Padouk... beautiful wood though...
Take care...All the best.....Andy
You've given me a good idea for my next two bowls. I think I'll use maple and walnut. Thank you.
Hi Paul...
That's what I like about UA-cam... the sharing of ideas...
Maple and Walnut are a great combination...
Both really hard to get here in the UK...
I hope that you enjoy making yours...
Take care...All the best.....Andy
Great little bowl Andy. I want to make one of those soon. Well done.👍
Hi Dave...
Thank you so much... I enjoyed making this project and I hope that you will enjoy making it too...
Take care...All the best.....Andy
You make that look easy, Andy! I think it looks great! You make me want to try one now 🙂 love the design 👍🏻 Ivy has gotten so big! But still cute🙂
Hi Mike...
Thank you... it's actually quite easy to make... even when you get your calculations wrong with the rings it still turned out ok..
Go on Mike..give it a go ... they are fun to make...
Ivy will be 2 in November... how time flies... I have some more footage of her for the next video...
Take care my friend...All the best.....Andy
I thought that looked familiar! Yeah, Gary just did that a couple weeks ago. Very cool idea to stack them and get two bowls for the same setup. Looks great, keep'em coming, Andy!
Phil
Hi Phil...
Yes.. I thought that I would give it a go after watching Gary's CNC version of the wobbly bowl...
I liked the fact that you get 2 for 1.... and that it uses so little wood...
I'm glad that you liked it...
Take care my friend...All the best.....Andy
Very nice Andy! That method works well. Without you pointing them out, I doubt anyone would notice the imperfections. The colour combination is so spectacular.
Cheer, Rick
Hi Rick...
Thank you for your kind words... I'm glad that you liked it...
I always look at my work with a view to how I can improve it ... but it was only a test piece and I was happy with how it worked...
I agree with you about the colours... Padouk and Oak are a really nice combination... I will use it again...
Take care...All the best.....Andy
Very cool. I got worried it was too thin, but it worked out in the end. Nice job
Hi Jay...
Thank you... yes ... I really didn't think that it would turn as the rings were so far out... but in the end it worked in my favour forcing me to do thin walls and the flattened rim looked nice as well... all accidental of course... Haha
Take care...All the best.....Andy
Hi Andy...experiment or not it came out great...contrasting woods and finish look nice... stay safe...press on 😎 Joe
Hi Joe...
Thank you for your kind words... yes the Oak and Padouk go well together... I enjoyed making this one...
Take care...All the best.....Andy
Hi Andy.
Another great idea, this time from You 👍 Finished bowl looks like candy 🍭 Beautiful work my friend 👌
Stay safe. Cheers.
Rav
Hi Rav...
Thank you for your kind words...
The idea was really Gary's... you are correct it does look similar to a candy on a stick... the design could be modified to replicate candy lollies... that would be fun...
Take care my friend...All the best.....Andy
You show here that this is a very applicable method. Beautifully done. The color combination is very good.
Like many other viewers, I will also give this method a try.
👍Frank.
Hi Frank...
Apart from messing up the rings.. the whole process is very simple... and you could be much more adventurous with the pattern... double sided tape would work as well as the hot glue...
The Padouk goes well with the Oak as it does with Ash.... but what I would like to try is Padouk and a really dark wood ... Ebony or Leadwood perhaps...
I really hope that you do give it a go and enjoy making it as much as I did...
Take care...All the best.....Andy
Brilliant mate and a superb adaptation of Gary's idea.
You can add me to the list of people that will give this a go.
Paduk is such an amazing wood we tend to forgive it for tainting all the other pieces in the project and for turning our workshops orange from the sanding.
Fantastic video mate.
Take care.
Cheers, Huw
PS Ivy is sooooooooo GGGOOORRRGGGEEEOOOUUUSSS!!!!
Hi Huw...
Thank you very much...
This kind of project is right up your street... I will look forward to seeing your version...
Yes I love the Padouk too...
Ivy is growing up now... I will take some more footage of her and hopefully have a full battery next time... Haha
Take care my friend...All the best.....Andy
Turned out great Andy! I'll have to try that. It would save on wood if you didn't have a way to get a lot. Thanks for sharing and keep them whirling! Take care and GOD BLESS 🙏!
Hi Stephen...
Thank you very much... give it a go... but make sure that your rings are more accurate than mine... Haha
It is a great way to make a bowl from very little wood...
I will endeavour to keep them whirling...Haha
God bless you and yours...
Take care...All the best.....Andy
Ivy has had a new hairdo too! Great bowl, I had no idea how they were done - i do now, and i have plans to make bowls - thanks for sharing, Andy! Lovely job as always. Claire x
Hi Claire...
Ivy is growing up... I must get some more footage of her for future videos... without my camera dying... Haha
I hope that you do have a go at making one... you could use double sided tape instead of hot glue..
When gluing the Oak base to the board .. put the base on your chuck .... mark the centre on the board and glue together using the tailstock point on the centre mark on the board then apply pressure with the tailstock... clear as mud ehh...
Also get your ring measurements more accurate than mine... Haha
Take care...All the best.....Andy x 👋
@@AndysCornishCreations more ivy!!!! Ok, will get my head around it and add it to my to do list x
I bet that your "to do list " is as long as mine ... Haha
Thanks, I'd never thought about cutting the layers for a bowl like that (I don't have a bandsaw - yet !) Lovely bowl in my two favorite woods - Cheers!
Hi Anthony...
Thank you... I'm glad that you liked the bowl...
If you have a lathe ... I think that the bandsaw is your next must have item... it doesn't have to be top of the range... a small one can do most jobs...
I agree with you about the wood...they work well together...
Take care...All the best.....Andy
@@AndysCornishCreations Hi Andy, yes mine's a Charnwood W815 bought 3 months ago, decided to get a bench grinder first as a. I'll need sharp tools & b. it was cheap (Screwfix) I do pens mostly, but a bandsaw is the big 2022 purchase (Screwfix again I think) I've also managed bowls up to 7" and little boxes. Before this the last time I turned anything was at night classes 45 years ago! Cheers
Hi Anthony...
Ahh yes ... I forgot about the bench grinder... as you say... you need sharp tools...
The Charnwood is a nice machine... the variable speed is very nice... great for smaller projects and especially for your pens...
Take care...All the best.....Andy
A brilliant idea, just like Jack Morgan mentions, it works for us tiny swing lathe guys... Nice thin bowl, actually wafer thin, like an after dinner mint in a Monty Python movie... Take care! Claes.
Hi Claes...
Thank you very much... I do like working on the small projects... I was forced into making the walls thin which was a happy accident after messing up the ring sizes... Haha ..
Let's hope that it doesn't have the same effect as it does on the Monty Python character...
Take care...All the best.....Andy
Hi Andy, The problem you encountered with you maths is a 2mm wide parting tool, is 2mm wide when at 90 degrees, when it is angled at 45 degrees it is wider using a rough calculation (Pythagoras's theorem) 2mm adjacent, 2mm opposite gives you 3mm on the hypotenuse.
Alternatively if you think of car parking spaces being 8 feet wide at the kerb they are 8 feet wide at 90 degrees, however if you mark the kerb at 8 feet and then angle them the bays would be narrower.
Hoping this makes sense
Keep safe
Phil
Hi Phil...
Thank you very much for taking the time to sort out my miss calculations...
I must admit that my head was starting to hurt with the 1st explanation...
But I really liked the parking space analogy...perfect for this old brain of mine...Haha
I still have the other piece to try it out again...
Cheers... take care...All the best.....Andy
@@AndysCornishCreations Hi Andy at 3.26 on the linked video may help your mathematical problem
Keep safe
Phil
ua-cam.com/video/M-jsSczoTbw/v-deo.html
Nice bowl Andy, Just a suggestion you could have held the 2 sheets together with double sided tape, which I think would be quicker, cleaner and easier to disassemble
Just a thought
Hi Phil...
Thank you...
I totally agree with you about the double sided tape... I have some but I keep forgetting to use it... I remembered whilst editing the video and suggested using it to some of the people who were going to have a go at making it...
I need to put it somewhere where I can't miss it ... stuck on my forehead perhaps... Haha...
Thank you for your interest and comment...
Take care...All the best.....Andy
Looks great Andy! The Perils of Paduk bleeding colour!! I wonder how it would look if you made a few degree rotation in each ring rather than try to get the lines up and even us Black CA to glue the rings together. On the basis of if you can't hide it, shout about it! Maybe I'll have to try it. All the best, Dave
Hi Dave...
Thank you very much.. yes the Padouk colour did bleed into the Oak a little but not as bad as with Ash... sanding sealer or thin ca work ok...
The rotation idea could work well... a bit like Gary's "dissy" bowls...
The black ca is a good idea also .. perhaps a dark wood veneer... I agree with your.. if you can't hide it .. philosophy...
You should definitely give it a go...
Take care...All the best.....Andy
Bravo pas simple a réaliser 👍👏
Hi Denis...
Merci beaucoup... ce nétait pas trop difficile...
Tous mes voeux... Andy
You should check out Olivier Gomis' channel. He does a lot of segmented pieces and I think he did a bowl like this one. Yours turned out nicely.
Hi Andey...
Thank you...
Yes Oliver does some great work...
This idea came from Gary... The Papa 47... and was just an alternative way of making his bowl...
Take care my friend...All the best.....Andy
Hi Andy, I recently watched Gary (The papa1947) make the same sort of bowl using his method and thought perhaps doing as you did would work; clearly, it does. I have yet to try with so many other things to try on my list perhaps I should bump it up and give it a go sooner. I have made a few bowls from a board and suffered the glue line issue too. I found that slightly uneven boards, tear out on the ring cutting and one more thing which I cannot recall seem to contribute.
Hi Steve...
Gary's version is very good but I am always looking for a simple way to make something...
This method works really well and has many possibilities with design...
If you do bump it up the list and make one then send me a picture if you wouldn't mind...
A bit more prep work before the glue up would probably benefit my results...
Take care my friend...All the best.....Andy
The other day I was looking at Gary's channel and came across the 2 board hot glue method. I have bumped the creation of a "wobbly bowl" up the list of things to do, the plan is to turn both boards over the next week.
@@AndysCornishCreations
Well, I made two bowls both have positives and negatives. I'm not sure how I can send a photo. I'll post on Instagram soon and can send you the link.@@AndysCornishCreations
Hi Steve...
You can send me a picture to...
andyscornishcreations@gmail.com
I would love to see them...
Take care my friend...All the best.....Andy
Wonderful idea and very nice looking bowl! Is 'Andy's Cornish Abrasive Paste' available for sale? Best wishes, Marc
Hi Marc...
Thank you... I'm glad that you liked it...
I can sell my paste in the UK only ... it has to be £10.00 plus postage to cover costs im afraid...
If you are interested let me know and I will let you have my email address...
Take care...All the best.....Andy
@@AndysCornishCreations Hi Andy, yes I would be interested in buying a pot of this. I live in Bristol (UK), so please let me have your email address and I'll email you about this. Cheers, Marc
andy.paramore@btinternet.com.
Hi Andy! I think your little zebra bowl looks fantastic, well done 👍🏻👏🏻 and your method is really easy, all you need is a bit of creativity and a bandsaw! And so little wood is needed, quite amazing… It sometimes pains me to see a great block of wood which probably took many decades to grow transform into a heap of sawdust… Sorry, that sounds awful… I am sure you know what I mean… You said you miscalculated? You mean the 13 mms or the angle at which you cut the rings? To make it thicker, more overlapping of the rings would be needed, no? Meaning a flatter angle? Meaning a thinner parting tool? Which would then result in a flatter bowl? Sorry 😬🙄 I do have a bit of a headache today… In any case, you turned it really nice and thin, well done, Andy! And the padouk and the oak make a lovely pair! It would be a great Leckerli bowl for Ivy 😃🐾 Is that word understood in English? It means « little treat » and is one of our “little” Swiss German exports, like Müesli (by adding « li » at the end of a word, it becomes “little”, e.g. Ivyli would be Little Ivy)… If that does not keep her in your workshop, I don’t know what will 😂 Have a lovely Sunday, Andy, and hopefully some sunshine as well ☀️ Cheers from cool and rainy Switzerland 👋🏻 Take care 🙏🏻 Jude
Hi Jude...
Ooh Zebra bowl... it would look good in black and white... future project perhaps...
The whole process is quite easy apart from me messing up the rings...
I know what you mean about the heap of sawdust left over from most bowls... it is so wasteful... the bowl savers are a good idea but they are very expensive and the bowls finish up all the same shape... Google bowl savers if you haven't seen them...
Haha.. I like that ... Ivyli sounds good... and I do have a few treats in the workshop or should I say treatsli for Ivyli ... Haha
I hope that you had a lovely weekend Jude...
Take care...All the best.....Andy 👋👋
@@AndysCornishCreations 😂👍🏻 Well done, Andy, you do sound “a bitsli” (a little bit) Swiss German already 👏🏻😉👋🏻👋🏻