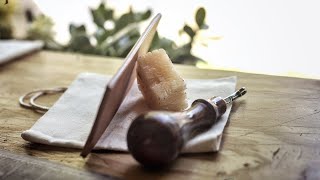
How to Burnish Glass Edges on Leather

Вставка
- Опубліковано 9 лип 2024
- When I started leather working I never thought I'd be able to get an edge like this. I looked but there was no real information on how to do it other than "its all in the sanding".
The leather craft community is pretty amazing but there definitely seems to be a bit of gatekeeping surrounding this skill.
With the help of Ikki Leather and a few others I've talked to, I have cracked the code!
It is definitely all in the sanding, but there's more to it than that.
If you give this a try, please post a reel and tag me so I can see it!
Ikki Leather: ikkileather?igs...
Lesbian EDC: lesbianedc?igsh...
Benjamin Bott: benjaminbott?ig...
SHOW NOTES:
www.blackflagleathergoods.com...
TOOLS I USED IN THIS VIDEO 🛠
BURNISHING MACHINE: amzn.to/3B1QlSw
SAND PAPER: amzn.to/34cuJ7O
MICRO MESH: amzn.to/3RzgD3h
TOKONOLE: amzn.to/3R1Bjl2
Grog Marker: amzn.to/3DTZrz6
RELATED VIDEOS 🎥
Leather Burnishing: • How to Burnish Leather...
Tokonole Marker: • Burnish Leather TWICE ...
Find me on Instagram: / blackflagleather
TikTok: / blackflagleathergoods
Or Facebook: / black-flag-leather-109...
Or Patreon: / blackflagleathergoods
MACHINES I USE:
3D PRINTER: amzn.to/38hi02t
BURNISHING MACHINE: amzn.to/3B1QlSw
Sand Paper: amzn.to/34cuJ7O
TOOLS I'D RECOMMEND:
Vera Forma Leather Balm: amzn.to/33Q5w3r
Sand Paper: amzn.to/34cuJ7O
Strop: amzn.to/3KQc8zi
Corner Punch: amzn.to/3iVtsXO
Owden Maul: amzn.to/3uabZ1t
Punching Mat: amzn.to/2NQ5QGS
John James Needles: amzn.to/3bzA0r8
Ritza Tiger Thread 1mm: amzn.to/3vfPloA
Mallet: amzn.to/3dzohZK
Wing Dividers: amzn.to/3rXYYGg
Burnisher: amzn.to/3RlSqOq
Stitching Chisel: amzn.to/2OTv5Jf
Stitching Pony: amzn.to/3vlU33J
Copper Rivets #9: amzn.to/34BR2k6
Rivet Setter: amzn.to/3p9hZp1
Ball Peen Hammer: amzn.to/3vJoMZ0
End Nipper: amzn.to/2SNV9qK
Weaver 2lbs Maul: amzn.to/3unAQhm
Photography Light I use: amzn.to/2QQ0xJi
Softbox: amzn.to/3ccDgcf
Sinabroks Stitching Punch 1mm, 5mm Spacing:
sinabroks.com/products/stitch...
Grog Marker: amzn.to/3DTZrz6
MY FREE TEMPLATES:
Leather Cup Sleeve: • How to Make a Leather ...
Folded Cardholder: • How to Make a Leather ...
Wrapped Cardholder: • FREE Leather Card Hold...
Leather Sunglasses Case: • Making a Leather Sungl...
Valet Tray: • Making a Leather Valet...
Coinholder Wallet: • Leather Challenge Coin...
Long Wallet: • Making a Leather Long ...
Intro 0:00
What You Need 2:02
The Process 4:00
Thank you, Tom McBride! 7:50
Wrapping it up 8:31
If you liked this video, check out my Leather Working Tips and Tricks Playlist where I make beginner leather working tutorial videos, show you some tips and tricks, and give you a few beginner leather working projects to try out.
• Leather Working Tips a...
Join the mailing list: mailchi.mp/442e3cd11415/subsc...
My name is Tim. Thanks for checking out my UA-cam channel. I started leather working in July of 2020. My passion for leather work quickly grew as I learned and practiced. I received a ton of help from the leather working community when I was new and now I aim to pass on what I learn to other beginner leather workers. I post weekly leather craft videos that include tutorials, free pdf pattern templates, how to's, tips and tricks, and any other leather work content that I think could help you out!
#leathercraft #leatherwork #tutorial
--------------------------
Disclaimer: Links to products/services in the description are often affiliate links that let you support my channel at no additional cost. As an Amazon Associate I earn from qualifying purchases. - Фільми й анімація


All I can say is that is just the best burnished glossy edges i've ever seen. Much thanks for sharing.
Thanks for watching!
It's no challenge creating a glass surface on the thickest leather you have.
Life is funny sometimes, I started crafting with epoxy resin initially, sooooo much hand sanding and I wanted to try micromesh for polishing, never let myself buy it. I moved into leathercraft several years ago now, and here you are making me want micromesh again 🤣😭🤣
When using a rotary punch to punch clean holes in thin to moderate weights of leather, try placing a piece of scrap leather under the project piece of leather and squeeze the handles as normal. You'll hear a certain sound when both thicknesses are punched through. This will assure you a definitely clean inner edge of the punched hole.
Very cool to see my Rainbow Cardcase featured in your video. Thanks for the shout out! That edge is looking mighty fine at the end there. I admire the dedication with the super high grit micro mesh, too! It definitely gave you some killer results 🔥
I'm so glad you liked it! I've been a huge fan of your work since I started leather working. I'm honoured you saw the video!
I've been doing leather for about a year now and the one thing that's always thrown me for a loop was finishing my edges. I now have a much better understanding of the proper process and technique to get the finish I'm looking for. Thank you soo much!
120,240, 400, 800, edge dye, wood burnihishing, edge dye,, 1000,1500,,tokonole,, 2000, tokonole, canvas... My happiest way
That's pretty much what I usually do too!
At what point do you do your bevelling?
I watch your videos in Brazil and it's been so helpful to improve my process here! GOD Bless.
I'm so glad they've helped! Thank you for watching!
Awesome video! Thank you for taking the time to explain this and thank you Tom for sponsoring it. 🤣
Thanks for watching!
To sharpen leather shears, get a large sheet of Reynolds Aluminum Foil and cut as many narrow strips of the foil as possible. This will enable the crafter to cut thin to moderate thicknesses of leather, "clean as a whistle." KEEP THE GOOD VIBES GOING..................
I've been doing leather work for about two and a half years. I've gotten shiny edges but never a glass edges. Thank you for the instructions I will be trying it.
Thanks for watching! Let me know how it goes!
Hey! I just came across your channel while watching leatherworking ASMR shorts. I plan to start some leatherworking myself and hopefully start to sell after a few months of practice. I LOVE this glass edge look, and will definitely be trying this out! Also I really appreciate all the information in your videos.
I have to revisit the video but, I followed Don Gonzales' method from his video titled "Quick Tutorial: Slicking Edges on Leather". I'm sure most people here are familiar with Don. I Started leather work while on "2020 layoff" and following was the first people I learned from and I personally have always gotten great results using his methods. I get a very consistent finish doing it this way. He also sands his stuff, shown in other videos and has some very helpful techniques to get good results, like using a sanding block/board with sandpaper on it.
I'd say see what result you get sanding up to the 800 grit and then finish it Don's way and compare the result.
I'm not sure it's worth the effort for that glass finish on products made to be sold though. I'll have to make one of my custom fit belts and see how long it takes to edge it this way and what added cost is for the extra sandpaper. Not a complaint about work but, you have to pay yourself for the work and price it fairly for your customers. Looks like you did a test on about 3 inches of edge, my average belt is 50 inches long so that's about 100 inches all the way around.
I'm always looking for ways to get better results and or speed up production as long as quality is not compromised.
I also wonder what if you used a buffing wheel/bench buffing machine at a certain point to finish up. That might speed up the process and possibly improve the end result.
Loved the video, always looking to improve quality.
I’m fairly new , but your vids help so much . Thanks !!
Great tips and advice!
great information here, one of the things that really important to get those edges is the Temper of the leather your using, Additionally the denser the fiber structure the easier it is to archive the look. If Veg tan is your choice as it is mine, I personally use Horween (sp) The Russet strips from Tannery Row. it's tanned by the first half of the Shell process, it's a bit pricier than most Veg but the way it works if you're carving and tooling the piece is second to none, and yes, it is possible to easily bring that glass edge up on your pieces, the other thing about that edge is you normally only see it on short straight relatively thick pieces, and a lot of cliental dont care for the bulk, but to each there own!
Thank you! Horween is my preference as well although lately I've been using a bit of Wicket & Craig. Both of them are so nice to burnish.
I chose the leather I used in the video because it is a dirt cheap veg tan I got at Tandy for prototyping. Figured if I can get the mirror edge on that stuff, you can do it on anything.
Your videos are extremely helpful. I especially appreciate the tool listings with links. Thank you!
Thank you so much! I'm glad you found it helpful!
Hey brother, love your videos. I have a tip I picked up from an old timer. Try to get the biggest sheets of paper you can. The longer strokes you can make, the faster it will go and it's much easier on the arm. Long consistent strokes will make life easier.
Thank you! They are actually long sheets but I fold them. Maybe I'll try leaving them unfolded
Awesome as always, you're an inspiration to us starting out in leathercrafting.
Thank you so much! I really appreciate it!
This video is very helpful. Thanks for all your work. Love the hat. Go Jays!🇨🇦
Thanks for watching!!
Great work, Tim!
Thank you!
Alright... I tried this on some scrap. went up to 7k grit paper. 400, 1000, 1500, 2000, 3000, 5000, 7000 with tokonole between each little sanding from 2k. hot damn, did not take that much time. got to try this on next cardholder. Thanks ^_^
Solid video!
Thank you!
Thanks for the links mate
Whats the "clicking thing" you mention at 5:23?
Thanks Tom Mcbride!
I wonder if you ever dye your edges, and if so do you follow the same procedure for burnishing? Thanks
Great video. I love that you shared links to your tools, BUT, please tell me where you got the stitching pony thats right at the beginning of the vid. I love it!
great information how long do you sand and burnish in between each step?
Great video, thank you. Do you fill the tokonole from the jar into the grog marker. My tokonole is quite viscose, will that work? TiA
thanks for share, I have a question , ¿Its for a wood or metalic sand paper?
🔥🔥🔥🔥🔥🔥
Thanks, brother!
Hi! Can I ask at what stage do you do the edges? Is it final stage, after stitching and all?
Newbie question: when in the process would you colour the edge if you wanted to include that?
Good question! Add dye before you use Tokonole. Tokonole contains glue that coats the leather and would prevent dye from soaking in.
Stupid question: Where are there these "pieces of canvas" that I need? Can't find anything on Amazon.
I just use a canvas bag that I received something in. These look about the same though amzn.to/498XfUk
Could you please add a Turkish automatic language translation option for your wonderful educational videos? Thanks
Thanks, Tom!! 😂
Do you burnish before dying? Mostly making knife sheaths, or should burnish after the dye process?
What type of canvas is that? I have scrap duck canvas, would that work?
This is just a little canvas bag I received something in. Scrap duck should work great!
Do these edges last? I’ve heard that they will dull pretty quickly with use
I really enjoy your videos. Would you be so kind to tell me about your pony clamp. It looks really nice Thanks John. Toronto Canada
Hey, John! Thank you! The clamp is from Wing and Wave designs on Instagram. He's a small business operating out of Florida. Really cool guy.
Love you stitching pony where did you get it?
Out of interest, do you charge more for glass edges? Is this extra work and effort factored into your prices?
THANKS TOM MCBRIDE!
What type of leather are you using?
So, who says "glass edges" should be the standard? There are those who would say that "glass edges" for leather is just a current fashion. I personally do not believe that everyone should do finishing the same way.
I agree. But I feel like learning how to do a variety of methods then choosing what works for you is of benefit to a leather crafter.
Glass edges look out of place on some projects, but really good on others. In my opinion. And I think the more techniques you know the more options you have. You can never learn too much.
Love the video Tim. Question. Your burnishing 'glass' technique...is you little Amazon burnishing machine not used? Can you use both to speed up the process? There has to be a way to add different strips of sandpaper to that drum sander. One section for 120, one section for 220. One section for 400? That would save a bunch of minutes getting up to the Tokonole stage. I do not have one of those machines yet. But a cardboard tube that fits the drum and then glue strips of sandpaper to the cardboard may work. Again, my thanks.
Thanks Bruce! That is definitely something I've been looking into and just haven't given it a go yet.
There are a few videos out there where people have done just as you describe with a paper towel roll and a bunch of glue. It'd definitely be handy!
@@BlackFlagLeatherGoods I think it would cut down the hand work for the second hand of the process.
What we need is a 12" wide belt sander with all the grits lined up on one belt. Just move across the belt with a little canvas inbetween.
That's a brilliant idea!
What is the difference between burnishing with a cloth and wooden slick?
I find I get a smoother edge using the canvas cloth than I do using the wood slicker. The wood slicker does shape the leather nicely though, so usually I'll start with the wood slicker then do the rest with canvas.
Shoutout to Tom Mcbride
The glass edge looks amazing but what would it look like after say a week of use?
It definitely gets scuffed up. Maybe I'll make myself a wallet and see how long it lasts.
Definitely curious about that. Seems like a lot of work for a beautiful edge that quickly degrades. Not much of an issue for personal/gifting means but for production might not be practical
It's definitely not practical for production unless a customer requested it and you charged accordingly.
What about using acrylic finisher? Or something like 4-coat high gloss angelus, i think that the finish is gonna last atleast a few months of use
Great video. Once you get the edge to that level do you finish it with beeswax & canvas or leave it as it is?
I've tried using beeswax & canvas to finish the edge but it tends to dull the edge, it does however leave the edge feeling smoother for longer than just using tokonole & canvas.
Thank you! I don't wax the edge once I'm done, but I have tried it. After you put wax on, add a bit of water to it and burnish. I found adding a bit of water made it smoother, but not this smooth. You could also try using a blend of waxes melted together. Beeswax alone is pretty soft. Mixing it with carnuba would be interesting...
@@BlackFlagLeatherGoods thanks for the tip. Will definitely try it with a bit of water. I made a formula with 85% beeswax & 15% paraffin wax. It works better than the pure beeswax. Columbus wax gives the best shine, but the hardness of it makes it difficult to apply without the right creaser tip.
No Elmers or PVA in sight - YAY!!!
Haha I wonder if I could do this with Elmer's now.... 😂
CORD O VAN
You are Canadian AF!
I am!
@@BlackFlagLeatherGoods Happy Thanksgiving! Great vid.
Thank you! Happy Thanksgiving!
its kind of funny, because in one of your older videos, you also only said something along the lines of "its all in the sanding"......
Haha well good thing that's mostly correct.