Just a tip, any rubber trim (like window moldings) you are tossing, cut a piece off and keep, when you run into problems reassembling in a year or two you can check if the new trim is actually a match for what you took off. Some of the aftermarket replacements are sketchy.
The sample also will come in handy to match, if the original is not directly available. Steele Rubber has almost any car rubber seal profile ever made.
This is the most real ILikeToMakeStuff I’ve ever seen. Seeing Bob struggle with the seat is so something that me and my Dad would do and it just makes me feel more relatable to these videos…
Total love for this project. You're attacking it just like every other vehicle repair, rebuild or shade tree upgrade I've ever worked on with friends growing up. Keep going man. Great stuff.
Ziplock bags Bob, for all the hardware that comes off, then label the bags. You’re going to end replating/coating the bolts and nuts etc, so that also helps keep them organised.
you can use one of those small instant photo print camera and place the photo in the bag next to everything else. 2 years from now you wont remember what the 3/4 x 2 washers left mid cylinder bolt" means
To get those door screws off, I’d recommend a manual impact driver. It’s a simple tool you hit with a hammer to free stuck screws and can work really well. It’s about $8 at harbor freight.
@@iandoesit Like a big phillips screw driver and a sledge shock it while trying to turn it, or add a little bit of heat then hit it and try to turn. VW mechanic moto if it doesn't come off, get a bigger knockometer
DO NOT use a manual impact I had a 71 ghia when i was 16 and that was all that was available and by hitting the impact with a hammer you can misalign the pillar or worse break the welds at the rocker . use penetrating oil heat and a good cordless impact driver with a number 3 impact bit. used this on my grandads 68 bug and it worked well without deforming anything
In the old days, my uncle used a Polaroid camera and coloured markers and put dots on the picture and on the compartments of his containers with the hardware as it took him years restoring old cars in his garage.
Write sequential numbers on painters tape, stick one number on the part, take a photo, maybe several if it needs it, each with the same number. Then stick the tape with the number on an index card, write notes as needed, put the card and small parts in the ziplock bag. Obviously, use different numbers for each assembly. Later, match the photos to the parts, using the number.
Really like this series! Idea for the bolts is to put them through cardboard roughly in the layout the were on that part. Piece of cardboard for each part and you can put tape over them to make sure they don't come out. Keep up the great videos Bob!
I think a load of VW guys know exactly what you're getting yourself into! Early days, keep enthusiastic about it, even when it tries biting back! The car will be awesome when it's done!!! I couldn't help but laugh when you said that you were hoping for the floor pan to be in reasonable condition 😅 ...when you get to it, if you don't decide to replace your whole floor pan with new, the best thing I found to get the bitumen coating off is a propane torch... it saved me weeks of back breaking work on my project. Looking forward to the next episode!!!
Been waiting for this for a while. Love the comment- "in two years when I go to put this back together". Realistic and honest! Great job!
3 роки тому+41
Producers jokes aside, I am totally on board for this series... especially the "car rotisserie build". Question for Bob: for the repaint, have you picked a colour scheme yet?
Also, pro tip when working with automotive stuff. Whenever possible use the box end of the wrench, not the open end. Much less likely to round off your bolt heads and nuts. Also highly recommend 6-point box wrenches over 12 point. Again, less likely to round off your bolts/nuts.
I am cracking up!! I love when things don’t work right: you can’t get the seat out, the door won’t come off. Ahhhh, so relatable! Keep showing all the things… I am enjoying the journey!
Dude, I admire you for tackling such a major project. Taking a car apart that has just sat fit any length of time to get it all back together is an incredibly complex undertaking. I wish you well & take not to “bust” too many knuckles.
I love the optimism, ".. so when I go to put it back together in two years..." :-) I love this project. Prior to pouring myself into woodworking, rebuilding an antique vehicle from the ground up was a desire. But, no money and no space for working on it. Love seeing the variety here.
A trick i learned that works well on organizing small parts for stuff like this is taking a picture of the part/location that it goes, printing it out, circling the location, and then either taping the part to that picture or putting it in a plastic ziploc or tupperware. That way come time to reassemble I have a photo/location of where it goes
So happy to see this new video on the build video series. Keep up the great craftsmanship and hard work my friends. At ILTMS. can't wait to see more videos on this great project. And other builds on the channel. Weld on. Fab on. Keep fixing. Keep repairing. Keep making. God bless.
Way to go! Lifelong air-cooled VW enthusiast, but have never owned a Ghia. want to build out a hardtop like yours but electric. will definitely be keeping up with this series! Good luck!
Love the series so far Bob. I’m sure this was already mentioned but it doesn’t hurt to hear it again I guess. After applying the stripper, cover the body panel with plastic so the stripper doesn’t dry out as quickly and also wait for the stripper to do it’s job. You will know it’s working when the paint starts to bubble off of the metal. Keep up the fine work and enjoy the restoration. Looking forward to your next vid.
I like to restore stuff…The Karmann Ghia project. Awesome video.
3 роки тому+1
For organization, I’d suggest small mason jars. With labels on them. I did that on my tractor engine rebuild and it worked like a charm. You can see inside and the label tells you exactly what it’s for. I also grouped these jars together in boxes.
I've really enjoyed this series so far. I am purchasing a 72 Ghia that is mostly disassembled and ready for resto soon and this body off process is exactly what I plan on doing. Keep it coming!
Absolutely love watching his car restoration series he’s got going. Just cant say it enough but love the videos Bob honestly cant wait for the next. Good luck with the car!
I find the hardest part of tackling any complex project is just getting off my ass and picking up the first tool. You are well past that point and a gem to watch. My contribution? Digital photos are next to zero cost and can document how things came apart, so 2 years on, you aren't entirely dependent on memory. Take a ton of pics before you dismantle things, large or small. Keep it up, Bob. Looking forward to the next installment.
Cardboard!! Label it and punch little holes through to push the bolts into it! I’ve even zip-tied parts to the cardboard, kinda grouping things together on different pieces. Then I wrap them in ceran wrap to keep it all in place. Depending on the parts I may shoot some WD-40 over them to keep rust from at bay. Also, depending on the part, let’s say a water pump, I’ll doodle a little sketch on the cardboard so I know which bolt goes where since they may be different lengths..etc..ziplock bags work but I have found you just get a pile of bags after a while and it’s hard to index them or find what you’re looking for. Good luck with the restore!!
This is a really fascinating series on a channel where I already don't want to miss a video. Great stuff! Something I like to do when having to keep track of small parts and screws (mainly for moving furniture) is to put the parts in sandwich bags and write on the bag what the parts go to. I'll even tape them to the furniture sometimes so that I don't lose track of the bag. Hope that helps.
Reminds me of working on my El Camino 😂 the bench seat was a bear to get off, the bolts were stripped and one was broken clean off so I had to get 3 out and then just break the frame off at the foot My floorpans are all rusted out, its a Flintstones car basically xD only spit it wasn't rusted was the transmission hump and crossbraces
We need more car mechanical Bob!! That was so fun to watch. How you just go through the project trying to figure things out. Best perk of watching ILTMS videos in my opinion!
Putting bolts back where they came out of is exactly what I was going to suggest! Its a great way for organization. When you need to remove them again for any reason, get a box of good heavy duty ziplock bags or old tupperware that you can write on so you can label what goes where.
As a qualified mechanic it's fun to see you working on a car, it's great that you are doing your research, those repair manuals will save your life. Penetrating oil is going to be essential, spray every nut and bolt and it's going to be a lot easier to disassemble
Bob, I’ve been using ziptop bags for my hardware, but realizing there’s lots of shortcomings to that. Leverage Tupperware may be better. Also, store your glass upright, not on its side, or it’ll randomly explode! (From second hand experience)
Love that your taking on this challenge. As someone who’s been a part of doing something similar I’d say freezer bags are great for storing nuts and bolts and such. They’ve already got a place to label them and they’re pretty tough. When I was about 16 my buddy bent the frame on his Chevy S10. So we spent the summer switching everything over to a new frame he picked up at a junkyard. The wiring was definitely the most difficult thing next to the break lines. But if two knucklehead teenagers borrowing or renting tools can do it I know you got this. Best of luck to you.
This is amazing to me -- and theoretically something I think would be a lot of fun. But that's where it ends, theory. The complexity of such a project astounds me, but I love watching it. Keep up the awesome videos, and good luck!
I’m loving these videos. Just the laid back kind of hang out with Bob videos are really awesome. Keep up the great work! I keep thinking of tips and stuff that I have learned from taking apart a Jeep but I know if someone told me them while I was doing it, I wouldn’t have listened. I would have rather learned through messing up. Great job!
Really excited about this series! I know nothing about cars and I just hope I'm not going to be lured into a new hobbie like what happened with woodworking after watching your videos :D Keep it going!
Fantastic work, Bob! 😃 It's definitely not an easy job, but you're doing really well! Stay safe there with your family! 🖖😊 BTW, I was going to tell you about the plastic bag trick! 😂
Love IT! I am really looking forward to this series. I am still working on my Ghia that I started a year ago. I had to replace the floor boards and I have to say that some of the best ideas came from "duck man". His videos are weird but he does things like modify an engine hoist to remove the body. I think it was his channel that I found out about putting the chassis on its side to work on it. I also removed all of the old wires and used a PAINLESS kit to redo all of the electrical. Worked OK, but all of the pre-done kits are for front engine cars so I still had to do some modifications.
I use plastic zip top bags either with the info written right on the bag or on a piece of tape adhered to the bag. For some of the bigger fasteners, those lunch meat containers are great. Good luck on this project. You have taught me a lot over the years, so hope this little tip helps you out.
when you were struggling with the large Phillips head screw it reminded me of a trick i was told years ago . the shape of the handle on the classic craftsman screw drivers is designed to work with a box end wrench .. this way when you are trying to break torque on something like this you can get more leverage .. i am restoring a 1950 Willys Jeep and i have experienced the same struggles you are going through .. i used paper lunch sacks and wrote on each of them as i pulled screws and parts then wrapped them in tape and set them in a tote .. this soaked up any grease and kept them some what organized ..
Hey Bob - as you begin to clean up bodywork and reassemble the body/interior, consider lining big, broad, interior-facing panels with a sound treatment like Dynamat. It will make the car feel _much_ more solid when it goes back together, and you'll hear a lot less rattling/shaking/buzzing. It can really add to the car feeling like a bit more luxurious.
I'm in the middle of a Ghia restore with my 16 year old son. If you are going to dismantle this thing, always put the bolt or nut that goes to something back on as you disassemble it. If that is not possible, I put everything in a plastic zip-lock and include any notes or drawings you think may help in the bag. When disassembling electric. tag one side with 1A and the other side with 1A and so on. It's not as hard as it sounds. Different wire wheels on a 4" grinder will take a lot of rust off fast. Take lots of photos and use lots of PB Blaster!!!!!! Good luck!!! It's a big job.
Great series! Make sure to spray all the nuts and bolts with a penetrating fluid and have a blowtorch on standby just to make sure everything comes out in one piece without too much of a hassle.
Nice video Bob! Great to see some progress on this. I'm getting ready to fix a rusty floor in my truck with no welding or bodywork experience whatsoever, so I'll be watching your videos closely! Keep 'em coming :D
This is relatable content! Fun and informative to see you doing something new to you as well to me. I'm glad you are sharing this journey with us. Have heard you talk about this on the podcast and am glad you are doing it.


Just a tip, any rubber trim (like window moldings) you are tossing, cut a piece off and keep, when you run into problems reassembling in a year or two you can check if the new trim is actually a match for what you took off. Some of the aftermarket replacements are sketchy.
Agreed, excellent tip.
The sample also will come in handy to match, if the original is not directly available. Steele Rubber has almost any car rubber seal profile ever made.
West Coast Metric makes all the rubber seals and items for these cars. Check them out.
This is the most real ILikeToMakeStuff I’ve ever seen. Seeing Bob struggle with the seat is so something that me and my Dad would do and it just makes me feel more relatable to these videos…
The struggle is real
Maybe he needs to rename his channel to "I Like to Break Stuff" :-D
I thought this exact thing. Seeing him back there shouldering a seat made me smile....I've been there.
Total love for this project. You're attacking it just like every other vehicle repair, rebuild or shade tree upgrade I've ever worked on with friends growing up. Keep going man. Great stuff.
Glad you enjoy it!
Ziplock bags Bob, for all the hardware that comes off, then label the bags. You’re going to end replating/coating the bolts and nuts etc, so that also helps keep them organised.
Agreed.
you can use one of those small instant photo print camera and place the photo in the bag next to everything else. 2 years from now you wont remember what the 3/4 x 2 washers left mid cylinder bolt" means
@@nimuie That or a digital picture and add the picture number on the bag.
This is exactly what I do.
Came down here to say exactly this
I'm not a car guy. And I've been loving this entire series of videos about the Karman Ghia. Great job as always Bob and crew!
I'm not a car guy either, but I'm working on it piece by piece
To get those door screws off, I’d recommend a manual impact driver. It’s a simple tool you hit with a hammer to free stuck screws and can work really well. It’s about $8 at harbor freight.
That's what I was about to say.
@@iandoesit Like a big phillips screw driver and a sledge
shock it while trying to turn it, or add a little bit of heat then hit it and try to turn. VW mechanic moto if it doesn't come off, get a bigger knockometer
Also, those big cross heads aren't Phillips, they're flat bottomed like a slotted screw
@@lynxshd exactly, in brazil we called this "wake up" the screw
DO NOT use a manual impact I had a 71 ghia when i was 16 and that was all that was available and by hitting the impact with a hammer you can misalign the pillar or worse break the welds at the rocker . use penetrating oil heat and a good cordless impact driver with a number 3 impact bit. used this on my grandads 68 bug and it worked well without deforming anything
In the old days, my uncle used a Polaroid camera and coloured markers and put dots on the picture and on the compartments of his containers with the hardware as it took him years restoring old cars in his garage.
That would be a fun way of chronicling your build process
For all it's worth, @tom's turbo garage uses labeled ice cube trays to hold those, and i found it very useful...
Write sequential numbers on painters tape, stick one number on the part, take a photo, maybe several if it needs it, each with the same number. Then stick the tape with the number on an index card, write notes as needed, put the card and small parts in the ziplock bag. Obviously, use different numbers for each assembly. Later, match the photos to the parts, using the number.
As a Vw french enthusiast, I'm super happy when i get notified of some ghia content ! Love it
Happy to hear that!
Really like this series! Idea for the bolts is to put them through cardboard roughly in the layout the were on that part. Piece of cardboard for each part and you can put tape over them to make sure they don't come out. Keep up the great videos Bob!
That's a great idea!
What a great project. But oh boy am I glad I just have to watch him do the work.
I think a load of VW guys know exactly what you're getting yourself into! Early days, keep enthusiastic about it, even when it tries biting back! The car will be awesome when it's done!!!
I couldn't help but laugh when you said that you were hoping for the floor pan to be in reasonable condition 😅 ...when you get to it, if you don't decide to replace your whole floor pan with new, the best thing I found to get the bitumen coating off is a propane torch... it saved me weeks of back breaking work on my project.
Looking forward to the next episode!!!
I’m glad your doing a off frame restoration, you will appreciate it. It’s great your taking us down this road with you! Thanks Bob
Patiently waiting for another video on this project.
Been waiting for this for a while. Love the comment- "in two years when I go to put this back together". Realistic and honest! Great job!
Producers jokes aside, I am totally on board for this series... especially the "car rotisserie build". Question for Bob: for the repaint, have you picked a colour scheme yet?
Also, pro tip when working with automotive stuff. Whenever possible use the box end of the wrench, not the open end. Much less likely to round off your bolt heads and nuts. Also highly recommend 6-point box wrenches over 12 point. Again, less likely to round off your bolts/nuts.
you are very confident, geep going, dont you worry......
I am cracking up!! I love when things don’t work right: you can’t get the seat out, the door won’t come off. Ahhhh, so relatable! Keep showing all the things… I am enjoying the journey!
Dude, I admire you for tackling such a major project. Taking a car apart that has just sat fit any length of time to get it all back together is an incredibly complex undertaking. I wish you well & take not to “bust” too many knuckles.
I love the optimism, ".. so when I go to put it back together in two years..." :-) I love this project. Prior to pouring myself into woodworking, rebuilding an antique vehicle from the ground up was a desire. But, no money and no space for working on it. Love seeing the variety here.
Long time follower. The fact you are a newbie at this just makes it more interesting than any pro restoration.
A trick i learned that works well on organizing small parts for stuff like this is taking a picture of the part/location that it goes, printing it out, circling the location, and then either taping the part to that picture or putting it in a plastic ziploc or tupperware. That way come time to reassemble I have a photo/location of where it goes
That’s going to be a great ride once it’s finished.
This has quickly become my favorite series y’all have done
The fan favorite series is back!
It's not going anywhere! It just may take some time between updates
So happy to see this new video on the build video series. Keep up the great craftsmanship and hard work my friends. At ILTMS. can't wait to see more videos on this great project. And other builds on the channel. Weld on. Fab on. Keep fixing. Keep repairing. Keep making. God bless.
Way to go! Lifelong air-cooled VW enthusiast, but have never owned a Ghia. want to build out a hardtop like yours but electric. will definitely be keeping up with this series! Good luck!
Love the series so far Bob. I’m sure this was already mentioned but it doesn’t hurt to hear it again I guess. After applying the stripper, cover the body panel with plastic so the stripper doesn’t dry out as quickly and also wait for the stripper to do it’s job. You will know it’s working when the paint starts to bubble off of the metal. Keep up the fine work and enjoy the restoration. Looking forward to your next vid.
so hyped for this series
Im learning so much from watching this! Keep it coming Bob and team!
I'm so glad to hear that!! (I'm learning a ton as well)
I wish I can do a project like that. I love the way those videos are done. No filter, just plain raw! Great videos.
For part organization, Just get a piece of carboard. Label "zones" on the cardboard and then just push the bolts through! Super simple and effective
nice!
I like to restore stuff…The Karmann Ghia project. Awesome video.
For organization, I’d suggest small mason jars. With labels on them. I did that on my tractor engine rebuild and it worked like a charm. You can see inside and the label tells you exactly what it’s for. I also grouped these jars together in boxes.
The Karmann Ghia videos are the ones I look forward to the most!
As a person who fixes all his cars I am really excited to see this happening.
As a person who has a car, I'm really excited to eventually be a "car guy"
@@Iliketomakestuff you got a long way to go, but you'll get there. Keep it up!
With the aircraft remover, cover it with clear wrap, it’ll hold in the fumes and helps it work even better
Or aluminum foil.
That's genuinely the best way to organise bolts - you can't do any better than to store the bolts where they actually live!
I think, in this video, you have hit on every single problem that someone restoring a car strikes. Keep at it.. this is going to be awesome
Putting parts back where they came from or ziplock baggies are the best methods I've found after DIY carwork for 20+ years.
I've really enjoyed this series so far. I am purchasing a 72 Ghia that is mostly disassembled and ready for resto soon and this body off process is exactly what I plan on doing. Keep it coming!
I have zero interest in restoring an old car like this, but these videos are so fun! I'm enjoying them and the cool pace.
Absolutely love watching his car restoration series he’s got going. Just cant say it enough but love the videos Bob honestly cant wait for the next. Good luck with the car!
Thanks so much!
I find the hardest part of tackling any complex project is just getting off my ass and picking up the first tool. You are well past that point and a gem to watch. My contribution? Digital photos are next to zero cost and can document how things came apart, so 2 years on, you aren't entirely dependent on memory. Take a ton of pics before you dismantle things, large or small. Keep it up, Bob. Looking forward to the next installment.
Cardboard!! Label it and punch little holes through to push the bolts into it! I’ve even zip-tied parts to the cardboard, kinda grouping things together on different pieces. Then I wrap them in ceran wrap to keep it all in place. Depending on the parts I may shoot some WD-40 over them to keep rust from at bay. Also, depending on the part, let’s say a water pump, I’ll doodle a little sketch on the cardboard so I know which bolt goes where since they may be different lengths..etc..ziplock bags work but I have found you just get a pile of bags after a while and it’s hard to index them or find what you’re looking for. Good luck with the restore!!
This is a really fascinating series on a channel where I already don't want to miss a video. Great stuff!
Something I like to do when having to keep track of small parts and screws (mainly for moving furniture) is to put the parts in sandwich bags and write on the bag what the parts go to. I'll even tape them to the furniture sometimes so that I don't lose track of the bag. Hope that helps.
By far my favourite series on your channel Bob!
ChrisFix is a good person to learn how to fix and work on cars, he shows tips for anything from body to engine, and goes into full detail
Reminds me of working on my El Camino 😂 the bench seat was a bear to get off, the bolts were stripped and one was broken clean off so I had to get 3 out and then just break the frame off at the foot
My floorpans are all rusted out, its a Flintstones car basically xD only spit it wasn't rusted was the transmission hump and crossbraces
We need more car mechanical Bob!! That was so fun to watch. How you just go through the project trying to figure things out.
Best perk of watching ILTMS videos in my opinion!
Absolutely loving these restoration videos, please please keep them coming!!!
Love to see you are restoring a Ghia. I am almost done with my 69 Ghia. Have fun.
Putting bolts back where they came out of is exactly what I was going to suggest! Its a great way for organization. When you need to remove them again for any reason, get a box of good heavy duty ziplock bags or old tupperware that you can write on so you can label what goes where.
Longer and more videos, pleaseeee!!!! Loving this series!!
I just love these type of video's, no script, just someone trying something and hoping it will all go well :P
I love how raw this is and the fact you kept all the different ways you tried it’s inspired me that one can do this
Loved the Flight of the Navigator vibes from the music in the first sequence.
What you did with the bolts is perfect
awesome video!!
This looks like fun! To organize a little easier label shelves and put the parts accordingly.
I have a '64 Ghia. Will be watching this series for sure!
Is anyone already making a looped version of the ILTMS ASMR bit? Because I need that to fall asleep to!!
Hey I love how you show us learning your way through this. It helps us learn better as well
As a qualified mechanic it's fun to see you working on a car, it's great that you are doing your research, those repair manuals will save your life.
Penetrating oil is going to be essential, spray every nut and bolt and it's going to be a lot easier to disassemble
So glad you decided to film this! This is fantastic.
Bob, I’ve been using ziptop bags for my hardware, but realizing there’s lots of shortcomings to that. Leverage Tupperware may be better.
Also, store your glass upright, not on its side, or it’ll randomly explode! (From second hand experience)
Love that your taking on this challenge. As someone who’s been a part of doing something similar I’d say freezer bags are great for storing nuts and bolts and such. They’ve already got a place to label them and they’re pretty tough.
When I was about 16 my buddy bent the frame on his Chevy S10. So we spent the summer switching everything over to a new frame he picked up at a junkyard. The wiring was definitely the most difficult thing next to the break lines. But if two knucklehead teenagers borrowing or renting tools can do it I know you got this. Best of luck to you.
Great video - When I was in HS - I had a 1970 KG same color as yours. Always going to junkyard for parts. Loved that car!!!
*LOVE IT!!*
Best series so far on this channel.
This is amazing to me -- and theoretically something I think would be a lot of fun. But that's where it ends, theory. The complexity of such a project astounds me, but I love watching it. Keep up the awesome videos, and good luck!
I’m loving these videos. Just the laid back kind of hang out with Bob videos are really awesome. Keep up the great work! I keep thinking of tips and stuff that I have learned from taking apart a Jeep but I know if someone told me them while I was doing it, I wouldn’t have listened. I would have rather learned through messing up. Great job!
I love watching this process from you. Please make more videos of this
Really excited about this series! I know nothing about cars and I just hope I'm not going to be lured into a new hobbie like what happened with woodworking after watching your videos :D Keep it going!
I hope you ARE! :) Thanks for watching!
Love this series on the Ghia.
I'm loving these videos about the car. I'm so excited to see how it turns out!
Fantastic work, Bob! 😃
It's definitely not an easy job, but you're doing really well!
Stay safe there with your family! 🖖😊
BTW, I was going to tell you about the plastic bag trick! 😂
Ghias are one of my most favourite cars . I’m envious .
Love IT! I am really looking forward to this series. I am still working on my Ghia that I started a year ago. I had to replace the floor boards and I have to say that some of the best ideas came from "duck man". His videos are weird but he does things like modify an engine hoist to remove the body. I think it was his channel that I found out about putting the chassis on its side to work on it. I also removed all of the old wires and used a PAINLESS kit to redo all of the electrical. Worked OK, but all of the pre-done kits are for front engine cars so I still had to do some modifications.
Yes! I've watched several of his and gotten some great tips 👍🏼
6:27 I feel your pain, Bob. I go through basically this same thing with Every Single Thing on my restoration...good luck!
I use plastic zip top bags either with the info written right on the bag or on a piece of tape adhered to the bag. For some of the bigger fasteners, those lunch meat containers are great. Good luck on this project. You have taught me a lot over the years, so hope this little tip helps you out.
Im in love with ILTMS ASMR, please include this section in each video from now on. Honestly would subscribe to an ILTMS ASMR channel.
Seriously? Wow, the guys thought it was an annoying joke.
@@Iliketomakestuff well, the public has spoken in your favor, sir!
Watching stuff like this makes me think dangerous things about my '90 Miata... I don't know if that's good inspiration or not. 😁 Thanks for sharing!
I really like this series! It’s cool to watch you develop some new skills during this build. Entertaining
when you were struggling with the large Phillips head screw it reminded me of a trick i was told years ago . the shape of the handle on the classic craftsman screw drivers is designed to work with a box end wrench .. this way when you are trying to break torque on something like this you can get more leverage .. i am restoring a 1950 Willys Jeep and i have experienced the same struggles you are going through .. i used paper lunch sacks and wrote on each of them as i pulled screws and parts then wrapped them in tape and set them in a tote .. this soaked up any grease and kept them some what organized ..
Look up an impact driver for the larger #3 Phillips screws in the doors. Works wanders!
Hey Bob - as you begin to clean up bodywork and reassemble the body/interior, consider lining big, broad, interior-facing panels with a sound treatment like Dynamat. It will make the car feel _much_ more solid when it goes back together, and you'll hear a lot less rattling/shaking/buzzing. It can really add to the car feeling like a bit more luxurious.
Saw one of these in Western MA last week. Looked great and sounded great. Yours will too, Bob!
Keep on with these videos please.
Really looking forward to this resto!
Your thumbnail! You look like a Tuscan Raider waving your gaderffii in the air. Love it!
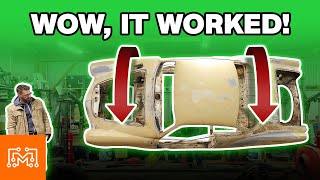
I waited for this moment @12:00 because of the thumbnail and it did not disappoint. Solid work gents 👍
I'm in the middle of a Ghia restore with my 16 year old son. If you are going to dismantle this thing, always put the bolt or nut that goes to something back on as you disassemble it. If that is not possible, I put everything in a plastic zip-lock and include any notes or drawings you think may help in the bag. When disassembling electric. tag one side with 1A and the other side with 1A and so on. It's not as hard as it sounds. Different wire wheels on a 4" grinder will take a lot of rust off fast. Take lots of photos and use lots of PB Blaster!!!!!! Good luck!!! It's a big job.
When it comes to disassembling old cars, a MAP torch is your best friend. A bolt can’t be stuck if it’s liquid!!
Awesome, Bob! Since you are not going electric, I'm hoping for a little hot rodding of the ICE.
Great series! Make sure to spray all the nuts and bolts with a penetrating fluid and have a blowtorch on standby just to make sure everything comes out in one piece without too much of a hassle.
Love this project and the documentary style!
Nice video Bob! Great to see some progress on this. I'm getting ready to fix a rusty floor in my truck with no welding or bodywork experience whatsoever, so I'll be watching your videos closely! Keep 'em coming :D
This is going to be your finest work yet. I can feel it.
This is relatable content! Fun and informative to see you doing something new to you as well to me. I'm glad you are sharing this journey with us. Have heard you talk about this on the podcast and am glad you are doing it.