I would have used some anti-seize lubricant on the retainer clips (which you didn't replace I guess) where they meet the pads. Would have also cleaned where the rotor sits and added some lube there too. With that much rust, you're probably going to have some issues with everything sitting well.
If you take the bracket off first it's a lot easier because of that brake pad pin that holds it to the caliper I also drill out that screw on the rotor if it doesn't come right out that could be a real headache
@@k9casablankino845 Wrong , the slide pins should be cleaned and lubricated ( I use 3M high temp silicone grease ) at every brake pad replacement. Many also have a rubber component that often comes with new brake pads and should be replaced as well. Ask any mechanic or anyone who does their own work and cares about their vehicle.
If the rust is that bad. Chances are the interior of the calipers is just as bad. Just replace the calipers. $120 and you take away all of that headache. Get some good rustoleum spray paint to paint the calipers and brackets. Where did this guy get his powder coated rotors?
My rotor completely stuck. A simple love tap did nothing... about to get domestic violence charges with the amount of beating I've been trying with ZERO luck. Any ideas?
@@mechdjango3490 Well... I promise I'm not an idiot, but I've never done padded rear brakes before. Had no idea the safety brake was holding that rotor on. lol Just happy I got it done. Made a 70 year old woman who didn't want to bother anyone very happy.
this video is not for a 2016 hr-v awd ex-l .the caliper does not press back like in the video, it has a plastic motor unit on the caliper. this has to removed to depress caliper back and first adjust caliper on the back side where the plastic unit was
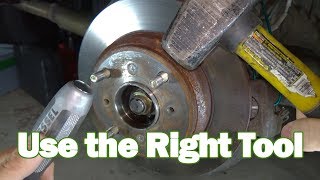
Milwaukee Tool M12 2554-20 3/8 impact wrench. Available at home Depot $179 battery is sold separately. I loved it, used it more then my electric ratchet. It has 4 power settings doesn't disappoint
I have a question. We have a 2016 CRV SE AWD and I'm about to do a brake job on the rear (later on, the front). In watching lots of these types of videos, in some where the model year is older, like 2011 to 2013 or so, the rear rotors seem to be vented. When I bought the new rotor, it was not vented. When I questioned the store about that, he said that for the 2016 he doesn't even show a vented rotor option. So then I found your video and I think you said that this was a 2015. I noticed that the rear rotors are NOT vented either! Do you know why Honda would decide to go NON vented when earlier models had vented rotors? Heat buildup is the actual problem I'm trying to resolve, so I find it so odd that these rotors are not vented. UNLESS this has to do with the rotors having a built-in drum for the emergency brake shoes. ???? Any chance you know? Thanks in advance.
@@mechdjango3490 hey you tube followers yes born and raised in Rochester NY and never had that much rust when replacing my brakes on any car when they were needed! If a car in NY never had brakes or maintenance in 10 years I see the issue. So comment uselless
So that rubber is a cover to an access hole to adjust the brake shoes as they sometimes may need to be adjusted when replacing rotors. Just make sure to take it off the old rotor and put it on the new one.


Real nice video. Short no drawn-out stuff yet some fun dialogue at the same time
thank you for this quick tutorial, cant wait to fix my rotor after 5/6 year of purchase
Great video, the tool sizes save time and I appreciate that.
I would have used some anti-seize lubricant on the retainer clips (which you didn't replace I guess) where they meet the pads. Would have also cleaned where the rotor sits and added some lube there too. With that much rust, you're probably going to have some issues with everything sitting well.
Great video, is there any procedure with regard to adjusting the handbrake when replacing the rear rotors?
If you take the bracket off first it's a lot easier because of that brake pad pin that holds it to the caliper I also drill out that screw on the rotor if it doesn't come right out that could be a real headache
Did you lubricate the slider pins before re-install? Thanks....
No need to lubricate them if they move easy
@@k9casablankino845 Wrong , the slide pins should be cleaned and lubricated ( I use 3M high temp silicone grease ) at every brake pad replacement. Many also have a rubber component that often comes with new brake pads and should be replaced as well. Ask any mechanic or anyone who does their own work and cares about their vehicle.
Very easy voice & video
Maybe I wouldn't hate working on cars if I didn't live on the east coast
Nice and to the point. Thanks! Q: Did you replace the pad retaining hardware/clips? Couldnt tell.
No I typically don't if they're not damaged, the original ones are thicker and provide less squeal. But do whatever you feel most comfortable with
Great video. The pad and rotor kids include grease. I didn’t notice you use any? Do the pads need grease on the ends or just the sliders bolts.
Helpful!
Thanks
How did you compress the piston? Straight down or "turn and down"?
It just goes down
I spent maybe an hour an half just inserting brake pad with three prongs on the caliper.
Great job but why didn’t you clean the piston and rotors?
Rotors were replaced. I ran a wire wheel in the piston I don’t think I showed it though. It’s boring to watch
Do you torque the caliper bolts to a certain foot pound or just tighten by them as much as possible? Thanks!
Just tighten them as tight as you can and I guarantee you that they will break. Just joking. Anyone not using a torque wrench is a fool.
17mm nuts have 108NM, 12mm nuts have 23NM, 14mm nuts have 35NM, wheel nuts 108NM
If the rust is that bad. Chances are the interior of the calipers is just as bad. Just replace the calipers. $120 and you take away all of that headache. Get some good rustoleum spray paint to paint the calipers and brackets. Where did this guy get his powder coated rotors?
My rotor completely stuck. A simple love tap did nothing... about to get domestic violence charges with the amount of beating I've been trying with ZERO luck. Any ideas?
WD40 in the center where it sits on the hub and smack the outside area of it hard if you're replacing them because the face will be ruined
@@mechdjango3490 Well... I promise I'm not an idiot, but I've never done padded rear brakes before. Had no idea the safety brake was holding that rotor on. lol
Just happy I got it done. Made a 70 year old woman who didn't want to bother anyone very happy.
this video is not for a 2016 hr-v awd ex-l .the caliper does not press back like in the video, it has a plastic motor unit on the caliper. this has to removed to depress caliper back and first adjust caliper on the back side where the plastic unit was
Of course not, this is for a CR-V. The awd models will have some changes as well.
Excellent video. I really like the stubby impact tool. Could you give us some details on this tool, if you don’t mind?
Milwaukee Tool M12 2554-20
3/8 impact wrench. Available at home Depot $179 battery is sold separately. I loved it, used it more then my electric ratchet. It has 4 power settings doesn't disappoint
I have a question.
We have a 2016 CRV SE AWD and I'm about to do a brake job on the rear (later on, the front).
In watching lots of these types of videos, in some where the model year is older, like 2011 to 2013 or so, the rear rotors seem to be vented.
When I bought the new rotor, it was not vented. When I questioned the store about that, he said that for the 2016 he doesn't even show a vented rotor option.
So then I found your video and I think you said that this was a 2015.
I noticed that the rear rotors are NOT vented either!
Do you know why Honda would decide to go NON vented when earlier models had vented rotors?
Heat buildup is the actual problem I'm trying to resolve, so I find it so odd that these rotors are not vented.
UNLESS this has to do with the rotors having a built-in drum for the emergency brake shoes. ????
Any chance you know?
Thanks in advance.
Hi I have CRV 2010. but theere is NOT vented rear rotors too... reason. rear brake is not strained with heat as the front rotors are
Is there a torque rating for the Bracket Bolts or Caliper Bolts?
100 and 38 ft/lbs respectively
@@condor5635 what is the source of these figures. By the way, excellent question Mike. I would not use an impact wrench on this.
@@realname6586 saw it on another video and compared it also to my Toyota bracket and caliper bolt torque‘s so I think they’re very close
What's the power tool you used?
www.milwaukeetool.com/Products/Power-Tools/Fastening/Impact-Wrenches/2554-20
no way this car was being driven on the road like this .
Yes way.
@@mechdjango3490 yea ok with all that corrosion and rust then you NEVER changed your brakes in over 10 years and were driving on metal.
@donnafinocchiaro5836 😅 Not my vehicle. Seems like you haven't been to the northeast are in NY either.
@@mechdjango3490 hey you tube followers yes born and raised in Rochester NY and never had that much rust when replacing my brakes on any car when they were needed! If a car in NY never had brakes or maintenance in 10 years I see the issue. So comment uselless
@donnafinocchiaro5836 again not my vehicle 😅.
Argument useless? 🎉
missing a lot of steps
You got that right. This guys a clown.
My rotor a rubber circle on the face of the rotor what the heck is it. You didn't seem to even address it
So that rubber is a cover to an access hole to adjust the brake shoes as they sometimes may need to be adjusted when replacing rotors. Just make sure to take it off the old rotor and put it on the new one.
Mucho bueno...
No jack stands!!!
Yes I forgot I initially and then threw some on the rear subframe
STEP ONE: BUY THIS TOOL www.harborfreight.com/6-bit-impact-screwdriver-set-with-case-64812.html
4:51 painful to watch