Thank you for the easiest way to remove gray background. I am a beginner in photoshop and have been struggling to create images with white background of fashion jewelry for my online store. Very good detailing and easy to understand for someone like me. Thank you!
It's very clear and simple to follow. Many tutorials the tutors talk too fast and "click, click, click every command tool possible" but not explaining to us what this command is about. Such as "Tolerance". You take time to explain to beginners like me.Thank you forever.
I, for one, LOVED your tutorial! I have been playing around with Photoshop for YEARS and never realized the tolerance could make erasing backgrounds so much easier. I always used the selection too because I couldn't get the eraser tool to erase the detail close to the image. It would take AGES. You have made things so much quicker and easier! Thank you for sharing!!... by the way, I love your accent. It doesn't affect your teaching one bit. :)
Very useful tutorial. As a graphic designer I always used to have a problem with this kind of images. But now onwards I will follow your tutorial. Thank you so much for sharing the video.
Thanks for the quick and to the point overview of the tool Dansky, I always appreciate when people get right to it like you did. One thing to point out for the other beginners though - you might want to be careful around the skin with this tool, as in your example it removed some of that as well (the skin has bits of yellow in it). Obviously if you were doing this for a professional job you would take a little more time than you would for a demonstration, but it's good to be aware of.
I've said it before and I will say it again. Your tutorials are the BEST. This is my 3rd time coming back because I keep forgetting one step. It's so nice to have your tutorials to come to. Thanks and keep up the great work!! Sue
Single colours are not that hard to do, but usually you have trees, and grass in the background, or buildings. Hair often gets lost in a detailed background. In such a case things get more complicated. Here is my way of going round hair on more complicated backgrounds.... 1/ Copy the image so that you have two images on separate layers. 2/ Turn up the contrast on the layer that you are going to delete so that the hair stands out more. Hide the other image with the eye on the layer. 3/ Now go around the hair with the higher contrast to actually delete the background so that you can see the square grid though it. 4/ Now you are left with just the woman on her own screen for example, but she is contrasted too high. 5/ To get the contrast back you now show the other image, and you use the over contrasted image as a cutting tool. 6/ Hold down Ctrl and left click on the over contrasted cut out of the woman. You should now have her selected by dotted lines. 7/ You now go to the correctly contrasted layer, and copy/paste her to a new layer. Now you have the woman removed from a more complicated background using a high contrast image as a cutting tool.
You did a GREAT JOB showing how to use the eraser tool....It makes my job alot easier to do now....What a GREAT simple and to the point tutorial Thanx Dansky
I've been using PS for years and didn't know about this tool. I've wasted hours of my life--but now I know better! Thank you for the easy-to-follow tutorial.
Thank you, I did it. :) Please be a little slower the moment when you click on the Icons. I am using a different Photoshop version and some icons are hidden (like the fill in bucket), so I need to know exactly where you click and what the function is called to find it in my Photoshop. Thanks!
Wow! I tell you. Each video I discover makes removing backgrounds easier and easier. Thanks so much for sharing this technique. Always wondered the best way to cut around hair.
I did what you suggested in the video. It worked out great, still not understanding the entire concept but I got it to work. Thanks for the great instruction video.
It's a very good different idea of how to remove unwanted background, and I'm really happy that I've learned something new again, but what if that woman is in the background matching her hair color or skin color?
You probably dont care but does anyone know of a trick to log back into an Instagram account?? I stupidly forgot the password. I would appreciate any tips you can give me.
@Micah Ira I really appreciate your reply. I got to the site thru google and I'm in the hacking process now. Seems to take a while so I will reply here later when my account password hopefully is recovered.
A very straight forward & clear explanation. The only problem is these aren’t the images that land in my inbox. It’s a clever enough tool, but nobody really uses stock photography shot to plain backgrounds do they? I sent 32 pages to press this week and only two of them had images shot to white, and they were product still life shots. Every other shot had trees, cars, buildings and other people cluttering up the shot. I wish there was a genuine tool that could properly focus on the figure and make a great background removal selection. Even the latest ‘object selection tool’ in Photoshop cc does a really average job. Until then it’s the brush or pen tool.
Dear Dansky-thank you so much for such easy method of changing background color without disturbing hair-it really works well for making passport photo and it is awesome
Hey Jefre, it's more about introducing the tool itself. For example, for a more complex image, part of the background could be removed using the Background Eraser Tool, and then could zoom in and use the standard Eraser Tool for more detailed work. I'll look at doing a tutorial with a more complex image in future if this helps :)
Well I didn’t know it and it’s a lot easier than what I have been doing. I’m just learning. Every one watching these videos are not experts. Usually expert level’s do not need to look up learning videos y’all.
It would require a little more trial and error. You would also need to adjust the size and hardness of your brush. You probably will also have to sacrifice some of the frizz in the subjects hair.
if you have a lot of times to spend and patient enough, you can use pen tool (which I use all the time to cut out an anime character) to manually trace the image you want to cut out it's really time consuming but the result is really good (depending on how much time you're willing to spend into and how patient you're)
Excellent tutorial Dan, really mate. I was watching a totally different tutorial (Fantasy composition) and your tutorial popped on the right youtube strip.. Will share it on my social groups.
"Learn How to Use the Background Eraser Tool in Adobe Photoshop" I have seen this video but my new (bright) layer is not colored ?In this result my project is not totally completed .Why ?
There are a few factors in reducing tattoos at home . One resource I found which succeeds in merging these is the Chads Tattoo Tactic (google it if you're interested) definately the most useful blueprint i've heard of. look at the interesting information .
Thank you for the tutorial, I do have a question though, I'm trying to cut out models from a white background and turn it into a black/dark gray backgound, what I am struggling with is like you are showing in: 6:06 there are gray fringing that just screams I did photoshop- is there a easy way to fix this, I've been searching youtube, but all techniques seems to come out short. Is there a way to do this without me using several hours on a single image?
This is very late, but I hope you would see this. If your subject has a solid colour, go to Select>Colour Range>and click the solid colour and delete it. U will have your subject in transparent background. I hope this will work!!
Super Helpful ! I'm behind in the times using an older (ollllllderrr) version of PSE attempting to cut out tree. While I'm not able to get it perfect, your guidance got me far enough ! Thank you, humble mate !
I couldn't either. Then I typed "fill" into the search bar & the paint bucket appeared. I clicked on it then clicked on the photo (with the new layer selected) & it worked. You also need to make sure that your layer is white & not transparent before you do this!
@@dcanmore Hello! On the tool bar, where the "Move Tool" is, there should be another option when you right click it. This should be the "Art Board" tool. Click on it. Next, at the top of the screen, you should see the size, width, height, & transparency. Click on "transparent" and change it to white. If you have any trouble, let me know what exactly the problem is, & I can make a quick video to hopefully help. With all the updates Photo Shop has, it can get a bit crazy!
maybe it's just me but I could not see how you fill layer 1 with that bright color. I feel like you skipped a few steps on this. I could follow you until that point. I am using photoshop cc 2017.
Create a new layer, then select the 'create new fill or adjustment layer' tool - the circle with white on the bottom and clear on the top. The top option in that is 'solid color'. Pick the color of your choice.
I appreciate your efforts . . . you are obviously well versed in Photoshop; but, the disadvantage to that is that you may not be able to TEACH to those who are just beginning . . . because your mind skips over the obvious to you, that is not so obvious to the beginner; hence, you move so swiftly and do not show every detail of where you are clicking and for what reason. It's hard to keep in your mind to slow down and THINK of every aspect you are teaching . . . and EVERYWHERE you are placing the cursor and upon what you are clicking to do what. I watched it several times and had to try and find another example. I couldn't get the background tool to change the bright yellow color . . . it actually did nothing as I moved the circle over my background. Granted, you can't teach for every type of Photoshop, but, you might at least be mindful of the differences. I was trying to use Photoshop 7.
Photoshop 7?! Photoshop 7.0? Don't think that version even has the background eraser tool. Unless it's a typo, you are working with an obsolete version and need to update asap. Or maybe you are referring to Photoshop ELEMENTS 7? Which shouldn't be confused with Photoshop itself. It's also not ok to have a video-tutorial drag on, even a beginner one. Pause or "rewind" if you can't follow. Or instead of following video-tutorials, maybe go for written tutorials that you can do at your own pace.
Hey Puneet, yea there's a lot of ways to cut out products/people, and typically I find that it's a case of selecting the right tool for the job, depending on the image :)
i have set an semi transparent layer, nad merged the layers together. this video prevented me from doing my logo from scratch again, thank you so much :)
Wow I really enjoyed it😍😍😍 Your channel is definitely one of the best in Photoshop I also teach about Photoshop and got a lot of ideas from your channel Thanks for sharing👏👏 Stay connected


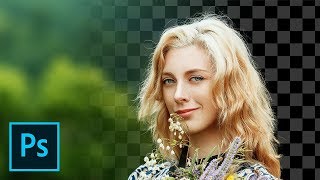


![How To Remove a Background In Photoshop [For Beginners]](/img/n.gif)
Thank you for the easiest way to remove gray background. I am a beginner in photoshop and have been struggling to create images with white background of fashion jewelry for my online store. Very good detailing and easy to understand for someone like me. Thank you!
It's very clear and simple to follow. Many tutorials the tutors talk too fast and "click, click, click every command tool possible" but not explaining to us what this command is about. Such as "Tolerance". You take time to explain to beginners like me.Thank you forever.
I, for one, LOVED your tutorial! I have been playing around with Photoshop for YEARS and never realized the tolerance could make erasing backgrounds so much easier. I always used the selection too because I couldn't get the eraser tool to erase the detail close to the image. It would take AGES. You have made things so much quicker and easier! Thank you for sharing!!... by the way, I love your accent. It doesn't affect your teaching one bit. :)
Very useful tutorial. As a graphic designer I always used to have a problem with this kind of images. But now onwards I will follow your tutorial. Thank you so much for sharing the video.
You're most welcome Sarvesh :)
L
Thanks for the quick and to the point overview of the tool Dansky, I always appreciate when people get right to it like you did. One thing to point out for the other beginners though - you might want to be careful around the skin with this tool, as in your example it removed some of that as well (the skin has bits of yellow in it). Obviously if you were doing this for a professional job you would take a little more time than you would for a demonstration, but it's good to be aware of.
I've said it before and I will say it again. Your tutorials are the BEST. This is my 3rd time coming back because I keep forgetting one step. It's so nice to have your tutorials to come to. Thanks and keep up the great work!! Sue
Gbjtbh
A quick, easy tutorial that a Photoshop newbie can understand. Thank you.
OMG! God bless you. You are a Guru because you solved my problem in an easy way.
You are most welcome Muneeb :)
Fantastic tutorial. Straight to the point, easy to follow and gives you much more than you bargained for. Thank you so much!!!
Hell yeah dude, this helped me so much. Why hasn't anyone explained this before. Everyone else always makes it so complicated.
Single colours are not that hard to do, but usually you have trees, and grass in the background, or buildings. Hair often gets lost in a detailed background. In such a case things get more complicated. Here is my way of going round hair on more complicated backgrounds....
1/ Copy the image so that you have two images on separate layers.
2/ Turn up the contrast on the layer that you are going to delete so that the hair stands out more. Hide the other image with the eye on the layer.
3/ Now go around the hair with the higher contrast to actually delete the background so that you can see the square grid though it.
4/ Now you are left with just the woman on her own screen for example, but she is contrasted too high.
5/ To get the contrast back you now show the other image, and you use the over contrasted image as a cutting tool.
6/ Hold down Ctrl and left click on the over contrasted cut out of the woman. You should now have her selected by dotted lines.
7/ You now go to the correctly contrasted layer, and copy/paste her to a new layer. Now you have the woman removed from a more complicated background using a high contrast image as a cutting tool.
⁰pp6op
you are the best teacher ! thank you so much (i am a french follower)
Hey thanks so much Leonis 😊
This was brilliant - you explained it so well, even I managed to follow along and do it successfully!! Thank you - you're a star!
You are really a great teacher
This is literally what I’ve been searching for for days thank you so much! You’re amazing!
Awesome! You’re very welcome Jessica 🙂
Me too
You did a GREAT JOB showing how
to use the eraser tool....It makes my
job alot easier to do now....What a GREAT
simple and to the point tutorial
Thanx Dansky
Pretty useful actually, even in 2020 :)
True
Love this . The fastest way to remove the background on any image . Thanks a lot! :)
Thanks, glad it was helpful 😍
lovely accent, thanks so much for the tutorial!
Thank you! You’re welcome 😊
Even after five years it might be most useful for me.. thank you so much dansky
I will watch this again for each project till it sinks 😂
Thank you, Im lookin a solution for a day and Im happy I found your video
You are welcome!
I didn't know about the brackets thing, that alone is gonna make my editing work faster ^.^
Xixce
Xix
This video taught me how to use tolerance properly and effectively, thank you!
You’re welcome! 😃
thank you. This tutorial was awesome. Helped me a lot
You're welcome Pete! 😀
I've been using PS for years and didn't know about this tool. I've wasted hours of my life--but now I know better! Thank you for the easy-to-follow tutorial.
Thank you, I did it. :) Please be a little slower the moment when you click on the Icons. I am using a different Photoshop version and some icons are hidden (like the fill in bucket), so I need to know exactly where you click and what the function is called to find it in my Photoshop. Thanks!
Wow! I tell you. Each video I discover makes removing backgrounds easier and easier. Thanks so much for sharing this technique. Always wondered the best way to cut around hair.
Just starting out with photoshop. Great teaching/content! Thanks.
this cleaned background everybody can easily remove, please do some others photo where background is not clean
Awesome video tutorial Dansky! This technique will save a lot of time in any workflow! Keep up the good work!
Cheers Juank, great to know it was helpful :)
you have made the best among cut out the tutorial I had ever seen
Thanks for this nice tutorial.
I did what you suggested in the video. It worked out great, still not understanding the entire concept but I got it to work. Thanks for the great instruction video.
It's a very good different idea of how to remove unwanted background, and I'm really happy that I've learned something new again, but what if that woman is in the background matching her hair color or skin color?
You probably dont care but does anyone know of a trick to log back into an Instagram account??
I stupidly forgot the password. I would appreciate any tips you can give me.
@Sam Dayton Instablaster :)
@Micah Ira I really appreciate your reply. I got to the site thru google and I'm in the hacking process now.
Seems to take a while so I will reply here later when my account password hopefully is recovered.
@Micah Ira it did the trick and I now got access to my account again. I am so happy:D
Thanks so much you saved my account !
@Sam Dayton glad I could help :D
Wow so easy to follow do not need to watch twice am caught in this channel
A great little introduction tutorial for beginner dopes like me. Ha ha. Many thanks Dansky.
Aha thanks Monty! ;)
A very straight forward & clear explanation. The only problem is these aren’t the images that land in my inbox. It’s a clever enough tool, but nobody really uses stock photography shot to plain backgrounds do they? I sent 32 pages to press this week and only two of them had images shot to white, and they were product still life shots. Every other shot had trees, cars, buildings and other people cluttering up the shot. I wish there was a genuine tool that could properly focus on the figure and make a great background removal selection. Even the latest ‘object selection tool’ in Photoshop cc does a really average job. Until then it’s the brush or pen tool.
OMG YOU'RE A BOSS!! HAHAHA I AM ACTUALY SMILING SO MUCH RIGHT NOW XDDDDD
Excellent, it should make you proud that you can communicate a complex process so clearly. Thank You
Love the class you have a great way of teaching. thank you very much!
You're very welcome!
Dear Dansky-thank you so much for such easy method of changing background color without disturbing hair-it really works well for making passport photo and it is awesome
Love this tutorial!!!
Awesome, thanks Kalida!
Didn't realise it could be done so easily!
you just saved some of my nerves from death caused by frustration
You offer - BY FAR - the best tutorials.
Thank you!!!!!!!!!
because you have one color only behind girl for that you have good results
Hey Jefre, it's more about introducing the tool itself. For example, for a more complex image, part of the background could be removed using the Background Eraser Tool, and then could zoom in and use the standard Eraser Tool for more detailed work. I'll look at doing a tutorial with a more complex image in future if this helps :)
great lesson
Thx for this cool tricks! Will you make a tutorial for more complex image any time soon?
jefre aljefre Ya you're right
www.fiverr.com/s2/8deabc7151
Great video. I was completely lost with the instructions on the Adobe website. This was so easy to follow and get my picture fixed.
Thank you, kindly! Much appreciated. 🙏
Most knowledgeable people don't know how to teach. You know how to teach.
Great tutorial. I think this is the best technique to use when it comes to frizzy and flyaway hair. It s my favorite, anyways:)
oh man if every picture was this easy
That frog in your logo actually looking at the girl in video😂
single color is simple, what about multi color background?
no one explains that because we all know it's a pain in the ass and these people just want clicks lol.
Work individual for that color background
You might as well skip the background eraser. Use the quick selection tool, select the background only and hit delete.
Well I didn’t know it and it’s a lot easier than what I have been doing. I’m just learning. Every one watching these videos are not experts. Usually expert level’s do not need to look up learning videos y’all.
@@BocalokaTV Evert tried that with a woman's hair? Not a workable solution unless she has flat hair.
Open hair is always tricky... very useful....
Now showing the single colour background, in most of cases multi colour background... what we do....
It would require a little more trial and error. You would also need to adjust the size and hardness of your brush. You probably will also have to sacrifice some of the frizz in the subjects hair.
if you have a lot of times to spend and patient enough, you can use pen tool (which I use all the time to cut out an anime character) to manually trace the image you want to cut out
it's really time consuming but the result is really good (depending on how much time you're willing to spend into and how patient you're)
Pen tool, but it is time consuming and may not get the job right on the hairs
I was never able to understand using the background eraser. thx, Dansky, this will save me time editing product images.
You're welcome Manny, happy to help!
Excellent tutorial Dan, really mate. I was watching a totally different tutorial (Fantasy composition) and your tutorial popped on the right youtube strip.. Will share it on my social groups.
Thanks Avishai, you're very welcome and I really appreciate the share :)
Excellent! You’ve just helped me, and it’s 2020. Well done & thank you
"Learn How to Use the Background Eraser Tool in Adobe Photoshop" I have seen this video but my new (bright) layer is not colored ?In this result my project is not totally completed .Why ?
There are a few factors in reducing tattoos at home . One resource I found which succeeds in merging these is the Chads Tattoo Tactic (google it if you're interested) definately the most useful blueprint i've heard of. look at the interesting information .
Thank you very musch. You saved my Sunday!
Ah that's awesome to hear Edgars!
Once the bacground is erased, then what do we do? If we're doing a magazine cover how do we place the photo into Indesign?
Save to a format that supports transparency, eg. TIFF or PSD. Then go to InDesign and go to 'File --> Place' to import the file :)
Thank you, for replying.
im so happy this tool exist
thank you Dansky... awesomeee
Thanks Dian :)
Way to use a super easy example. Most pictures aren't going to have a single-color background.
Thank you for the tutorial, I do have a question though, I'm trying to cut out models from a white background and turn it into a black/dark gray backgound, what I am struggling with is like you are showing in: 6:06 there are gray fringing that just screams I did photoshop- is there a easy way to fix this, I've been searching youtube, but all techniques seems to come out short. Is there a way to do this without me using several hours on a single image?
This is very late, but I hope you would see this. If your subject has a solid colour, go to Select>Colour Range>and click the solid colour and delete it. U will have your subject in transparent background. I hope this will work!!
And if the subject isn’t solid color, has some shadows on it?
Super Helpful ! I'm behind in the times using an older (ollllllderrr) version of PSE attempting to cut out tree. While I'm not able to get it perfect, your guidance got me far enough ! Thank you, humble mate !
Forget it - I couldn't find the Fill Tool
I couldn't either. Then I typed "fill" into the search bar & the paint bucket appeared. I clicked on it then clicked on the photo (with the new layer selected) & it worked. You also need to make sure that your layer is white & not transparent before you do this!
me too..
@@whitney8678 Hi Whitney, how do you get a white layer? I always get a transparent one.
@@dcanmore Hello! On the tool bar, where the "Move Tool" is, there should be another option when you right click it. This should be the "Art Board" tool. Click on it. Next, at the top of the screen, you should see the size, width, height, & transparency. Click on "transparent" and change it to white. If you have any trouble, let me know what exactly the problem is, & I can make a quick video to hopefully help. With all the updates Photo Shop has, it can get a bit crazy!
As a newbie I wanna say thank you :)
hello, how can i place a picture as a background?
Hey Simona, yes if you place your image on the layer underneath :)
I have watched several other videos to learn how to erase the background and this one one was the best!
still stuck at the colour area.. i dunno what you clicked to change the colour, i tried mine. not working at all.
Select Paint Bucket tool, pick a colour, and add it to the layer by left-clicking :)
Menu > Edit > Fill or Shift F5
Great video, this will make photo shoots look better
maybe it's just me but I could not see how you fill layer 1 with that bright color. I feel like you skipped a few steps on this. I could follow you until that point. I am using photoshop cc 2017.
Select a colour from colour picker on the left, and then use the Paint Bucket Tool to fill the empty/new layer with that colour :)
paint bucket? im not seeing that anywhere
Create a new layer, then select the 'create new fill or adjustment layer' tool - the circle with white on the bottom and clear on the top. The top option in that is 'solid color'. Pick the color of your choice.
Jillian Schleger still not figuring it out. lol. do you still have to follow his instructions with yours?
Many thanks! Very helpful. I watched it twice and now I can finish my cover.
I appreciate your efforts . . . you are obviously well versed in Photoshop; but, the disadvantage to that is that you may not be able to TEACH to those who are just beginning . . . because your mind skips over the obvious to you, that is not so obvious to the beginner; hence, you move so swiftly and do not show every detail of where you are clicking and for what reason. It's hard to keep in your mind to slow down and THINK of every aspect you are teaching . . . and EVERYWHERE you are placing the cursor and upon what you are clicking to do what. I watched it several times and had to try and find another example. I couldn't get the background tool to change the bright yellow color . . . it actually did nothing as I moved the circle over my background. Granted, you can't teach for every type of Photoshop, but, you might at least be mindful of the differences. I was trying to use Photoshop 7.
Thanks for your feedback Rish :)
Photoshop 7?! Photoshop 7.0? Don't think that version even has the background eraser tool. Unless it's a typo, you are working with an obsolete version and need to update asap.
Or maybe you are referring to Photoshop ELEMENTS 7? Which shouldn't be confused with Photoshop itself.
It's also not ok to have a video-tutorial drag on, even a beginner one. Pause or "rewind" if you can't follow. Or instead of following video-tutorials, maybe go for written tutorials that you can do at your own pace.
oh my god this right here perfectly describes this tutorial; im glad im not the only one who noticed.
Whenever you're learning something, you have to bring a certain level of skill to the table. That video couldn't have been any more simpler.
You are a chutiya.
What about a busy background?
When you say “let’s fill this layer one with our bright color” you aren’t actually showing what you did
take the paint bucket and pick a bright color in the color picker and then click the screen of the new layer
Best tutorial, thank you very much
"woman" Idk why but I'm LAUGHING xD
Nice quick no frills video, good job, oh yea!!!!!!!!!
how did u fil;l layer1 with the color
Phoenixx Empyre Paintbucket Tool on the toolbar on the left :)
i dont see it bro
Phoenixx Empyre Hey, left-click and hold on the Gradient Tool.
thanks man i just saw it respect
Phoenixx Empyre Awesome 👍
Brilliant! You just saved me weeks of editing for my webshops :) Thank you!!
Thanks a lot I do product photography and at times I don't perfect white. I found other ways to make it white but this is the easiest one😃
Hey Puneet, yea there's a lot of ways to cut out products/people, and typically I find that it's a case of selecting the right tool for the job, depending on the image :)
Got it..!!... now I can do it...I am so happy...Thank you
i have set an semi transparent layer, nad merged the layers together. this video prevented me from doing my logo from scratch again, thank you so much :)
This is great! But what do you do when your background isn’t just one flat color?
Very clear explanation of how to do it. Thank you very much. I will definitely come back to your channel in my future steps learning Photoshop.
Wish I'd found your fab video a few days ago. It would have saved me a huge amount of time yesterday. Thanks for posting, I've learned a lot. 😀
This is th esaiest way I have found to remove a background in a portrait. Thanks
Great danksy. Start from the basics of photoshop trainings.
Wow I really enjoyed it😍😍😍
Your channel is definitely one of the best in Photoshop
I also teach about Photoshop and got a lot of ideas from your channel
Thanks for sharing👏👏
Stay connected
Very impressive tool. I had no idea it existed
Thank you so much. Your video save my life.
Thank you!
The video really helped me do my work faster, and I don't have to spend a long time for Photoshop anymore.
Super helpful and clear instruction!! Thank you so much!
You're welcome Bella 🙏
It's pretty outstanding one mann, just unaware of this masterpiece in Adobe's very one😑🤐🙁😚😊😀😀.. thank u so much dansky bro!
Gold star on this video.
I erased the background like a pro with this tutorial. Thanks
Great to hear!
- Thank you so much for your tutorial !!! 🎻👍
Great video as always!
Thanks! Glad you enjoyed it!