Creative In-Camera Motion Blur | Inside Fashion and Beauty with Lindsay Adler

Вставка
- Опубліковано 1 чер 2024
- Use this technique to add creative streaks of light and blur to your image, while your subject’s face is still in focus!
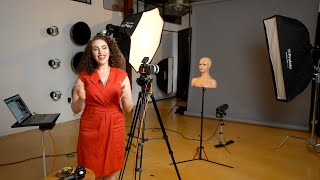
The key to this creative lighting technique is mixing studio strobes, a constant light source, camera movement, and shutter drag.
Let’s take a look at "Creative In-Camera Motion Blur"
Step 1: Use a strobe to light your subject. Anywhere that the strobe illuminates will be frozen in place.
Step 2: Introduce a constant light into the scene. This can be a modeling light, a work light, an LED, a flashlight… etc! In this case, I have chosen a Nanlite Pavo because it is inexpensive and has a full RGB range (plus it's quite bright!)
Step 3: Change your shutter speed to a long/slow shutter speed. Start with somewhere around 1/8 to 1/20 of a second.
Step 4: Turn off all ambient light in the room (other than your purposeful constant light). This includes overhead lights, covering windows, and turning off modeling lights.
Step 5: Take a photo and move your camera or subject. Try zooming your camera, wiggling it side to side, or a combination of both. This will create streaks of light across your image.
Pro tip: Select clothing or jewelry that has sparkle/shine. This is the best way to pick up the reflections of the constant light!
For this setup I used a total of 4 Profoto strobes:
Main light: Beauty dish + Grid
Constant light: Nanlite Pavo
2 Rim Lights: 1x4ft strip softboxes + teal gel
SUBSCRIBE AND BE PART OF THE ADORAMA FAMILY:
➥ / adoramatv
__________________________________
✘ PRODUCTS USED:
Profoto D2:
adorama.rfvk.net/qvB7y
Profoto 1x4ft strip:
adorama.rfvk.net/4AdQn
Profoto Beauty dish + grid:
adorama.rfvk.net/NJNOV
NanLite Pavo:
adorama.rfvk.net/vnno1N
Rosco Creative Gels:
adorama.rfvk.net/oZDno
Canon EOS R5:
adorama.rfvk.net/Q14Ra
Canon RF 24-104mm:
adorama.rfvk.net/q74XY
#motionblur #lightingtutorial #adorama
__________________________________
❐ LET'S GET SOCIAL ❏
➥ Facebook / adorama
➥ Instagram / adorama
➥ Twitter / adorama
❐ MORE ADORAMA ❏
➥ Podcast www.adorama.com/g/adorama-pod...
➥ Blog www.adorama.com/alc/
➥ Shop www.adorama.com/
__________________________________
To learn more about this technique, check out my creative studio lighting recipe guide here: store.lindsayadlerphotography...
Creative Team:
Photographer: Lindsay Adler
/ adlerphotoworkshops
Video: Samuel Bouret
/ samuelbouret
Hair: Linh Nguyen
Makeup: Lijha Stewart
Styling: The Cannon Media Group
__________________________________
THANKS SO MUCH FOR WATCHING! - Навчання та стиль


You are such a great teacher Lindsay! Your instructions are so clear with excellent examples-thank you!
Something important that wasn't mentioned is the difference between Rear Curtain and Front Curtain Flash synch. Really good video in nay case, good to see the process. Thank you.
this is exactly the info i was looking for.. and never got!! lol now im still looking
I think you’re one of the best photographer teachers on the web. You were so thorough and explained the whys of this process so clearly. Thank you
Amazing instructions! At first I didn’t think it’d be necessary to explain in such detail but wow was it cool to see the step by step build up even as someone who’s not totally new to photography. Thanks a lot!
I have been struggling with this technique for a a school assignment. This video helped immensely. Thank you.
Lindsay you are not just a great photographer, you are a great teacher too! You exlain complicated things in understandable way. Thank you very much!
Glad you enjoyed it!
Your instructions are so clear! Thank you for showing us the mistakes so that we can fully understand everything. 🙌🏼
I always check this channel every week for great content. One of the best instructors on the internet!!
My mind is so opened now with the ambient light
I’ve learned so much from you! Although I know this material well, it’s still great to have a refresher and to see what other people are doing
Glad you enjoyed it!
Not sure why i subscribed to skillshare when everything I need is on your channel. Great teaching!
Damn you Lindsay. Always with the hot stuff.
I love Lindsay’s work
It's helpful that you allowed for the mistakes and talked us through the solutions. Amazing job, Lindsay!
loved the video, I was looking for a video explaining how to do the shooting technique, and here it is, so thank you very much Lindsay 👌✌
Wow I find all videos amazing and inspirational ,I have so many things I want to try I'm just putting a small studio together,BIG THANKS ❤️
Nice, Lindsay!
Thanks a ton Lindsay.
ouaw.. i'm in love.. the potential of mixing flash and constant light is fascinating and give a mesmerizing/creative effect on the image.. wonderfully explained/presented with a superb model!!!
fantastic tutorial, all my questions were being answered just as i was having them
Great video, great class! Thank you Lindsay and Adorama! 🙏🙏🙏
Wow … straight 🔥🔥🔥
A-M-A-Z-I-N-G- class Lindsay!!!!!
Congrats!!!
I absolutely love how you are explaining this. I used to use this technique when photographing concerts. ❤️ I love your videos. So insightful and creative!
Way cool! Also- you have a great teaching style and camera presence, thanks!
Thanks for the creative and inspiring photo tutorial to create colorful motion blur in studio.
A wonderfully detailed explanation, accurate, Awesome and Amazing as usual , Thank you Lindsay
Great video. I really needed this several days ago. Live and learn!
Spectacular! This is how to really liven up an image! Thanks for sharing this video.
Lindsay, you are amazing! Thank you!
Beautiful video this Lindsey love the details from the shoot very dramatic
always love your work and how you teach!!!!
So fun!!! Can't wait to try this!
wow it's like magic..... ❤️❤️❤️❤️
This was a great technique. I have to try it. Love your content
You are so creative and amazing!! Love your videos
This is insane!! I’m obsessed 😍
Great tutorial as always. I love you eye make up too! Very nice blend of colours with your beautiful eyes.
That's a dope shot! Great idea!
Great work Lindsay Adler I love it
Adorama this is 🔥🔥🔥
- Swole Beast🤙🏽🙏🏽✌🏽
P E A C E !
Great videos as always
Wow.... I just learnt something new, A big thanks to the team
Thank you! This is awesome! ❤️👏👏
damn that last photo is 🔥🔥🔥🔥🔥🔥🔥🔥
One more awesome class. You are great cheers
Simply amazing
you’re the best! 🙌
love this look!! 🔥💙🔥
This is super cool video. Thank you for sharing this video.
That was Amazing!!!
Trying this right now
Wow! Impressive!
Freaking genius!!!
Very good ideas! Thanks!
You're awesome
Great video/explanation.
MIND BLOWN :)
Great work
GREAT VIDEO
thanks
Thank you!
Thank you
10:27 - what a great shot, Lyndsay! One thing you forgot to mention in the video and in the text here - that shot was fired with flash synchronization to the second curtain, not plain X-sync.
Actually it was first curtain sync. It froze the motion and then moved the camera to simulate the movement appearing behind the subject. So... nope! Didn't forget :D
. I prefer to freeze the the motion at the front of the exposure so I can see what's in my frame before I actually move the camera.
@@lindsayadlerphoto - you're the best. Silly me. The whole purpose of this video was to demonstrate motion blur caused by the photographer moving the camera. That didn't register - some cognitive dissonance, I guess.
thanks for this Lindsay... just one quick question... are you using a second curtain flash in this?
great video, but what about if u would close aperture around 8-12 and make shutter speed longer ? would be more dramatic blue light?
SUPER. SUPER , THE BEST VIDEOS
நன்றாக இருக்கிறது வாழ்த்துக்கள் R.MANOHAR-CHENNAI
Very informative and awesome result. Curious to know whether using rear curtain sync change anything in this kind of set up?
First curtain! Just moved the camera in a way to simulate movement behind her.
Just wow
Awesome
Hi Lindsay, do you use a 2nd curtain flash in this demo? Reason I asked is I'd watched one of Gavin Hoey's video where he'd used the 2nd curtain flash. In his video, the subject moves and at the end, the flash triggers to freeze the model. In your video, I believe you shoot first with the flash, and then moved your camera. I am not sure which is the preferred method? Thanks!
7:39 Can you purchase legs for an auto-pole separately?
I've never seen that before, but it's a great idea.
Also, BIG love to Linh, he's awesome.
Yes you can! manfrotto has the legs as a separate thing if you need! Linh is the best
A very useful and concise explanation - maybe should have mentioned rear curtain sync though
do you need rear curtain flash sync? or is this done with front curtain? also.. does this works on light colored backdrops? or does it have to be on dark/grey/black backdrops?
I want to do this on FIlm photo...
Really nice effects here. Did you also use back curtain sync for the strobes?
No expert here but, I bekieve you use that for freezing motion. Not to say it won't work/maybe, haven't tried. You?
@@thomastuorto9929 You will freeze motion both with front and back curtain sync. It just controls where the light trails starts and ends relative to the frozen subject.
It was first curtain, then moved the camera to simulate the correct motion of the blurs to make it look like they were behind her.
Did you use "rear curtain" flash synch?
Nope!
Great tutorial, as always, Lindsay. What effect, if any, would putting the camera in rear (2nd) curtain sync have?
I was going to ask the same thing. I always put it on 2 ND. It freezes the movement at the "end" . Flash right before the shutter closes. When I put it on first...I'd the opposite. It is frozen at the beginning. It think Lindsay put it on first. For sport and dance I put it on second...
@@trudansing I djnt like to put it at the end for this sort of stuff because I want to see what my camera is capturing at the first shutter.
First curtain gives me more control when moving my camera so I can actually see what's in frame.
@@lindsayadlerphoto ah, thank you!
@@lindsayadlerphoto got it! I will try! Thank you so much!! 🙏🙏🙏
And what about focusing do we pre focus in manual focus???
does the flash go off at the begining of the shutter release or at the end ?
Which of your courses do you teach this technique in? Thanks
Why did you set the WB while shooting RAW
Great video. My wife really wants to know where you got the suit from.
My stylist sourced it.
Please mention the focus mode and type?
i would have liked to see a photo with only the blue light on at 1/8sec, now it’s impossible to know the power of the blue constant light compared to the strobe
Hello. This is second video on YT I've seen where it is advised to turn off modeling lights. I'm curious why? I always keep them turned on, because I can see the scene, shadows distribution and they help to set AF. They have no influence on exposure because, when shutter is released, they will be automatically turned off for a while. This functionality was implemented even in the old 'analog' systems. So why the pressure to turn them off?
In this case it's because you're using long shutter speed. So after the strobe flashes, you're still left with that modeling light for quite a long time and it affects your exposure.
Can I do this for indian dance portraits
cool
You forget to mention the 2nd curtain sync setting…
No, I used first curtain. I prefer to freeze the the motion at the front of the exposure so I can see what's in my frame before I actually move the camera.
Wouldn’t it be easier just to take a shot nice and sharp and then take one with the blur and combine them on photoshop ? 😅
why didnt you talk about curtain sync?
Less talking, more examples pls, you just make workflow look much harder