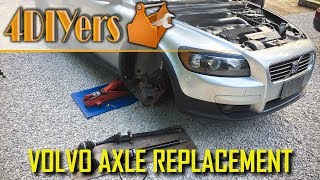
How to Replace the Rear Upper Control Arms on a Volvo C30 S40 V50 C70

Вставка
- Опубліковано 9 чер 2019
- How to replace the upper control arms for the rear suspension on a Volvo C30. This is a 2007 model and the same procedure can also be used on the Volvo S40, V50, and C70 models of the same generation. Worn control arm bushings will cause excessive inner tire wear and when inspecting the bushings, you’ll notice rubber deterioration such as cracking. This car currently has 140,000km and as far as I know, these are the original control arms. #volvo #volvoc30 #volvos40
AutoPartsWay (CA): www.autopartsway.ca/partdetai...
AutoPartsWay (US): www.autopartsway.com/partdeta...
Website: 4diyers.com
Patreon: / 4diyers
Facebook: / 4diyers
Google Plus: plus.google.com/+4DIYers
Twitter: / 4diyers
Instagram: / 4diyers
Tumblr: / 4diyers
Pintrest: / 4diyers
Tools/Supplies Needed:
-1/2" drive ratchet
-1/2" drive 10" and 5" extension
-1/2" drive 15mm socket
-15mm wrench
-T25 torx driver
-penetrating oil
-new control arms
-torque wrench
-wheel wrench
-jack and jack stands
Procedure:
Start by safety jacking up the vehicle and remove the rear wheel. Place a jack stand under the subframe. The upper control arm is only held in with two 15mm bolts, on the side with the fuel filler neck is the hard. There is a module which is held on with 3 T25 torx screws. You’ll need to bend the bracket slightly to access the bolt.
In order to access that bolt, you’ll need a 5” and 10” extension with the socket and 1/2” drive ratchet. The bracket can be bent out towards the wheel and you can see the socket in behind the bracket. The module has been pushed up so the extensions runs underneath it. Gloves are recommended, many components are sharp such as the heat shields and some suspension components.
Don’t remove that upper bolt just yet as there is tension on the control arm. Remove the bolt on the wheel carrier first. Using a 15mm socket and ratchet, remove this bolt. The rubber flex line for the brakes is also held on the same bolt. If you are finding the bolt binding, there is threadlocker installed from factory, you can work the bolt back and forth to break it loose. Penetrating oil can also be used here.
Push the wheel carrier in, then remove the bolt by hand and the carrier will spring back slightly. Finally you can remove the bolt on the subframe, then pull out the control arm. Make note of it’s orientation. Compare the old and new control arms. While it’s a bit hard to see on the camera, my bushings are starting to show it’s age by cracked rubber bushings.
Clean up the bolts using a wire brush to remove any rust, dirt, or old threadlocker. If penetrating oil was used, wash the bolts with brake cleaner, along with the welded nuts on the vehicle. Then apply a medium grade threadlocker.
Install the new control arm, it’s best to start with the rear bolt first. Run the bolt in, but don’t tighten it as it needs to move freely to connect it to the wheel carrier. Next is pushing the wheel carrier into place, you might be able to have someone help you. Instead I jacked up the car higher, then placed a jack stand under the rear mounting point on the rear lower control arm and lowered the car to compress the suspension with the vehicle’s weight.
Install the bolt with the flex line bracket into place. Don’t tighten it just yet. These bushings need to be pre-loaded, so the suspension needs to have the vehicle’s weight, otherwise the bushings can prematurely failure. With the wheels on, you won’t have enough room to get a ratchet or wrench in to tighten up the bolts on the wheel carrier. Jacking up the car, then placing a jack stand under the rear mounting point on the rear lower control arm just like before, this will help compress the suspension when the jack is lowered. Considering I do have to go under the car, I am using an additional jack stand under the rear subframe as a safety, there is a slight space so I know the weight is on the control arm instead.
Tighten the bolts. The torque specifications for the 15mm bolts are 57 to 75 ft lbs or 76-102nm. You’ll need to go under the car to tighten the bolt on the subframe side.
Reinstall the module with the 3 torx screws. Reinstall the wheel, the torque specifications for the lug nuts is 80 ft lbs or 108nm. Moving onto the opposite, the same procedure applies however you do not need to work around the fuel filler neck assembly or module.
Thank you to all those who watch my videos and support my content. Don't forget to subscribe to my channel for future tutorial videos and like my video if you found it helpful. New videos are always being uploaded every week!
© 4DIYers 2013
All Rights Reserved
No part of this video or any of its contents may be reproduced, copied, modified or adapted, without the prior written consent of the author. - Авто та транспорт


Amazon Tool Recommendations: amzn.to/3QrjM8c
Current retailers partnered with me & coupon codes:
eManualOnline website: shrsl.com/3vcz4
Coupon Code: 4DIYERS20 (20% off any order)
ECS Tuning Website: bit.ly/46tMpXP
Auxbeam website: auxbeam.com/?ref=4DIYERS
Coupon code: 4DIYERMR10 (10% off any order)
Teslong website: teslong.com
Coupon code: 4DIYERS (10% off any order)
Lanmodo website: shrsl.com/3vczf
Coupon code: LMD4DIYERS (Save $50 off order)
Auxito website: www.auxito.com/?ref=xR3VZnDW
Coupon code: 4DIYERS (15% off any order)
Headlight Revolution website: www.headlightrevolution.com
Coupon code: 4DIYERS (Free shipping on all US orders)
Was about to give up on this project as the passenger side is a real bear due to tight spaces on the upper bolt. I always look on UA-cam before a project but this time I thought no way is there going to be a video on this. Well before giving up I searched and found this video. It saved me from giving up. Thank you for this video!!!
You're very welcome, happy I was able to help!
Thank you! One of the last jobs I need to do on my C70.
No problem, happy to help :)
Please keep doing C30 videos!
I have to replace my right axel, the belts and pulleys, and lube my sunroof now!
I definitely will be! I have the lower control arm schedules for this Friday, brakes are supposed to be on the list, I do have a door panel removal tutorial, need to finish up on troubleshooting dim headlights, and a couple other things. I do have tutorials on the repairs you're doing, but I'm guessing you already know that :)
Please,make more videos of V50,thanks a lot..
This will work for v50 as well
Good clear video, I have a C70 II with the same set-up, but my tyres are wearing badly on the inside edge, I have been told this is due to poor wheel alignment on the rear hubs, can these be adjusted to bring the alignment back where it should be ? you can see how bad the alignment is simply by looking at the car from the rear, the top of the wheel has a negative camber of about 25 mm from the vertical !
Thank you! You can adjust the back suspension, but to get more adjustments, custom adjustable control arms can be installed.
I've picked up a 2010 Volvo C30 base T5 from a private seller and the seller told me something " plastic cosmetic" from the center lower bumper is missing. Can you tell me if the front lower air guide is visible from the front? There's no honeycomb lower grill insert on this yr/model, I understand that. I've looked at stock photos front angle and compared to mine. There isn't any obvious difference. I see what looks like lines radiator & a/c compressor horizontal metal lines on stock and my own currently. I'm thinking lower front air guide but it doesn't appear to guard or protect. What am I missing? Thanks!
Exactly how to do it- but why go with the factory non-adjustable replacements instead of adjustable arms? Are Canadian roads bad? No thoughts of lowering it for better performance later on? The C30s handling is significantly improved lowered but negative camber is an issue if you value tire life. Go adjustable man! Great videos and keep up the good work!
Thank you :) At the moment I'm debating on what to do with the car, the adjustable arms were well over double the price than compared to the versions I installed (I still used quality replacements).
@@4DIYers The adjustable arms are all the same - manufactured by Performance Parts Sweden. Buy the unbranded ones and they're half the cost.
@@4DIYers hey man! Love your videos. You have helped me so many times. I am replacing these control arms on an 05 v50.
I bought the adjustable ones, because the neg camber was eating up my tires. But looking at this video, you seemed to say that replacing them with the non adjustables might fix the excessive inner tire wear. I am also debating where to go for the OEM again or installing these adjustable ones.
In your opinion, is there a drawback to using either set? Is it good to have adjustable ones?!
I’m new to suspension work entirely. But I love the channel and how thoroughly you explain everything. It really helps. I watch each video and pause in between steps. You’re great
@@MintCorn same here with my 06 S40 T5! I could do anything on my Saabs but needed a little guide for the Volvos. Which control arms did you ultimately end up going with? The negative camber is worse on one side than the other and it’s driving me crazy lol
😂
Poderia mostra como funciona esguicho dos faróis
Unless you have to think about changing the brake discs :)
Only if you're offering to pay for an upgrade ;)
Can you confirm that a C70II (2011) has this same set-up suspension wise as this C30 ? I can buy adjustable control arms from PFS an online parts supplier for Volvo, Merc, and BMW, but they only advertise this part for a Volvo S40 and V50, but I thought the rear suspension on the C70 was the same as a V50 ?
The C30, S40, V50, and C70 is all the same as far as I know in this generation. You can also cross reference the control arm part numbers just to be safe.
@@4DIYers Yes I can confirm they are the same, as I fitted new adjustable upper control arms myself last week, and all went well, no issues.