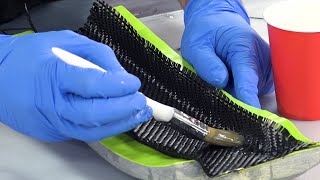
Using Sheet Wax to Create an Offset Mould for a Carbon Fibre Cover Component

Вставка
- Опубліковано 21 тра 2020
- Full project details: www.easycomposites.co.uk/lear...
Further information and links ▼
► easycomposites/
Products featured in this tutorial:
► Calibrated Sheet Wax www.easycomposites.co.uk/shee...
► Epoxy Mould Making Starter Kit www.easycomposites.co.uk/epox...
► Filleting Wax www.easycomposites.co.uk/soft... - Навчання та стиль


i like how you always also talk about not wasting and/or reusing materials
I haven't seen sheet wax since my early foundry pattern making days. Great for turning existing castings into cheap patterns by adding wax in areas for contraction allowance and machining allowance.
What I would associate with filleting wax was you could get wax extruded in long length so if laid into an inside right angle corner it formed a ready made radius fillet.
Nice technique worth remembering.
Very well done Paul, The polish on vlads bike frame looks amazing.
Thanks! Yep, that's why it needs this frame protector! (Well, this one doesn't actually because it never leaves our studio!).
Have been watching a few of the tutorials, Great videos guys, very interesting and easy to follow, I'm now hooked and keen to find a project so I can have a go this👌
It's very generous of you to make these videos.
Thank you, we love to share this information and hopefully help people to achieve more with composites.
You guys make THE best videos. very good editing. Not boring or too much propaganda and useless noise. THank you!
Thanks for your comment, glad you enjoy our videos and editing style!
Amazing video , the sheet wax is really amazing. The epoxy putty is something I was thinking of for so many months. Whenever I visit UK I make sure to visit easy composites just to have a technical conversation and buy some stuffs. I am expecting a video on manufacturing of drone propellers using core material and prepreg.
Thanks from India.
Thanks Akshay, great to hear from you. Look forward to seeing you again on your next visit :)
This is exactly the video I was waiting for. Cheers and looking forward to investing in your kits!
Thanks Anthony, that's great to hear. We're just putting the finishing touches to the second part of this tutorial which I guess you'll find interesting or helpful too. Look forward to working with you.
Once again, absolutely outstanding content. Good mix of information. Fantastic presentation. Professional camerawork. A++++++++++.
If I had a request, I know you've already done this before, but a full project really reinforces the idea that I can go out, buy these kits and make stuff. I've bought some stuff from you before, but if you started with a Mold making kit, a prepreg kit and a pattern, and showed it end to end it'd be GRAND. Cheers bud.
Hi Stan, thanks for the comments. Yes, we take this on board. You're right that we have done several full projects (usually over a number of videos) but we are conscious of making some more 'accessible' projects using our starter kits. The second part of this video uses our laminating starter kit to make the component so is hopefully along the lines you're thinking.
Thanks to this well explained video and the technical help of Easy Composites I have managed to make my first mould and it looks great.
Glad it went well for you!
Awesome content and great quality video. You are the masters of composites.
Thank you very much, we do our best.
As a Junior, I' ve learned lots of things from your videos. Please keep up with manufacturing stuff with different methods.
Thanks Furkan, we’ll certainly try.
Again a great video, pls keep them coming on a regular basis 🙏🙏🙏🙏
Thanks Jeroen, we'll do our best :)
Loving the frequent videos as of late.
Thanks, we're doing our best. It helps a lot having a full-time editor now, you wouldn't believe how long these things take!
Brilliant content, very well explained! Love this channel!
Thanks MichaU, appreciate the feedback.
That's exactly what I was searching for. Thank's a lot!!!
Glad to hear that, you're welcome.
I have really enjoy this tutorial video very informative, looking forward to get me some kits from you guys.
Thanks Jorge, appreciated. We'll try to keep them coming!
Superbly done thank you
good to see you guys posting videos again and thank you! keep up the good work
Thanks a lot, we love doing it. The second part to this video shouldn't be too long.
@@easycompositestv doesn't matter it is long or short. detailed and well demonstrated one would be great!!
Learn something new everyday, tq❤️
Just a note from across the pond - I absolutely love your videos! Your products seem superior to what I've found locally. I wish shipping wasn't cost prohibitive. Thanks for great content
Jep!
Agreed! Easy Composites needs a US division.
Guys, yes, absolutely. We get this. So much of our support, and views and feedback comes from the US. We know it's difficult for you guys to buy from us, pretty much all down to shipping. We would love to be able to support our US followers better and we are thinking about ways we could do that. In the meantime, stick with us, enjoy the content and know that we love having your views, comments and support. We'd love a US division and maybe some time soon we can make that happen.
I'm down to go in on a group buy to save on shipping... I use composite envisions now... but seems like these materials would make my life so much easier, lol.
I didn't know sheet wax existed. This was great!
That's great, glad we've introduced you to a new method.
What an instructive video.
If my teachers were this good at teaching I wouldn't fail any class
Well, yes, indeed. But then if your teachers got to spend a full week preparing 15 mins of class then you'd expect it to be pretty good!
lol i wouldn't have completely failed school l learnt more from the internet then school hell from what i have learnt if i had the money i could build my self a basic nuke. schools dont know how to adapt to there students i learn more from watching or getting hands on then off a piece of paper. growing up on a farm i was around machinery a lot after i spent tonnes of time with my old man i learnt the ins and outs of engines by the time i got to year 11 i could overhaul a damn engine all by my self year 11 opened up automotive class and i took it thinking it would be a walk in the park nope first day they gave us a work book a good 1 1/2 inches thick and it all went over my head if they had given me an engine and let my prove my self that way i would have it striped by the end of the day but it was all paper nothing hands on so i drooped that class. now when I'm not helping my old man i do odd jobs around the other local farms and i always get asked why i dont become a Pro Diesel mechanic. school never did much for me hell they never even tried to stop the bullies but when i did stand up to them i was some how the bad one yet hear i am on a farm making food for people to eat and all the bullies are on the steers dong hard drugs.
@@easycompositestv Well played. The time and effort certainly shows, top notch quality videos, and greatly appreciated!
Lol 😂
@@easycompositestv very well done, I do not need to do anything with composites, but I feel strong desire to create some carbon part after watching this video.
Been wondering how to create offsets for ages and now it’s super easy
Great, that's just what this video was for, glad it helped.
So cool, so nice, so beautiful. Thanks a lot!
Haha, you're *so* welcome John :)
Spoke to this guy yesterday,the knowledge that him and the team have is next level,you can tell he is passionate about the product,he never once tried to make me buy anything just gave solid advice and technical support,I have been considering fully getting involved with carbon/fibre glass for years but after our conversation I literally purchased £700+ worth of bits last night.keep up the good work guys.
Wow, thank you very much. That feedback means a lot; you're right, we're not sales oriented, we're outcome oriented and we'll always try to give honest advice about what would be best for our customers and if that's our products or services then that's great, if not, that's OK too! Looking forward to working with you, thanks for your support and positive feedback.
Awesome stuff as always!
Thanks Caleb :)
thank you and all your videos are educational and great for a beginner like me
Thanks John, that's good to hear.
Another great video. Many thanks.
You're welcoe, glad you enjoyed it :)
These videos are excellent!
Thank you Stuart, glad you like them.
this channel is just amazing ..
Thank you for the really kind comment!
Amazing video quality and information packed in! Huge thanks for your job and your products!
Thanks a lot, we appreciate the appreciation!
Wow that looks super easy, gunna buy your kit now 😆
Hi Kevin, thanks, and yes, it is a straight forward process. We look forward to working with you.
I found this rather interesting. Thank you.
Glad you enjoyed it!
excellent work
Thanks Steve.
If i want make a mould directly on the parts (like a clutch cover) i need a barrier for dont make the epoxy tooling gelcoat stick? if i dont have the epoxy putty i can use a normal epoxy resin and chopped strand mat on top of gelcoat, or i have to use another system like the kit uni mould? thanks for an help
btw, really useful and good tutorial!
Welcome back, we miss your videos
Thanks, well, we're producing a lot more at the moment, as you've probably seen. The second half of this on the way too.
lovin it!
Awesome Video!
THanks, glad you enjoyed it
Очень крутые видео !
Very Educational.
Glad you enjoyed the video!
nice job easy composite, I am still waiting for those technics you promised gonna make a video about that get used in building planes thank you for your amazing videos I can't wait for the next one thanks
Thanks Amir, we're working on videos as much as we can. Stay stuned and hopefully the topics you're interested in will come along soon :)
@@easycompositestv thank you so much I can not wait :)
I love these mold materials. Can you guys add a wishlist to your store pages? Would be handy.
Yes, absolutely; we added this feature at the start of the year. It’s called project lists, Easy Composites staff can also see these lists if you need us to help out or make suggestions on what products you might need for a project.
the hunble bee saves the day once more
Well, sort of. I think these wax sheets are synthetic wax. But still, bees do rule!
used this already very good material how ever it does not come out very easy, sticks both to the part and the mould, its a pain in the ass to clean it. Thank god the mould cleaner from easy composites :D
Hi Tan, yes, agreed, sheet wax has always had that problem. It’s not so bad when you’re working all in epoxy (no solvents to soften the wax) but with polyesters and vinylesters the cleanup job is a pain. Also agreed on the mould cleaner!
Glad to see more regular of your spectacular videos and tutorials. Can I use acetone to clean the surface from wax instead of mold cleaner?
Yes you can but you need to be a little bit more careful with acetone because it can be more aggressive to the mould than mould cleaner. The other thing you'll find is that it's easier with mould cleaner but the mould cleaner solvent is less volatile (so, evaporates less quickly) and so it softens the wax more before it just evaporates away.
Love the vid
Thanks Marcus.
I bet you have for every question an answer! Greetings from 🇨🇭
Thanks Alex. We'd love to take the credit but most of what we're showing is techniques that are widely used in the composites industry, we're just helping to make them more accessible. Sometimes we do bring some advancements of our own, especially in resin infusion.
Well done as usual! Thanks for making it. I never had any success polishing epoxy gelcoat much. Is this something special? Perhaps hitting the first layer with the hair drier would be useful to pop any air bubbles.
Epoxy gelcoat is normally just *harder* that a polyester or vinylester gelcoat. This does indeed make them harder to polish but certainly not impossible. The key would be making sure you've done the rubbing back properly with the abrasive paper (no underlying scratches) and then using a suitable polishing compound. The NW1 we use in this video is designed for very hard materials, like epoxy, and so does a much better job that most compounds.
Very nice video
Thank you, glad you enjoyed it :)
You're the best
I bet even his morning Coffee cup is out of carbon fiber.... XD
It's a material we never get bored of, but, no, ceramic mugs for us, we're from the 'The Potteries', the home of ceramics!
if only these resins wouldn't be so expensive for private people.
@@lenny108 I think the idea is that you're probably selling your parts and the material costs are negligible in comparison.
@@easycompositestv How about carbon-ceramic mugs then?
@@easycompositestv any videos on increasing resin flexibility? Would love to create some highly flexible fiberglass parts for my car.
Awesome!
Thanks Benjamin
liked and subscribed only for paul
Great vid as always. I wanted to ask what release agent i should use if i am not using sheet wax/making an offset mould. I can see on your website the Blue PVA release agent, mould release wax and easy lease release agent. Which would be best for use on a plastic part on which i would prefer to leave the original surface unharmed?
For a simple moulding process like that then Mould Release Wax would be the best option.
Nice! I guess the wax sheets technique could be use to make some nice carbon fiber mudguards for a bicycle by applying it over the tire
Yes, you could certainly do that. You'd probably need quite thick sheet wax to allow enough clearance but it can be layered if needs be.
Clutch protectors are a requirement for racing now and they are not available for older bikes. I'll be placing an order later on this year to make one thanks to this video.
That's great, we love to hear of people enjoying our videos but of course we're a business and if it motivates you to get involved and place an order then of course that's what helps us to make more videos :)
That is amazing! Quite a simple method to create
custom interior parts or wheel house moldings.
Do you offer classes and support to find a cheap
(from 10£+/night) acommodation?
Thanks, glad you enjoyed it. Under normal circumstances we do offer training courses but as you might guess these are on hold at the moment, under the current COVID-19 measures. When they do restart I'm afraid there are not any options for accommodation locally at that price, it would be more like the standard £50-60/night for a Holiday Inn or Premiere Inn etc.
OMG where has this been?
LOve the colour of the gel coat
You know, that gelcoat goes back to when we started business as 'Carbon Mods' and the lime green was our company colour. We've stuck with the same formula (and colour!) for that product since then.
I love that colour too! Word has it that Kermit is jealous.....
Thank you
You're welcome!
I have been a good cutter for over 30 years.
Not only do we give out kits and materials pattern makers often asked for wax.
As a young man when they came to the hatch and asked for sheet wax
I would always reply no sir we only have the good stuff
So if I need to make a quick mold and don't want to have to spend the time laying up layers of glass under the gelcoat (which can also get bubbles) I can use a putty of filler and strands with resin that I mix some hardener in? That's GENIOUS!
It is a specially formulated epoxy putty but yes it does save a lot of time for smaller moulds.
Nice. thanks
You're welcome Khaled.
oh king George III's god, this channel always makes dope content
Haha, thanks. Glad you're enjoying it.
Thank you very much for the video. I have a question, in case of making clutch housings or any other part that is exposed to higher ambient temperatures, I understand that high temperature resin EL160 is necessary, is this the case or does it work with EL2?
El2 with an oven post cure can go up to around 80C so it depends on the temperature resistance you need.
Cool method I haven’t seen that sheet wax or the putty.
Does polyester gel coat melt the wax?
what’s the advantage of epoxy gel coat over polyester?
Hi, yes, polyester can be a bit more problematic with sheet wax. It's not unusable but we do normally find that polyester softens the wax and the mould usually ends up with wax pretty well stuck to it. It can be scraped off (it's wax at the end of the day) but it is more work. There are sealers available for sheet wax to make them more resistant to polyester. The main advantage to epoxy over polyester for a mould is that an epoxy mould can be used for direct contact with epoxy resin, such as when we make the carbon/epoxy part in the following video. Epoxy has a real habit of sticking into polyester moulds, no matter what release agent you use!
To think I was about to give up on trying to make molds cause the difficulty in getting good flange this video pops up. Great job guys btw can I use any sheet wax
Hi Neilon, thanks, I'm glad this helps. As for what sheet wax you can use, I'm not sure what other kinds there might be or what their properties are. The sheet wax we supply is specifically for composites, it's precisely calibrated for thickness (important for offset moulds, less important as a temporary flange barrier) and it's self-adhesive. If you can get these properties then it's probably the same material and of course, depending on where you're based you could always buy it from us to be sure!
I live in the US
Would love to hear your thoughts on how to deal with inserts in a composite part! I'm making a kevlar/carbon longboard currently and I'm trying to figure out the best way to bolt the trucks to the board. These videos are gold and I really hope you keep making them! :)
Thanks Scipier we certainly plan to. There are lots of different ways that inserts can be included or combined with composites. One simple but effective method, for something like a longboard, would be to include a metal plate inside the laminate. Especially if you have a thick laminate with a core, you can cut the core out where you want the hard points and swap it for a metal plate. This plate could be drilled and tapped in advance or afterwards. The reinforcement can rub over the metal plate top and bottom, encapsulating it into the 'sandwich' This is simple but effective. We are planning a video on this and other fittings/inserts in the future.
your videos are excellent. I adore them. I noticed your vise. is this a product that you are selling?
It is not one we sell. It is a Zyliss Z-Vise
Brilliant thought provoking video Thank you! I am not sure how to view the following video ?
We’re just finishing it off now. Should be ready in a few days. Make sure you’re subscribed and get notifications.
We’re just finishing it off now. Should be ready in a few days. Make sure you’re subscribed and get notifications.
Will the epoxy and gel coat shrink or deform if you used a low temp oven (e.g. 75 C) to soften the wax? For a complex shape I can see the wax becoming difficult to remove.
For our EG60 and EMP60, the 'Tg', i.e. the maximum temperature the gel and reinforcement can go to without any problems is 60°C. At 60°C the wax would not really have changed a great deal in terms of removal. It's probably more helpful to use more heat from the heat gun, aimed directly at the way, to aid with removal. Generally speaking, if you're using sheet wax with epoxy resin, like we are in this tutorial, then you're unlikely to have any trouble removing it. When using sheet wax with polyester or vinylester resin then it can be more of a problem and that's where sheet wax sealers can help.
alright time to tackle on making a front bumper.
Check out our carbon fibre bonnet video, that would be the same process as the bumper.
Where can i get this in the U.S
I'd like to make a guitar case. Can I use the same technique or do you recommand another way for larger pieces? I obviously dont own specialised equipment like a vacuum table or stuff like that.
Hi Tigrre, if you're starting with a guitar case made out of another material and want to make it in carbon fibre then you would take the moulds directly off the original case (because you want the carbon fibre part to be the same size as the original), you wouldn't need to use the sheetwax like we use in this video because otherwise you'd be making a mould (and part) that's slightly bigger than the original. In terms of making the carbon fibre part then yes, the process you could use could be exactly as you see in this video, you could improvise the vacuum or just not bother at all and then tidy up the surface with clear-coat.
@@easycompositestv Thanks for the answer. I'll try to make one from scratch.
I want to make lower fairings for a V Star 1300. We'll need to talk in the future probably using this product.
Great stuff, please get in touch; we'd love to work with you on your project.
I have no real use for this...but watched the whole video and enjoyed it 👍
Haha, well, that's just fine Jeff. Glad you enjoyed it.
Would it be possible to use this method to create a 2-part mould? For example, using the wax to get the form of a turbo compressor housing, creating the mould the same way as in the video, but once the epoxy putty has cured, leaving the wax in place and applying a gelcoat layer and further putty. Once cured removing both halfs and using bolts to apply presure on the flanges to the carbon inside?
Yes you could use it to create the "void" for the carbon fibre to sit in with a compression moulding 2 piece tool. You would have to ensure your lay up is the right thickness for it to work neatly. Also don't forget your dimensions will be displaced by the thickness of the wax.
@@easycompositestv brilliant, would the mould hold up to oven temps for using pre-preg?
@@mattygerbil123abc Not using the EG60 and EMP60 that we used in this video but we do have high temperature versions of these products; EG160 and EMP160, which would be suitable.
What resin should we use to make exhaust shields? I can’t find nothing about high temps resin and I am not sure. That yours will be good in this case as your service temp only goes max to 160 Celsius
It depends on how hot the exhaust gets but generally you are looking at a specialist resin. None of our resins go over the 160C mark.
Do you ship to USA from Britain at competitive prices? I noticed with exchange rates and whatnot, your shop offers competitive prices compared to the sometimes very high prices in US warehouses.
Hi, to be honest it usually depends on what you're ordering. We do offer direct shipping to the US from the UK and yes, with the exchange rates how they are and some lower prices anyway our prices can look very competitive against your local prices for some products. The sting in the tail is usually delivery cost; for non-hazardous products - like dry materials, cores, fabrics, sheet wax even - then the shipping costs are very reasonable and the service is fast (1-3 days). For hazardous materials - like resins, release agents, solvents etc. - then the shipping costs are considerably higher because of the various surcharges when transporting hazmat by air. On the Easy Composites website though you can get an instant, accurate quote for shipping to just about anywhere in the world, including the USA, by simply adding the items to your basket and then entering your address details on the shipping calculator on the basket page. The only additional charges you will pay would be US import duty.
How the sheet wax behave with polyurethane expanding liquid foam?
Does it release easily and how the foam surface will look like?
PU foam will release from the sheet wax. The finish should be pretty good, similar to the finish on the sheetwax itself.
What process would I use if I wanted to make a few copies of the frame protector ? If I ONLY had the frame protector to work from .
Thanks
You would take a mould directly from the frame protector much like our other mould making videos. You won't need the sheet wax.
How good does the surface of the mold come out from the sheet wax? Could you use duratec primer on the wax and sand that down to make a smoother finish? The mold parts look a little wavy in the video.
The soft nature of the wax means you may struggle to overcoat it. The mould surface can usually be easily sanded smooth as long as the gelcoat layer is thick enough.
@@easycompositestv Thank you I will start with that and go from there.
How to repair hole in a blue, gray, or green tarp sheet that has eyelets spaced apart on its edges? Splice another to one that could use a repair to make larger.
when you join the two pieces of wax @4:08 how would you do this as to not mar the job you where moulding?
Just take care with the blade. The wax is soft enough to not need much pressure to be cut.
That logo is a registered trademark for WE Knives.
WeKnife is a chinese company. They most likely didn't receive trademark protection from the UK. Easy Composites has every right to use this logo, especially since its in a completely different market.
can u do cut to custom length orders as i need to replace my motorcycle fairings and this would be grate to create my own designs
We can supply carbon fibre and the other raw materials used in this tutorial in whatever quantities you need, please just just get in touch through our website or speak to our sales team :)
I'm looking to manufacture around 100 chain guards I'm think of making a carbon fibre mould using a manual lay up over a 3d printed model. Would that work?
Do you mean carbon fibre mould or carbon fibre moulding (i.e. part)? For ambient temperature use, there's no advantage in using carbon fibre for the mould. You could certainly 3D print the pattern and then use a hand layup process (like we use in this video) to make the mould. You would normally need to finish the 3D print with some kind of coating; our Pattern Coat Primer works well.
Why when I watch your videos it's all looks so simple and when I start making something myself I always have whole bunch of different problems!?)) Thanks for your videos guys, they really help a lot) Your videos are big part of my humble successes (you can find them on my channel, but they are mostly in Russian)
To be totally honest, it might well be the materials you're using. In composites, there are so many possibilities for incompatibility between materials that you can often find something not releasing, or not curing, or no spreading, or infusing as you expect. One of the reasons for our success is because we carry a limited range of materials and know exactly how they all behave with each other. The processes we demonstrate will work exactly as they should if you're using these exact materials, as soon as you start using alternative materials then you pretty much have to start over again with testing for compatibility and suitability. So, you shouldn't feel bad if you experience some problems, we all have to go through that process.
@@easycompositestv nah its that you make it look so easy! Ive tried many times to produce parts that end up needing 50 hours work to end up with a part that no one wants to pay a fair price for!
@@theravedaddy When I watch some of these videos I come away with the opposite impression. There was definitely a lot of work for such a simple part. Not something I'd want to do as a one-off unless I had a lot of spare time to kill.
@@rickden8362 i started out all enthiuastic in the beginning, located a market for certain parts, started making them and getting through the teething problems and then chynaaa comes along and floods the market making my efforts not worth the cloth i used. I gave up.
@@theravedaddy I hear ya. I always assume these videos are at least twice as hard as they look and will take probably three times as long the first time.
your videos are excellent but i have a question, when you remove sheetwax the mould will become a little bit bigger, so the carbon detail you make in this mould will be bigger right?
Hi Lasha, yes, that's exactly the point. In this video we're making a mould for a 'cover' component that will fit over the original part; for this reason we *need* the mould to be bigger than the original component. If you watch the second video in the series you will see us make the part and hopefully then it will be more clear to you.
@@easycompositestv i didn't listen you well))
i'm sure i've missed this being answered in the past but do you have any suggestions for obtaining materials in the USA? Thank you! Love watching these. edit: noticed a similar question in the comments. We'll see! ty
Hi, well, I've answered it but only to say that we really want to be able to do more to help our (potential) customers in the US. For some of our materials, mainly the non-hazardous ones, it's not too expensive to buy from us directly, especially if it's materials that are difficult to source locally. For hazardous materials, like resins and solvents, we can ship to the US but it can be pretty expensive, mainly because of the 'dangerous goods' surcharge that FedEx (or other couriers, to be fair) charge to handle the paperwork of dangerous goods on aeroplanes. Although only in the early stages, we're certainly now thinking about what are options might be to support you guys better.
@@easycompositestv thank you! I'm hoping to give some fabrication a go soon. Thinking some door panels! cheers
Don't forget to change water for each grit.
What if I want to make a mould that is identical to the original part? How can I get around using the sheetwax? Thanks
You just don't use it. You mould directly from the part itself.
Is there any chance you can make a tutorial on making a dirtbike clutch cover using this or similar method? Please
Hi Marko, it would be exactly the same process, from start to finish. The frame protector is just an example of the process, you can apply this process to any parts you need to make a cover for.
@@easycompositestv Thank you
Would this be the preferred method for creating automotive interior trim covers that are attached with 3M tape? Only using 1mm wax for a thinner part?
Hi Nick, yes, the thickness of wax you use will be determined by the thickness of the component, for example a 1mm sheet wax offset would accommodate a 0.75 mm laminate thickness. This is to ensure that the trim cover fits over the existing component.
@@easycompositestv Thank you for the reply. And this would be the ideal method for creating such pieces correct? if it were just for one car I would simply skin the stock parts.
Yes, if you want to produce more than one then you’d want a mould and that mould would need to be offset slightly to allow for the material thickness. The other way to get the offset is to skin the one part and then take your mould off the skinned part. In some ways, this would be a better and more accurate process than sheet wax.
When the sheet wax is applied, wouldn't any finger marks or imperfections be transferred to the gel coat and final mold?
Careful handling can avoid this, but yes, if you damage the wax, it would be visible on the mould necessitating some sanding and polishing of the mould to fix it.
Good job ... but how do you fix the difference in the dimension of the piece resulting from the thickness of the wax layer ....?
The whole point of this process (the reason we're using sheet wax at all) is that we *want* the difference in size between the original and the mould, so that the cover component will fit correctly. If you don't want the size difference then just take the mould straight off the component.
What is the tool that you are using to get a crisp edge at 3:33 and where can I get one? Thanks.
Great. It's one of our prepreg laminating tools, sometimes knows as dibbers, or dobbers, or various other things. You'll find them on the Easy Composites website.
Can this be used to make prepreg moulds? I.e can I use tooling prepreg a after the gel coal and then oven cure?
You would use either tooling pre-preg which has its own gel coat built in, or a high temperature gelcoat and resin laminate to make a mould for pre-preg use. You would not mix the two processes.
@@easycompositestv Apologies, I misspoke. I meant can I use the tooling prepreg after applying the sheet wax to create an offset mould?
Ahh, right, I see. Yes, you could you do this. The sheetwax is 'high temperature' wax and the XT135 tooling system can be cured at a very low initial temperature (65C) so you should be able to do this. You'd need to make sure the wax was fully supported though, because of course the whole thing would be under vacuum pressure.