You could do all of this with a cheap drill, a wrench, some bits and a hand tap... less that $100. Either way though, that 4k in tools will pay for itself time and tiome again.... also, most people interested in DIY'ing either already have tools or have no issue with getting more.
Great video. There’s a lot of money to be saved with DIY that can be spent on new tools. I too use my projects as an excuse to buy the tools I want/need. One thing I would suggest, is to use butyl rubber for the bolts that go into the factory drilled holes in the roof. If water gets in there, you may get some serious rust issues and potential leaks into the cab. Also, using some sort of thread lock fluid would be a good idea, especially on off road vehicles because of all the added vibrations from driving in rough terrain.
with all the $$ I saved I invested in proper tools/bits/and more! Now Im at $45,000 over budget! lol but in all seriousness solid video thank you for this! Gonna be giving this a go for my van roof rack! Cheers and thank you for the video
Pro tip. Get a 'machine tap' with spiral flutes of you're going to use a drill for tapping. The straight flute ones are hand taps and won't evacuate chips well enough.
Thank you so much for this. I've been wondering how to make a rack myself that wasn't A: made from steel and heavy as hell or B: made from aluminum and ending up costing me more than a platform rack I could have bought. These crossbars will be stellar. On top of having access to a waterjet, I should be able to slap together a pretty sick setup
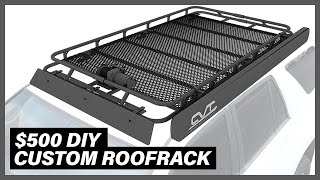
they look to be simple aluminium flats bent 90 degrees at the end where they rest inside the rain gutter. I had the same question since I think there's too much leverage that would be applied to the sides without the support. it's probably offering plenty of support. The only concern i would have is rattling on the roof if not at the precise length, I guess slightly longer is better than shorter on these support legs. Small rubber pads under are probably a good idea as well.
THIS is the reason I don't do my own house repairs.... the money I save doing it myself will get expensive and will clog up my garage with tools that I may, or may not, ever use again.
Whether it makes sense for someone to build their own is up to the builder, however, I found your video detailed and thorough, and very interesting topic. Next, maybe you can devise mounting ideas for 4R as well as Wranglers! New subscriber!
Are you kidding? Making your own custom rack at 1/3 the price makes absolute sense! You also control the finish, rust proofing, and understand it well. You spend the same amount of time assembling someone else's shoddy work with huge profit margins and cut corners. Sit in your armchair and do nothing! You don't learn by over analyzing, but by doing.
its a vicious cycle. build something to save money and gain some knowledge. buy tools to build project, do this for a few years have to build extra garage to house all these "money saving" tools. life it good. BTW this project is on my to do list before hunting season, good vid.
Great videos. Just wondering what size tap and bolts were used to attach the flat aluminium to the extruded 80/20? Thanks to you I’m working on building my own rack for my canopy. I’m not buying all the fancy tools though. Lol. Love the humour in all your vids.
dude great video, you deserve more views! keep at it, our channel is only a year old and randomly we shot up to 70K subscribers, so your not far behind, keep up the great content! ... oh and you totally made me be like "I am just going to buy the $1,000 roof rack" :)
Easiest subscribe for a new channel ever, I can tell it's going to be great. I literally LOLed at the 5:45 mark when I finally noticed the diving mask on the snorkel.
I have been thinking about building the same type of rack. Did you consider using tslot for the sides, too? I have been thinking about it both ways. But I think I like your way better. Well done.
As soon as you cracked open the beer I saw the beer caps “teeth” marked on your rack , or was that just me? Great video , very informative and it looks great! Thanks.
Super informative, very entertaining. The math on the tooling all adds up, too. What savings! Came here from imgur, found it very informative, but decided to check YT in case somebody else had a similar build, and you were the first hit. Bravo!
Love your sense of humor and great DIY projects! I also love this rack! Subscribed. Thank you for no music during the build, hallelujah! Incredibly useful video, and you are a frugal genius. I hate being ripped off with the outrageous extortionary prices 80/20 wants for every nut and bolt. I know darn well they are getting them very cheap from China then reselling at mafia prices. So happy to see you give us some alternatives. Using cheaper side rails is very clever and drops price a lot. Knowing what size 80/20 struts worked for you is also a step closer to my build design. I have a 22 ft Class C so big roof with all sorts of things to trip over like vents, hoods, etc and to design around them. Thanks also for showing us where you bought the supplies, super helpful. My tips to you from the RV world: Use Butyl under anything that you place on roof that could leak. A roll on hand never hurts. Its a rubber compound, so on my RV, I would use it around every light fixture so no water gets into the wood structure behind. If you cut out a hatch in the metal for example, add butyl tape under the hatch ring that sits on your metal. Prior to that, of course, spray Loctite Rust Neutralizer on bare metal right after drilling and vacuuming metal bits off, and then some paint, then your butyl. The Loctite RN bonds rust to metal and acts like a barrier before painting. You probably know all this but ... sharing my favorite spray can. The other thing that you need is Dicor Lap Sealant Self Leveling type. When you drill a hole for a screw, add a dab of that, then screw your nut into the metal roof, then put another dab on top of the screw so its completely protected. Works wonderfully to seal up that screw head. To remove it, scrape it off with a knife and /or Dremel wire wheel. Dicor is the bible of the RV world! They make a non-leveling version too, but I've never used that. Question for you: Do you have to have a drill press or a drill will do? What do you mean by 'tap' on 80/20? Drill a hole? A specific kind for metal screws or ...?? What was that talk about special drill bits for drilling into the 80/20? I use the Dewalt Cordless 20V Drill and Driver. Model 887 is best. Model 885 is cheaper. 3 LED lights in front is a game changer over 1 LED light in front. Small 2 amp batteries for both is easy on the wrist.
"Wiggle the drill while cursing liberally " We have all been there !! I just bought a $1,000 flat rack for my 2015 Grand Cherokee that sits 2 3/4" out of level higher in the front. It's useless. The manufacturer says " that's how it's supposed to be" . Now getting ready to build my own.
In my experience the "save yourself 50 cents per tapped hole get comfortable and start tapping" is followed almost immediately by breaking a $12 tap reducing a $25 part to a piece of 23 cent scrap metal. Don't worry, I'm smart enough to learn from my mistakes. I learned the same lesson twice last month (Februaryis a bit shorter after all) , 4 times in January, 3 times in December, and I've scheduled lessons twice a week till fishing season opens in May.
I was thinking about making a simple roof rack style mounting for solar panels(think of a tiny RV type setup) I was thinking of using some regular square steel tube instead of aluminum.
I’m saving money by watching free YT videos of car camping, travel adventures, and DIY mods. With the money I saved, I bought myself an awesome $35,000 4Runner and added another $5000 of mods and gear - so I can stop watching free YT videos PS Cool vid! Knowledge + skill + snarky sarcasm 💪🏻
I have no problem making my own mounting solution and longitudinal rails if going that way, but I 100% want teardrop shaped aerodynamic cross bars. That matters.
LOL!!! "I bought a $2,000 mill to drill these last holes." You could have bought an AC-DC TIG welder for $800, thrown away most of those nuts and bolts and welded this in either aluminum or steel. Better yet, you could've bought a stick welder for under $200, steel bar, a welding helmet, gloves, electrodes, clamps for maybe 300 more. and you've learned to weld, too! And you'd only need to drill holes on the plates that match the threaded holes on the SUV. That said, you should go ahead and buy a welder anyway and get started on a second rack.
Do you design for others? I've got a 2000 chevy express conversion high top. No one I can find is clamoring to manufacture racks for these vans. I like your idea, but I have to mount to the gutter rails and go up 12"/13". I can put things together, but not good at the engineering and manufacturing part. Thanx, Chase
Anyone that thought they could actually build this for $300. Not true, unless you have the tools already. Sometimes it's as simple as telling people that before baiting them in. Yes, projects sometimes require you to buy more tools but some of these diy vids get out of hand lol. Build this for $10 bucks, spends $8000 grand in tools hahahahhaa
$4000 in tools to save $800 on a roof rack. I totally see the logic in that. My wife, not so much... but anyways, your video gave me so many money saving ideas that I figured I can totally afford to buy a JD Squared tube bender, pedestal and dies, since I want to build one with round tube. So I did myself a favor and spent only $900 to make a few bends. Hopefully my wife won't curse at me liberally.
i built my own tacoma overland rack for $100, i happen to work for a company where i have access to a bandsaw and a welder, it’s pretty clean and does the job or holding my RTT in place. i am NOT spending $800 plus on a rack, fuck that
hey, have a quick question. I have been looking at roof racks for a long time, most racks are made from 5052 aluminum have you had any issues with using 6061?
You can purchase one from Cabela's for $120. Sprayed it down with clear coat and used loctite. This thing is a beast! You should have talked to me first before spending the $300
Start selling them for more than $300, but less than $1000. Make a huge profit from the community, enjoy your life. PS: Not right now though, as people are looking for Toilet Paper, and Food, more so than a Roof Rack..
Hi Matt thanks for the video, did you experience any lifting of the front portion of the rack since it is not mounted to the roof? Or did those 4 stock mounting points suffice?
Why didn't you cut like slot on brackets to slide whole rack up and down don't have to put 12 spacers. Tight screws direct to bracket and brackets are tight direct on all manufacturer bolt hole. ( Just my opinion)
This video captures the very essence of DIY. I have ~$50,000 invested in tools and building to save a couple hundred bucks building my own jeep parts. Could have saved a lot just buying the parts and paying a shop to put them in. BUT, the memories. Of cussing things that didn't fit quite right.
300$ too expensive too much work, i would just get a bed frame and put it on the roof there problem solved, if can wistand the weight of two people can easly whistand anything you put on it since the roof limit is around 80KG
$300 in parts.. how much for time? But then factor in your income from the this snazzy video. Ahh now it makes sense.. make the rack, make the video, make your money.. and we get to watch you.. win win win..
I feel better spending $800 on a roof rack now. If it cost you $300 with out cost of labor or machines, I feel as though the money was well spent on qualified and proven roof rack.
How much weight can the roof rack hold? I am 170 lbs and want to be able to walk on mine. do you think the 1x2inch cross bars with a width of 40 inches would hold me no problem?
I am interested in a rack like this, but love my cargo box since I can lock everything easily in the box and it stays dry. Is there any reason why I can't use a low profile rack similar to this when I need to attach my cargo box?
Two sets of holes? Why not just flip the frame. The brackets would be your only weak spot then …. Less holes are stronger … why not anodise the frame ….paint flakes off ….
Love your videos. You are by far my favourite youtube channel at the moment! studying mechanical engineering and I find your stuff inspiring as you dont tale yourself too seriously but do the stuff right that has to be done right. keep it up! greetings from Luxembourg
Eh i prefer a basket honestly, this is just too low and flat for my tastes.. And those leds you got arent bright at all, i have the same ones for back up lights and thats all there really good for. I bought a 64 inch chinese basket on amazon for $100, just paint the welds and seal the tubes with silicone and it hasnt rusted on me yet in the months ive had it. That an my basket is 6 inchs up, securing things feels safer in a basket vs a flat top but thats just me. Kudos to you for building one though
So save $700 on a roof rack spend more on tools paint and use hours and hours of ( time = money) hmmmm. Sounds like your rack actually costs twice as much.
The DIYer in me hates to admit it.. but this video just made buying a nice Gobi (or the like) really attractive. If I had room for some rad tools, I'd totally do this.
Make the roof rack come forward and have a ruber seal on the windshield at the top, (with appropriate drainage) so keep that windnoise to a complete minimum
You made a killer roof rack but in the pictures of the rack mounted to your vehicle when you were out wheeling had nothing on it seems like a complete waste of time and money but you probably used the rack as an excuse to your spouse to get the new tools. Lol


I saved $700 so I bought a $2000 mill. Makes sense
you've never bought a tool for a project? (tip : you can use the tool again ; )
That right there is the reason I subscribed. 🙃
Now he has the tools to make these for other people and charge 700 each...
sounds legit, perfect man math.
I can’t stop laughing 😂
Instead of buying a $1000 rack, I bought $4000 in tools and materials to build a rack! Well done sir! We all identify with you
My missus particularly found this funny! I keep on telling her we saving money in the long run😂
You could do all of this with a cheap drill, a wrench, some bits and a hand tap... less that $100.
Either way though, that 4k in tools will pay for itself time and tiome again.... also, most people interested in DIY'ing either already have tools or have no issue with getting more.
That’s the point. The wife doesn’t know and you say you saved 700
LOL! Literally every DIYer on the planet.
We have been needing a new roof rack. The fact that this design comes with a mill and a bunch of new tools puts it at the top of our list!
This channel is CRIMINALLY underrated.
“I saved 700, but spend 3000 in tools and 4 weeks building it” yup makes sense.
We've all been in that project ;)
@@myownschadenfreude My life is that project.
I already have the tools, my problem is that my car has no mount holes so while this video is great, it won't work for me at all.
@@biggaywizard I used rivnuts. Threaded rivet inserts,
@@electricdeckhead3083 right into the roof of your car?
“I have a lot of questionable ideas about cars”. Just what I’m looking for! Subscribed.
Great video. There’s a lot of money to be saved with DIY that can be spent on new tools. I too use my projects as an excuse to buy the tools I want/need. One thing I would suggest, is to use butyl rubber for the bolts that go into the factory drilled holes in the roof. If water gets in there, you may get some serious rust issues and potential leaks into the cab. Also, using some sort of thread lock fluid would be a good idea, especially on off road vehicles because of all the added vibrations from driving in rough terrain.
I love at the end when he shows images of him offroading without anything strapped to the roofrack.
shhh just fer looks.
The goggles on the snorkel was classic… FTW!!!
I saved so much money that I went out and bought a 2000$ mill😂
with all the $$ I saved I invested in proper tools/bits/and more! Now Im at $45,000 over budget!
lol but in all seriousness solid video thank you for this! Gonna be giving this a go for my van roof rack! Cheers and thank you for the video
Pro tip. Get a 'machine tap' with spiral flutes of you're going to use a drill for tapping.
The straight flute ones are hand taps and won't evacuate chips well enough.
pinkskud1 I was thinking this aswell.
I’m going to make mine from bamboo
Because I watched Gilligans island and I think that anything can be done with bamboo
Except boats
Bamboo projects are nothing without the coconuts!?
DON'T FORGET THE COCONUTS!? 🤣😂🤣
Man, in thailand they really do that shit. All the scaffolding. Bungalows in truck beds. Ladders on top of the damn ISP van
🤣🤣🤣🤣🤣
Thank you so much for this. I've been wondering how to make a rack myself that wasn't A: made from steel and heavy as hell or B: made from aluminum and ending up costing me more than a platform rack I could have bought. These crossbars will be stellar. On top of having access to a waterjet, I should be able to slap together a pretty sick setup
These videos are so well edited and narrated. I may not be building a roof rack this week but I was mesmerized by watching you show us how. Thanks!
Overlanding and build info, AWESOME 👏🏼. Sense of humor and sarcasm, PRICELESS!👊🏼💪🏼
I thought it said “how I built a $100 roof rack for $300.” And I thought that made complete sense when I think of all my projects.
Please show more details about to frontmost feet
they look to be simple aluminium flats bent 90 degrees at the end where they rest inside the rain gutter. I had the same question since I think there's too much leverage that would be applied to the sides without the support. it's probably offering plenty of support. The only concern i would have is rattling on the roof if not at the precise length, I guess slightly longer is better than shorter on these support legs. Small rubber pads under are probably a good idea as well.
THIS is the reason I don't do my own house repairs.... the money I save doing it myself will get expensive and will clog up my garage with tools that I may, or may not, ever use again.
Whether it makes sense for someone to build their own is up to the builder, however, I found your video detailed and thorough, and very interesting topic. Next, maybe you can devise mounting ideas for 4R as well as Wranglers! New subscriber!
Are you kidding? Making your own custom rack at 1/3 the price makes absolute sense! You also control the finish, rust proofing, and understand it well. You spend the same amount of time assembling someone else's shoddy work with huge profit margins and cut corners. Sit in your armchair and do nothing! You don't learn by over analyzing, but by doing.
Loved video👊🏼. Your narration and sarcasm, PRICELESS 👏🏼
This is a pretty quality video, Matt! I laughed when you said how you saved money and you should buy a drill... and it was a dam Snap-On 😂
By the way, what material did you use for your wind guard or as you call it, the aero shield?
@@RecordnMotion Aluminum sheet, I think it was 6" wide and around 1/16" thick.
Hmmm. “A butt load of holes”. So that would be one hole? 😂😂
my but has only one hole , i just checked .......
One beer opened and your bedliner is gone... What a quality material :) Otherwise, quite good idea.
I was looking. Seemed to hold up tho
🤣🤣 I loved it! "Saved 700 so you bought a $2000 mill"
its a vicious cycle. build something to save money and gain some knowledge. buy tools to build project, do this for a few years have to build extra garage to house all these "money saving" tools. life it good. BTW this project is on my to do list before hunting season, good vid.
This is the best DIY rack I've seen to date. Gonna rock this style build on my old Montero Sport.
Hell yeah I want to do something similar for my Montero sport
Great videos. Just wondering what size tap and bolts were used to attach the flat aluminium to the extruded 80/20? Thanks to you I’m working on building my own rack for my canopy. I’m not buying all the fancy tools though. Lol. Love the humour in all your vids.
dude great video, you deserve more views! keep at it, our channel is only a year old and randomly we shot up to 70K subscribers, so your not far behind, keep up the great content! ... oh and you totally made me be like "I am just going to buy the $1,000 roof rack" :)
I'm crying laughing! SOOOO many times on my DIY projects , "I'm gonna save money building this myself" I spend $1000 on tools!!!
“....and since you saved $700, go out and buy yourself a new friend to help lift the roof rack.”
I love it, dirty adventures. I also am cheap, but making your own lets you get the size and design you want or need. Good job!
I like it! Looks good and sturdy enough for actual use. I think the same way on tools. ROI somewhere around 10 racks, but totally worth it.
Easiest subscribe for a new channel ever, I can tell it's going to be great. I literally LOLed at the 5:45 mark when I finally noticed the diving mask on the snorkel.
I have been thinking about building the same type of rack. Did you consider using tslot for the sides, too? I have been thinking about it both ways. But I think I like your way better. Well done.
I didn't consider it, but I'm sure it would work, and would probably make it easier to mount things to the side.
Saved $700 on the roof rack and spent how many thousands on tools.
Love your honesty.
Hilarious!!!
Genius...I think Gobi gave you a thumbs down, they don't like you. Thanks for the video.
Because the fact they charge 1600 bucks for roof rack is absurd
As soon as you cracked open the beer I saw the beer caps “teeth” marked on your rack , or was that just me? Great video , very informative and it looks great! Thanks.
We did a sort of similar T-slot rail rack for our Ford Transit campervan build!
It's been some time since you built this, how is the extruded aluminum holding up? Are the threads still happy? Anything you would change?
Everything is great. wouldn't change a thing
@5:16 what did you end up doing with the small LED spotlight on the far left that disappeared are reappeared in different shots?
Super informative, very entertaining. The math on the tooling all adds up, too. What savings! Came here from imgur, found it very informative, but decided to check YT in case somebody else had a similar build, and you were the first hit. Bravo!
Love your sense of humor and great DIY projects! I also love this rack! Subscribed. Thank you for no music during the build, hallelujah!
Incredibly useful video, and you are a frugal genius. I hate being ripped off with the outrageous extortionary prices 80/20 wants for every nut and bolt. I know darn well they are getting them very cheap from China then reselling at mafia prices. So happy to see you give us some alternatives. Using cheaper side rails is very clever and drops price a lot. Knowing what size 80/20 struts worked for you is also a step closer to my build design. I have a 22 ft Class C so big roof with all sorts of things to trip over like vents, hoods, etc and to design around them. Thanks also for showing us where you bought the supplies, super helpful.
My tips to you from the RV world:
Use Butyl under anything that you place on roof that could leak. A roll on hand never hurts. Its a rubber compound, so on my RV, I would use it around every light fixture so no water gets into the wood structure behind. If you cut out a hatch in the metal for example, add butyl tape under the hatch ring that sits on your metal. Prior to that, of course, spray Loctite Rust Neutralizer on bare metal right after drilling and vacuuming metal bits off, and then some paint, then your butyl. The Loctite RN bonds rust to metal and acts like a barrier before painting. You probably know all this but ... sharing my favorite spray can.
The other thing that you need is Dicor Lap Sealant Self Leveling type. When you drill a hole for a screw, add a dab of that, then screw your nut into the metal roof, then put another dab on top of the screw so its completely protected. Works wonderfully to seal up that screw head. To remove it, scrape it off with a knife and /or Dremel wire wheel. Dicor is the bible of the RV world! They make a non-leveling version too, but I've never used that.
Question for you:
Do you have to have a drill press or a drill will do?
What do you mean by 'tap' on 80/20? Drill a hole? A specific kind for metal screws or ...?? What was that talk about special drill bits for drilling into the 80/20?
I use the Dewalt Cordless 20V Drill and Driver. Model 887 is best. Model 885 is cheaper. 3 LED lights in front is a game changer over 1 LED light in front. Small 2 amp batteries for both is easy on the wrist.
"Wiggle the drill while cursing liberally " We have all been there !! I just bought a $1,000 flat rack for my 2015 Grand Cherokee that sits 2 3/4" out of level higher in the front. It's useless. The manufacturer says " that's how it's supposed to be" . Now getting ready to build my own.
In my experience the "save yourself 50 cents per tapped hole get comfortable and start tapping" is followed almost immediately by breaking a $12 tap reducing a $25 part to a piece of 23 cent scrap metal. Don't worry, I'm smart enough to learn from my mistakes. I learned the same lesson twice last month (Februaryis a bit shorter after all) , 4 times in January, 3 times in December, and I've scheduled lessons twice a week till fishing season opens in May.
I think I'm going to make this for my CX9 and eliminate the need for crossbars altogether.
Hold on - you saved +/- $700 by DIY-ing this roof rack... But you spent $2,000+ on tools so that you could DIY this roof rack... 🤔😉
I’m gonna need a link to that mill, you know- for building my roof rack
I was thinking about making a simple roof rack style mounting for solar panels(think of a tiny RV type setup)
I was thinking of using some regular square steel tube instead of aluminum.
I’m saving money by watching free YT videos of car camping, travel adventures, and DIY mods. With the money I saved, I bought myself an awesome $35,000 4Runner and added another $5000 of mods and gear - so I can stop watching free YT videos
PS Cool vid! Knowledge + skill + snarky sarcasm 💪🏻
I have no problem making my own mounting solution and longitudinal rails if going that way, but I 100% want teardrop shaped aerodynamic cross bars. That matters.
LOL!!! "I bought a $2,000 mill to drill these last holes."
You could have bought an AC-DC TIG welder for $800, thrown away most of those nuts and bolts and welded this in either aluminum or steel. Better yet, you could've bought a stick welder for under $200, steel bar, a welding helmet, gloves, electrodes, clamps for maybe 300 more. and you've learned to weld, too! And you'd only need to drill holes on the plates that match the threaded holes on the SUV.
That said, you should go ahead and buy a welder anyway and get started on a second rack.
Do you design for others? I've got a 2000 chevy express conversion high top. No one I can find is clamoring to manufacture racks for these vans. I like your idea, but I have to mount to the gutter rails and go up 12"/13". I can put things together, but not good at the engineering and manufacturing part. Thanx, Chase
Anyone that thought they could actually build this for $300. Not true, unless you have the tools already. Sometimes it's as simple as telling people that before baiting them in. Yes, projects sometimes require you to buy more tools but some of these diy vids get out of hand lol. Build this for $10 bucks, spends $8000 grand in tools hahahahhaa
$4000 in tools to save $800 on a roof rack. I totally see the logic in that. My wife, not so much... but anyways, your video gave me so many money saving ideas that I figured I can totally afford to buy a JD Squared tube bender, pedestal and dies, since I want to build one with round tube. So I did myself a favor and spent only $900 to make a few bends. Hopefully my wife won't curse at me liberally.
Just watched this video thinking it was a new episode, damn your production value has increased.
i built my own tacoma overland rack for $100, i happen to work for a company where i have access to a bandsaw and a welder, it’s pretty clean and does the job or holding my RTT in place. i am NOT spending $800 plus on a rack, fuck that
hey, have a quick question. I have been looking at roof racks for a long time, most racks are made from 5052 aluminum have you had any issues with using 6061?
You can purchase one from Cabela's for $120. Sprayed it down with clear coat and used loctite. This thing is a beast! You should have talked to me first before spending the $300
I was quoted CAD$705 just for two crossbars for my hyundai Tucson...that's not even genuine Hyundai bars....man!
I can weld aluminum (Or for Europeans, Al-u-mini-um). Would it be just as string to weld 1" x 1" cross-members to 1" x 2" rails?
Start selling them for more than $300, but less than $1000. Make a huge profit from the community, enjoy your life.
PS: Not right now though, as people are looking for Toilet Paper, and Food, more so than a Roof Rack..
Hi Matt thanks for the video, did you experience any lifting of the front portion of the rack since it is not mounted to the roof? Or did those 4 stock mounting points suffice?
Why didn't you cut like slot on brackets to slide whole rack up and down don't have to put 12 spacers. Tight screws direct to bracket and brackets are tight direct on all manufacturer bolt hole. ( Just my opinion)
Lol Saved $700, so spent $3000, i like your honesty, keep er up.
This video captures the very essence of DIY. I have ~$50,000 invested in tools and building to save a couple hundred bucks building my own jeep parts. Could have saved a lot just buying the parts and paying a shop to put them in. BUT, the memories. Of cussing things that didn't fit quite right.
Something like the lrtime channel. Convert garage to machine shop, install lift in driveway to DIY
300$ too expensive too much work, i would just get a bed frame and put it on the roof there problem solved, if can wistand the weight of two people can easly whistand anything you put on it since the roof limit is around 80KG
$300 in parts.. how much for time? But then factor in your income from the this snazzy video. Ahh now it makes sense.. make the rack, make the video, make your money.. and we get to watch you.. win win win..
I feel better spending $800 on a roof rack now. If it cost you $300 with out cost of labor or machines, I feel as though the money was well spent on qualified and proven roof rack.
hahahahaha I love your video. Great project. Love how this 300$ roof rack cost you over 4000$. You showed them.
I need to build one of these for my '03 sequoia... too bad material costs are probably close to that $1000 price tag anyway right now... :(
One of the better DIY roof racks I have seen, and no welding, for those that can't. Looks good.
I have a questionable car idea that would benefit nobody but me...
Microsquirt efi conversion of a klr650
How much weight can the roof rack hold? I am 170 lbs and want to be able to walk on mine. do you think the 1x2inch cross bars with a width of 40 inches would hold me no problem?
This channel is therapy.
Oh man. How hilarious would it not have been; if instead of incredible outdoor pictures. It was just your car in different mall parking lots.
Excellent! Never thought about building my own roof rack. Great video, thank you!
You’re finally back!! What happened to all your old car reviews?
I spent ages measuring and designing, then just bought a Rhino Rack. Unfortunately I just don't have space for a milling machine.
I absolutely would love to get my roof rack for 300$ and save 700$!! Can you link me to all the tools you have for 700$ or less?! Thanks!
I am interested in a rack like this, but love my cargo box since I can lock everything easily in the box and it stays dry. Is there any reason why I can't use a low profile rack similar to this when I need to attach my cargo box?
Hey, I also have a 2010 4runner. What did you do to fit the metal bumper? Order a unpainted 14+ bumper and cut it?
What did you use for the Aero Shield?
Two sets of holes? Why not just flip the frame. The brackets would be your only weak spot then …. Less holes are stronger … why not anodise the frame ….paint flakes off ….
Love your videos. You are by far my favourite youtube channel at the moment! studying mechanical engineering and I find your stuff inspiring as you dont tale yourself too seriously but do the stuff right that has to be done right. keep it up! greetings from Luxembourg
Eh i prefer a basket honestly, this is just too low and flat for my tastes.. And those leds you got arent bright at all, i have the same ones for back up lights and thats all there really good for. I bought a 64 inch chinese basket on amazon for $100, just paint the welds and seal the tubes with silicone and it hasnt rusted on me yet in the months ive had it. That an my basket is 6 inchs up, securing things feels safer in a basket vs a flat top but thats just me. Kudos to you for building one though
Lmao I like the last part when u said u spend 4K to save 700 😂😂😂 ima just ball out on Black Friday for my Tacoma
So save $700 on a roof rack spend more on tools paint and use hours and hours of ( time = money) hmmmm. Sounds like your rack actually costs twice as much.
Buying expensive tools to do an inexpensive project....completely justifiable!!!
The DIYer in me hates to admit it.. but this video just made buying a nice Gobi (or the like) really attractive. If I had room for some rad tools, I'd totally do this.
Make the roof rack come forward and have a ruber seal on the windshield at the top, (with appropriate drainage) so keep that windnoise to a complete minimum
Love the video. This is the same diy math my husband and I use. 😂 Now off to build a roof rack.
Any idea on approximate load capacity of the t slot cross bars? I just want to make sure that i can hold a bunch of camping stuff.
Were you on Doogie Howzer MD? BTW...the rack, a fine piece of craftsmanship!
Questionable Ideas for cars? That's an automatic subscribe. Also, nice rack buddy.
Hey thanks for all the info good video, I like your 3 front bumper lights can you share the info , Thx
Not worth it, at all. The amount of time alone is ridiculous. And it came looking incredibly home made.
You made a killer roof rack but in the pictures of the rack mounted to your vehicle when you were out wheeling had nothing on it seems like a complete waste of time and money but you probably used the rack as an excuse to your spouse to get the new tools. Lol
been loooking for a reason to justify purchasing a mil. 10 outta 10 will never drill again
What are the dimensions specifically the thickness of the side aluminum flat bar?