etrailer | How to Set Up Your Curt Trailer Hitch Receiver on a 2013 Volkswagen Touareg

Вставка
- Опубліковано 7 вер 2024
- Click for more info and reviews of this CURT Trailer Hitch:
www.etrailer.c...
www.etrailer.com
Don’t forget to subscribe!
/ etrailertv
Full transcript: www.etrailer.c...
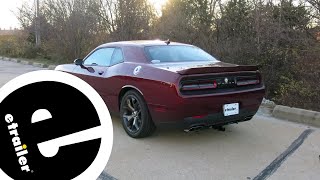
Today, on a 2013 Volkswagen Touareg, we're going to show you part number C13116, from Curt. This is a Class III 2" Receiver Hitch. This is what the hitch looks like once installed on a Touareg. We'll go ahead and cover how the hitch fits with the vehicle. First off, it fits through the factory opening of the bumper cover, here, and the bumper cover does have to be removed to install the hitch. Easy access to our safety chain loops, and this is a 2-inch receiver. Cross-tube goes up and over, and replaces the internal bumper beam that's originally with the vehicle.
This also uses all existing hardware that's in the vehicle. There's no trimming or modifications needed for this install. Next, we'll give you some measurements to help you out in selecting some accessories for your hitch, like a ball mount, a bicycle rack, or a cargo carrier. From the top of the receiver opening down to the ground will be about 16.5 inches, and from the center of our hitch-pin hole to the edge of the bumper will be around 1.5 inches. Now, we'll go ahead and show you how the hitch is installed. To install our hitch that means removing the bumper cover, so we're going to start off by removing these four screws on the bottom. We'll be using a T-25 torque bit.
Next, typically, there will be a mudflap here; in this case it's not on our vehicle, but you would have to remove that and then get to our next step. That would be about five screws you have to remove for our mudflap. Then we have to remove this screw here for our trim panel. Again, we're using a T-25 torque bit; and then we need to loosen this trim panel from our bumper cover, here. Now we just need to pop this loose; now there's a series of snaps that you have to undo.
Apparently somebody's been in here before so it came apart petty easy; and we just need to go probably about half way up to the top. Just get past this seam right here, and we should be good to go. Let's do this on both sides. Now there are four more screws that we have to remove. There's one that's right here, however on this vehicle it's already missing. Number two, number three, and number four.
Go over and repeat the same process, over on driver's side. Next we need to remove the taillights. On our passenger side here, we have to remove this little panel right here to get access to the hardware that holds the light in place. Small flat screwdriver, pop this panel loose; there's a little opening for it, and then there's a nylon assembly. We need an 11mm socket and extension to go into an angle to get at it. That nylon assembly stays in there, but you can still take off the light. OK, now to disconnect the light from the wire harness there's a little, red plastic lock on the end of the connection right here. A real small screwdriver will pop it loose. We need to push down on the small tab here and pull it apart. Let's let that sit for now; we'll go ahead and repeat the same process over on the driver's side, however our opening is just a little bit different. Now on the driver's side there's a simple, circular cap in this area right here; however once again in our car this cap is missing. Again, you would just simply pop it loose and get access to the hardware. With our taillight removed, we can go ahead and remove these two torques-head fasteners, and we're using a T-30 torque bit. We're done with this side. Now some vehicles may have an additional fastener over here; you just push down on the center of it here just to release it. Once again, we'll go back over to the driver's side, repeat the same process. Now, we should be able to pop the sides loose here, and then take the whole assembly off; so I'm just going to start this here, and push down and pull back. We should be able to grip it by the fender well, down here, and pull it apart, as well. Get both sides loose. It may help to have an extra set of hands to help loosen it up as you pull it away. Now I just need to pop loose our foam insert right here, then we can go ahead and remove the bumper beam. To remove these bolts, we need an 18mm socket. Two on top, and two on the bottom. Let's go back to the driver's side, one more time. It may be a good idea to have an extra set of hands hold the other side while we do this side. Now, we go ahead and put on our hitch. With an extra set of hands, we'll go ahead and install one bolt in each side to help hold it up, and then we'll install the rest of our fasteners; and we're reusing the fasteners we just took out. OK, with all the hardware loosely installed, we'll go ahead and snug down the bolts. Make sure that our hitch lines up with the alignment pin on the inside, here, as well. Once


Nice!!!!
Do you have an instructional for installing the light harness connector
We do have an install video for the wiring harness for a 2013 Volkswagen Touareg if you don't have the factory trailer connector and you can find it here www.etrailer.com/Custom-Fit-Vehicle-Wiring/Volkswagen/Touareg/2013/118668.html?VehicleID=201334812