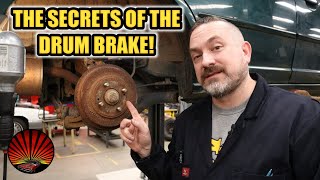
STEP by STEP: Chevy HHR & Cobalt front brakes & rotors

Вставка
- Опубліковано 25 тра 2015
- Replacing the front brake pads and rotors. This video should apply to mosts Chevy HHR and Cobalt vehicles but the concept is similar among most vehicles.
Due to shaking issues that I believe are the brake rotors loading up with pad material I have decided to switch to ceramic pads. I am using Autozone Duralast Gold C-Max pads which include a hardware kit, backing on the pads, and caliper pin grease packet.
The tools needed are pretty simple...
- Breaker bar (a large ratchet might work instead)
- 14 mm socket
- 15 mm socket
- 19 mm socket (for the lug nuts)
Optional, but helpful...
- Flat head screwdriver
- Hammer
- 15 mm wrench
- 14 mm wrench
- Torque wrench (to tighten to bolts to manufacturer specifications)
I'm using only basic hand tools and the jack that came with the car for reasons of demonstration. This is not a difficult task to perform.
I am not a professional mechanic, just a guy who works on his own cars at home. The procedures shown in this video may not be correct or safe, always consult a professional and follow manufacturers guidelines and specifications. Use common sense, only you are responsible for your own safety.
Basic Steps:
1. Raise and secure vehicle, remove wheel.
2. Remove the two 14mm caliper bolts, Remove caliper
3. Remove two 15mm caliper bracket bolts, remove bracket
4. Remove rotor, install new rotor
5. Reinstall caliper bracket & two 15mm bolts
6. Install new brake pads
7. Compress piston, reinstall caliper & two 14mm bolts
8. Reinstall wheel, pump brake pedal to seat piston - Навчання та стиль


8 years after you uploaded and you just helped someone (me) change his brakes for the first time ever and it was a success! Thank you!
This is not just the best video on changing brakes and rotors, but it sets a whole new standard for UA-cam presentations in general. The camera shots are superior, the audio is superb and the content was well organized and prepared. Outstanding!
At the time I viewed this video, 72 people placed a thumbs down. I would be eager to view a video from any one of those 72 people as this video was of EXCEPTIONALLY QUALITY. I was stunned at the end when he said he was not a professional!! One of the best instuctional/tutorials about that subject on UA-cam.
You ARE a professional sir!
Thanks & 2 thumbs up!!👍👍
I had to replace pads and rotors on my step-son's HHR. This is, hands down the, best how-to video, ever. Thank you so much.
Thank you! Step by step complete job 😊
2023? Never done brakes before but this makes the task easier to understand. Again, thank you!
That was the best and most extensive video I've seen on brake replacement, thank you!
This is an amazing tutorial. I have been looking for tutorials that someone like me (doesn't know a lot about fixing my own car) could understand enough to feel confident to do it myself. Most of them leave large chunks out or start in the middle or they have the camera zoomed in so much you can't tell what you are looking at. You even show where to safely put the jack. I am a woman who lives on her own and I can't tell you how much it means to me to be able to learn how to do things like this myself. I once had a Tuffy tell me it would cost $400 to fix my serpentine belt because they had to remove the engine (I knew you go in through the passenger side tire, 2006 Cobalt and no he didn't mean the timing belt). Another place charged me $360 for a battery when actually the door lock switch was corroded and needed to be replaced (it was draining the battery because it was locking and unlocking the doors all night). I never write reviews but thank you so much, I can't wait to finally replace my brake pads and rotors, it has needed it for over a year but I was in no mood or financial position to get screwed around. :)
So I have worked on cars for over 20 years I'm a single mom don't have the income to pay anybody and watching your tutorial and all the comments I got my confidence back that I lost over a couple years of not working on cars so I'm heading out now change my brakes I will comment again after I have successfully complete my brake job
2023 and your video is still helping people out! Thank you so much for this tutorial!
GREAT VIDEO!!!! The skip marks as well as the highlighted parts was a plus. 👍👍👍
I wish UA-cam added a feature to buy a creator a beer (or other beverage of his/her choice). I would totally buy you some beers right now. My boyfriend and I are young and broke. Brake Check wanted almost $700 for new pads and rotors. I watched this video twice and thanks to your calm demeanor and great explanations/instructions, we have new pads and rotors on for about $300 total, including about $120 in tools we did not have. So if we had the tools, it would probably be around $180 or roughly 25% of the price that a shop was going to charge.
Now we are empowered to take care of this maintenance in the future. We have the know how and the tools. Thank you for this excellent, thorough video. I am still shocked that we managed to do this with no prior experience or training. Just a little bit of patience and pausing your video at each step along the way as we worked. I can't say thank you enough. He's able to continue to safely get to work and we're gonna make it without going totally broke. Occasionally you come across a UA-cam video which makes you appreciate what this technology has done for us. This is one of those. You rock!
Jobs are always more fun (and usually go faster) when you are all buzzed up on beer.
I've looked at several videos to do this task. Each have some of the pieces, however neglect to show everything a somewhat knowledge deficient novice like me needs - like torque settings, complete list of tools, every little movement that makes it go better, info on the clips and so on. Also information on what to purchase to do the job. All I can say is way to put a mechanic out of a job...or else prevent more extraction of value from my wallet than need be. Kudoes for a really good job. Good camera work, detailed explanation, also coverage on doing the job safely. Nobody else mentions that. Great production. Please excuse me if I am gushing here. It is well deserved.
I wish people made more auto fix it vids like this. You keep it simple enough to understand and very thorough. plus great camera angles. thank you so much for making it.
Dear DoSompthin; Your explanation, wording, and visual video examples are impressive! Your communication skills are really admirable! Thanks for the vid!!
Concise, no extra chatter, good sound. This video should be an example for all U tube video people to learn from. Thanks.
did front end brakes on an 09 hhr today, thanks to your video. Thank you for the step by step, appreciated!
Awesome video. Thanks for boosting my confidence and teaching me. The heads up about where to fast forward the video was a huge touch. Much appreciated.
Probably the most comprehensive video on doing the brakes for an HHR,,thanks
Excellent video. TIP: You can use the C-Clamp and compress the caliper piston prior to removing the caliper, this will not be awkward trying to compress the piston while the caliper is suspended.
I don't know how anybody could possibly give you a thumbs down on that video. I would give you 2 thumbs up for sure. I have watched this topic a few times to make sure I didn't miss anything and found it is "THE BEST" step by step instructional video for this job I have watched. Great job "Do Sumpthin'"
Best tutorial ever. I’ve done my own breaks before but it’s been 10 years. Nice refresher video for me along with some tips and tricks I’ve never used before. I have an 07 Cobalt LT for my beater car pads were gone, and rotors were warped.
Excellent quality, clear sound, thorough explanation. Great video. Thank you very much, friend!
On the Cobalt make sure you use a torque wrench and make sure you use thread locker on the caliper bolts. If you don't they will most likely back out. The Cobalt has a warning for this. You can also buy new caliper bolts that come with thread locker supplied for $8 a set.
I really liked watching this tutorial. I have been wanting to learn more about fixing my car and one of the rotors and the pads needs to be replaced asap so I definitely came to the right spot so I can do it on my own. Thanks for this!
Most thorough and informative brake job video ever! Thanks!
Thank you so much!
I attempted to replace my own brakes a few months back and almost succeeded but had a minor set back when the videos I watched didn't explain the brake piston.
This resulted to me
Taking my car in which costed me a great deal of cash.
With your help I realized I was just steps away from
Being done. That's okay!
I know now that I was on the right path thanks to your tutorial.
- john
Nice instructional! I used it today to redo the front brakes on my 2008 HHR. Thanks!
Awesome video tutorial. I'm not able to afford a mechanic to do this, so this is a life saver. Thanks for you efforts and for posting this!
I am trying to learn how to work on my own cars and this is an amazing video. Walks you step by step. I am fairly confident I can do this and not mess it up. Thank you!
Very clear, detailed explanation of each step. Also, excellent use to camera angles and spotlighting the bolts. Great video
Thank you so very much for your amazing video. You do an absolutely brilliant job of explaining the steps involved and the tools required for the repair. With your guidance, I was able to change the front rotors and brake pads on my 2007 Cobalt in 40 minutes. I know this video is years old, but I wanted you to know it's still very valuable. Your knack for explaining and teaching should be on display in more videos. I see you have a video on changing the front struts on my car too. Off to the parts shop!
Remember, when you go with ceramic pads, the heat allowance in the pads may exceed the heat allowance in the metal rotor, causing more wear on the rotor than the pads. When this happens, the HHR tends to develope a shimmy in the front end and steering wheel (warped rotors), and then you will have to replace the rotors before the pads. I have done this with my 2006 HHR over several brake replacements, so keep that in mind when going with ceramic pads. If you stick with metallic pads, the pads will wear before the rotors, which is commonly wanted so that you avoid the costs of always having to replace the rotors before the pads.
MrBossHoggAOL. I think I have this issue now. I just bought a hhr ss last week, when applying the brakes at a higher speed it starts to shake back and forth bad. I read the previous owners notes and seen he had a issues with rotors from auto zone the needed replaced in one year. He used ceramic pads both times. Now its my turn to get them right.
Tha ks
MrBossHoggAOL ,Thank you sir for your very helpful tip I am defiantly not buying ceramic pads thank you very much from me and my family and our wallets GOD bless you and your family Have a merry Christmas - Kris from Texas
I believe ceramic pads are OEM, so you are saying you know more than the Manufacturer, you must be a genius. I am replacing pads today, the old are original with 74,000 miles on the car (worn out). And before you wonder, they car is used in suburban type driving mostly, not much freeway. I have had no rotor issues. I will be replacing with ceramic (since that is how the car came from the factory). Using non-ceramic brake pads will result in you replacing your brake pads A LOT more often.
I’m doing this same job in 15 degrees northern Michigan. 2nd off someone called you the bob Ross of cars and I think it’s awesome. Subbed.
Great video, thanks for taking the time to show us the job in a very simple way, very well done!
You deserve more subs. Through, foresight, explained, and shown. Clear video quality, good sound balancing, no "umm Ahh errr"s. Subbed.
Thank you!!! I now feel confident I can replace my own brakes and rotors :-)
Great video never changed brakes before but had no problems at all watching this video and making it happen thanks a lot
Thank you for this video. As soon as it warms up outside my son and I are going to replace the brakes and rotors on my HHR
This is the best. Clear explanation, great presentation skills, the best!! Thank you very much for making this video.
Excellent DIY video and very well explained in an even succinct fashion, well done.
Hey wanted to thank you for such a great and helpful video! The easy step by step way to proceed was very helpful.
I am indeed a beginner to brakes. And needed this to be sure of my work. Thank you sir.
Man, you are a professional.Thank you for this video. The best ever, so detailed and precise.
Boy what a great video. I only wish other would follow his example. I have the confidence to do this job
thanks so much for your efforts
Thanks for the great video! Thanks to you I changed brakes and rotors in less than an hour. Took longer to jack it up than it did to change everything!
Just wish you had a video on changing bearings, that is next project.
Thank You for putting together this great tutorial. It helped tremendously!
Very thorough and helpful video, a big thank you along with a hat tip for taking the time to do this.
Just did my brakes with this video. Thanks for the help!
excellent video, thanks for taking the time to show us.
Excellent, step by step tutorial video . Thank you Sir . It helped a lot.
“Make sure these are as clean as they deserve to be.”
You’re like the Bob Ross of mechanics.
Really great job. attention to details, editing , great
Great video. Gotta do this job today and you made it look easy.
Thank you I just replaced my rotors with your help. 😊
Great Video, ready to change my pads today! Very informative!!
Thanks for this video. just did my breaks and rotors.
Sir, this was informative and straight forward, thank you and you got another subscriber!
Perfect tutorial! Thank you.
Great Video ! This is exactly what i was looking for. Thank you
Thanks for your video . Very easy to follow!!
EXCELLENT video, Well done my friend!!!
Excellent video. Thanks for making.
Thank you veeeeeeeeeeeery much i change my rotors and my pads thanks to you, keep going!!!
..very nice presentation!
👍 good advice. New Discs will arrive next wed. Looking forward to a smooth operation for my both left hands😂.
This was a great beginning job for me, I was able to save $125.00! Definitely worth a comment. Stay positive bro!
Really great video! Great explanations!
wow, thanks. I got it done. I had the laptop out in my garage, replaying portions. Thanks again
Excellent work
One tip. I have seen numerous videos where a person puts a c clamp or other clamp directly on or inside the piston. Do take a flat bar or the old pad and press against it instead. It wont cock the piston by unequal pressure. Also, in some applications fiber/organic pistons have been used. If the piston does have a weak spot or thinner material the caliper piston can be chipped, cracked, or broken.
great step by step. thanks for the video
Excellent video, thank you!
Great video 👍
Great instructions. Got it done in an 1hr. Thank you
So, you didn't go to a shop and pay them 2hrs of labor, north of $150? Just got a quote, because I live in an apt. Welp, I'm doing it myself tomorrow right in the parking garage, because screw paying $300 for the job when I can get away with $95 in parts.
Perfect tutorial, thanks for posting. 👍👍👍
Great video! Done VERY well 🚘🚘
Excellent job
Your videos are very good.
Thank you very much for this awesome video.
This is perfect for beginners like me thank you!
Awesome video! Thank you!
Best video by far
great video, congratulations.
Very professional video! Hat is tipped
Great video. One thing that happened to me a few years ago; I was replacing the brakes on my 99 Buick Park Ave. And like you I would just push the piston in forcing the fluid back to the reservoir. After that I had problems with the ABS. After talking to a technician I know at the GM dealer, he told me to never push fluid back on cars with ABS. Any amount of contamination from the calipers will end up in the ABS unit. I had to flush my entire system to get it working again. Now I always open the bleeder when I push them back. And if you close it while fluid is still coming out you will not have to bleed the system.
This guy needs to flush his lines anyway. Did you see how dark the fluid was? New/good fluid is clear.
Yep you have to do that with abs and I’m surprised with a 2009 hhr didn’t have it ? It might be a ls model with 2.2
Awesome, man!!! Subscribed!
Great presentation
Beautiful video explained .. 👏🏼👏🏼👏🏼👏🏼
Thank you for the detailed video incase I have to change my own brakes. The only thing is I DON’T trust those hand jacks on the front end of cars as they tend to bend and fail. So I’m going to invest in a floor jack to do this type of job if need be. Thanks again.
I love your video!!! So very detailed I feel confidence with doing my own brakes. You are awesome at providing instructions. Do you have a video for the rear brakes??? Thank you.
Thanks for a great vid
Excellent job Thanks
excellent tutorial
Well done bro! Thanks so much!
Good instructor!
Thank you so much brother for sharing your knowledge and taking your time out to help others out it is so selfless and I thank you for that and your help GOD and JESUS will bless you for your kindness GOD Bless from Texas- Kris
Great video
This really help me alot
This video is so well made that I wonder the author may have a background in Instructional Design.
GOOD VIDEO, THANK YOU
Well done!