Burnishing Leather Edges

Вставка
- Опубліковано 3 жов 2024
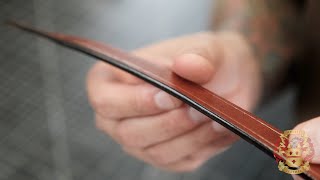
- This is a quick video showing how I burnish the edges on my leather products - at least as of late 2015.
► PATTERNS: www.adamsleath...
► IN STOCK www.adamsleath...
► PATREON: / adamsleatherworks
► FOLLOW: / adamsleatherworks
► TOOLS & GEAR (affiliate links)
Air Brush - Badger 150 Airbrush: amzn.to/2PrSnnB
Air Compressor - Senco PC1010 1-Gallon Air Compressor: amzn.to/2BCN5gO
Bone Folder: amzn.to/2Wdbbbx
Brass Maker Stamps: www.leathersta...
Burnishing Gum (Gum Tragacanth): amzn.to/2JmeRT3
Burnishing Gum (Tokonole): amzn.to/2WgkY0f
Cardstock: amzn.to/36ycaqY
Cocobolo Burnisher: www.proedgebur...
Contact Cement (Barge): amzn.to/2tCPiIs
Contact Cement (Fiebling's - Non Toxic): amzn.to/2VRTdv8
Contact Cement (Weldwood - this is what I use): amzn.to/39L2883
Cutting Mat: amzn.to/2QPgv2q
Dye: amzn.to/2Fmk2zZ
Edger (C.S. Osborne #125 Size 3): amzn.to/3an2OiU
Edger (Weaver Size 0 = 1/16"): amzn.to/2pRobXU
Fiskars Rotary Cutter: amzn.to/2QRIWg3
How To Make Holsters, by Al Stohlman: amzn.to/2pfsTPt
Punching Pad: amzn.to/2VuYjyJ
Roughing Tool: amzn.to/2KkYPZL
Round Knife: amzn.to/32V7ycR
Scratch Awl (Tandy): amzn.to/2FrR9m0
Scratch Awl (Kobalt): amzn.to/2ZTW48J
Sewing Needles: amzn.to/2xPrJyf
Snap Press: Pres-N-Snap www.rochfordsup...
Stitching Chisels: amzn.to/36044rr
Stitching Pony: DreamFactory www.etsy.com/s...
Straight Edge Ruler: amzn.to/2KkYPZL
Sewing Machine: leathermachine...
Tandy Leather Craftool Adjustable Creaser: amzn.to/2MLgcoq
Vacuum Press: www.adamsleath...
Wood Slicker: amzn.to/3cFiHTc
Wool Daubers: amzn.to/2FoT0b5
► LEATHER SUPPLIERS
Wickett & Craig - I typically order their "Tooling/Holster/Carving" vegetable tanned leather. I purchase their "Standard" grade, and I request that they split it down from a thicker hide so the back is as clean as possible. I normally order 7-8 ounce for holsters, 3-4 ounce if I'm lining a holster (I build the whole thing out of 3-4 ounce), and either 3-4 or 4-5 ounce for wallets, journal covers, etc... They will allow you to purchase individual hides
Herman Oak - While I love the leather I've gotten from Wickett & Craig, I prefer the warmer coloring of natural Herman Oak. Unfortunately, H.O. requires you to buy leather in bulk from the tannery, and buying from distributors can be hit & miss. Springfield Leather sells "Herman Oak Premium Belt Bend", so I’ve been using this lately.
The Leather Guy - I don't have a lot of experience with this leather, but the "Artisan's Choice" leather I've used has been very nice. The coloration is similar to Wickett & Craig. The thing I really like about The Leather Guy's website is that nearly every single hide shown on their site is a listing for the actual hide you'll be buying, complete with photos and a description of blemishes for that particular hide. Very cool that they do that!
District Leather - I've never personally ordered from them, but I've heard good things about their leather.
Acadia Leather - I've never purchased from here either, but I've also heard good things about their leather.
Horween Leather - At the risk of sounding repetitive, here's another I've never ordered from, but their leather is very well known.
Weaver Leathercraft - Most of what I order from weaver is buckles and tools, but they also sell leather.
► VIDEO EQUIPMENT (affiliate links)
Camera - Canon 60D: amzn.to/33Uzldg
Lens - Canon EF-S 10-18mm f/4.5-5.6 IS STM Lens: amzn.to/32X2R1O
Lens - Sigma 17-50 f/2.8 EX DC OS HSM FLD Lens: amzn.to/3at3Vxm
Lens - Sigma 17-70mm F2.8-4 Contemporary DC Macro OS HSM Lens: amzn.to/2VtwXsF
Tripod - 62": amzn.to/362WOuP
Tripod - Travel Size: amzn.to/2Vt14R5
Tripod - Spare Release Plate Ball Head: amzn.to/3byQmhC
Portable SSD: amzn.to/3btaZvv


You are the first person to simply and quickly demistify the secrets of a perfect burnished edge. Everyone uses different steps but your video shows why each step is not to be skipped! Thank you!
Do you mind me asking what you have your ProEdgeBurnisher attached to?
Josiah Reed thanks for the kind words. I should mention the sanding pretty much went out the window when I bought a proper edger that makes clean cuts in one pass. I mount my burnisher and n my bench-top drill press.
Your use of the sharpie taught me something cool! When you say edger, do you mean an edge beveler? Do you have a fancy drill press or can I buy an 80 dollar 5 speed one for this? Hard to imagine spending 400 on a drill press only for burnishing. haha
Josiah Reed Yep, edge beveler is what I was referring to. My drill press is an el-cheapo. I don't have a lot of room in my 2-car garage since it serves quadruple duty (leather workshop, wood shop, storage, and enough parking for one car if a hail storm rolls through). I needed something lightweight that can move around from bench to bench, so the little bench-top drill press is perfect.
At first I was thinking some of this was a little overkill, but then I saw the finish and it was seamless and flawless. Awesome work and its nice to see such attention to detail. Thank you.
You almost lost me at the sharpie, turned out really nice, I'm glad I finished watching.
Thanks for watching! Sharpie may not be for everyone, but it works for my purposes. There is a refillable dye pen that does the same thing, though I've never tried one. I did, however, try refilling a sharpie with Fiebing's Pro Oil dye, and it resulted in an enormous mess... Perhaps the materials are different between the two.
What is the purpose of using the sharpie? Wouldn't just using the oil dye later on do the same thing?
@DieselsWorkshop99 Thanks, that makes sense!
Same here Matt, Sharpie = Pretty ghetto. Get some proper leather dye from Angelus or Fiebings.
@@HillCountryCodger you mean like at 3:21
You and Chuck Dorsett may be the best holster/general technique instructors on UA-cam.
Excellent job ! I have watched a lot of leatherworking videos and have never seen such a great tutorial on burnishing. Subscribed.
seriously impressive start to finish, I was shocked how clean you got that edge.
Best burnishing video on UA-cam
Beautiful, I’ve seen nice edging before, but this was beyond exceptional. Thank you for sharing.
Thank you! I appreciate the compliments, especially about the editing! This one was filmed and edited entirely with my phone. :)
Thanks a lot! Short, simple and on the spot!
Thanks, I appreciate it!
Oh my thank makes this video. It my first time doing leather and this help me.
This is a great vid, i've incorporated your techniques into how i do my edging. I tried the sharpie technique and it works great, perfect dyed edge.
Can you explain the sharpie for me?
My heart skipped a beat when the sharpie came out.
LOL, I don’t use a sharpie anymore. Now I use the refillable dye markers that I fill with Fiebings dye.
Thank you for this!
Very creative, very professional.
Thanks for watching!
I burnished raw edges of a leather covered Bible with coconut oil. Made the edges darker with a subtle sheen.
WOW, just wow!
Lovely work, and looking forward to trying out the Sharpie technique, great idea. Thanks.
The cool thing about the sharpie is that it stops fiebings dyes from bleeding over the edges. You can use it to outline areas in backgrounds for tooled pieces before filling in with dye as well, and it won't bleed past the marker. This is definitely one of my favorite "secrets" in leathercraft.
ty
Dayum! That’s some fine work!
Very nice results!
That's glass baby!
Excuse me, I'm new to leather crafting. After i saw your video, i have a question. Is that really plain water you're using to dampen the edge and the surface? Because it looks black..
And is it realy okay, to wet your leather, like the way you show at your video?
Thanks
its the die on the sandpaper @Novan Wahyu
Thanks for this video!
I would've assumed wetting and then applying paraffin/beeswax would trap the moisture in and make problems but you're the pro.
Would you say with that mix there's no need for the Gum/Asian alternative?
The leather is porous enough that any moisture added to the edge can easily migrate through the leather and evaporate. Adding moisture to the edge prior to the wax allows the edge to be rounded/shaped more easily with the burnisher.
If you are using gum, you don't need wax. If you are using wax, you don't need gum. A lot of people don't like gum because it resists dye, and can even resist oil penetration. Wax can too, but it's much easier to control the application.
Thanks for the lesson and well done.
I am using genuine leather 1 oz and and my leather is not as stiff and the edger only cuts in the leather on the front.
1 WEEK later..................still burnishing...................
邊油處理的真完美, 謝謝讓我長知識
Thanks for the video! Super nice job
100% perfect good job and thank you
Thank you so much for a great tutorial without a bunch of talk. I am just now trying to teach myself about the steps of working with leather so I have 2 questions. Why do you use the Sharpie on the edge? What is it you are using to rub on the edge after applying the wax/paraffin? Thank you.
If you ask 10 different people how they burnish their edges (or any particular step of any part of leather working), you'll probably get 12 different answers. I say that to encourage you to experiment with multiple techniques, then find what works for you and your workflow and know there's room to wander to either side of the line a bit.
I used the sharpie for a while to help with that sharp definition between the front/back face and the edge. Then I came back with Fiebings Pro Oil dye to dye the majority of the edge black. The sharpie just helped with that very small edge transition. I later learned that there's a difference between "parmanent" and "archival", and sharpies are not archival, meaning the black from the sharpie can change color or fade over time. They're solvent based. But guess what else is solvent based? If you guessed alcohol based dyes (like Fiebing's Pro Oil dyes), then you guessed right! What's the difference? I don't have a clue, but I just found it interesting. :-)
Do I still use sharpies? Only on spots that won't take dye for some reason.
I'm not sure what you're referring to with your last question, but at 4:30, I'm rubbing the edge with a canvas cloth.
Thank you for watching, and I'm glad you enjoyed the video!
you're the best for this video.. I think I love you
Thanks for watching! :)
Thanks. very helpful. And l loved the final resul.
Hi
I just purchased your Glock 23 Avenger pattern...looking forward to starting. My very first project.
+duenge Awesome, thanks for your business! Please feel free to contact me via my website if you have any questions along the way.
AWESOME VIDEO !!!
Highly Skilled Beautiful Craftsmanship! Why the Sharpie; and was that Edge Coat you applied afterwards?
Thanks A Million!
Thanks! I use the sharpie to define the edge. It's not impossible, but it can be very difficult to brush dye on with a wool dauber while maintaining a straight edge. Even if you burn away the frizzies, it seems inevitable that stray wool fibers will pop out and paint tiny hairlines of dye in places you don't want it. The sharpie is much easier to control, and permanent. Penetration isn't very deep, which is why I come back and dye the edge with dye. There are a couple companies that have made dye applicator pens (that look and function exactly like permanent markers), but I've never purchased one. I just buy the really large Sharpie markers in bulk. To answer your second question, I was applying Fiebings Pro Oil dye, not Edge Kote. I've only used Edge Kote once on a personal project, and didn't really like it.
Your procedure, techniques & skills are commendable.
I appreciate You IMMENSELY for sharing Eric Adams (Same last name as Mine)😊.
Thanks A Million & Perpetual Success!
~Add Love!™👑
Does the sharpie trick only work with dark colours? I guess if you're adding tan to the edges the sharpie will show through. Also I guess it only works with oil dyes?
Ian Alexander I only dye my edges black. If your edges are dyed the same color as the rest of the leather, the sharpie trick is unnecessary. If you dyed them brown, you'd have to test to see if the brown sharpie is a close enough color to the dye color. Sharpie can be applied over any type of dye. Even "oil" dyes are still spirit based, just like the sharpie.
Very nice video. Thanks
Greetings and congratulations this refillable ink pen which ink you used to own for edge dissolved in water or alcohol, grateful.
Nice! thanks for the informative video.
Why sand in just one direction?
Great video! Thanks! I was wondering if I can use that oil dye to fix my cracked bag handle edge, will it conceal the crack and is it waterproof? Thx a lot!
Best video on edge finishing. The beeswax and paraffin, is it general paraffin wax? Thanks from the UK.
Thanks! I think last time I just cut up an old white candle, non scented. I just made a new one and used a block I bought on Amazon. Premium candle wax from Country Lane Candle Supplies. Seems to work great.
Wow!! Very Nice.
You make so much Beautiful things ,works of art..Eric i have a should bag made of the same leather as the top of the sandal in your opening of this video.it is untreated,it looks dry and afraid of spotting if out in the light rain.could you tell me how to treat it.thank you very much.
+drohegda Thanks! This is vegetable tanned leather. I usually oil it with neetsfoot oil, then apply a heavy coat of Fiebing's Acrylic Resolene for water proofing. That being said, for your bag you probably want to use something like Obenauf’s Leather Oil, or Chamberlain's Leather Milk Formula number 3.
thank you.Eric Adams
great videos!
Hi Eric, I love your videos. I just ordered my cocobolo hand tool and very excited to start using them. Just a few questions:
- Where can I get canvas cloths, I don't think they sell at Tandy
- Where can I get a drill machine
- I noticed you were burnishing the edges with saddle soap prior to applying dye, however Richard Loy provided different instruction on his website. What is the reasoning behind it and what works best?
+Peter Trang Hi Peter - I think I bought my canvas pieces from Springfield. But you can probably find some at your local hobby store, though you might have to buy it by the square yard. I had my wife hem the edges on her sewing machine so they wouldn't fray.
My drill press is just a cheap benchtop model that I got at my local hardware store for around $99 if I remember correctly.
Edges - I like saddle soap because it doesn't block dye from penetrating the edge, unlike Gum Tragacanth. I don't recall what Richard suggested, but I'm sure there's nothing wrong with his technique. On my last couple batches of holsters, I simply dampened the edges with water, sanded smooth with 400 grit, then dyed my edges, then burnished with beeswax/paraffin on the drill press. Edges came out just as good as any others I've done.
+Eric Adams thanks for the quick reply Eric! I was referring to the dyeing order. On Richard's website he explained the need for dyeing before applying the saddle soap. But on your other video you did the contrary, which also turned out great. Have you tried dyeing before applying the saddle soap? How did it turn out?
I think either way is fine. I don't think there's really a right way - many different methods will accomplish the same thing. Yes, I have used saddle soap after dying the edges, and it worked fine. However, I think saddle soap is better applied before dying the edge, for two reasons. (1) It makes the edge a little smoother, which makes the dye go on more smoothly, resulting in less splattering from the tiny wool dauber fibers catching on the leather fibers and flinging tiny drops of dye on your leather, and (2) the saddle soap can pull dye pigment from the leather, which could possibly stain your thread if you're using lighter colored accent threads.
Good job!
Thank you Niko!
Nice Video. What is the purpose of the Sharpie if you dye it anyway after? Keep up nice work. Cheers from Scotland.
Thanks! The sharpie just helps to define the edge of the dye with a nice sharp line. That being said, an actual refillable dye pen is a much more appropriate tool since the sharpie can fade or change color a bit over time.
good video. subbed
Video: "Sand in one direction."
Me: "...Shit. That explains a lot."
LOL - I felt the same way when someone else shared that tip with me years ago. Thanks for watching!
what is with the marker? can u tell me the reason? this is a great video anyway, ive been using oil dye for edges too, they work better than the edge kote
+Kenneth Halianto The sharpie is to cut in the dye edge. It gives a nice, clean, sharp edge dye transition. Then I go back and dye the rest of the edge with a dauber. They make dye applicator pens that do the same thing, but the sharpie works for me and I can buy them at the store in bulk packaging.
+Eric Adams transition? So it is some kind of pre dyeing edge before the dauber? I came from asia, southeast asia, is there any spesific kind or type or nicknamed of marker that i can use to ask people over here, i bet they wouldnt know what sharpie is.
Thankyou
+Kenneth Halianto Transition - the line between the dye on the front of the leather and the edge of the leather. In my case, Saddle Tan on the front, and Black on the edges. The "Sharpie" (a brand of permanent marker) helps to get a nice, crisp edge. Here is a similar product that does the same thing, and you can refill them.
angelusdirect.com/products/dye-pen-applicators
And another.
www.tandyleather.com/en/category/refillable-dye-pens
Try this for Sharpie.
www.sharpie.com/SharpieLandingView?locale=n
what if you have a thin piece of leather that is not stiff and too soft to use the edge bevel ?
That makes it a lot more difficult. Your edger has to be really sharp and polished. It might help if you slightly dampen the edge a bit. Otherwise, I would just apply gum tragacanth to the edge, place the piece on my granite slab, then rub a piece of canvas over the edge, using mainly my fingernails to apply pressure only (or mostly) to the edge.
This is somehow one of the most informative videos on burnishing edges while also being one of the shortest videos. Super concise and super helpful! One question thought: What was the sharpie for?!
Thanks! The sharpie is to cut in the dye edge. It gives a nice, clean, sharp edge dye transition. Then I go back and dye the rest of the edge with a dauber. They make dye applicator pens that do the same thing, but the sharpie works for me.
Why sharpie and then dye? Sharpies aren't archival quality and will turn strange colors (green, yellow, brown) after some time
Admiral Wolverine Lightningbolt the sharpie is just to cut in the sharp edge. I go back over it with dye, staying about 1/16" to 1/32" away from the edge.
Thanks so much
Oh you are the best
exelente final, limpio, fino
Why use the sharpie and not just stain after sanding?
The sharpie is easy to control and doesn't have random strings that tend to pop up like traditional daubers tend to exhibit from time to time, potentially painting hairlines of dye in areas you don't want dyed. There are refillable dye pens that function just like a sharpie, but use actual leather dye. Same principle, but probably better than a sharpie, provided they're not to messy. I've not tried one yet. This method works fine for me, but I might try the refillable pens at some point.
Eric Adamc s
im not sure about using A MARKER FOR THIS...not a good choice to use marker on something so fine
+Ella Marie Have you tried it? I only use it to cut in the sharp edge. Then I go back over it to fill in the rest of the edge with dye. Not really any different than the Angelus Dyeliner refillable leather dye pens.
Oh ok...thank you so very much for explaining that. no i have not used it but will give it a shot. Your piece is so beautiful, you are very skilled and talented, I simply love what you did there. I am sorry if i sounded harsh in my comment, i never meant for it. I will look into the Angelus Dyeliner, but i have used Sharpie pens for many art drawings and painting and I know they DO NOT RUN...they are safe and the outcome is great. I wish you much success in all you do. Excellent. thank you!!!
+Ella Marie No worries - I appreciate the kind words. I was reluctant to use a sharpie at first too. It doesn't penetrate very deep, but it doesn't take very many times of messing up the edge because the dauber dripped, or got too far over the edge, or the fuzzies (that I burned off, but it's impossible to get it perfectly smooth) painted tiny hair lines on the front or back faces, before realizing there has to be an easier method to cut in nice edges. Maybe not better, but certainly easier.
Hmmm well it sounds good and you definitely know what you're doing. I wonder what the perfect way to burnish the edges would be without purchasing a machine. I'm trying to set up a small leather studio in my home, but I don't have the cash to buy the machines. And truly i just want to start some simple projects and bracelets, belts, leather bound notebooks, wallets, custom work etc. But i want the finished product to be very very clean---> Like the look of factory made. I think my desire is unrealistic though. I am working on Sheridan Style tooling too and I have been looking at many videos lately and have found such excellent instruction. I love working with leather, didn't know i liked it so much. I know i need a sewing machine and a leather polisher but a burnishing machine would be Excellent..but i know that this craft can be done entirely by hand but for selling purposes machines cut time etc. Well LOL....you know what i mean. Thank you so much for your time. Really appreciate it.
A cheap dremel tool and a burnisher made for it will do wonders and is more versatile than a stationary machine. I'm sure Eric has one in his collection of tools.
What is the purpose for the paraffin?
The paraffin helps to polish the edge and 'glue' down the edge fibers. Some people only use paraffin and avoid beeswax entirely. Others just use beeswax, or some other special edge burnishing mixture. Here's a great article on burnishing in case you haven't seen it. leatherworker.net/edging.htm
Eric Adams Thank you.
How did you get the leather that tan colour? Is it just dye? I take it there is no coating as the leather watts easily.
Chuck Norris, the tan color is several coats of Fiebings Pro Oil "Saddle Tan", applied with an airbrush.
Chuck Norris oh yeah, the leather has no sealers on it yet at this point in the process.
Thanks Eric! I have a pair of Red Wing Beckman 9016 that I had to strip because of a stain. Do you think I will need to dye the leather again? Or just apply some finish to the leather? Thanks!
Sorry, I went out of town and completely forgot to respond. What did you use to strip the leather? Is the color completely gone, or did the oils just get removed from the leather and it looks lighter and dry looking? I'd start with the care guides on the Red Wing Heritage website. www.redwingheritage.com/us/USD/care-products#category=care-guides
Eric Adams hi Eric! Yes, most of the dye has gone, i used some Fiebing's deglaze, the leather is almost back to the original veg tan, russet look. I looked on the red wing site and the Beckmann care guide, but it suggests using a dark brown balm, which is a lot darker than the original colour. I have a few Fiebing's dyes but non of them really seem close, I think the British tan is pretty close, I think a coat of that then the carnauba wax and then some resolene should do it, what do you think?
bravo!!!!!!!!!
Beauty ;)
Ty
Interesting
Thanks for watching!
これは、何かしら?
감사합니다
환영합니다. 지켜봐 줘서 고마워!
Как же много лишних движений
Nice.
wow Amazing Amazing... 👌
Thank you!
please answer my question down below
все круто. только зачем мочить изделие ?! и зачем мочить изделие целиком? в этом нет необходимости, если это кожа растительного дубления, то нужно намочить всего лишь торцы водой и потом пройтись сликером.
+Антон Шаповалов Я смачивать кожу забивать швы плоские. Тогда я округлить по краям и полировать их. Забиванию стежки плоским после приработки края просто портит края так я сгладить швы первого.
+Eric Adams I don't get it, sorry. Can you write in English, please? Then I'll understand
Антон Шаповалов Sorry, your post was in Russian so I used Google Translate to type a response. I like to hammer my stitches flat, which works best when the leather is damp. So, I go ahead and dampen the entire piece to do both at the same time. Dampening the whole thing isn't necessary, it's just part of my workflow.
It's ok bro, I used to work with leather and I haven't seen that way of making edges, that's why I asked. Now I got it. Thanks!
Антон Шаповалов это шо было я не понял???
complete overkill!
I looked at your channel, but couldn't find a video showing your technique...
A sharpie bro? Really?
LOL, at the time, I didn’t realize the difference between Permanent and Archival. Not sure how long it takes before the Sharpie coloring begins to change, but I’m sure it’s affected by environmental conditions and sun exposure. But there are refillable dye pens out there - just imagine I was using one of those. :)