WTF am I doing with my life, watching you soldering a clock kit in real time? Your videos are strangely addictive and interesting. I can't stop watching, no matter what you're talking about or doing...
I had to.... bought three of these and put one together this morning - powered up first time - I'll be building the other two with my son. Much more educational than video games and with the exception of the solder fumes likely healthier too. Thanks again Clive!
I bought a few of these kits (one for myself and several to give away) the christmas before last - finally got around to making mine and everything worked first go - miracle! Thanks for the tutorial Clive, I would never have worked out the chinglish "instructions"
@1FireyPheonix totally understandable. :) it's easy enough to mix them up because they contain what the Chinese call Han zi, and the Japanese call kanji (hear the similarity?) ---- warning TL;DR rant approaching --- they literally are the same characters often times with a similar or identical meaning. Hence numbers. The only thing that changed, just like had happened across mainland China for hundreds of years before, the sounds that fit to the characters changed. This is also why Japanese kanji have what's known as an On and Kun reading, giving two pronunciations for a character. One the original Chinese, and one the Japanese pronunciation. Both Simplified and Traditional Chinese use strictly Han zi and other symbols, whereas Japanese include the kanji, and 2 distinct syllabaries (like alphabets) call Hiragana, and katakana... These two extra sets of characters help Japanese text to stand apart from Chinese. It helps if you know both too I suppose lol :P
20:57 - "...I really haven't a clue that this thing is..." Go ask the college kid that designed it for his electronics class project that this Chinese company ripped it off from...LOL
The film over the display is placed onto the the acrylic front clear section before the display is assembled. Any film covered surface like dvd players TV's and even new mobile phones is placed on after assembly
those little buzzers that seem to be everywhere are actually very simple electromechanical bells with the metal diaphragm also switching the coil.... I took one apart to see why I couldn't get one to sing.
I have used hundreds microcontrollers as rudely as you want and never had a single failure attributable to static. The inputs are protected. The earliest CMOS chips were not, so the lore has spread and still sticks..
It's unfortunate but I was sold some quite rare vintage sound chips embedded in what only LOOKED like dissipative foam, Without a proper static shield bag too. Most of the cheap bits I get come incorrectly packaged. If you need to build something you might come to rely upon I'd suggest other sources. I still love cheap eBay deals though. They keep my hobbies going.
Amazing video as always! Just wondering, you've inspired me to start soldering! Just wondering if you can recommend a half decent sdering iron to choose for a beginner, but one I will feel happy soldering with as I get better! Many thanks and keep up the good work!
Justin Parker A good general purpose iron that will serve you well will be an Antex XS. You can probably get one from Maplin, but I'd recommend using lead based solder which Maplin don't seem to sell. If you can get the iron along with a suitable stand that's even better.
Interesting way of driving the segments. Maybe the MCU can not source enough current to drive the segments directly, but can sink the current to shunt them out?
Total novice here, I had actually ordered two of these so I could bugger up one of them and perhaps make the second one work. The first one didn't work due to my dodgy soldering and that night I saw this video, so today I attempted my second one and finally managed to produce something that doesn't look like a hedgehog and actually works. I think I might change the power supply widget though as I wanted to be able to plug it into a usb connection and so far it goes into a bread board and then into a USB connection which isn't ideal. Clive just sails through these videos, with double joints and a skill that makes my attempts look like a five year old poking things with a big stick. One day.... ;)
Kits like these are perfect for practising soldering though and are cheap! You could use a micro usb breakout board like this www.ebay.co.uk/itm/Female-MICRO-USB-to-DIP-5-Pin-Breakout-board-UK-STOCK-/252737357565?hash=item3ad85206fd:g:ZRAAAOSwjDZYgx05 for your USB connection!
I hope you will do your reviews on the new kits from radio shack,they have a line of kits for 19.99 .if you haven't already done them. A lot of us buy some of our kits ,from your review or how to videos. Thanks I still trying to find more of your review ,etc.
I got one of these kits to practice and for fun. Mine came packaged much the same but it had a broken SIL. I happily proceeded to assemble it and watch what happened when I powered it up, I was pleasently suprised to get smoke and flashes! Managed to get a full refund too...!
Hey Clive, great video but might you consider making a few videos of making your own basic electric components from raw materials as it could be a little interesting as I have seen it done before by other UA-cam users(e.g small solar cell,basic transistor,capacitor,ultra capacitor...ect.)
Made mine this afternoon and dropped my psu down to 2.75v and seemed to work fine. So I am using 2xAA batteries in a clear case pinched from a £1 set of LEDs. Will see how long it lasts. That buzzer though is excruciatingly loud and annoying so stuck a rubber foot over it. Bliss. Also why is there a sticker over the buzzer which says don't remove until washed? wtf?
I saw this just after I received my own clock kit in the mail. Thanks for doing the video and telling the story about your early days soldering. It makes me feel better as I'm just starting and making all the mistakes in the book. Sigh. Which reminds me... The kit came together easy enough but when I powered on - it kind of glitched. It cycled through the modes A - I properly - but the rest of the display (besides the mode) was dark.. pressing the second button had no effect. Since all the segments lit up momentarily on the start-up - it doesn't seem like a defective display. I'm sure I messed up the assembly somehow. How would one go about debugging this? I eyeballed the components, polarities and all the joints look good. What would you do next? Anyone??
+Bill McCollam Jusy check for tiny solder bridges or joints that aren't quite making. Try metering from the component leads at each end of a track for continuity
+bigclivedotcom Yes... I had a actually found a few mistakes like that and corrected them (i seem to be susceptible to the solder kind of 'ringing' the pad and missing the pin). Anyway - fixing those got me this far - but the rest look really good. Continuity also looks okay. Oh well - if I have to - I guess I will de-solder and start again. Anyway - I really appreciate the vid and the response. Cheers.
+bigclivedotcom Figured it out. Just not sure how to fix. Pin 10 on the IC (GRND) was not making contact. The chip was seated in the socket okay - but the socket somehow isn't in right. When I ground Pin 10 with a separate wire - it works fine.
+Bill McCollam Is the IC pin definitely in the socket? Sometimes the leg folds underneath the chip. It may be worth taking a good look at the solder on that socket pin too.
Big Clive ,I just finished my clock kit ,I followed your video step by step,it seems to work except my buzzer ,I thought I might have reverse it,no it's just like yours,any idea ,I check to make sure no solder touch other pins,also ,I am looking for another soldering pen,my weller is 30 or more years old,what brand is your and where did you buy it.and how many watts. What is our time difference ,I am in California.also thanks for all your help.and your videos are the best.
+Ron Thompson Check the circuit path to the buzzer for solder bridges or dry joints. That includes from the processor pin via the resistor to the transistor and the beeper itself. Also make sure the transistor is in the right way round.
+RecurveNinja The fearmongering is generally profit motivated. I can't think of a single person I know who has suffered ill health as a result of soldering. I'd be more worried about the chemical aroma from an air freshener.
Get a hex dump of the microcontroller's flash and dissasemble the code??? ;) (These days, Maplin just stuff everything into an ordinary polythene bag.)
Regarding "rising clamp terminals" - do they have another name? I just looked on eBay to get some (I'd not heard of them before - I've only used those crappy terminals you got in your kit), and there are a few, but really not many and every single one of them was from Maplin. Where are the Chinese cheapies?? So I'm wondering if they have another name I should search for? "screw terminal" just seems to find the basic cheap ones that you got here in your kit.
+TheBloke The rising clamp terminals are not cheap, so I don't see them much on eBay. They might not even describe them as rising clamp even if they were. The word "cage" is sometimes used, but that's still no guarantee of getting the better terminals.
+bigclivedotcom Awesome, thanks for the fast reply Clive! The Maplin ones are not unaffordable, at least when used sparingly for specific jobs, so I guess I'll just get a few of those. Actually rather than using eBay maybe I can find them in my local store, because they charge £2 for shipping which doubles the price in some cases. But I'll have a look for "cage" terminals as well before I buy. Thanks again!
Old video,I built two fun little kit ,fyi Aliexspress has that kit for under two dollars and the have a lot of di y electronic kits way cheaper then eBay
What's the best way to power this? I tried 2 CR2023's at 6V, and it didn't work. But a USB wall wart and cable at 5V worked perfectly. Anyway to make batteries work?
At 50 mA, it would drain a CR2023 in about 4 hours even if it would work. If you must have battery, I would suggest AA or C cells, and definitely rechargables because even those wouldn't last longer than a few days. But it would be in the realm of possible, just not very practical.
bigclivedotcom The other problem I used to have was holding the component in place while the solder solidified. It was unbearably painful fir my poor sensitive teenage hands. I can now hold the components, but always use my beautiful Bernstein ball joint vice bit.ly/2hStUcB It's so great to use that I look for excuses!
Me when I get a diy kit: *meticulously follows the directions and circuit diagram, suffering through any chinglish in order to be as exact as possible* Clive: "Let's just mash everything in where it makes sense to." I wish I was this good at electronics.
The only way to get good is to study, and build these kits, they teach you a lot. Also get an arduion or two and play with them. Examine the example codes and you can easily learn the short version of C and C+ that they run on. Get some ESP8266's as well to play with the internet of things, great fun and the lua code is very much like the Arduino codes, in fact now you can program the ESP with the Arduino programer with just a bit of work.
Nice assembly technique! I like how you manage to hold the board and the component in place in one hand along with the solder, and the iron in the other. I have to resort to a set of helping hands!
about 17:30 in when you went looking for your pin aligning tool I was so hoping you would produce a hammer.. as always an informative way to kill some time
A company that sells wigs and random electronic components? What an oddly specific combination. By that logic, I could make millions selling cricket larvae and assorted pharmaceutical supplies.
Tom Wilkinson I doubt it - just for giggles I built a "bomb" timer like in the movies and the uC made the silly "wheres that damn hero when we need him/her" chirping sound for each second the clock counted down. However in a lot of TV shows and movies I've seen the common garden variety kitchen timer with two rows of number buttons and a pair of control buttons made by micronta exhibit this behaviour and I actually have one in the kitchen. It has no beep function except when the time expires, so the each second chirp had to have been put into the film in post
I got a rather nifty looking large digital desk clock in my office (we all did) It had date and timer on it too. Quite impressive I thought. I did notice that after a couple of months the date was losing days... when i cycled through the dates i found that 30 days hath September, April, June, November, January, March, May, July, August, October, December - except February which had 28 days.... Genius! Then the batteries all died one by one !
lol I am building the same kit with you...it makes me smile....second attempt!!! I have built much more complex kits with no issues...lets see if round 2 works...love your videos clive!! P.S the drink tonight is Rum and coke :)
Hi Clive, After watching this video, I went out and got this kit to solder as my first practice. It was great following along! Is it bad that I am learning to solder "Clive-style" holding the solder and PCB in one hand?
Built a couple of those clock kits. The one like yours worked till I inadvertently hooked it up to my 12 volt power bank instead of the 5. The other had soldering iron problems. You see, I spend most of my time in a lift recliner because of my body condition, at any rate, I thought it would be a smart idea to buy one of those little cheap USB soldering irons. They do work GREAT for just tinning a lead or something but building a kit? Not so much. Seems they just keep heating up and suddenly the traces and pads are seperating and your kit is pretty much garbage. Ruined four or five different kits with that before it became a little used item. I finally bought a cheap mains type with thermostat on the handle taking the tips like the ones you use. It does a nice job if you are careful but I have yet to buy any more kits. I do have decor that I built up such as little Christmas trees and heart we put on the dash of our Motor Home while traveling and when we spend the winter months in Arizona to keep away from the dreaded snow of North and South Dakota.
Who the hell knows, some days I just ramble on, and on and on. I once considered myself a writer, even had a few short stories published, one in a magazine, another in a sci-fi anthology, but I gave it up and turned to computers, then to arduinos, then oh well you get the picture, hell I have been a soldier, a cop, a clerk to a district judge, and a carpenter. I have been a wood worker, a painter and a few other things I shan't go into, but the young in our family remember me the most as that uncle who tells the best ghost stories ever.
Clive, chip pin alignment tool - table top and gently lean on the splayed pins until the alignment is achieveed. Been watching your vids for the past two days having found the mother-lode. The Postman is going to be busy end of this month with a cornucopia of bits that I didn't realise that I needed/craved until prompted by you. Keep up the good work. Ian
Got the same one last year as a project for my 15yr old son. Although the crystal died after a week but once replaced it works fine. It is still running. Was so impressed I ordered their battery backed version at £2.10
I just finished this kit and it works fine. Thanks for the video. I will study it to find out how to set the time and alarms. When I do my soldering I always use a small fan to blow the smoke from the hot flux away to one side, so I don't end up breathing too much of it. I'm using 3 penlight cells to power it with about 4.5 Volts, and that seems to be quite sufficient.
just watching randomly through your videos and got here now. AFAIK the capacitors at the quarzoscillator are there to help it start up oscillating. only does not work if they are really off, but often even works without them, solely by copper line capacities...
Not sure if anyone else has said, but the caps across the crystal (calculated by C = 2CL - (CP + CI), where CP + CI can be estimated as 5pF) are the load capacitors and they cause/encourage the oscillation that makes a crystal do it's thing usefully. Wrong value caps, or no caps == no oscillation.
I love that lead/tin solder. It's what I learned on. By the way, here in "the land of the free" (USA), any product that contains lead based solder has to be handled as "hazardous waste" when you want to get rid of it. You see old TV sets abandoned along the road, because you can't just put them in the trash and even most thrift stores won't accept them as donations. I saw a UA-cam video where the cheapest way to dispose of them "legally" is to send them to China or third world countries. Many times they are just dumped on empty or swamp land, tossed in rivers, etc. The lead content of the soil and water is HUGE, but the few bucks that a USA "exporter" will pay goes a long way in an impoverished village.
When learning how to solder at college [C&G] was told not to melt the solder with iron but heat componets/ wire so that it melted the solder. the test to pass exam was to remove chips/ components and refit then it was tested to check it still worked.
When I first watched this, I was wondering, "Why did they bother to include a socket for the IC instead of just putting it directly on the board?" Then I watched Clive solder the thing going right down the rows. That's when the light bulb went on, "Oh, so an inexperienced amateur won't cook the chip while soldering it in place." I'm going to assume, Clive, that you did it this way because you knew you were just soldering the socket, not the actual chip. When my dad taught me to solder, he was adamant about that concept: *Never* solder adjacent pins on an IC one right after another. *Always* solder diagonally opposite pins and, even then, it's a good idea to allow a few seconds cooling time after soldering each pin. When possible, keep a finger flat against the top of the chip while you're working. If it gets too hot to keep your finger on it, it's time to stop and let it cool before proceeding. You might consider adding a caption to your video to point this out. :)
+Greg Wolking On the rare occasion I solder a chip in directly I stagger the soldering on opposing pins and also pause mid soldering to let the chip cool down. A socket is always preferred.
+bigclivedotcom I had figured as much, Clive, as I stated previously. It's quite clear from your videos that you really know your stuff. Thank you, sir, for taking the time to answer my inquiry. I thoroughly enjoy your videos. In particular, I find the calm, measured, "thinking out loud" style of your narration to be a refreshing change from many other "how-to" UA-camrs who seem to think they must become some kind of "character" telling jokes, cracking wise, getting ridiculously upset, and so on. I have often wondered whether you plan what you intend to cover before you start recording or just go completely off-the-cuff every time. If the latter, it _sounds_ like the former, as you're very good at staying on point and not needlessly repeating yourself (AvE comes immediately to mind in that regard). You may count me as a fan, sir, and I applaud your endeavors!
High frequency crystals are terribly bad at timekeeping. That's because for them a "cut type" parameter (how the actual quartz piece was cut from a large crystal) is almost always "AT-cut", and low-frequency crystals are typically "XY-cut". This leads to far better temperature stability for low frequency (and in particular 32768 Hz) crystals, which makes them suitable for use for timekeeping purposes. The next difference is that high frequency crystal physically is a solid quartz block, and "watch" crystal is a "tuning fork" style. This also matters. So this clock won't be accurate, unless they've used some extra-custom crystal. :)
Another fun build by Master Clive! Question asked: "...why use 2 little caps with the crystal"? Answer: You're actually building an oscillator circuit, using a crystal, some capacitors, and the internal circuitry of your microcontroller. If you don't use the caps, your clocking won't work. The values are calculated based on the properties of the crystal, as described in datasheet from Microchip "Crystal Oscillator Basics and Crystal Selection for rfPICTM and PICmicro® Devices" ww1.microchip.com/downloads/en/appnotes/00826a.pdf


"Soldering kits are quite therapeutic" - I totally agree
WTF am I doing with my life, watching you soldering a clock kit in real time? Your videos are strangely addictive and interesting. I can't stop watching, no matter what you're talking about or doing...
youtubkeeper Same idk either why am i watching this
where has the *time* gone
same here, i think it has to do with how expresses himself and relate what he is doing.
He would have been an outstanding high school electronics teacher!!!
Utube us full of these. Auto repair, small engines... it is always therapeutic to watch someone else work. Puts me to sleep. ;-)
Who needs a helping hand? Clive, that is next level soldering, holding the board and the solder in same hand....my hat is doffed to you sir.
"uh oh it looks strongly chineseish" BAHAHAHA
+Oriole Advent i lost it at this point lol
I had to.... bought three of these and put one together this morning - powered up first time - I'll be building the other two with my son. Much more educational than video games and with the exception of the solder fumes likely healthier too. Thanks again Clive!
Scott Warmbier there's nothing wrong with video games you middle aged old sack
Guilty as charged DerpBomb Gaming... All kidding aside he gets a lot from games like Mine Craft and Tereria...
The 30pf capacitors are in series with the xtal; they provide the correct load for the xtal and the necessary phase shift to make the oscillator work.
Not exactly. I was told by an engineer some years ago that those were added to ensure that the oscillator would start reliably.
8'55" solder the middle lead of the transistor then check it's square - what a brilliant idea. Thank you Bigclive.
Big Clive the Bob Ross of Electronics :D could watch your videos all day!
I bought a few of these kits (one for myself and several to give away) the christmas before last - finally got around to making mine and everything worked first go - miracle! Thanks for the tutorial Clive, I would never have worked out the chinglish "instructions"
@1FireyPheonix totally understandable. :) it's easy enough to mix them up because they contain what the Chinese call Han zi, and the Japanese call kanji (hear the similarity?)
---- warning TL;DR rant approaching ---
they literally are the same characters often times with a similar or identical meaning. Hence numbers.
The only thing that changed, just like had happened across mainland China for hundreds of years before, the sounds that fit to the characters changed. This is also why Japanese kanji have what's known as an On and Kun reading, giving two pronunciations for a character. One the original Chinese, and one the Japanese pronunciation.
Both Simplified and Traditional Chinese use strictly Han zi and other symbols, whereas Japanese include the kanji, and 2 distinct syllabaries (like alphabets) call Hiragana, and katakana...
These two extra sets of characters help Japanese text to stand apart from Chinese. It helps if you know both too I suppose lol :P
20:57 - "...I really haven't a clue that this thing is..." Go ask the college kid that designed it for his electronics class project that this Chinese company ripped it off from...LOL
I just desoldered the beeper. Silence is golden
The film over the display is placed onto the the acrylic front clear section before the display is assembled. Any film covered surface like dvd players TV's and even new mobile phones is placed on after assembly
Love the smell of melting solder in the morning :-)
Real solder with lead and tin.
And flux in the core, don forget the flux
those little buzzers that seem to be everywhere are actually very simple electromechanical bells with the metal diaphragm also switching the coil.... I took one apart to see why I couldn't get one to sing.
I really like the settings menu, easy to learn and uses only two buttons.
I have used hundreds microcontrollers as rudely as you want and never had a single failure attributable to static. The inputs are protected. The earliest CMOS chips were not, so the lore has spread and still sticks..
Great Video Clive Very Random But Cool Kit. Keep up the great work. Nick.
That's more than I was expecting, actually.
Impressive number of features for a cheap kit!
It's unfortunate but I was sold some quite rare vintage sound chips embedded in what only LOOKED like dissipative foam, Without a proper static shield bag too. Most of the cheap bits I get come incorrectly packaged. If you need to build something you might come to rely upon I'd suggest other sources.
I still love cheap eBay deals though. They keep my hobbies going.
Amazing video as always! Just wondering, you've inspired me to start soldering! Just wondering if you can recommend a half decent sdering iron to choose for a beginner, but one I will feel happy soldering with as I get better! Many thanks and keep up the good work!
Justin Parker A good general purpose iron that will serve you well will be an Antex XS. You can probably get one from Maplin, but I'd recommend using lead based solder which Maplin don't seem to sell. If you can get the iron along with a suitable stand that's even better.
Interesting way of driving the segments. Maybe the MCU can not source enough current to drive the segments directly, but can sink the current to shunt them out?
Total novice here, I had actually ordered two of these so I could bugger up one of them and perhaps make the second one work. The first one didn't work due to my dodgy soldering and that night I saw this video, so today I attempted my second one and finally managed to produce something that doesn't look like a hedgehog and actually works. I think I might change the power supply widget though as I wanted to be able to plug it into a usb connection and so far it goes into a bread board and then into a USB connection which isn't ideal. Clive just sails through these videos, with double joints and a skill that makes my attempts look like a five year old poking things with a big stick. One day.... ;)
Kits like these are perfect for practising soldering though and are cheap! You could use a micro usb breakout board like this www.ebay.co.uk/itm/Female-MICRO-USB-to-DIP-5-Pin-Breakout-board-UK-STOCK-/252737357565?hash=item3ad85206fd:g:ZRAAAOSwjDZYgx05 for your USB connection!
I hope you will do your reviews on the new kits from radio shack,they have a line of kits for 19.99 .if you haven't already done them. A lot of us buy some of our kits ,from your review or how to videos. Thanks I still trying to find more of your review ,etc.
I got one of these kits to practice and for fun. Mine came packaged much the same but it had a broken SIL. I happily proceeded to assemble it and watch what happened when I powered it up, I was pleasently suprised to get smoke and flashes! Managed to get a full refund too...!
god dammit. i fell asleep watching jacksepticeye and woke up because there was a loud ass beeping. That really is one annoying beep.
That was a very interesting video. I hope you find time to do some more kit builds in the future.
I tend to use long nose pliers when straightening the pins
19:00 I too hate those 'protection leaf' terminals but if they don't screw them down for transport the damn' screws fall out.
Well, this is definitely not a HeathKit project!! Many years ago, I assembled digital bathroom scale from HeathKit and the directions were quite good.
Function C is for the whole hour punctually reporting(beeping).
Hey Clive, great video but might you consider making a few videos of making your own basic electric components from raw materials as it could be a little interesting as I have seen it done before by other UA-cam users(e.g small solar cell,basic transistor,capacitor,ultra capacitor...ect.)
He's got quite a few videos on it and he used to even manufacture stuff for sale etc.Look back about 6-10 months and there should be some.
SouthJerseySound Thanx I will have a look.
I'm not 100% sure I should be watching this. But Iam so there you go
y friend is also a scout leader ,and if you gives us a idea for him ,it might also work for his boy scouts too
thanks anyways for your time Clive.
Love soldering videos!
Made mine this afternoon and dropped my psu down to 2.75v and seemed to work fine. So I am using 2xAA batteries in a clear case pinched from a £1 set of LEDs. Will see how long it lasts. That buzzer though is excruciatingly loud and annoying so stuck a rubber foot over it. Bliss. Also why is there a sticker over the buzzer which says don't remove until washed? wtf?
I'm guessing the MCU is an ATtiny2313? They seem to be the go to for a lot of these kits.
Matthew Harrison (matthehat) AT 89C2051-24PU
bigclivedotcom Ah, an 8051 clone. Makes me wonder if it's based on something a lot older.
Even the beeping from the video was annoying :)
Do you use it for anything or just put into the "bin of many things"?
I saw this just after I received my own clock kit in the mail. Thanks for doing the video and telling the story about your early days soldering. It makes me feel better as I'm just starting and making all the mistakes in the book. Sigh. Which reminds me... The kit came together easy enough but when I powered on - it kind of glitched. It cycled through the modes A - I properly - but the rest of the display (besides the mode) was dark.. pressing the second button had no effect.
Since all the segments lit up momentarily on the start-up - it doesn't seem like a defective display. I'm sure I messed up the assembly somehow. How would one go about debugging this? I eyeballed the components, polarities and all the joints look good. What would you do next? Anyone??
+Bill McCollam Jusy check for tiny solder bridges or joints that aren't quite making. Try metering from the component leads at each end of a track for continuity
+bigclivedotcom Yes... I had a actually found a few mistakes like that and corrected them (i seem to be susceptible to the solder kind of 'ringing' the pad and missing the pin). Anyway - fixing those got me this far - but the rest look really good. Continuity also looks okay.
Oh well - if I have to - I guess I will de-solder and start again. Anyway - I really appreciate the vid and the response. Cheers.
+bigclivedotcom Figured it out. Just not sure how to fix. Pin 10 on the IC (GRND) was not making contact. The chip was seated in the socket okay - but the socket somehow isn't in right. When I ground Pin 10 with a separate wire - it works fine.
+Bill McCollam Is the IC pin definitely in the socket? Sometimes the leg folds underneath the chip. It may be worth taking a good look at the solder on that socket pin too.
Big Clive ,I just finished my clock kit ,I followed your video step by step,it seems to work except my buzzer ,I thought I might have reverse it,no it's just like yours,any idea ,I check to make sure no solder touch other pins,also ,I am looking for another soldering pen,my weller is 30 or more years old,what brand is your and where did you buy it.and how many watts. What is our time difference ,I am in California.also thanks for all your help.and your videos are the best.
+Ron Thompson Check the circuit path to the buzzer for solder bridges or dry joints. That includes from the processor pin via the resistor to the transistor and the beeper itself. Also make sure the transistor is in the right way round.
Thanks you so much ,I let you no if I find the problem,also thanks for your video,it made it easyer.
How would you go about installing a backup battery on this so it will maintain the clock without running the whole device?
3 bells midday.
Regards Tony Henderson
There's quite a lot of fearmongering about lead solder these days, so I was wondering: How enclosed is your workshop? Do you use a fume trap?
+RecurveNinja The fearmongering is generally profit motivated. I can't think of a single person I know who has suffered ill health as a result of soldering. I'd be more worried about the chemical aroma from an air freshener.
Where is the SNOOZE button?
"its not that bad and BEEP and the BEEP"
its hard to watch the video with all the loud beeps
You're right
Just tried this as a first time soldering project, and all i can say is wow what a mess i made of it lol
+aceominous Don't worry about it. Everyone messes up their first kit. (and sometimes more than one)
Get a hex dump of the microcontroller's flash and dissasemble the code??? ;)
(These days, Maplin just stuff everything into an ordinary polythene bag.)
Regarding "rising clamp terminals" - do they have another name? I just looked on eBay to get some (I'd not heard of them before - I've only used those crappy terminals you got in your kit), and there are a few, but really not many and every single one of them was from Maplin. Where are the Chinese cheapies?? So I'm wondering if they have another name I should search for? "screw terminal" just seems to find the basic cheap ones that you got here in your kit.
+TheBloke The rising clamp terminals are not cheap, so I don't see them much on eBay. They might not even describe them as rising clamp even if they were. The word "cage" is sometimes used, but that's still no guarantee of getting the better terminals.
+bigclivedotcom Awesome, thanks for the fast reply Clive! The Maplin ones are not unaffordable, at least when used sparingly for specific jobs, so I guess I'll just get a few of those. Actually rather than using eBay maybe I can find them in my local store, because they charge £2 for shipping which doubles the price in some cases.
But I'll have a look for "cage" terminals as well before I buy. Thanks again!
err... clive... it's a timer for a homemade bomb.
Are you using a Yihua 936 by any chance? Because I have one and yours looks identical.
8786D. Same but with hot air pen.
bigclivedotcom oh ok, thanks
Old video,I built two fun little kit ,fyi Aliexspress has that kit for under two dollars and the have a lot of di y electronic kits way cheaper then eBay
Cmon Clive, add an esp8266 to it, and upgrade the code to the better version off github
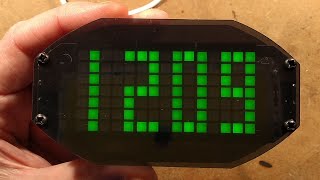
They should've used 12 hours time ^^
How accurate is it on the time?
There's an instruction manual for this kit here www.icstation.com/product_document/Download/1765.pdf
It's a bomb
What is the controller?
I'd like to know where to get those buttons separately.
Tactile switches. Cheap and common from any electronic component supplier.
+bigclivedotcom Ah right. For a second they looked like the harder to find smaller ones in the exact same style. Thanks though!
I've not got that kit near me right now, but I'm pretty sure they were this style.
www.rapidonline.com/miniature-tactile
+bigclivedotcom can you send me the link to buy this LED clock
go to eBay and type in electronic diy kits
What's the best way to power this? I tried 2 CR2023's at 6V, and it didn't work. But a USB wall wart and cable at 5V worked perfectly. Anyway to make batteries work?
It's too power hungry for battery use.
+bigclivedotcom lol
At 50 mA, it would drain a CR2023 in about 4 hours even if it would work. If you must have battery, I would suggest AA or C cells, and definitely rechargables because even those wouldn't last longer than a few days. But it would be in the realm of possible, just not very practical.
Anyone got a schematic for this kit please? Thanks John :)
does anybody know of it is aqurate?
You sir are the Bob Ross of soldering. Please put more kit-building vids up. ;]=
XombyCraft Couldn't have said better myself. A soothing voice, technical knowledge and a good sense of humor. Can't get much better than that.
He’s not the bob Ross of soldering .He’s more a Da Vinci Highly intelligent and amusing. Bob Ross sooooooooo boring
Could this be wired to run on a li-po battery?
I dont think so, you will have to use a verry big lipo. The currentdraw is hight (yes, I also tried batteries).
.... i cant mount components straight even with a pair of helping hands and clive can do everything with his left hand.
So much road ahead
Don't worry, the more you do it the easier it gets.
bigclivedotcom
The other problem I used to have was holding the component in place while the solder solidified. It was unbearably painful fir my poor sensitive teenage hands. I can now hold the components, but always use my beautiful Bernstein ball joint vice bit.ly/2hStUcB It's so great to use that I look for excuses!
"and Clive can do everything with his left hand."
Don't tell his wife that. 😀
@@BedsitBob Not _really_ a worry...
Those parts are protected from ESD using the Shenzhen Damp Air technique. The air in the bag is humid enough to have a dissipative effect. ;)
+Godfrey Poon lol
Lol 😂
Me when I get a diy kit: *meticulously follows the directions and circuit diagram, suffering through any chinglish in order to be as exact as possible*
Clive: "Let's just mash everything in where it makes sense to."
I wish I was this good at electronics.
+Chris Roller You're already on your way to that point. Time to treat yourself to some random Chinese ebay kits.
The only way to get good is to study, and build these kits, they teach you a lot. Also get an arduion or two and play with them. Examine the example codes and you can easily learn the short version of C and C+ that they run on. Get some ESP8266's as well to play with the internet of things, great fun and the lua code is very much like the Arduino codes, in fact now you can program the ESP with the Arduino programer with just a bit of work.
Nice assembly technique! I like how you manage to hold the board and the component in place in one hand along with the solder, and the iron in the other. I have to resort to a set of helping hands!
Quite funny that they used 8 for B and 0 for D where they could have used b and d respectively.
That's what I thought too when I saw it.
about 17:30 in when you went looking for your pin aligning tool I was so hoping you would produce a hammer.. as always an informative way to kill some time
Looks like a bomb...
Only in Texas.
+Bright Spark I think you owe Clive $15m now
+bigclivedotcom this comment wins everything. Edit: Your reply, not spark's comment.
imagine, replacing buzzer with relay and detonator...(thus making sound signal trigger bomb....).then accidently shorting a button...and going kablewi
totally impractical for a bomb
A company that sells wigs and random electronic components? What an oddly specific combination.
By that logic, I could make millions selling cricket larvae and assorted pharmaceutical supplies.
Nah fam making Saab hubcaps and flower seeds is where it's at.
I imagine they live close to both manufacturers
Didn't you get the 4 pounds of C4 and the bag of ball bearings with it? :P
Mark van Werven it came from China, dude...accessories sold separately.
The translations on the manual are priceless though, "place the round bearingballs in cute pattern", I mean, my chinese is worse, but still...
This is the kit they use in movie prop bombs haha
metalmaniacmat nearly, usually in movies they beep each second they countdown, as if no-one can hear or notice them! lol
jusb1066 Pretty sure that's post production :p
Tom Wilkinson I doubt it - just for giggles I built a "bomb" timer like in the movies and the uC made the silly "wheres that damn hero when we need him/her" chirping sound for each second the clock counted down. However in a lot of TV shows and movies I've seen the common garden variety kitchen timer with two rows of number buttons and a pair of control buttons made by micronta exhibit this behaviour and I actually have one in the kitchen. It has no beep function except when the time expires, so the each second chirp had to have been put into the film in post
You'd want to do the sound in post anyway to get a clean recording. Recording sound on location is challenging, the less you have to do it the better.
I got a rather nifty looking large digital desk clock in my office (we all did) It had date and timer on it too. Quite impressive I thought. I did notice that after a couple of months the date was losing days... when i cycled through the dates i found that 30 days hath September, April, June, November, January, March, May, July, August, October, December - except February which had 28 days.... Genius!
Then the batteries all died one by one !
lol I am building the same kit with you...it makes me smile....second attempt!!! I have built much more complex kits with no issues...lets see if round 2 works...love your videos clive!! P.S the drink tonight is Rum and coke :)
Hi Clive,
After watching this video, I went out and got this kit to solder as my first practice. It was great following along! Is it bad that I am learning to solder "Clive-style" holding the solder and PCB in one hand?
Built a couple of those clock kits. The one like yours worked till I inadvertently hooked it up to my 12 volt power bank instead of the 5. The other had soldering iron problems. You see, I spend most of my time in a lift recliner because of my body condition, at any rate, I thought it would be a smart idea to buy one of those little cheap USB soldering irons. They do work GREAT for just tinning a lead or something but building a kit? Not so much. Seems they just keep heating up and suddenly the traces and pads are seperating and your kit is pretty much garbage. Ruined four or five different kits with that before it became a little used item. I finally bought a cheap mains type with thermostat on the handle taking the tips like the ones you use. It does a nice job if you are careful but I have yet to buy any more kits. I do have decor that I built up such as little Christmas trees and heart we put on the dash of our Motor Home while traveling and when we spend the winter months in Arizona to keep away from the dreaded snow of North and South Dakota.
lol what the fuck you on about mate.
Who the hell knows, some days I just ramble on, and on and on. I once considered myself a writer, even had a few short stories published, one in a magazine, another in a sci-fi anthology, but I gave it up and turned to computers, then to arduinos, then oh well you get the picture, hell I have been a soldier, a cop, a clerk to a district judge, and a carpenter. I have been a wood worker, a painter and a few other things I shan't go into, but the young in our family remember me the most as that uncle who tells the best ghost stories ever.
lol
Clive, chip pin alignment tool - table top and gently lean on the splayed pins until the alignment is achieveed.
Been watching your vids for the past two days having found the mother-lode. The Postman is going to be busy end of this month with a cornucopia of bits that I didn't realise that I needed/craved until prompted by you. Keep up the good work.
Ian
+0PAIx I've got a proper "hand exerciser" type pin aligner, but it was hiding when I made the video. Yeah, the postman is here almost every day.
Got the same one last year as a project for my 15yr old son.
Although the crystal died after a week but once replaced it works fine.
It is still running.
Was so impressed I ordered their battery backed version at £2.10
Love watching your video's very therapeutic. Best wishes from Hamilton.
I just finished this kit and it works fine. Thanks for the video. I will study it to find out how to set the time and alarms. When I do my soldering I always use a small fan to blow the smoke from the hot flux away to one side, so I don't end up breathing too much of it. I'm using 3 penlight cells to power it with about 4.5 Volts, and that seems to be quite sufficient.
Did you get invitation from Her Majesty to Buckingham Palace?
+ArrowAxe No. I've not been invited back since I took a dump in her handbag.
Yes, those horrid blue resistors that seem to be coded in varying shades of brown.
cool clock ahmed
I just put one of these together and was about to give up on figuring out how to set it when i found your video. Thank you for the help.
Maybe you should have left the sticker on top of the buzzer after all.
I have never been so amazed by a video that shows how to complete such a simple kit! Keep making these videos!!!
just watching randomly through your videos and got here now.
AFAIK the capacitors at the quarzoscillator are there to help it start up oscillating.
only does not work if they are really off, but often even works without them, solely by copper line capacities...
Not sure if anyone else has said, but the caps across the crystal (calculated by C = 2CL - (CP + CI), where CP + CI can be estimated as 5pF) are the load capacitors and they cause/encourage the oscillation that makes a crystal do it's thing usefully. Wrong value caps, or no caps == no oscillation.
I love that lead/tin solder. It's what I learned on. By the way, here in "the land of the free" (USA), any product that contains lead based solder has to be handled as "hazardous waste" when you want to get rid of it. You see old TV sets abandoned along the road, because you can't just put them in the trash and even most thrift stores won't accept them as donations.
I saw a UA-cam video where the cheapest way to dispose of them "legally" is to send them to China or third world countries. Many times they are just dumped on empty or swamp land, tossed in rivers, etc. The lead content of the soil and water is HUGE, but the few bucks that a USA "exporter" will pay goes a long way in an impoverished village.
That's why I only buy my solder from China, where I can get the lead/tin combo that works! Tried some of that leadless crap, never liked the results.
i buy a 60 tin 40 lead from the hardware store for use
You mean REAL solder!
strangely i needed to wake up for work when he started pressing the buttons like HUH/.? WHAAA ? im up im up
Have been giving soldering workshops all day today.
And agree with everything you said . . and so should my students ;)
Really appreciate all the good tips on soldering, very helpful indeed.
Can x-ray machines damage electronics, when going through customs?
They're very low energy, so they shouldn't.
When learning how to solder at college [C&G] was told not to melt the solder with iron but heat componets/ wire so that it melted the solder. the test to pass exam was to remove chips/ components and refit then it was tested to check it still worked.
When I first watched this, I was wondering, "Why did they bother to include a socket for the IC instead of just putting it directly on the board?"
Then I watched Clive solder the thing going right down the rows. That's when the light bulb went on, "Oh, so an inexperienced amateur won't cook the chip while soldering it in place."
I'm going to assume, Clive, that you did it this way because you knew you were just soldering the socket, not the actual chip. When my dad taught me to solder, he was adamant about that concept:
*Never* solder adjacent pins on an IC one right after another.
*Always* solder diagonally opposite pins and, even then, it's a good idea to allow a few seconds cooling time after soldering each pin. When possible, keep a finger flat against the top of the chip while you're working. If it gets too hot to keep your finger on it, it's time to stop and let it cool before proceeding.
You might consider adding a caption to your video to point this out. :)
+Greg Wolking On the rare occasion I solder a chip in directly I stagger the soldering on opposing pins and also pause mid soldering to let the chip cool down. A socket is always preferred.
+bigclivedotcom
I had figured as much, Clive, as I stated previously. It's quite clear from your videos that you really know your stuff.
Thank you, sir, for taking the time to answer my inquiry. I thoroughly enjoy your videos. In particular, I find the calm, measured, "thinking out loud" style of your narration to be a refreshing change from many other "how-to" UA-camrs who seem to think they must become some kind of "character" telling jokes, cracking wise, getting ridiculously upset, and so on.
I have often wondered whether you plan what you intend to cover before you start recording or just go completely off-the-cuff every time. If the latter, it _sounds_ like the former, as you're very good at staying on point and not needlessly repeating yourself (AvE comes immediately to mind in that regard). You may count me as a fan, sir, and I applaud your endeavors!
High frequency crystals are terribly bad at timekeeping. That's because for them a "cut type" parameter (how the actual quartz piece was cut from a large crystal) is almost always "AT-cut", and low-frequency crystals are typically "XY-cut". This leads to far better temperature stability for low frequency (and in particular 32768 Hz) crystals, which makes them suitable for use for timekeeping purposes.
The next difference is that high frequency crystal physically is a solid quartz block, and "watch" crystal is a "tuning fork" style. This also matters.
So this clock won't be accurate, unless they've used some extra-custom crystal. :)
Another fun build by Master Clive!
Question asked:
"...why use 2 little caps with the crystal"?
Answer:
You're actually building an oscillator circuit, using a crystal, some capacitors, and the internal circuitry of your microcontroller. If you don't use the caps, your clocking won't work. The values are calculated based on the properties of the crystal, as described in datasheet from Microchip "Crystal Oscillator Basics and Crystal Selection for rfPICTM and PICmicro® Devices"
ww1.microchip.com/downloads/en/appnotes/00826a.pdf