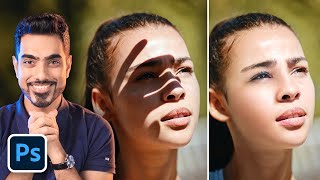
2 Accurate Ways to Set your White Point and Black Point in Lightroom | Lightroom Tutorials #6
Вставка
- Опубліковано 12 вер 2024
- Learn how to use the white and black sliders properly in Lightroom to set your white point and black point. This will allow you to widen your tonal range and have more details in the highlight and the shadows at the same time. One of the ways is to let Lightroom do that automatically, watch to find out how. We'll also understand what are black and white points.
► To Learn more about post processing, do SUBSCRIBE to our channel: goo.gl/94umrc
This does give a punch to your image and also doesn't compromise with the details as it increases the intensity of brighter areas and darker ares just before the point at which they start clipping.
In this video we'll learn what are white points and black points in photography and post-processing and how to set that both automatically and manually in the most accurate way possible in Lightroom. Setting white and black points makes sure that the tones are completely within the limits of the Histogram and at the same time are at the brightest and the darkest values possible without losing details. Setting the correct white and black points will give you contrasts without messing with the highlights and shadows and you'll have more dynamic range with contrast.
The first way is to use indicators. while tweaking the black or white slider, hold the Alt key on Windows and Option key on Mac to see which areas would clip at what values. The second way is to let Lightroom automatically set White and Black points automatically for you. To do that, Watch the Video.
This will help you increase your dynamic range have HDR like effect and prevent your image from being too bright or dark and have depth at the same time. White point in photography is simply the brightest area of the image. Similarly, black point is the darkest area of the image. Correcting the white and black points refer to brighter area more brighter and darker areas more darker to the extent at which pixels start to clip.


I have been learning through these videos by applying the lessons in real time on my clicks. I just realized the importance of the ALT function while adjusting the white and black points, the aspect related to the patches, and the automatic feature for the same. I tried all 3 techniques to test my accuracy in relation to the automatic feature. This one trial and error activity has given me much insight into the whole point of the video. Not just that, I noticed how alive my picture became after I applied your techniques. Something I couldn't even foresee earlier. This has taken my game to the next level. So I came across you through the Adobe Max session and noticed the in-depth subtlety that you use to explain things in a very simple way. That's when I understood that you had something great to offer to Photoshop and Lightroom students. I'd say you're doing great Unmesh. Good luck. Love from India brother. If you see this comment, please have a look at my photography page, @anshagrawal19. Any constructive feedback would really help. Thanks
Dude, I like tutorials that get right down to it. You get 10 stars for that! This is really great info that's presented quickly and comprehensively. Excellent job!
Best tutorials on the internet for PS/LR. By far! :)
Alway I enjoy your tutorials. I like your new look as well. Would love to meet you some day, you are a good person.
Thanks m really enjoying this tutorials so much
Thank you!It will be really helpful.
Thanks for the information
Merci !!!
amazing tutorial
This is amazing! Thx
Unreal / thank you
PERFECT-ΤΕΛΕΙΟ!!!!!
Bl & W 😍😁
I'd like to know how to set correct white balance if your image don't have grey! as on different colour casted grey brings altogether different result.
How you got before and after (by what clicking) ?
simply click \
when i commented here it was get 600 likes, Thanks to me later XD
btw, thanks for the great tutorials :))
how to see before and after?
The shortcut key for Before and After is y. Just press y
hahahahaahh what happend to your hair ???