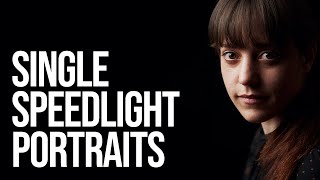
Home studio w speedlights

Вставка
- Опубліковано 8 лют 2025
- With the article on lighting a white seamless studio backdrop in the studio, the question came up how you would do that in a home-based studio where there is less space. The answer? In pretty much the same way. This tutorial video on how to set up a small home studio using speedlites, will show you that the techniques remain the same, whether it is a speedlite, or a powerful studio light.
More info: neilvn.com/tang...
#flashphotography #homestudio #studiophotoshoot #studiophotography - Розваги


Let me know if there are any topics you'd like me to delve into.
Great video Neil. Never get tired of watching it over again.
Love your closing line ; "its well within your reach". Brilliantly true! Very nice, simple tutorial.
What I like about Neil's work is his lucid, no-nonsense approach to photography. His approach to correct exposure is also the best I've seen and the first "aha" moment I've had since Morten Harket!
This video is the CLEAREST explanation yet. Neil is THE pro to emulate. Thanks!
you are so simple to teach any thing , thats the maturity of a teacher .. many thanks
Neil, you are simply the best, not only is your photography amazing, but your teaching skills as well
Amazing! Very detailed, very clear, very useful. Not only the basics but also real hand-on’s from an experienced photograph. Thank you very much.
Did I tell you this guy is probably the best portrait photographer on earth? I learned so much from you plz keep posting new videos. Thank u
not only that but also an altruist, giving for free in his videos/ blog lots of pro tips
Thank you Niel. As a fellow SA and an amateur photographer I'm really enjoying your video's. My skill set is slowly growing, thanks to you.
Thank you for the kind words.
Thanks a ton! Really Straight forward explanation and just what I was looking for
Very well done, organized and easy to understand. Thank you Neil.
Great job. I like the references to items I learned in school - inverse square law, simple tools used and paper background. Thanks great job.
still relevant. wonderfully presented. enjoyable and so instructive. thank you for the effort and the sharing. thumbs up.
Glad to see you back Neil
Cool! Will be buying more lights here in the Philippines for my small office studio.
Elegantly simple , great adjectives for an excellent video , well explained and not rushed liked and subscribed
Excellent tutorial. You have a pleasant teaching manner. Thanks.
Excellent for what I'm trying to get my head around. To me, it's really important to be clear about the workflow, not just the gear itself ready to go. It's nice to see something attainable on X amount of budget and Y amount of working space, since I'll be confined to my subjects in their rooms on location, not mine, just like this example.
Very helpful video, thanks!
Welcome back! It is so good to see you again :)
Hey Neil! Cool video. Great tutorial. Very informative. Nice to see you on UA-cam again.
Greets form the Netherlands
Steven
Great work, simple and concise!!
I love the tada gesture at 3:16! Hahah. Great video, man!
NVN - master of flash. Hope to take a class with you in NJ one day.
very nice! good tips about lighting. good poses too.
Ideal tutorial for beginners
வீடியோ மிகவும் பயனுள்ளதாக இருந்தது மிக்க நன்றி 🙏🏻🙏🏻🙏🏻
R.மனோகர் சென்னை .
Very useful this video sir big thank you 🙏🏻🙏🏻🙏🏻
R.MANOHAR
Chennai.
Great as always Neil. Thanks!
Your amazing great to call you a friend. Your a great teacher and this setup is great. Thank you for this and all your information on lighting.
Carlos Zaldivar
Thanks Neil,, great instructional video
nice to see you. very good tutorial i hope to see more.
Thank you. I really like the slow paced and clearly detailed information. I just bought a speedlight and the same 2 reflectors. I don't have the fill light and no white backdrop for now.
Question: if the back light is on full (hypothetically) wouldn't that blow the background white anyway?
Jason -- that depends on what you have in the background. Yes, you can blow grey out to white. But you'd have to dump full power (or close to full power) from the flash in the background ... and then still most likely drop the exposure for the flashes on your subject, to balance it all properly.
great info, very simple and effective!
Perfect... as always! Many thanks!
Good tutorial.
Very useful info - thanks Neil ;-)
It also helps that he has great window light
The window light has minimal effect at the chosen camera settings. What you see in the final photos of him, is all due to the flash lighting.
Got ya! So with the speed light behind the subject is it still possible to get the same washed out background if it’s a full body? Likely having to photoshop the speed light out in post???
@@jamalymall -- yes, you could do full-length with this setup, but you'd need a longer working distance. And yes, you'd have to photoshop out the lightstand in the background.
Thank you very much, very good video.
If i dont have a light meter then how would I go about obtaining the correct exposure with my speed light? I have a shoot through umbrella and a soft umbrella i think that's what it is.
You could always use the histogram to check exposure:
neilvn.com/tangents/using-the-histogram-to-determine-exposure/
Awesome
cool video
What settings do you use for the camera and the flash ? How much power do you give to the flashes.
Why is a deflector important in this case?
Where do stand having so many things in front of the model....Please explain the back ground light.
There is more info on the linked article:
neilvn.com/tangents/home-studio-setup-with-speedlites/
The camera settings were: 1/160 @ f/5.6 @ 100 ISO
The power settings of the camera were under full power so that the flashes would recycle faster after each shot, giving me more consistent exposures. I don't recall the exact power settings - but that's immaterial.
I'm not sure what you mean about the "many things" in front of the model?
The reflector on the side is there for fill-flash, to give a more even light.
Interesting. How big of a space does it require to use a 105mm macro lens? My basement is 19 ft x 21 ft (400 sq feet) and 7 ft high ceiling; is that good enough?
The ceiling might be too low for standing photos, but seated should be fine. Check the Angler 60" umbrella from B&H -- it is oval shaped, and perfect for using in tight spaces.
Other than that, you have enough space for headshots and even wider portraits.
neilvn.com/tangents/best-photo-umbrella-for-a-home-studio-indoor-headshots/
Wow I learned far more than the title promised! I'm curious, did ambient light (passing time of day) through the windows change your settings as you went? Thank you.
Nope .. the ambient light remained well under what I had set my camera to.
well done. thanks ;)
I am struggling with white bg, if I get Blinky even just around the subject, I do not get her in silhouette , and I lose contrast, that is before I turn my main light on, I always seem to have to go down on the power of the bg light (which is not pure white any more) to maintain the contrast and evade the washout look or burning the hair, I tried and tried and am not sure what is wrong I am doing, I did not v flats but it is tight space for them, ceiling is 7 feet. any advise? (subject from bg is about 7 feet, I also meter the fall of light on subject back equal to the main on front))
Very informative thanks
Hello there your video is awesome and amazing and now I’ve become a subscriber of your UA-cam channel. I have a question that bag you have your light stands inside of where can I purchase one of those from because I am in serious need of a large bag that can hold all my light stands thanks
It is the Photoflex Transpac roller case.
Here is an Amazon affiliate link to it:
neilvn.com/tangents/recommends/photoflex-transpac-roller-case/
Neil van Niekerk thanks very much for responding to my email
Apologies for taking so long to reply - I’ve been slammed, catching up with work. Check the time-lapse clip I just posted.
Thanks Alot Sir!❤
Light fall-off by the 'Inverse Square Law' really only applies to a 'point Source. NOT to your Umbrella but that is only being a bit pedantic --- enjoyable Video with NO 'Hums and 'Erms'
PS -- you have much more gear than me! I do not have a 'Colour Checker' chart so that was interesting and I do not have Manfrotto stands -- no space in my home - even smaller than the room you used. i HAVE done Actor shots years ago all on Real Film and got them some work !
Is that a reflector on the right?
Check the explanation at 3:55
Ok I see, I totally missed you setting up that sun bounce
bottom of the white background has some fall off, as the back light form a circle white spot exposure in the center only, any suggestion to get an even full white background with just one speedlight for the back?
The best way to get an even better spread of light, is to have the speedlight as far back as you can from the backdrop ... and to use a diffuser that can spread the light wider. Of course, you will have to bump up the power from the flash for that.
greate one
What was the zoom setting for the shoot through brolly?
I don't offhand recall, but it would have been around 24mm or maybe 28mm
Where is that color checker from?
Check the linked article - there is specific mention of the color checker, and other info.