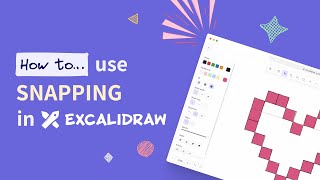
💡5 Tips & tricks for PRODUCTIVITY in Excalidraw 👀 | T&T #1

Вставка
- Опубліковано 30 лип 2024
- In video #1 of the Tips & Tricks series, we'll show you some features and functions that are great for better productivity in Excalidraw, and that were selected by our team members themselves 💪
=========================
⬇️ CHAPTERS & INSTRUCTIONS ⬇️
0:00 | Text-to-diagram for quick diagramming (AI feature)
AI features are a great time saver, especially our text-to-diagram feature! Go to the last item in the toolbox at the top of the editor and select Text-to-diagram.
- Just type your prompt (what diagram you want to create) into the left part of the dialog box that appears and click the Generate button (or use the Ctrl/Cmd+Enter keyboard shortcut).
- Allow a few seconds for the AI to generate a diagram based on your prompt. Once it's done, you'll see it on the right side of this dialog.
- Once the diagram is generated, you can either insert it into the scene (using the Insert button), view its Mermaid code (using the View as Mermaid button), or re-generate it (using the Generate button) if you are not satisfied with the result.
0:19 | Libraries for quick visual representation
- With Excalidraw libraries, you can quickly add visual representations to your creations (also to diagrams created with AI features, as in our example).
- Open the sidebar on the right side using the button in the top right corner and click on Browse libraries.
- Search for the keyword that is most likely to match the topic of your creation (or if you have a specific object there, search for it to find the most suitable library). Once you've found the right one, click Add to Excalidraw to have it automatically appear in the Excalidraw library.
- Switch back to Excalidraw, go through the inserted elements in the sidebar, find the most suitable one and either click on it (to be place on the scene) or drag it onto the scene.
- Note that all of these libraries were created in Excalidraw, so you can easily customize them as needed and adjust color, stroke, sloppiness, etc, as usual.
1:45 | Groups for easy manipulation
- You'll appreciate using groups if you have multiple elements in your scene and want to manipulate/align them easily.
- Simply select the elements that should be grouped, right-click on the selection and select Group selection. Or for even faster action, you can use the Ctrl/Cmd+G keyboard shortcut. Use the same method to ungroup a selection, i.e. right-click on the selection and select Ungroup selection or use the keyboard shortcut Ctrl/Cmd+Shift+G.
- Once the group is created, it behaves as 1 object. So if you adjust the colors of a stroke, for example, it will change for the entire group. However, you can use Ctrl/Cmd to select only a certain part of that group without having to ungroup it first (but you can do it via ungroupping as well).
6:36 | Grid mode for quick alignment
- Not many people know about this hack, but Excalidraw has its own grid mode for quick and easy alignment of objects in the scene.
- Just right click on the canvas and select Show grid or use the Ctrl/Cmd+' keyboard shortcut.
- Now all objects will be snapped to the grid. However, you can temporarily disable this behavior by pressing Ctrl/Cmd while dragging an object. Once you stop pressing that key, the object will be snapped to the grid again.
7:51 | Stats for nerds for specific dimensions
- Stats for nerds contain a lot of interesting information, including the width and height of the selected object. Which is great, because then you can adjust the element size to a specific dimension.
- So right-click on the canvas and select Stats for nerds or use the Option/Alt+/ shortcut. A new section will appear at the top right of the editor.
- Select any object in the scene (or create a new one). Once selected, you will see its current width + height in the Stats for nerds section. Use the selection handles to adjust the size of the selected object as needed.
TIP: With grid mode enabled, you can adjust the dimensions even faster. Since the columns and rows are 10px wide/tall, you can quickly set the rectangle size to any multiple of ten. However, if you need to be more precise and have the size accurate to the pixel, just hide the grid and resize the selected elements again using the handles (now the size will resize by pixels).
8:26 | Bonus
See how easy it is to take your creation to the next level with just a little imagination and the tips and tricks above!
=========================
🔗 Try it out for yourself at excalidraw.com
🔗 Explore the premium Excalidraw+ at plus.excalidraw.com
👇 CONNECT WITH US 👇
🐦 Follow us on X: x.com/excalidraw
👔 Follow us on LinkedIn: / excalidraw
💬 Join our community on Discord: / discord
#HowTo #HowToDo #Tips #TipsAndTricks #AI #GPT #TextToDiagram #Productivity #KeepItSimle #Excalidraw


I'm completely sold on this now that I know about grid mode. Thanks for these great tutorials. The bonus sections are much appreciated 💡
Love to hear that! ❤️
best tool i've found in awhile.
Love to hear that ❤️
Thanks for the Demonstration,if we could actually straighten the arrowhead lines automatically,it would be amazing 7:23 🙏👌
You mean like having automatically arrows with 90 degrees when switching to straight edges?
What’s about search by elements which already added to the library? Are going to add it ?
Yes!
I love this s2
🫶