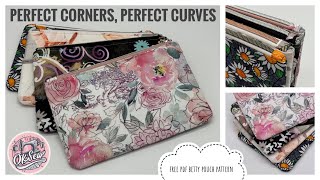
Better Boxed Bottoms, featuring the OKSew Pythagorean Pouch

Вставка
- Опубліковано 28 вер 2024
- In this Skill Builder tutorial we will look at the common cause of boxed bottoms that do not sit flat and learn how to quickly adjust your pattern piece to give you a perfectly level bag base. We also cover techniques for lining up the side and bottom seams for beautifully aligned edges.
The Pythagorean Pouch pattern template is available for download as a pdf here: drive.google.c...
The finished pouch as is measures 7" wide, 2.5" deep at the base, and 4" tall but can be scaled up to make a larger pouch.
I am sewing on a domestic Juki HZL-DX7.
My exterior is cotton woven interfaced with light weight woven interfacing and stabilized with fusible fleece. My lining is quilting cotton interfaced with p44f.
Other tutorials you may find helpful in conjunction with this one are:
Zipper pull installation:
• Get Your Pulls On! - M...
For neat corners:
• Perfect Corners, Perfe...
Topstitching your lining:
• More Tips For Top Zips... - Навчання та стиль


Totally mind blown! I have made 1000+ bags and this is the the very best explanation of the "bottom problem" ever. Wish I could give you 10 thumbs up.
You can. Gotoher other vids and give them thumbs up too.
As an engineer who was very good at trigonometry in high school, I appreciate this immensely. this is absolutely brilliant explanation!!! I applaud you for explaining it so well! Thank you so very much!
So amazing
Math teacher here…this makes so much sense!! Thanks for showing the all the math images with it.
I don't cut the corners. I prefer to leave the corners and fold the fabric to get the triangle shape and then measure and mark your line. Sew on the line then cut the triangle off leaving a 1/4" seam allowance. What's nice about sewing is that it's all personal preference. This is a great tutorial for those that like to cut the corners out.
Yes, that's how I do it too. Seems much easier. Having said that though, the explanation & tutorial is really excellent.
A sewer’s favorite words: Nice and flat.
Where have you been all my pouch life? This address so many of my issues. Thank you. SUBSCRIBED
So glad you found the channel! 🥰
Thank you! Thank you! Thank you! I always thought that I was cutting something crooked or wrong. What an eye opener, this is so awesome. And your tutorial and explanation was the best. Great work, I can't wait to see more of your videos and tutorials.
THANK YOU! I haven't been able to figure out the right angle and you've made it sooooooo simple! Great tutorial.
Thank you! You are the absolute best teacher on utube, and that covers a lot of countries!
Perfect! Also love the zipper tape trick of melting!
So many great and helpful tips to make your pouches look more professional and take the stress out of sewing.
Thanks so much Joy!
Thank you for this tutorial. I learned so much and have been "adjusting" a lot of patterns to ensure great boxed corners. I also went to a bag making retreat and adjusted your pattern to me a two tone zipper pouch. Many of the participants took that pattern and made their own versions as well. We had a ball thanks to you!! And all had lovely boxed corners!!
Thank you Angela! I’m so pleased you were able to share what you learnt and everyone had pleasing results! 🥰
Your instructions are very good. Watch for the second time as I am so impressed.
Thanks so much Melanie! Glad you found it useful. ☺️
thank you for sharing this tip-- It never crossed my engineering mind to correct the angle of the outer edge-- BRILLIANT!!
Amazing video. Love the details. Found you today cursing a project. Thank you.
So glad to be able to help! I hope you got the better of the project in the end. ;)
Thank you so much for this tutorial! I made several bags from a similar pattern and just struggled to get the bottoms to lie flat. Now I know why!! I appreciate all your tutorials and free patterns !
wow! you explained this so well, I feel like I really understand the construction of the bag so much better!! Thank you!
You are so welcome! I like being able to demonstrate the why for people so I really appreciate your comment! 💕
@@OKSew474 I'm just starting to teach beginning sewing for community ed in my city so this really helps me to get a handle on what I'm doing.
I consider myself an excellent bag maker. You have made me even better. Your tips are absolutely incredible and this pattern is now my go-to 👍👍👍❤️❤️❤️
Thanks so much Dianne!
Incredible! Thank you! I also have been making bags, purses, and totes for a while. Your instructions and examples are mind-blowing! Again, thank you!
When explained so simple, marvellous, brilliant xx
Wow!!! I love your explanation. It makes perfect sense and I have full confidence that I can modify my bag patterns to produce the results I want. Thanks so much.
An absolutely excellent tutorial! I have never seen this explanation before. Thanks so much.
Amazing! I’ve been making bags for several yrs and this is so helpful!!
Thank you for explaining putting the box corners together. I have always wondered why there was a little bit of a gap. I am glad to say I was ignoring the Gap and going with the straight line
Though tech savvy, I do best with basics. I've watched your tutorial six times now and see something new each viewing. Best of all I now understand the reason your techniques are best of all. I so look forward to more educational opportunities with you. Thank you for taking time to share and your generous gift of the pattern. Have printed and will laminate that and keep with my special tools.
Thanks so much Donna! I’m so pleased you are able to pick up new things each time you watch. ❤️
WOW!! Thank you,thank you!! Beautiful! Explains a lot of my frustrations in bag making. New subscriber here
Omgoodness such a small adjustment and that makes a huge difference! Subscribed and will watch all your videos. Thank you for sharing such great information 🫶🏽
Oh my gosh, I have been wondering why I kept getting that mismatch in the boxed corner! This is a great explanation, and thanks for the pattern. I love that you made the lining pattern correctly sized and tapered rather than just telling us to cut 4 pieces of the outer pattern. Now I can't wait to make my next boxed-corner bag!
I’m so glad you found that to be worthwhile! I considered calling this pouch the “pedantic pouch” or the “punctilious pouch” because of the time I spent trying to get it just right. 😄
OMG! This is totally a earthquake moment for me! I have made so many bags and have had bottom issues! I can’t thank k you enough for your absolute genius! 😍
It can’t be unseen! So glad to be able to bring you an easy fix. :)
MATH FOR THE WINNNNNNN!!!!! Thank you for the pattern & for taking the time to make the video, it is GREAT!🤩
Thank you!
Such a great tutorial, thank you for showing us how to get flat bottoms.
Nice explanation of taking the 2D to 3D to perfection!!
OMG. I thought it was just ME. All the bags I’ve made, and I’ve only been doing bags since quarantine/lost job/retired, NEVER had a straight edge to sew, even though the tutorials made them look straight, mine are always bowed. I was directed to your channel via an email from My Handmade Space, and have watched two of your videos already. You have a new subscriber!
So glad to help!
Same as everyone else, WOW, I could never tell why things didn't turn out as well as I expected when I followed the directions. Using the staple is brilliant. I use a dab of glue, but the staple is quicker. Also, none of my patterns has ever said not to topstitch the lining. Thanks so much for all this great information.
So glad I could help!
That was fascinating. I’ve been sewing for years and I learned so much from this one video! Thank you thank you thank you.
Thank you! So glad it was helpful even with all your experience!
This was eye opening. Shared with my sister - mind blowing and makes such a professional end product. WooHoo!
I've just learnt some good tips from your video today. The stapler, the tape you used to stick the zipper down and of course the box bottoms. I do prefer two do tabs at both end of my zips though. Thank you.
Glad it was helpful! In my video on getting wave free zips I demonstrate a two-tab zipper, I try to do different things to suit all different preferences.
This is the best , most informative video, that I have ever watched. Your techniques are just amazing! Thank you for sharing your knowledge! Wow just Wow! ♡
Thank you for your kind feedback! Glad it was helpful!
You are amazing I just made 3 . Thank you for spending time creating this pattern. I added handles to two of the little bags they are so stinking cute!
Oh that sounds adorable! You are very welcome!
I really liked the mathematical explanation of the bag ❤ very nice👏👏
Thank you so much 😊
Thank you so much for this detailed video- very informative. Love it!
Wow. I have learned so much from this 1 tutorial. Thank you for making it so easy to learn from. I look forward to watching all your tutorials. 😄😄
Oh em gee - this is an amazing video. Thank you so much for your very clear explanation. So logical. Just wow.
❤
Thanks so much for explaining! I think my bags will now look better because of your video.😀🙏❤
So glad to help!
This is fabulous! Thank you for sharing the template and the math behind it.
This video just popped up in my feed today, and I’m so glad it did.
I’m now subscribed to your channel.
Thank you, and stay well!
Muskoka ON 🇨🇦
Glad it was helpful!
Most comprehensive and clear instruction! Subscribing now!
Thanks so much!
Pure perfection, I' m not the one. good job any how
Thank you so much for such an excellent explanation and example! I don't make a lot of 'plain' pouches but I definitely noticed this particular problem with the ones I would make; the other patterns I use are of different enough styles that the boxed corners didn't seem to be a problem. I will definitely be trying this tomorrow to level-up my pouch making skills. Thank you!!
I am glad I watched the whole video as your tips are amazing!!! My bags will be better because of your helpful tips. Thank you. I subscribed.
Glad it was helpful!
Thank you! Now I know that I haven’t been making a mistake on my bags. I just thought I was just not doing something right.
Omg, you are so helpful. Thank you, thank you.
Thanks for this useful geometry lesson!
Best instructions I've ever seen. Thank you so much.
Thanks for taking the time to do this video. So helpful.
Thanks for the awesome tutorial and for sharing your pattern!
Thank you so very much. Have a blessed day.
Thanks so much for this explanation. It is so simple, and makes so much sense.
Thank You for the free pattern & tutorial!! 💗💓
I've spent 2 hours looking for your site again will now subscribe so i cant lose it again want to watch the baG with the boxer corners
Let me know if there is a specific video you need help finding!
Thank you for sharing this OKSew! I’d love to see you make a simple tote bag with this concept 😊
Thank you for the suggestion!!
Hey! Thanks for that explanation!! I always thought it was something I did wrong!
Omg ❤ you are so thorough thanks so much for this tutorial 🙌❤️
Wow. Pretty awesome tutorial. Thank you for the awesome explanation!
This is awesome - thanks so much for explaining and giving a solution.❤️❤️❤️
Thank you so much! So simple, but what a difference😊
Thank you so much for this excellent explanation and tutorial.
there is always something to learn, thank you so much
Fabulous, thank you.
Hx💕🧵🧶🇬🇧
What a great tutorial! I have needed this. Thank you!!
Excellent tip. Thank you so very much.
Great explanation, thank you so much.
Newbie... so glad I watched you before jumping in... big hugs
Thank you so much for sharing this tip ,it’s a game changer😮
Well, how about that! Thank you for explaining this.
Another Amazing tutorial ❤️
Amazing!! Makes total sense!! Thank you so much!!
Thank you for the tute and thanks so much for the template also!
so obvious once you see it. Thank you!!!!
Great instructions
Thank you so much. I thought it was just me sloppy sewing 😮
Thank you so much! It was always so frustrating that the bottom didn’t line up to be flat.
❤thanks a lot. Love from Pakistan
Brilliant. Thank you for sharing this. INSTANT subscriber!
Thank you so much, it makes so much more sense now!
Love that floral fabric!
Thank you! It’s an older one from Wolf & Rabbit custom fabric.
Thank you! Always thought it was me!! And genius use of a stapler 😃🌟🌟🌟
Do you have a video showing how, if you customise a bag pattern or freestyling, when you cut out the corner, which side reduces the height/width. I always seem to get confused!! 😢
I don’t have a specific video on that yet but I will plan to incorporate it in a future video, several of the ones I have planned will work as examples; my bee boxy pattern may help a little in the meantime (The Bee Boxy Pouch: Fully Lined, Hybrid Turned & Bound - Full Free Tutorial
ua-cam.com/video/4lTXpbJeajE/v-deo.html). The summary would be the vertical cut is going to affect the height and the angled/horizontal cut is going to affect the depth and width, with lengths the same but making sure you account for any differences in the seam allowance.
@@OKSew474 thank you, will take a look and just to add to what others have already said, a very clear instruction - much appreciated.
Thank you for the great information.
This made so much sense❤
Wow. Just wow. Thank you so much!
Great explanation! Where did you purchase your narrow zipper foot from for your domestic Juki?
This is the foot I use!
YEQIN Zipper Foot Left Right... www.amazon.com/dp/B01MZ5SOTV?ref=ppx_pop_mob_ap_share
Thanks for a great informative video. V v v v helpful!!!
OhMyStars! Now I get it 😘 Thank you!
Thank you so much for sharing this info :) this helps a lot :)
love this video!
Is there just one size to this bag? I would love to make one a little bit bigger. I think this is the greatest video out there. Thank you so much.
Just the one size but for future demonstrations I can certainly do a bigger size. The principles apply to other pouch patterns though! Depending on your printer/computer this may help though: Scaling Up With Poster Settings - An OKSew Quick Tip
ua-cam.com/video/sFi89P-gWlo/v-deo.html
Thank you thank you thank you
Wow that’s a great tutorial! But I NEED that thread burner and your seam roller! Any idea where you got it? 😊
Thank you! Both are from Amazon. Here are my thoughts on the thread burner, Thread Zapper - OKSew Favourite Things
ua-cam.com/video/WKQQXC7iSUg/v-deo.html, I’ll be sharing a favorite things video on the seam roller soon too! The exact one I have is not in stock but this is the same style: a.co/d/8NKDl2x; direct link to my thread burner is: Etcokei USB Thread Burner Zap... www.amazon.com/dp/B0C23V8W9M?ref=ppx_pop_mob_ap_share
I’m blown away in how you did this. Where did you get the skinny double sided tape?
Hi! I actually just posted a quick video about it today since it gets asked often, the brand is Kesote, I get it from Amazon (a.co/d/eQJlGXy). More detail here if you need it: Double Sided Tape - OKSew Favourite Things
ua-cam.com/video/XzdJayfjfZA/v-deo.html.
Great demo!!Thanks!!
In this video from around 18:32 to 18.45, you are seen using a little pink coloured roller type of tool. Please tell, what it is called and what exactly it does.
Hi! It is a seam roller. It allows me to press a seam or fold without heat, it just puts concentrated pressure at the fold with a smooth, firm plastic wheel that you roll back and forth, similar to how you might crease a fold of paper with your finger.
Oh, I see!! Thanks Christene for your perfect explanation !!
I will buy a similar one.
Great explanation!