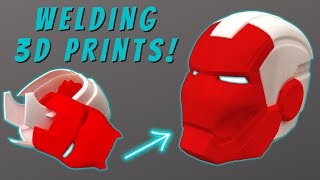
How To Fuse 3D Prints - Combining 3D Printed Parts Together with NO Glue! (OLD VERSION)

Вставка
- Опубліковано 15 січ 2020
- Check the NEW 2022 Version! : • How To WELD 3D Prints ...
Welcome to Part 2 of "However many i feel like making" 3d Printing tutorials!
Another questions amongst social media is "How to you attach the parts together?" or "How do you glue your parts?"
Well i'm here to show you, I dont use glue! With some confidence and a cheap Soldering Iron you can weld and combine PLA prints better than most glue and epoxy compounds!
Now this wont work for everything and everyone, this is just the way i've been accomplishing this. Please keep in mind this can ruin your print if you aren't careful so please take your time and determine if this is the best option for you!
And practice on some scrap parts first!
If you have any questions or comments please ask away! I'm an open book of knowledge and i'm learning as i go along too!
I will also be making more PLA and 3d Printing post-work Tutorials so stay tuned!
Thank you!
-------------------------------------------------------------------------------------------------------------------------------------
▼ SOCIAL MEDIA / CONTACT
Inquiries | bit.ly/3xQmgAS
Instagram | / frankly_built
TikTok | / frankly_built
Twitter | / frankly_built
Facebook | / franklybuilt
Reddit | / njtricker609
Discord Community | / discord
▼ SUPPORT THE CHANNEL!
Patreon | / franklybuilt
Frankly Built Merch | bit.ly/3AechHF
▼AFFILIATE AND DISCOUNT CODES!
CREALITY | bit.ly/3gV8iIo
☞ Visit Creality for my favorite FDM 3D printers, from entry
level to advanced!
EPAX 3D | epax3d.com?ref=25
☞ Visit EPAX 3D for my favorite resin 3D printers!
Use code “franklybuilt” for 10% off of E10 Series Resin Printer
DO3D | bit.ly/3zWo8tC
☞ Use Code “FBT20” at checkout for 20% off awesome
3D models and files!
AMAZON | www.amazon.com/shop/franklybuilt
☞ Visit my Amazon Store Front and explore my favorite printers,
filaments, build supplies and more!
SUNLU FILAMENT | bit.ly/3gXbSAo
☞ Use Code “VQLDTFWBMQ” at checkout for 10% off filament!
PRINT BED FILAMENT | www.printbed.com
☞ Use Code “Frank” at checkout for $4 off a roll of filament!
NIKKO INDUSTRIES| www.nikkoindustries.com/
☞ Use Code “Franklybuilt” at checkout for 20% off awesome files!
[NON SPONSORED VIDEO FCC DISCLAIMER]
Disclaimer- This video is NOT sponsored by any of the brands mentioned above or throughout this video. Honesty is very important to me and my channel- all thoughts and opinions mentioned are my own. The links provided above are affiliate links. Affiliate links allow me to make a small commission from purchases made on my recommendations, with no additional cost to the customer!
Thank you for supporting me!
#pla #3dprinting #fusing - Розваги


When I was a young child in the 70's, my grandmother bought me a model kit that was sort of like a plastic Erector set, except it came with plastic I-beams and plastic rivets and a tool that ran on batteries. The way it worked, you would lay the I-beams down the way you wanted to join them and hold the tip of the tool against the seam. It had a very fast rotating head, the friction welded the two pieces together. This kit was supposed to be a dragster, it came with a battery operated motor and a simple two pole switch. When you got your frame built, then you would take the body panels which were pre-drilled for the plastic rivets and hold them in place with one hand and put the head of a plastic rivet in the end of the tool and put the end of the rivet through the hole and against the frame and push the button. It spun the rivet fast enough to make enough heat from friction to melt the rivet and hold the rivet head, locking the body panel in place. I never finished the kit, I had enough fun melting the parts together and riveting them. :) "Gather round, kiddies, Grandpa Witt's going to tell you about Lawn Darts after he wakes up from his nap!"
now that is a long paragraph
Witt, I remember that kit. I had it too. Great toys back then. I enjoy seeing them show up on ebay from time to time.
@@hellomynameis1419 yeah break the paragraph into two parts at least 🥲
This are the toys I would have loved to have but got banned cause they were deemed too "un-safe"
Also a tip for external joints, rather than filling the new welded divet, use an extra spool of pla as basically plastic solder to weld
XD OH MY GOD this is a 2 year old video and you liked my comment in less than 5 seconds you are the best!
Basically like TIG welding
I love the Iron Man hand pen hold on the back of your desk lol.
Matthew Evans haha thanks! It was a failed hand. So I got creative and kind of love it now
Again, great info. Never thought to use the raw filament as a welding stick.
🤩 I knew I saved them for a reason!
Been doing this for awhile, but the X pattern makes a lot of sense. I've been just using a flat tip, push it between the parts and using a spare bit of plastic to push in the melted area. Doing an X might save me a few inches of PLA
I used gorilla glue that's like a gel to hold my mask I did together and I took your advice and used a soldering iron on the inside. It worked so well and even added some rigidity to the print. Outstanding advice man!
Thank you sooooo much for this video! I have an ender3 and been wanting to make bigger projects and already watched your slice videos and broke items into parts but then been struggling to put together!! I have a soldering iron already and now excited to put it all together xx
I started 3d printing in March 2021 and I just started welding my prints. I have a construction background so I am familiar with welding. I figured it couldn't be too different! I wondered if anyone else was trying this and thats how I got here. Good work!
Glad to see your channel growing your videos really help me out a lot and good luck with your PCS
I’m a pressure vessel welder for work and the skills transferred over nicely to my 3D printing hobby. I feel like I’m tig welding plastic 😂 awesome video!
i have had a ender 3 for 2 years and gave up on it after a couple months as the buildplate was to small for what i wanted to do. today i found out i can split builds using splicer but didnt know what i could do with it until your vid sparked my brain. thank you
This is exactly what I was looking for. I have a prop that I printed in multiple parts, and have been trying to think of the best way to fuse some of the parts together. Some of them have some defects where the print didn't bond super well to the bed, so I think I might be able to use this technique to kinda fill in the gaps that it created.
thank you very much. As someone with like 18 hobbies, videos like this save me a ton of time and headache. Thank you!
Awesome technique! Definitely will be using this moving forward! Thanks again Frank!
This helped me soo much on learning how to put together multiple parts
That’s why I come back to your channel. Thanks for the tip!
Never thought about doing this! Cant wait to try it.
Thank you so much for this video. I've been using all kinds of glues to secure 3d printed pieces together, but this looks a lot more fool proof and effective. I'll give it a go on some of my projects! 😀
Miller makes a nice small sized organic vapor respirator I use it when welding steel but it works for plastic fumes as well.
Also if you take a soldering iron and wire it to a light dimmer knob you can actually control the output of the soldering iron. I use it for wax chasing to keep it from getting too hot 👍
That's a nice idea!
I remember doing this to repair my rollerblades when when I was a kid and couldn't afford to buy new ones. Of course, my dad wasn't too happy about me using his soldering iron.
Applied this earlier. Always good to come back and get a fact check see if i did it correctly! im going through some of the other videos,
Its like watching a movie again and seeing parts you missed first time around. ;)
Again thanks for sharing your knowledge and experience👍
Just came from your Mando settings video where I asked a question about this very topic. Great info, I'll try this technique!
Truly have gone from HATING multi printed helmets to wanting to do more and saving a massive amount of filament!!! Thank you!
No problem my man!
THIS was amazing. I'm printing out a stormtrooper helmet that has been cut into 20(ish) parts! My first attempt at ANYTHING like this. Your videos have given me the confidence to at least TRY! We'll see how far my little Ender 3 can get me! 😜 Thanks for all of your videos Frank!!
How did the welding work for you? I will be redoing my Mandalorian helmet with this technique. I tried superglue and JB weld. My wife dropped it off the table into carpet and 1/3 of my seams popped.
It works great. I learned how to do this because of similar reasons and I dropped part of my suit lol
thanks this video was very helpful . got me a neo max since i couldnt get a c10v2 . i looking forward to big stuff and melding them together . awsome work !!
Thank you for making this video. I have a cosplay prop that I had made a while ago. It kind of came to be broken, so I've been trying to fix it. I might actually give the soldering iron a shot. You're a lifesaver man.
I really appreciate your video and your craftsmanship, as well as explaining your techniques in terms of welding. I recently went to Michael's craft store and bought a cheap direct plug-in to wall wood burning unit that had multiple tips and a thermostat, this is an excellent because I can get to the exact right temperature for welding but not burning different Plastics, I just did wleding of a 100 pieces in pet G and temperature control was a lifesaver.
Hey no problem! I’m just sharing what I learn or know! That’s awesome!
you’re amazing man! thank you
I've seen a technique that was basically friction welding, they took some filament and stuck it in a drill or dremel and spun it fast against the seam they wanted welded. It eventually heated itself up and melted down, was quick and easy
Brilliant technique. Thanks for sharing your knowledge.
I've been binging your channel, just wanted to say thanks. Great content very informative
Been looking for a solution to adhere my Mando armour for ages until now! Great video it was a massive help. Does mean I can procrastinate anymore though 😂
Just finished affixing the first 2 pieces of my mando helmet together with this technique, works like gangbusters. A little difficult to smooth the seam since the $5 iron I got only has a pointy tip, but the seam is on the inside so who cares?
You're the MAN, Frank!
Good to know it helped!!
Really useful frank - love your vids
What an amazing tutorial! Thanks man!
That’s an interesting technique. I’ve used a 3D pen to extrude filament and fuse different parts together, different kind of mess but probably a bit safer and easier.
This was so, so helpful! Thank you so much!
Mad skills. Love your work. Inspirational.
Awesome tutorial! Not sure if this was mentioned but they sell different style tips, like a flat one for example that could help smooth everything nicely.
class tutorial answered a lot of questions and gave me some great ideas cheers
Thanks pal!
Dude thats Madd Cool bro!! 🤘🤘🤘🤘
Agree. Great tips. Thanks for the demo.
you are byfar the best teacher ever
Thank you for this tutorial. I just finished printing this same helmet was wondering how to put it together. I’m new to your channel and I am enjoying your videos. Very helpful. Thanks again. Sandy from San Diego California.
Hey no problem!!
Thank you so much for sharing, it's a really useful trick :D
Great video!
Great techniques, will give it a try! 👍
great video bro. I will try this.
best video thx❤️❤️❤️
Nice... less expensive for sure and even better 👍🏽
Awesome job thanks for this
cool idea. I have bought a soldering iron now :)
genious idea !
This video helped me so much a piece had broke off mine then I watched this and it helpdd me do it so thx
Nice technique , thanks.
Super helpful!
Thanks!
i feel so smart right now, i have done this since my first print XD
I started doing this myself with a woodburner, made the work way easier
Good to know I'm not the only crazy one for using my old woodburner to clean and weld PLA. You could plug your soldering iron into A simple router speed control for variable temps. Lower temps are great for ironing smooth and finest details. PLA doesn't smell much but you're totally corret about superglue will burn you if toasted, 😆. ...I dare say, as I am learning from much your videos about printing larger sculpts. Thanks
From Egypt
Thank you
Awesome!!
Thank you so much, now I know how to 3d print a oversized boat using polycarbonate filament with a regular 3d printer.
I keep all starter strips of pla for filling and blending with my soldering iron, it roll and fills so easy
Thanks for the tip Frank :)
Awesome tip. I haven’t watched all your videos yet, but I’d love to see how you break those STLs into smaller sizes to fit on your print bed. Or did you make the design yourself?
I just did this help alot
Good idea
I actually just tried this with my first helmet and I think it worked really well. Unfortunately I saw the video after I had started gluing it and Frank wasn't kidding, the fumes are no joke if you burn super glue
My brother and I used to use an old soldering iron to melt bullet holes into model cars.
I clicked on this not knowing who it was. Bro has came so far
Excellent video, thanks!
What sort of mask do you recommend while doing this?
I'm printing pieces to attach to a giant box/squirrel house to make it look like an old victorian house. the front column piece is 15" tall and needs to be printed in 3 pieces to fit on my print bed, I wasn't sure how I was going to fuse them together, this helps a lot! thanks!
This same method in auto body, plastic welding. Either an welding iron is used or hot nitrogen air. There is also a tool to imbed staples into the plastic to hold them together first then you weld over it. This is like repair plastic parts of a car.
have you ever messed with 3d epoxy resin? I love that stuff!
nice i kinda use the same idea but super glue then using a 3D pen to reinforce it
This is a cool technique... I wounder if you could maybe print some overhang lip about 1-2mm and when you joining a part you actually melt that lip and just maybe avoid melting trough the part and also having that little bit extra material to work with your soldering iron. What do you think?
On Amazon you should be able to get a pretty cheap wire soldering kit for like $5-10 with a temperature controller between 180° and 400° and it comes with alot of useful tools like tweasers, tape, different miscellaneous accessories and even different tips for the soldering iron such as a chistle tip for smoothing
Try using a hot stapler for strength it would be perfect for joining prints.
Do you have an idea on ideal temperatures? I have a plastic welder (for kayaks) and a soldering station. The welder has a massive flat triangular tip which will be good for the final smoothing and is a set temp, no variable.
My soldering station does have a temp dial. What would you say is probably the best temp to reweld PLA post-extrusion?
Andrew Scarlett 400c seams to be the temp I like
To use
Have you ever used an automotive staple plastic welder? I feel like that would work really well for large parts
Try 3m plastic parts repair adhesives. The ones that are 2 part , they work as an adhesive and filler . Sands great too.
Looks like you build a lot of cosplay helmets. I've just set up my first printer, and am working on one for my kids. I have looked everywhere for a ready made Quorra helmet from Tron: Legacy, but evidently the plans aren't out there. Anyway, I've chosen a Pepakura model and exported it to Mesh Mixer. What thickness do you recommend for when I extrude the model, to get it to print decently? (I have a Voxelab Aquila, 200x200x250, basically an Ender 3 clone).
genius
great idea thanks but can you do that also for big flat surfaces that will be joined?
Yeah absolutely
Gluing plastic is a matter of physics, not opinion, Good job.
Gaffer tape works better for stuff you will paint or prime. :)
I use a USB soldering iron. Works great on PLA - it still stinks but there's barely any smoke (unless some gets stuck to the iron)
Nice!
I wonder if a clothes iron works like a soldering iron for large areas needed to be joined together
Hey Frank! I’m about to start printing for the first time and one of my first projects is gonna be an Iron Man gauntlet, so I was wondering: how do you attach pieces that only have smaller openings like finger holes? Do you have a technique for welding stuff like that or do you just have to use glue or something else?
How did it work out
Hello. Just subscribed after watching a few of your videos. Great channel. I am new to 3d printing and I am working with a mini 3d printer. My question is. That scar on your right hand looks fairly fresh. How did you burn yourself?
Th long scar on my right hand? Nah it’s over a year old. Deep laceration
Is it better to sand and prime the individual pieces before or after? I am printing a Mando helmet right now and it has 8 pieces but originally I thought It would better to sand and prime after the whole project is done.
Also I noticed you didn't really do the visible side as much, is that intentional and still holds just as strong? I have also thought of another tip for people who would do this: Use failed prints as extra strength like you did with an extra filler piece of spool. That way those prints won't go to waste.
That Oki life sticker. You ever plan on coming back?
What temperature do you use to PLA weld? Same temperature as what is required to extrude it from your printer?
4:00 I bet that hurt like a mf props of keeping your Character
If I wanted to weld something together will a simple face mask and being outside work just fine?
This will be what I do today. Printed an Ironman faceplate. It looks beautiful, but of cause it fell over with 2% left
is it possible to weld different materials together or does it have to be all the same plastic?
The front side doesn’t require any on the helmet?
EB GREEN!!!