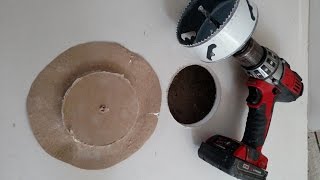
How to REPAIR OVER-CUT POTLIGHT!

Вставка
- Опубліковано 13 лип 2019
- How to make a STRONG, FLAT and INVISIBLE REPAIR to your over-cut potlight!!
Tools I use often:
DISCLAIMER: As an Amazon Associate I make a small commission from purchases through these links. Thank you for the support!!!!
Drywall knives:
2" amzn.to/2LwX8ty
4" amzn.to/32OHlw3
6" amzn.to/2LwP1x5
10" amzn.to/2QbLbOp (This one will rust if you leave it wet but feels nice to use)
10" amzn.to/3056fcU (This one is stainless. Stiffer, more expensive but won't rust)
Mud Pan with Grip!! (This is the BOMB! You will thank me!)
amzn.to/31tQauH
Tin Snips GOOD QUALITY!! amzn.to/2LzlOBv
Drywall Tape Holder!! amzn.to/32Udhzd
Paint Mixer for mud!! amzn.to/303fX0q
Full size mixer!! amzn.to/2LYrMLe
Mixing Drill (just in case)!! amzn.to/2O2oQ2P
Hawk and Trowels
13 inch hawk:
amzn.to/2ZWZXw2
13 inch trowels:
amzn.to/30aJPTB
amzn.to/2ZWH39d
amzn.to/2ZSY5Fj
12 inch trowels:
amzn.to/2Q5fGW4
amzn.to/2ZYKXxu
14 inch trowels:
amzn.to/34JeydR
amzn.to/34CdmsJ
Auto tools
If you don't want to think, here is the whole kit (Columbia is great quality too!) amzn.to/2UwPUae
Mud tubes and applicator:
amzn.to/2Xt65XR (different but works great, I have this one too)
amzn.to/2DBs1sz
amzn.to/2Vdy8x7
Flushers
amzn.to/2Dqa0x8
amzn.to/2GyDBGy
amzn.to/2Ix1Reo
Handle adjustable
amzn.to/2XuGP3x
amzn.to/2Xy5ILU
or fixed handle amzn.to/2DrNt2O
Corner roller (head only, you may need another handle)
amzn.to/2XpuJZo (cheaper)
amzn.to/2XpuNZ8 (better quality) - Фільми й анімація


oh my god those edge feathers. Best ones yet
So satisfying. He was right. When you hit those in one sweep... ahhh
I love watching these videos I’ve been doing drywall repairs for 30 years I like watching what you do right or different sometimes I even learn something new
Silky smooth circular motion with speedy confidence = perfect results. A joy to watch.
Looks great, really. Proper way to do it folks. Understand that this process, though it looks over the top, will let you get paid more for it properly rather than just caulking the seams which fetches just a few dollars. This is how it's done, good for the client and better for you.
Tony P
Just do it correct the first time
@@peterkelly359 looked to me like an over cut from the electricians.
You are not a drywaller. You, Ben, are an artist! I love every one of your videos, and now my wife is watching with me. We're going to tackle the finishing of our new 685 sq.ft. workshop next week. She's excited!
I'm halfway through a level five over latex paint that took forever but looks absolutely gorgeous thanks to you and figuring out level 5 trowels. Keep up the incredible work.
So we have patent pending bucket stool, t-shirt dust mask, hold your breath and run away, .... Honestly makes me laugh every time because I've done the same thing
I really appreciate this video, as I can use the same process for my over-cut bathroom exhaust fan. also, thanks for pointing out to mud all the way around it and not just the tape, that stuck in my head now.
I love your videos!! Im no contractor. Just a homeowner trying to keep my investment intact and do occasional upgrades without going broke. Your videos make it easy to understand how to make repairs on everything! Thanks so much!!
Great video, but you forgot the step where you go punch who ever bought trim rings that require the can cutout to be within 1/8th of an inch of the can.
Right fuck that
Word
Nah I tip him a 50 cuz he made me 300$ a patch and tell him to do it again
Should have used a different trim I agree.
Man, you make it look so easy! I really enjoy your short simple how-to's. I'm learning a lot and will be getting some practice real soon...
What I love is you know when to stop. Leave something for the next coat.
About the time you get thirsty for your next beer.
Beautiful. I've leaned a lot from you. Thank you!
I love that I found a video fix for exactly the random small hole I needed filled. Thank you!
Thanks for the videos, great channel 💯✅
You do excellent work 👍
This is clearly the right way to do it... but I was just involved in knocking out the punch list for a $2mil courthouse remodel, and around some of the can lights and in particular the bathroom exhaust fans, they overcut by a HUGE amount, like 3/4" in some spots. Since it was already all finished, painted, etc. and we were trying to get out of there, we got some paint-matched caulk, and just filled the gap that way (finger finish to blend it in). Since the ceilings were way taller than in residential construction, and so the issue wasn't right in your face, it looks pretty good actually.
Yeah, that is a pretty huge gap to do caulk on. But for this tiny of a gap, high quality caulk would have likely been perfect and easier fix that wouldn't have required repainting everything, just the tiny bit of caulk.
Once again you did an excellent job. I appreciate you teaching what seems to be the proper way to fix things, keep up the good work we're learning alot.
I have seen your work previously and have learned much from them. While observing the video presentation, I liked this one as well. In fact, this vid is also locked in my mine. Great teaching!
this is very useful for when i do my 4x atmos ceiling speakers
"In short order" I love that. I'm going to use that colloquialism myself next time I'm using quick-set :)
Good work is in the details.
Always enjoy your videos 👍👍
Drywall ASMR 😂🤣 You know how to get those views.
:)
Nice work, handyman in Minnesota...your detailed work is truly solid, and I love your positivity!
As a painter who often has to fix things like this, we'd just jam some caulk in the gap, run our finger across it, let it dry approx. 30 secs, put paint on it, and call it done. Thanks for showing the proper way to do it.
That’s a gorgeous job!!
This was a extra good one....Thank you
Great explanation as WHY you used the tape. Great video. I'm still working on feathering. You make it look SOOOOO easy, LOL. I'd love to shadow you on a job site one day.
I had mis-cut a couple of pot light holes with a cut-out tool recently. Thankfully, I had a couple of the 8 inch by 8 inch CGC paper patches in my van, so easy fix, cut the right size hole in the patch, hot mud one side, knife it on, then finish coat once set. For a couple of bucks each, makes life easier. (they also make pre-made patches for outlets)
Excellent work.
Much better than mine.
Thanks for the lesson.
YEAHHH!
I just had my rotozip become posessed and take off a few inches away from the planned flight path
You are my hero
Great vid as always🤠👍
Thank you for your time!
Best job I seen yet on this type of repair.
Great videos! Thanks for sharing your expertise. 👍🏻👍🏻
Exactly what I needed to find. Thank you!
Super crazy useful, thank you!
I love the run away method 🏃🏃🏃
You make it look so easy!
Metaly cylinder thing, i love your words LOL. Great video seriously thank you
Totally have been just mudding the gaps. Works for a month then cracks. TAPE! Thanks.
Lol you are so right ! It is satisfying.
Love watching thease videos to learn something new👍
“The metally cylinder thing!” 😂
Thanks and greetings from Phoenix!
So satisfying.
Great tutorial! This is definitely the correct and proper way to fix this problem but if you're like myself and are just looking to cover the problem you can use a "Goof Ring" which can be custom cut.
You are an artist! :)
Awesome! I over cut when I installed a vent in bathroom and now I can fix it. Sure its covered but I know it is not right to me.
Thank you so much. I love you . I feel a lot better thanks to you
Well done
Lesson learned do not over cut the receptacle
Awesome!
Great vid. Thanks
I’ve got to do this on basically every single spotlight in my house. Thank you to the electrician who ruined every whole the plasterer made 😭
Found this from your other channel. Super helpful. Could you use your awesome carpentry skills to show how to build a mini ramp?
How I repair an overcut potlight depends on it's location. Sometimes I cover it with duct tape... other times I use wood screws to pull the cover over the gap... or I install a really bright bulb that you can't look directly at!
😂
Great videos. How about a video for repairing ceilings where they meet the walls and the tape has let go due to "truss uplift"?
That sound of scraping hurts my teeth , when I tape I wear headphones lol , I kinda accidentally am good at taping and muddling , I don’t like sanding . So I learned to get it as smooth as I can for less sanding lol , I own a construction business nd when we remodel and stuff if there really isn’t enough drywall to sub out ( like under 10 sheets ) I do it myself . It’s a family business and my mother sands for me but still the smother you get it on the first two coats the less sanding . I don’t spend all day trying to smooth it out but after a while you get the hang of it. Great vids man . It’s funny that I was never taught ,but we use similar techniques. Great work . I’m about to finish a room in my house that I have been remodeling over the last three years ( carpenters house gets finished last they say ) and I did an angled bulk head to hide pipes , any vids on the best way to get a strait line when two angles meet , I usually use the corner bead for it.. also an important thing to note - you can tell you have a passion for your work , I do too . Having that passion drives you to do the best job you can and take pride in your work . I go onto job sites sometimes and look at the work some “ carpenters “ do , weather it be a gap in the heal of rafters or shitty lumber just a few minutes to adjust the cut or whatever would have brought the work up a few notches , in a way it keeps me busy . Quality over quantity. And its good to see that passion still exists . Keep up the good work
if no other lights near it, get a bigger trim ring :)
Excellent, i just did this with two over cut switch boxes , the covers today arent very forgiving, quik set and some tape, cant tell it was ever there
You can buy oversized covers
I just did something similar. I had these small lights like the one in the video except they had these feet that clamped onto the drywall to hold them in place. It was causing the cover to not sit flat. I ended up mudding around the opening, filling in the amount the feet dropped down and feathered it out. Sits good now but figure if anyone ever changes out the light housing, they're gonna have a heck of a time. Which will be me bc it's my bathroom lmao.
Very nice...
I like that repair, I like the hold my breath, sand and run away patented method, I had used before, I hope you don't mind, thanks.
*"Thats crazy talk!"* 🤣
Thanks Ben!
This is an awesome video, thanks! What to do when there’s no housing for the light? Is it possible to reduce the hole size by taping around the inside of the hole?
Ha ha, the old " Hold your breath and breath away trick" ... I thought I was the only one that did that....... hilarious....
The welder's equivalent of "look away while you're making those tack welds"
Good tips, especially feathering the edges!
Excellent
This is a great video. My only additional concern is how and when do I match the existing ceiling texture, as most ceilings are not just flat.
White caulk would be my little trick. You’re welcome! I am kidding. Nice work!
Looks great and i know this is a demo video but a slighty larger light ring would totally erase that over cut lol
Remember you have to replace all the rings so they’re all the same. Depending on how many, this could be cheaper.
skater dude. great vid.
:)
This video was just what I needed! I just installed 8 6" lights into my living room ceiling and had my hole cutter set about 3/16" too wide so have to fix all 8. Only difference is that I'm using low-profile LED lights which have no can, they use two spring-clips to attach directly to the drywall. I'm going to use the same technique with the tape and 20-minute quickset. What did you use after the quickset? Can I use a USG pre-mix? If so which would you recommend, they have light, ultralight, standard, and dust-control, and I never know which to use where. Thanks again for the videos!
What did you end up doing? I'm in the same predicament
@@OGCJ10 I used strips of plastic corner bead to make a ring and inserted it into the holes and mudded. This decreased the diameter. Pi*D for 6” is 18.84” so cut 19” strips and relatively thick mud so it doesn’t drip. I added glue as per VC’s instruction to make a stronger compound. It sets up quick though!
@@OGCJ10 oh I used standard usg powder and mixed it myself and added the glue
It always helps if the plaster is sticky side up to prevent it falling off.
I love how you do things the right way. I’m sick of doing things half ass cuz my boss makes me. He’d make me do 3 coats on this in 1 day with no tape because he’s always in a hurry to get paid. If it fails in a year it’s someone else’s problem. 😡
Get a new boss.
With a great work ethic like that one day you will be the Boss or have started your own company.
Had the same thing happen with my house.
I bought some goof rings that are slightly bigger than my potlight ring
I am praying my wife never sees this video, this will go to the top of the honey do list. I have at least 12 lights like this at my house.
They sell white stickers that you can just stick up there and it looks a lot cleaner than trying to mess with the mud and texture and paint
Could you skip a step by doing mesh tape then quickstep followed by one or two passes of mud? It would save an entire day of dry time and still provides the benefits of using tape.
Really like your videos but could you do one on how you bill? By the hour, job etc how u deal with dry times and return trips
Would you recommend this taping method if I need to transform the opening to fit a track light? There is a hole in the ceiling where the recessed can was fitted but the width of my tracklight is significantly smaller than the diameter of the hole. Would it work to use the taping method to leave a whole just small enough for the wires I need?
This is from a rank amateur, and probably well past when you need the advice, but if all you need is a hole big enough for the wire, you're probably better off cutting a plug for where the pot light was and then drilling a small hole for wires.
Patented? I got dibs!!
What is he applying around the opening in a circular motion? Is that also the quickset?
The non-pro quick fix: shift the bezel over to the good side of the cutout, squirt some painters caulk into the gap, re-center the bezel and smooth off with your finger. no sand and run needed. I taped over the face of the bezel first to keep any caulk off it. Works if the overcut is very slight.
This may be overkill depending on how far away the pot light is. If it's high up enough just use caulking.
3 days of work for a 1/4 inch gap. Who has time for that? Holy cow!
Will it look patched if you painted that area without painting the whole ceiling? Any tips?
I’m assuming you have to paint ceiling after?
what's the 'tape' you use in the second part of the process?
Great video, but most ceilings are not flat. They have knockdown texture (where I live). Is there a simpler way to do it without having to match a large area of knockdown?
You probably don't have to do as much of a build out with texture. That's pretty much the point of texture--you can do a shitty job and cover it up.
Caulk
Look for a wider replacement ring for the light.
In England you get the electrician back . It's his fuck up!
I used to do this but don't anymore. I consider it a proper fix, especially hoping around the whole perimeter so the light can sit flat.
This is what I do now. It comes from a combination of tiling and repairs made to old lath and plaster.
Taking a rapid setting thinset powder, i dry mid it with some glass fibers. Then mix with hot water. All this usually occurs in the same yogurt cup for a single repair. Otherwise I drymix a larger batch and make individual batches with hot water in the yogurt cup. You'll want to use small batches, it becomes unworkable in just a few minutes. Use room temperature water if you desire a longer working time.
I stuff the gap (after pre-sanding like Ben did). I usually use a thin pointing trowel inside the gap to force some pressure against the drywall edge to make a solid mechanical bond. I leave the final product about 1/16"-1/8" underfilled.
I then top flush with durabond. Then final skim with a topping mud. There is no taping required.
This might sound like more work but it isn't when I do it. It's way less work and using a fair bit less plaster because the finish stays flush with the existing ceiling. There's way less sanding of the finished product. Which is nice.
I've had to repair several dozen on a couple of separate occasions and came to appreciate doing it this way. If thinset can hold a tile to a ceiling, it can definitely hold itself and a little mud. I've been back to one of those jobs almost 10 years later for another job. Haven't found any cracks so far.
Note: I only use glass fibers because I have them around from making GFRC and I prefer overkill. However, for gaps under 3/8" I'm guessing they're not necessary really.
You can also use any modified or unmodified thinset for the job. I prefer a rapidset and I usually have leftovers from tiling jobs.
I guess the same process for bathroom fans that have a slight gap between the fan housing and the dry wall.
I wanted to install a chandelier light in the kitchen, but the hole is too big. What should I do? Put a small piece of wood inside (for support of the new chandelier) and then all this process?
Metally cylinder thing. I totally use those words in my professional life and I'm not even joking 😂
:)
What if the ceiling is fish scale textured plaster like mine?
I was thinking of a very different light. But thanks anyway!
lol you must i mean must do a full circle.. you could shape the tape first instead of cutting it later.. its all up to you
Fill it with some latex caulking, hit it with some paint and walk away. At least with a small overcut like that one
Quality job but I find using decorator's caulk to be just fine and takes about 20 seconds.
For this tiny sliver of gap, high quality caulk would have been much quicker, and just as good if not better, fix. And bar far the best way to do it if you had textured ceiling.