I am binging your channel.... I want to design a car and I had no idea how to start. Now I do. I am grateful for you generosity of posting all of these videos.
Your videos are top notch! You certainly deserve way more subs than you currently have. I will gladly recommend your channel for those wanting to learn FreeCAD! Thank you for posting such great tutorials! 🙏
Please can you explain why the sketch shows that it is under constrained, but after closing it is fully constrained. Should there be a separate section of constraining the b-splines? Thankyou for your excellent tutorials.
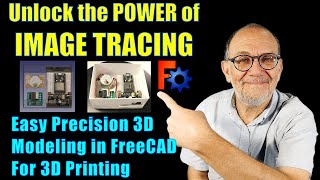
To help align the image, I suggest the following process: Put a construction line on the X axis of the sketch and make it's end points symmetrical around the origin. Select the image plane in the tree and adjust the position of the image using two symmetrical features ,such as the mounting holes in this model. You can adjust the length of the construction line to match the holes knowing that the end points remain symmetrical around the origin.
That's a nice tip I like it. It would be nice to have some tools in the image workbench for quick alignment and offset . I often find I spend a considerable amount of time aligning parts of the sketch to a verticle line to fix its rotation before I start sketching. And that's if I remember.
@@MangoJellySolutions When I was working out this trick ,I looked to see if I could put the construction line on the image plane. The ability to do that would be a great help. Then you could us the external geometry tools in sketcher to link to the image plane directly. I often put pen marks on an item before I take an image and work with those for alignment.
On the problem with aligning the image, you might want to consider opening it up in Photoshop or another image editing app and aligning it there beforehand.
Very handy tutorial! I wonder though, what actually makes the "part design" WB useful? I always make things in the "part" WB. If I need to make a hole, for instance, I'll make a part, extrude it, sketch a hole, extrude that, and use the hole extrusion to cut the main part.
I found its down sometimes solely to user preference. I original used freecad for modelling from blue prints and found it was easier to sketch parts by tracing over the blue print. But being from a pure 3D background (studio max and Lightwave) I have lately started using the part workbench more as needed do more boolean based modelling. It's interesting, I haven't asked the question before and would love to hear other people's views of which they prefer and why.
@@MangoJellySolutions I think that the "part design" workbench is useful if you want to make a new part from an existing part. For example, if you make a box with a hole in it, and you want to insert a peg into that hole, with the "part" WB, the peg becomes a part of the first part, bound together by the shared geometry. With "part design", however, the peg seems to be its own new part, and you can delete the first part if you want without breaking anything. I found this out today, after asking the question=P
I usually constrain all points of the control polygon; while this is quite cumbersome to do manually it makes it less susceptible to accidental degradation
Very helpful,thanks. I have been trying to trace a curve with limited success. I have spent a lot of time trying to get a fully constrained curve, is that a waste of time?
With bezier curves there is a special constraint that you can use, the block constraint, which I can only describe as it looks like the ghost busters sign but without the ghost in it. This I belive was one of the factors for the constraint emerging, to help constrain b splines. But having a fully constrained sketch is not the end of the world. They say its best practices but I and many others don't bother.
Thank you. A little tip for that which another viewer recommended is to take the picture further away and zoom in rather than getting closer. It really works well.
I'm a brand newby to freeCad having used Fusion360 (till my licence ran out). Ive created a B-Spline sketch based on a freehand object (scanned in and attached as an image), an ellipse with an oval end and a squarer end. Lots of B-Spline points. Now I find that one can only constrain the start and end points of the B-Spline sections. sigh. I know the actual length of the ellipse is 60.7mm however if I set 2 points at each end to that measurement, then the tool pulls one end of the B-Spline in 70% of the drawing to make the distance between the 2 points = 60.7mm. The rest of the sketch remains out at the originally drawn positions. I need to SCALE down the whole drawing to an overall length = 60.7mm. I am lost.....
These are construction geometry that constrain the curve and apply a 'weight'. There are a number of different control geometry on the b-spline. The wiki gives some indepth information regarding the b-spline and all these circles and constraints you see wiki.freecadweb.org/Sketcher_CreateBSpline
So the skin option is if you want a opening with a bottom. A pipe should be opening and bottomless but I have trouble getting this to work. I have read lately that it is yet to be implemented along with retroverso.


You are a FreeCAD guru !! Thanks for sharing .
Thank you 😁😁😁😁
Just got into the more technical side of Freecad and must say your videos are spot-on. great presentation that i can understand and follow.
Thank you for the kind comments and feedback. I always appreciate the comments on these videos and learn by them.
Most useful vlog out there! Thank you.
I am binging your channel.... I want to design a car and I had no idea how to start. Now I do. I am grateful for you generosity of posting all of these videos.
What a finding 🙌
I've been avoiding such models because I had no idea where to start. Perfect.
Great to hear, always good to know my videos are becoming useful. 👍
Really interesting demonstration . Merci
Thank you, Glad you enjoyed 👍👍
Your videos are top notch! You certainly deserve way more subs than you currently have. I will gladly recommend your channel for those wanting to learn FreeCAD! Thank you for posting such great tutorials! 🙏
Than you for your kind comments. Always great to get feedback. I really appreciate it.
Please can you explain why the sketch shows that it is under constrained, but after closing it is fully constrained. Should there be a separate section of constraining the b-splines? Thankyou for your excellent tutorials.
To help align the image, I suggest the following process:
Put a construction line on the X axis of the sketch and make it's end points symmetrical around the origin.
Select the image plane in the tree and adjust the position of the image using two symmetrical features ,such as the mounting holes in this model.
You can adjust the length of the construction line to match the holes knowing that the end points remain symmetrical around the origin.
That's a nice tip I like it. It would be nice to have some tools in the image workbench for quick alignment and offset . I often find I spend a considerable amount of time aligning parts of the sketch to a verticle line to fix its rotation before I start sketching. And that's if I remember.
@@MangoJellySolutions When I was working out this trick ,I looked to see if I could put the construction line on the image plane. The ability to do that would be a great help. Then you could us the external geometry tools in sketcher to link to the image plane directly.
I often put pen marks on an item before I take an image and work with those for alignment.
@@paulg3336 I am going to play with some python macros and see if I can come up with something. Good tip with the pen marks
On the problem with aligning the image, you might want to consider opening it up in Photoshop or another image editing app and aligning it there beforehand.
Nice tip there, you will have more control over the image in a dedicated image editor. Thanks for adding.
Awesome 👏💯💯💯💯👍👍👍👍..
Thanks 🤗
life saver, thx :)
Very handy tutorial! I wonder though, what actually makes the "part design" WB useful? I always make things in the "part" WB. If I need to make a hole, for instance, I'll make a part, extrude it, sketch a hole, extrude that, and use the hole extrusion to cut the main part.
I found its down sometimes solely to user preference. I original used freecad for modelling from blue prints and found it was easier to sketch parts by tracing over the blue print. But being from a pure 3D background (studio max and Lightwave) I have lately started using the part workbench more as needed do more boolean based modelling. It's interesting, I haven't asked the question before and would love to hear other people's views of which they prefer and why.
@@MangoJellySolutions I think that the "part design" workbench is useful if you want to make a new part from an existing part. For example, if you make a box with a hole in it, and you want to insert a peg into that hole, with the "part" WB, the peg becomes a part of the first part, bound together by the shared geometry. With "part design", however, the peg seems to be its own new part, and you can delete the first part if you want without breaking anything. I found this out today, after asking the question=P
I usually constrain all points of the control polygon; while this is quite cumbersome to do manually it makes it less susceptible to accidental degradation
thx
Very helpful,thanks. I have been trying to trace a curve with limited success. I have spent a lot of time trying to get a fully constrained curve, is that a waste of time?
With bezier curves there is a special constraint that you can use, the block constraint, which I can only describe as it looks like the ghost busters sign but without the ghost in it. This I belive was one of the factors for the constraint emerging, to help constrain b splines. But having a fully constrained sketch is not the end of the world. They say its best practices but I and many others don't bother.
Great video.
The difficult part is getting a photo that is square on.
Thank you. A little tip for that which another viewer recommended is to take the picture further away and zoom in rather than getting closer. It really works well.
I'm a brand newby to freeCad having used Fusion360 (till my licence ran out). Ive created a B-Spline sketch based on a freehand object (scanned in and attached as an image), an ellipse with an oval end and a squarer end. Lots of B-Spline points. Now I find that one can only constrain the start and end points of the B-Spline sections. sigh. I know the actual length of the ellipse is 60.7mm however if I set 2 points at each end to that measurement, then the tool pulls one end of the B-Spline in 70% of the drawing to make the distance between the 2 points = 60.7mm. The rest of the sketch remains out at the originally drawn positions. I need to SCALE down the whole drawing to an overall length = 60.7mm. I am lost.....
to what serve the big circles surrounding the edit points?
These are construction geometry that constrain the curve and apply a 'weight'. There are a number of different control geometry on the b-spline. The wiki gives some indepth information regarding the b-spline and all these circles and constraints you see wiki.freecadweb.org/Sketcher_CreateBSpline
@@MangoJellySolutions Excellent, thank you so much. I was able to appreciate the effect on the changes in the diameter of the circles etc ...
At 27:17 can you explain the difference in options skin, pipe and recto?
So the skin option is if you want a opening with a bottom. A pipe should be opening and bottomless but I have trouble getting this to work. I have read lately that it is yet to be implemented along with retroverso.
@@MangoJellySolutions ok thanks!
You missed the cutouts on the edges
Bit late tot the party, but the part looks likes the lid of a motorcycle brake master cylinder.
Yep, I can see that now you mention it.
no need for offset,
you can set sketch transparency in appearances instead
👍
It's probably better to offset as introducing transparency may make features hard to see,
my freecad crushes whenever I try to use B spline can someone help?
Not sure why but this video is all out of focus, Starts OK but at 0.17 on the time line it loses focus.