
- 3
- 30 638
David Marsh
Приєднався 27 чер 2006
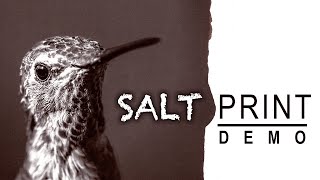
Silver Gelatin with Digital Negative - Print Demo
Demonstration of my silver gelatin print process using a digital negative. Benefits of creating silver gelatin prints include:
- editing can be done with software of choice
- properly calibrated, what you see is what you get (most of the time)
- digital photos can be printed on silver gelatin photo paper
resources:
www.easydigitalnegatives.com/
www.davidmarshprints.com/
discord: onemorestop.org/
- editing can be done with software of choice
- properly calibrated, what you see is what you get (most of the time)
- digital photos can be printed on silver gelatin photo paper
resources:
www.easydigitalnegatives.com/
www.davidmarshprints.com/
discord: onemorestop.org/
Переглядів: 1 128
Відео


2023 slideshow
Переглядів 1125 місяців тому
Some of my top photos from 2023. In 2024 my goals are to crate a gelatin silver printing from digital negative video, as well as polymer photogravure content. Instagram: @nimbledave Mastodon: @nimbledave@mastodon.social
What is salt printing? A demonstration of 19th century photography modernized
Переглядів 29 тис.2 роки тому
*IF YOU NEED HELP JOIN THIS DISCORD* discord.gg/onemorestop I am not good at checking youtube comments but I am active there *NEW* I finally made a website, you can see more of my prints at www.davidmarshprints.com/ Salt printing, also called salted paper printing, was the first process invented to create a photographic image on paper in the 1830’s. By using modern methods and materials we can ...
can you use marshalls oil colors to hand color these like the old school way?
No special inks or printer profiles? Just Photoshop and printer for the neg.
yes, although I did profile the output using the easy digital negatives system
@@marshmonkey Thx brother.
David thanks a lot for answering. The “press” is the hot press you use to flat the print. Which model is it?
Dear David, I'd like to know the type of press you use and also the flexible material into which you insert the print. Thanks a lot
The “press” is just something I made with a piece of glass and flat surface and a hinge so that it’s easy to register the negative with the paper. By flexible material you might be referring to the film I printed on which is made by Fixxons
thanks a lot for answering. The “press” is the hot press you use to flat the print. Which model is it?
@@massaomascaro the flexible material is a silicone mat, and the press is a heat press made for doing heat transfer prints on shirts and such
Too complex. I will give this a pass.
This is lovely! Such crisp detail. Thanks for showing us this-
imagine doing all his but also controlling for exposure and focus to get the negatives. so many variables. omg
Exquisite!
Hey David, I have some questions about your process, and was wondering if you would be willing to set up a discord call?
Thank you for making this demo :) it will be so so helpful.
Thank you David for such a wonderful presentation of the process - so unrushed and methodically well done. Love the subject matter too! Best wishes .. Peter in London UK
What printer setting are you using? VFA? (Wondering as I just bought a ET-8500) And thanks a lot for sharing the process and your work!
Yes, VFA
great video
Amazing year in photography!
BEAUTIFUL Demonstration And a more amazing subject quality Was it a woodcock ❓ Mm
I would suggest that you never get your negative anywhere near the wet side of your darkroom. If you don't have a dry side separated from a wet side, start there. That negative will be destroyed if you get any water on it.
I like this video...
While I was watching: "This process is called salt printing." "There's no way it uses regular table salt, it probably uses some silver salt or something!" "It uses regular table salt" "No way!" "This solution is called 'gold toner'." "There's no way it has real gold in it, that's probably the brand or something!" "It has real gold in it." "No way!"
Ficou muito bom !!!!!!
You should use quartz glass or fused silica glass during your exposure. Plastic attenuates UV light and over time your acrylic will become brittle and fog up unless you are using dedicated UV transmitting acrylic
I have a hard time believing any type of acrylic will survive uv for extended periods of time
Where I can get a pane of Quartz or fused silica of that size? I think normal window glass or borosilicate glass are the best options, both have acceptable UV transmission above 365nm.
so far I have not noticed any fogging, the biggest problem I have encountered is that it scratches very easily
Excellent demo, I was wondering when the print was going to cool down. Seem it might be hard to judge the level of cool in the end.
It usually cools as it dries but it varies a lot depending on the amount of time in the toner and how exhausted the toner is
did you use different amounts of thiosulphate in the two fixers? ...also my images com much darker out of the sun...your's seems orange... ?
Thank you for the demonstration, very clear and simple to follow. Is there a way to minimise the water used in the final step? Unfortunately I have limited amounts of fresh water and running the tap for 60 minutes would be prohibitive.
Something which I have been trying with silver gelatin prints is prolonged soaking in a single tray of water for at least 90 minutes (or longer, it won't hurt). This seems to dissolve most of the fixer and then you can do another 5 minute wash just to make sure you got everything. I started doing this after watching this video: ua-cam.com/video/IV7h-2WE8zI/v-deo.html
@@marshmonkey Thank you! I will give that a try.
Thank you so much for this clear-cut demonstration! And that's a stunning photo :)
Glad it was helpful!
Love the tip about using the Red to block more light when printing the negative. I've tried a few alternative processes but not have had much success or results were never detailed enough for me. I think it was down to how the negative was printed and getting an even exposure with a UV lamp.
I have respect fo the people who invented this process. The number of steps you have te get right :( Very inspirational to try myself....
I see that the Bergger paper is 100% cotton. Can you use the same process for printing on fabrics such cotton, linen and silk? Could it work also on clay and how to add more gold into the image? Your work is really beautiful, thank you to share your experience.
Thanks! Yup it should work with fabric, not sure about clay. As long as there is something for the chemistry to permeate the surface of, you should get some sort of result.
@@marshmonkey Thank you David, I am in the process of making the UV room and ordering the products. I can't wait to start. Thank you very much for sharing your experience. I feel like after a visit at the museum, really inspired. Your pictures are really beautiful. Where did you take he picture from your "about" page. Is it near San Diego?
I love the “graphics” of the filming for your demo. The raking like is good .. and you can cover the light with red, orange or yellow if you want since it’s so close. We use wads of cotton for application for sheets up to 14.” Scully & Osterman
Hello! I'm really excited by what you're doing here. Would you be able to post a link (such as Amazon url) to the exact Fixxons film that you're using, please? I'd never heard of this product before... had only ever tried with regular acetate sheets before, without huge success. Thank you!
Please disregard my request for a link... Just saw all the additional notes in the video description. This is really helpful, thank you so much! Sally
sure, it's this stuff: www.amazon.com/gp/product/B083GCM5LP/ref=ppx_yo_dt_b_search_asin_title?ie=UTF8&psc=1
Thank yoiu for a very clear and detailed demonstration. It gives a beautiful effect.
Simple beautiful, you make it look easy, I’m sure it not, wow, thank you for sharing.
Excellent demonstration anda a lovely prine! :-)
Good video. Thanks for it. Good discussion below also. Anyone have the ratio of bees wax to lavender oil for waxing salt prints?
An artist at work - that's a beautiful outcome!
An interesting video of an interesting process. What are in the fix1, fix 2 and the hypo-clear solutions please?
any type of normal fixer should be effective, I use whatever non-hardening rapid fixer (base or neutral) that I can find I think when I filmed this it was TF-4. The hypo clear is just a standard clearing agent, I believe I used photographer's formulary powdered concentrate.
This is a verydetailed instructional video of the salt printingprocess! Thank you for sharing this process with us. we elearned a great deal .
Why do you use two fix baths? If you are reusing the fixer aren't they the same?
the two baths are from two different bottles of fixer. I think the idea is that the first fix gets a bit exhausted during the first batch and the second bath can fix better than just using this same amount of fixer for twice the time.
@@marshmonkey Thanks! I thought it might be something like that.
Beautiful
Thank you! Cheers!
I’m curious because of the differing light levels in the video, does any part of this process need to be completed in a darkroom, or is dimmed light/non-uv-light okay?
Any dim non-uv light (be careful some normal lights also emit some UV light) is ok throughout the process, although I let the final coating dry in the dark just to be safe. I have some of those led strips as under cabinet lighting that I have taped UV blocking film over and keep those on during the entire process and have never encountered any fogging. An easy test is to coat a small scrap of paper and let it sit out for an hour with the working lights on to see if it exposes at all.
@@marshmonkey thank you so much! I love all your work and really appreciate the walkthrough!
Is not necessary all that salt and citric acid in the first baths. The most tap water already has chlorine which is enough to do the job of silver chloride precipitation.
I have stopped using citric acid in the first bath, although I could see it being useful if you are trying to acidify the print before going into a toner that is acid. According to Christina Z. Anderson (if I am remembering the book correctly) the purpose of the initial salt washes is to neutralize most of the light sensitivity of the silver, not necessarily to speed any clearing of it. It would be interesting to do a test replacing with normal tap water to see if there are any difference in the result.
@@marshmonkey I usually only use tap water as recommended by classic texts such as James M. Reilly's or as Mark Osterman always advises and I have no problem. On the contrary, I have a lower density loss. Of course, you should always do a test based on the tap water you have, to verify if the chlorine inside is enough. In my opinion, Christina Z. Anderson's method is not wrong, but excessive and causes a loss of density that could be avoided.
@@stefanob1 sounds like I will need to do a test then!
I went back and looked at my book and I was using much more than the amount specified, so I will definitely try much less or none at all.
@@marshmonkey well done! maybe first try without salt! ;)
David, How do the Salted Prints compare to Platinum Palladium in terms of print longevity, amount of tonal range, amount of work to produce finished prints, expense, ease of the process? Thank you for all the work you did on creating this tutorial and for including the valuable resources for getting into the system.
This is the only process I have experience with, so I really can only go by what the literature I've read mentions. According to the books I've read it is as archival as pt/pl when properly processed and toned. I have read that salt printing has the most tonal range of any alt process, but I have no idea if that is accurate or not. It should be cheaper than pt/pd in terms of chemicals, silver is less expensive than pt/pl - as for the ease of process again I have not had the experience to compare but salt has a reputation for being more finicky and more steps.
@@marshmonkey thank you David for taking your valuable time to answer my question in detail. I appreciate your kindness!
@@jerryeisner1 There are so many variables-paper can be a real pain when it misbehaves, But if you wash carefully and make sure all the silver is removed, the prints will be quite archival. I have many that are ten years old now and still in excellent condition and that's without toning in gold. When I start them again, though, I will do the gold toning-it's not expensive and very worth while. Salt f[prints made n the 19th Century are still in amazing condition. 🙂
Wonderful and Motivatonal explanation and tutorial on Salt Printing. I love it!!
Thanks so much!
What kind of gold toner do you use? thank you!
I use this stuff from Bostick & Sullivan: www.bostick-sullivan.com/product/gold-toning-kit-for-salted-paper-vandyke-kallitype-and-albumen/
Hi David, love your demon. My name is Chi & I'm from Hong Kong, I have 14 digital images which I would like to turn into salt prints. Do you do work like this & how much will it cost ?
I'm not currently doing any commissions, sorry!
Excellent video, I appreciate your production style, and beautiful print as well.
Much appreciated!
I presume you have some sort of filter in PS set up to print the negative. Do you also have a filter set up to give you a prediction of the final print?
I don’t with my current setup, but if if stick 100% with the easy digital negative tools that generates the adjustments it will also provide a screen proof adjustment that simulates the end result.
@@marshmonkey just watched your video, great work, hands down. I am starting my journey into alt process and a big part of this is having a good negative. Two questions come to mind if you don't mind. First, why the red negative? And do you use QuadTone Rip or any curves specific plugins? Thanks 🙏🏻
@@JasonRenoux Thanks Jason! I found during my testing that the red ink of my printer blocked a wider range of UV light than just using black ink. I haven't used QuadTone Rip but I have used the Easy Digital Negatives book and tools to get my negatives to the ballpark of where they need to be before I start doing more custom adjustments as I print.
@@marshmonkey thank you
Very nicely done. What do you use for fixer and hypo clear and do you reuse them? If yes, for how long can they be reused? TIA.
I use standard hypo thiosulfate for fixer, 150 grams for each preparation. I usually remix it after 5 or 6 prints or once the solution starts looking very dirty. The hypo clear I use is from photographers formulary and is supposed to be good for 50 prints so I have only remixed it once.
@@marshmonkey thanks a lot.
well i tell you a Secret. if you have PRINTER, you can Print image on the Paper, without that all headache
Thanks for the tip!
... or you could buy a poster. You don't even have to turn on the printer. Yet again, there are prints and there are PRINTS. This one is the LATER.
Brilliant observation, Watson! I guess that explains why an Ansel Adams poster costs ten bucks while an original print will sell for $65,000.00. It's just not worth all that headache! 😸
@@TheStockwell Ansel Adams did Real Film
Great video on the process.
Thank you!
Loved this, thanks for sharing the process. I've done lots of pt/pd etc, but never tried salt printing. This makes me want to give it a go.
Go for it!
Great username @18% Grey, lol