
- 32
- 289 364
Mantovani Racing
United States
Приєднався 6 вер 2016
Buy, build, race, sell, repeat
Barricade TJ/LJ Wrangler Roof Rack install
Just as the title says… install the Barricade roof rack on a 2005 TJ/LJ Jeep Wrangler.
Переглядів: 55
Відео


Porsche Cayenne electric retractable running boards install
Переглядів 739Рік тому
Here is a broad overview of installation instructions for eBay bought electric retractable running board for a 958 Porsche Cayenne.

The most famous McLaren P1 on the internet runs at Copart.
Переглядів 227Рік тому
I’m sure everyone has seen the floating P1 that circulated the internet after hurricane Ian. Well here it is “selling” at Copart. Now it was listed with a reserve so the final bid will have to be accepted by the insurance company.
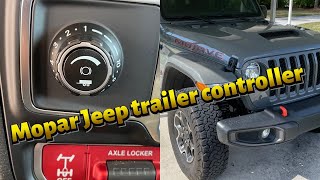
Factory Mopar Jeep Wrangler/ Gladiator brake controller install
Переглядів 11 тис.Рік тому
A short video showing the install of the factory Mopar brake controller for Jeep Wrangler or Gladiator. 2020 with factory tow package. Part # 82215652AD

Electron Sport C5 Vette fender duct install
Переглядів 3,3 тис.2 роки тому
Installing the newly released www.ElectronSportUSA.com C5 Corvette fender duct.

Installing the Electron Sport Headlight Delete Brackets on C5 Corvette
Переглядів 7352 роки тому
Want to delete the headlights on your C5 Corvette race car! Electron Sport USA (www.electronsportusa.com) has the answer! Check out this install video.

FOR SALE: **SOLD** 2001 Mazda Spec Miata
Переглядів 1343 роки тому
2001 Spec Miata. SCCA and NASA. Ready to race or track day.

Jeep ticking inside? Blend door actuator repair.
Переглядів 97 тис.3 роки тому
Is the inside of your Jeep JK ticking or clicking? This video takes you through replacing the blend door actuator.

For Sale: **SOLD** 1999 V8 LS3 Miata
Переглядів 2853 роки тому
1999 Mazda Miata V8 Roadster’s LS3 conversion.
For Sale: *SOLD* Phoenix C5 Corvette Race Car
Переглядів 3373 роки тому
Phoenix built C5 Corvette. Originally run in SCCA T1 but now NASA ST1/2. New LS3 crate motor. ARE Dry Sump. EFI Pro engine management. SKF hubs. AP Racing T1 brake kit. Kognition chassis mount carbon wing. Kooks Long tube headers. Pfadt front sway bar & T1 rear. Callaway external reservoir adjustable coilovers. Aluminum radiator. External oil cooler. Trans & diff coolers. Front spindle brake du...
Mystery RV part II
Переглядів 6343 роки тому
Here is a follow up to the previous video where I show me picking up and seeing an RV for the first time bought as-is at auction.
NINE Lives Racing Miata Air Dam/Splitter install
Переглядів 4,2 тис.3 роки тому
Here is the install of the 9Lives Racing NB Miata Air Dam & Sturdy Boii Splitter install. This will also apply to NA Miata.
Bought a mystery RV
Переглядів 1,9 тис.3 роки тому
So I purchased an AS-IS Super C RV at auction. It sits on a Freightliner Columbia chassis. Almost every detail about it is unknown. Showing up at the auction location to check it out for the first time!
🏁 WINNING at Sebring with NASA
Переглядів 3953 роки тому
NASA Sebring event Feb 27/28 2021. Just a weekend in the life. Racing the ST2 Hankook Corvette. Had three 1st place wins and a personal best lap time of 2:17.9 in this car!
Remove and install Jeep JK fenders.
Переглядів 68 тис.3 роки тому
Removal and reinstall of Jeep Wrangler JK stock fenders
‘07-‘18.5 Jeep JK Wheel Sensor Repair
Переглядів 3,9 тис.3 роки тому
‘07-‘18.5 Jeep JK Wheel Sensor Repair
FOR SALE: *SOLD* 2008 Factory Five GTM
Переглядів 8033 роки тому
FOR SALE: *SOLD* 2008 Factory Five GTM
FOR SALE: **SOLD** 32’ Millennium car trailer with 12’ LQ
Переглядів 1,5 тис.3 роки тому
FOR SALE: SOLD 32’ Millennium car trailer with 12’ LQ
FOR SALE: **SOLD** 2002 C5 Z06 Corvette Race Car
Переглядів 2673 роки тому
FOR SALE: SOLD 2002 C5 Z06 Corvette Race Car
FOR SALE: **SOLD** 2006 Freightliner SportChassis M2 106
Переглядів 2 тис.3 роки тому
FOR SALE: SOLD 2006 Freightliner SportChassis M2 106
Freightliner SportChassis M2 106 walk around
Переглядів 47 тис.3 роки тому
Freightliner SportChassis M2 106 walk around
FOR SALE **SOLD** 2002 Corvette Z06 Race Car SCCA NASA
Переглядів 6834 роки тому
FOR SALE SOLD 2002 Corvette Z06 Race Car SCCA NASA
NASA Homestead in the HankookMotorstorts.com ST2 Corvette
Переглядів 3996 років тому
NASA Homestead in the HankookMotorstorts.com ST2 Corvette
NASA ST2 HanhookMotorsports.com Corvette at PBIR
Переглядів 2666 років тому
NASA ST2 HanhookMotorsports.com Corvette at PBIR
Mantovani Racing driving the HankookRaceTire.com C6 Corvette w/ NASA at Homestead-Miami Speedway
Переглядів 2117 років тому
Mantovani Racing driving the HankookRaceTire.com C6 Corvette w/ NASA at Homestead-Miami Speedway
ChumpCar 38hr at Palm Beach International Raceway 2015
Переглядів 497 років тому
ChumpCar 38hr at Palm Beach International Raceway 2015
I opened up the actuator to see what was causing it, and it is cause by 1 just 1 broken tooth on the plastic cog.
Excellent video...very informative. Your Jeep looks a thousand times better.
Mine did that last year, but now it's clicking from behind the glove box 🙄
Thanks for sharing the clip info. I will go to Amazon and get some
Great video. I have a 2008 Jeep commander. Looks like it is very similar. Going to give it a try.
I agree, getting ready to tear into it. lol thanks for the great content my friend!
My clicking is on passenger side
The dealership at Chrysler jeep dodge said my 2013 jeep patriot latitude actuator don't get replaced they replace the housing for $470!
Great video. Just did this. You can get the front ones off by pulling up and out with out breaking all the connectors (I'd still use new ones though). The rear it's near impossible to lift up enough so I had to use brute force and it feels like the fenders will almost break ;-0. Amazon has connectors for much cheaper than other places but I needed 2 sets...cost about $27 for two sets. I also added an extra "christmas tree" connector at the very front end of the front bumpers as there is no connector there. Weird.
Great video. What about that very front place for a clip where it doesn’t have a slot to put the clip into? It’s at the very front of the front fender.
I’m gonna answer my own question and say I think you can use a Christmas tree in there to hold it. It’s weird how they made that without a way to get a clip in.
Fantastic video.
This video does not remove the fenders, only the fender flares and linings.
This video is for the fender flares, not the fenders as the title states. Good video, just not for the actual fenders.
Great video. I didn't know I could get the kit from Rugged Ridge but now I'm going to reattach my fenders. They have been loose for a while now. Thanks for all the info.
Thanks for the video!
Thanks for making life suck a little less!
Fuuuuck you saved me, I thought it was my engine thanks for this
How can i get a pare
I think they stoped making them :(
Duck?
Quack quack!
Most annoying sound 😂 mines doing it now
Hopefully you can DIY from the video
I have the same clicking sound coming from the passenger side. I’m assuming it’s basically the same issue. Thanks.
Hi! i have the same exact sound, but it starts at the moment I turn on my Jeep... ¿Could be the same prob? ¡Love your video!
Yes
Stacked trailer tamos pa la al barsha south drive tour in tech
1. Must have tool: Harbor Freight, PITTSBURGH Ratcheting Right Angle Multi-Bit Screwdriver Set, 8 Piece $2.99 2. Disconnect the negative battery cable (under passenger seat for 20 mins.) to recalibrate the blend door actuator system. 3. Do NOT drop the screw. You'll never find it again
Great input.
Anyone know how to fix that same noise from the glove box
There is a video for it
What is the price of the trailer ?
They are $100k + now
Is there one for each side?
Yes
Trailer is nicer then the car lol 😂
Great video. I'm having the exact same problem. But it only started immediately after I changed the battery. So I'm wondering if the actuator is fine but has somehow forgotten its position and so tries to go too far, resulting in clicking. When starting the jeep the rear defrost light flashes which is supposed to indicate some kind of hvac fault. Any thoughts?
I've been chasing this also. I tried to do a hvac actuator calibration this evening with a scan tool and still have the blinking light. I'm going to try disconnect the battery for a little while and reconnect. I read somewhere today that disconnecting the battery and reconnecting makes the system calibrate the blend door actuators. We'll see.
Battery disconnect and reconnect after about 30 minutes also didn't work. Not sure what the deal is other then buying the OE part which I'm doing at the moment.
@@jeffwallace5557 In the process of playing around I did try pulling the fuse for the hvac and replacing it to get the system to try to recalibrate the motors, but it didn't work. I just ended up replacing the part. There is no more clicking, but the flashing light indicating an hvac fault still comes on whenever I start the jeep. I don't know how to get rid of it.
@@ericmajzoub1289 Same here, pain in the ass.
Thats why I am here. Replaced the battery and it started clicking. Replaced it a couple times in the past. Just annoying that replacing the battery seems to cause a replacement again for the 3rd time.
Esa es la pieza que esta mala en tu Jeep
Had no problem taking the old flares off... it was in trying to resinstall them that I had an issue. No matter how hard I push, the pins will not re-engage into the body sheet metal. I think I will try putting the flare on first and then mounting the inner fenders as the final step.
I'm having the same problem you did putting them on. Did installing them separate work for you?
@@roberthikade9759 Here's what I learned.... the clips used to hold the flares on are not all made the same. They look the same, but some are much much much more flexible than others. The softer more flexible ones just pop right in! I ordered a couple or three bags off Amazon from different vendors. Hate to drop the few extra dollars but when I got some that were made of a softer plastic, the issue was solved.
Mine does this and the heat works occasionally ever since it also blinks a light on the air adjusting control before air turns on
Nice work, thanks!
Can I use the same round flat all around? I see you used different ones for different spots.
I enjoyed this!
I like the gun
Good job thank you very much
THAT IS SOOOOOO NICE ❤❤
that module is the TCM
Thank you for your jeep fender removal and replacement video. Thanks to you and thevntire weekend I managed to change out all 4 on my 2008 wrangler unlimited. THANKYOU!!
really good video ! i changed like you describe, working again de hot air but still clicking, do you know what can be the reason?
Air duct is a pain to get back on for sure
Thanks. Great video.
Did you say Go back on the CAR😑 You can Also go up Behind the fender Clips with a pair of needlenose pliers squeeze behind the clip, Then the fenders just pull off without breaking the clip 😉 your welcome 😁👍
How it works when we tow without this ?
@@Rescue-mt7flCase in point, the Bruce Jenner accident in malibu a few years ago.
Great video for a relatively difficult project. I did not have the tool to remove the 12 VDC lighter socket, but what I did was to drill out the littler plastic tabs. I was able to drill one from the outside and the other from the inside of the socket. Once I did that, the metal assembly came out pretty easily. This method does trash out the part, but avoids damage to the surrounding parts. Also, I was unable to mount the module in the factory location, but may take another look at it after seeing your excellent video. What I did do was to mount it vertically on the bar below the steering wheel with the connectors facing down. I was a bit concerned that the controller may not operate correctly if the internal accelerometers are directionally sensitive. On a test drive using a home-made 7-way circuit tester, It seemed to work correctly and the brake voltage would ramp up as the controller sensed the vehicle's deceleration.
Thank you for taking the time to make this helpful video.
Good video. Did you have to get the computer flashed after install
Thank you I don’t think I could have done that without this video. The instructions it comes with are not good!